
Introduction
Last summer, my best friend called me in a panic. She had twenty people coming over in four hours and completely forgot about dessert. I told her to grab three ingredients from the store and promised she’d have the best cheesecake ready in thirty minutes. That dessert? A cool whip cheesecake. It saved the day and became her most requested recipe.
Welcome to my kitchen, where we’re making a delicious and easy cool whip cheesecake that will change how you think about desserts! I’ve been making no-bake treats for years, and they’ve become my secret weapon for busy weeknights and last-minute gatherings. There’s something magical about creating an impressive dessert without turning on the oven or spending hours in the kitchen.
No-bake desserts hold a special place in my heart. They’re perfect for hot summer days when you can’t stand the thought of heating up your kitchen. They’re also lifesavers when unexpected guests show up or when you need something sweet but only have limited time. I love that I can whip up something amazing while still having energy left to enjoy my company.
So what exactly is a cool whip cheesecake? It’s a creamy, dreamy no-bake dessert that combines cream cheese with the light, fluffy texture of Cool Whip. You don’t need a springform pan, water baths, or any of the complicated techniques that traditional cheesecakes require. Just mix, spread, and chill. The result is a smooth, creamy dessert that tastes like you spent all day baking.
This dessert has become wildly popular for good reason. Home cooks everywhere love that it delivers that classic cheesecake taste without the stress. You won’t deal with cracks, burns, or sunken centers. Every single time, you’ll get perfect results. Plus, it’s easy to customize with different flavors and toppings to match any occasion or craving.
What Makes Cool Whip Cheesecake So Special?
The texture of a cool whip no bake cheesecake is something truly unique. It sits somewhere between traditional baked cheesecake and mousse. The Cool Whip adds an airy lightness that makes each bite melt in your mouth. You get that rich, tangy cream cheese flavor without the dense, heavy feeling that sometimes comes with regular cheesecake.
I remember the first time I tried making a whipped cream cheese cheesecake using Cool Whip instead of heavy cream. I was skeptical at first. Would it taste cheap? Would the texture be weird? But one bite proved me completely wrong. The dessert was lighter and fluffier than my traditional recipe, and my family actually preferred it. It became my go-to method from that day forward.
The flavor profile is incredibly balanced. You get the tangy richness from the cream cheese paired with the sweet, creamy notes from the Cool Whip. Many recipes add powdered sugar to sweeten it just right. Some include lemon juice for extra brightness and to help the cheesecake set properly. Others use sour cream for added tang and a smoother texture. Each variation brings something special to the table.
Cool Whip works beautifully in so many cream cheese cool whip recipes beyond just basic cheesecake. I’ve used it in fruit dips, layered desserts, pie fillings, and even frosting. It’s incredibly forgiving to work with. You can fold it into other ingredients without worrying too much about deflating it. Even beginner bakers can achieve professional-looking results on their first try.
The versatility of this dessert is another huge selling point. Want a chocolate version? Add cocoa powder or melted chocolate. Craving fruit flavors? Mix in strawberry puree, lemon zest, or fresh berries. You can make a no bake cheesecake with pudding and cool whip for extra flavor and stability. The pudding mix adds body and comes in dozens of flavors like pistachio, butterscotch, or vanilla.
Here’s what I love most about the convenience factor:
- No oven required means you can make it anytime, anywhere
- Only takes about 15 minutes of active prep time
- Uses simple ingredients you probably already have
- Stores well in the fridge for several days
- Easy to transport to potlucks and parties
- Can be made a day ahead without losing quality
The ease of making a no bake cheesecake with cool whip can’t be overstated. Traditional cheesecakes intimidate many home bakers. You need to worry about water baths to prevent cracking. You have to bake it at just the right temperature. Then there’s the slow cooling process to prevent sinking. One wrong move and your beautiful dessert can turn into a disaster.
With a Cool Whip version, you skip all that stress. Mix your ingredients in one bowl. Pour into your crust. Chill and serve. That’s it. No special equipment needed. No advanced techniques to master. It’s foolproof in the best possible way.
I’ve taught this recipe to my teenage daughter, my mother-in-law who claims she can’t bake, and my neighbor who had never made dessert from scratch before. Every single one of them succeeded on their first attempt. That’s the beauty of this recipe. It builds confidence in the kitchen and makes people feel like baking stars.
Many people wonder about the difference between recipes with and without Cool Whip. A no bake cheesecake without cool whip typically uses whipped heavy cream instead. While delicious, it requires more work and skill to whip the cream to the right consistency. Cool Whip comes already whipped and stabilized, which means less work and more consistent results every time.
The Kraft Cool Whip cheesecake recipes that appear on their website and product packaging have been tested countless times. They’re reliable and produce excellent results. I’ve made variations of their basic recipe dozens of times, tweaking ingredients here and there to suit my taste. The foundation is always solid.
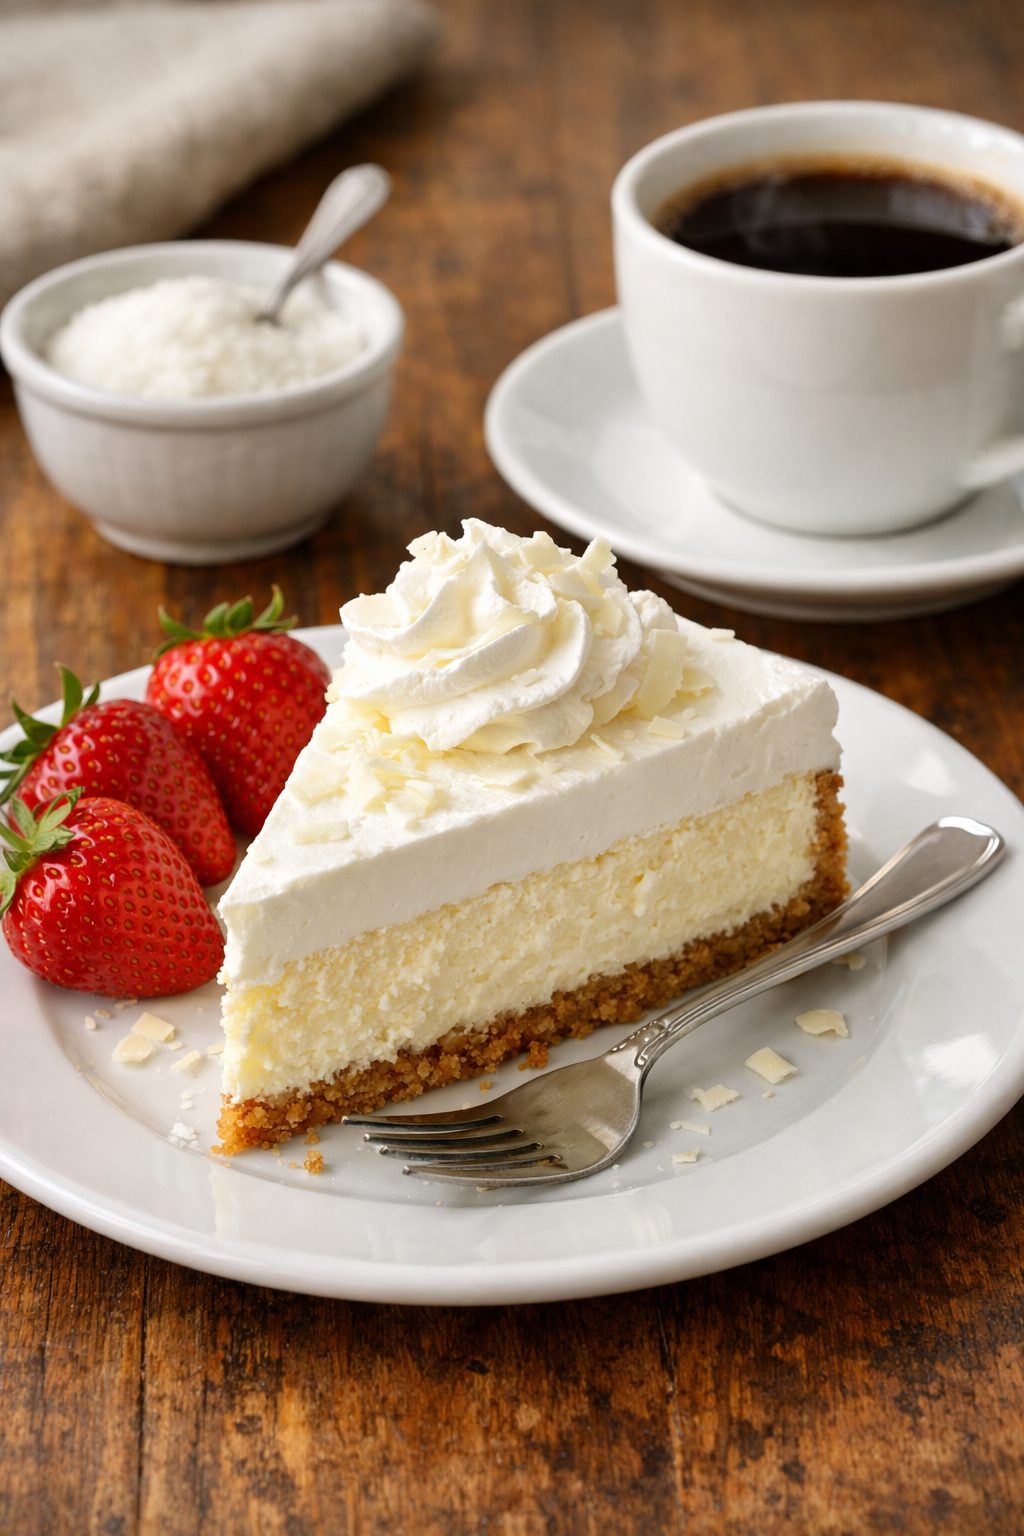
When you bite into a properly made cool whip cheesecake, you experience layers of flavor and texture. The graham cracker crust provides a sweet, slightly crunchy base. The creamy filling delivers richness and tang. Any toppings you add bring their own unique elements. It all comes together into something greater than the sum of its parts.
This dessert works for every occasion I can think of. Birthday parties? Check. Holiday dinners? Absolutely. Tuesday night because you want something sweet? Perfect. It’s fancy enough for special occasions but simple enough for everyday life. That’s a rare combination in the dessert world.

Ingredients and Variations for Your Cool Whip Cheesecake
Now that you understand why this dessert is such a winner, let’s talk about what you actually need to make it happen in your own kitchen.
The classic cool whip cheesecake starts with just a handful of ingredients. I’m talking seriously minimal here. You’ll need an 8-ounce package of cream cheese (make sure it’s softened to room temperature, or you’ll fight lumps forever), one container of Cool Whip (usually the 8-ounce size works perfectly), about half a cup of sugar, and a teaspoon of vanilla extract. For the crust, grab a pre-made graham cracker crust or make your own with crushed graham crackers, melted butter, and a touch of sugar. That’s your foundation right there.
Here’s the thing though. This basic recipe is like a blank canvas. I’ve spent years playing around with different ingredient combinations, and I’ve discovered some variations that are absolutely worth trying.
The no bake cheesecake cool whip sour cream version is one of my personal favorites. Adding about half a cup of sour cream to your cream cheese mixture gives the filling a sophisticated tang that reminds me of New York-style cheesecake. My brother-in-law, who’s pretty picky about desserts, swears this version is better than the fancy bakery cheesecakes downtown. The sour cream also helps the filling set up a bit firmer, which makes slicing cleaner. I usually reduce the sugar slightly when I add sour cream since it brings its own tartness to balance everything out.
Another popular variation involves the no bake cheesecake cool whip powdered sugar approach. Instead of using granulated sugar, you swap in powdered sugar. Why does this matter? Powdered sugar dissolves faster and more completely into the cream cheese, giving you an ultra-smooth texture without any graininess. It also contains a small amount of cornstarch, which helps stabilize the filling just a bit. I use this method whenever I’m in a rush because it cuts down on mixing time. You’ll need slightly less powdered sugar than regular sugar since it’s sweeter by volume, usually about a third of a cup does the trick.
The no bake cheesecake cool whip lemon juice combination creates something bright and refreshing. Adding two to three tablespoons of fresh lemon juice transforms the dessert into something that feels lighter and more summery. The acid in the lemon juice actually helps the cheesecake set better, which is a bonus I discovered by accident one time when I added lemon zest for flavor and noticed the texture improved too. This variation pairs beautifully with berry toppings. If you want to explore more citrusy options, you might enjoy my coconut cheesecake which has tropical vibes that complement lemon wonderfully.
I always reach for Kraft Cool Whip when I make this dessert. Not because I’m brand-loyal for no reason, but because I’ve tested store brands and honestly noticed a difference. Kraft’s version has a consistency that folds into cream cheese more smoothly. Some off-brands are either too stiff or too runny, which throws off the whole balance. Plus, the Kraft Cool Whip cheesecake recipes printed right on their containers have been perfected through years of testing. Why reinvent the wheel when they’ve already done the work?
By the way, you can experiment with different cool whip cheesecake flavor options by adding extracts, cocoa powder, instant pudding mixes, or fruit purees. I’ve done almond extract versions for holidays, chocolate versions that rival any fancy mousse, and even a pumpkin spice version that became my Thanksgiving signature. The pudding mix route is particularly foolproof because it adds both flavor and extra stability to the filling.
Speaking of pudding, many people swear by the no bake cheesecake with pudding and cool whip method. You beat together one package of instant pudding mix with milk according to package directions, then fold in cream cheese, Cool Whip, and you’re done. This creates an incredibly stable filling that holds its shape beautifully. The pudding flavors available are endless. Pistachio makes a stunning green dessert that tastes nutty and unique. Butterscotch creates something rich and caramel-like. Even vanilla pudding adds extra body and sweetness that some people prefer over the basic version.
For those curious about making a no bake cheesecake without cool whip, you absolutely can. You’d whip heavy cream with sugar until stiff peaks form, then fold that into your cream cheese mixture instead. It’s delicious but requires more technique and arm strength. The whipped cream can deflate if you’re not careful when folding. I make it that way sometimes when I want to feel fancy, but honestly, for everyday baking, Cool Whip wins on convenience every time.
How to Make a Classic No Bake Cool Whip Cheesecake
Alright, let’s get into the actual process. I’m walking you through this step-by-step so you can’t mess it up even if you tried.
First up, the crust. If you bought a pre-made graham cracker crust, you’re already halfway done. If you’re making your own, mix about a cup and a half of graham cracker crumbs with five tablespoons of melted butter and two tablespoons of sugar. Press this firmly into the bottom of a 9-inch pie pan. I use the bottom of a measuring cup to really pack it down evenly. Then pop it in the fridge while you make the filling. Some people bake their crust for ten minutes to make it sturdier, but I rarely bother unless I’m feeling ambitious.
Now for the filling, which is where the magic happens. Take your cream cheese out of the fridge about thirty minutes before you start. This is crucial. Cold cream cheese will not blend smoothly no matter how long you beat it. Trust me, I’ve wasted too much time trying to smooth out lumps that could’ve been avoided by just planning ahead. Room temperature cream cheese should be soft enough that you can press your finger into it easily.
In a large mixing bowl, beat the softened cream cheese with your sugar until it’s completely smooth and fluffy. I use an electric mixer for this because my arm gets tired, but a hand whisk works if you’ve got stamina. This takes about two to three minutes. You want no lumps whatsoever. Scrape down the sides of the bowl at least once during this process because cream cheese loves to hide in corners.
Add your vanilla extract and mix it in. If you’re doing any of the variations I mentioned earlier, this is when you’d add your sour cream, lemon juice, or melted chocolate. Mix until everything is completely incorporated and smooth as silk.
Here’s where people sometimes mess up. You need to fold in the Cool Whip gently. Don’t just dump it in and beat it with the mixer on high. That deflates all the air and you lose that light, fluffy texture that makes this dessert special. Instead, add the Cool Whip and use a rubber spatula to fold it in with slow, gentle motions. Scoop from the bottom, lift up, and fold over the top. Rotate the bowl and repeat until everything is evenly combined and you see no more white streaks of Cool Whip. This should take maybe twenty to thirty gentle folds.
The mixture will look lighter in color and incredibly smooth. Sometimes I can’t resist sneaking a taste at this point. It’s like a fluffy, tangy cloud of deliciousness.
Pour this filling into your prepared crust and spread it evenly with a spatula. Don’t worry about making the top perfectly smooth unless you want to. I actually like when it has some gentle swirls and texture because it looks homemade in a charming way. If you’re a perfectionist, you can use an offset spatula and smooth it into a perfect flat surface.
Now comes the hard part, which isn’t hard at all but requires patience. You need to chill this dessert for at least four hours. I know that seems like forever when you’re excited to eat it, but the chilling time is essential. This is when everything sets up properly. The cream cheese firms back up, the Cool Whip stabilizes, and all the flavors meld together. I usually make mine in the morning if I want to serve it for dinner, or make it the night before an event.
Funny enough, I’ve found that overnight chilling actually produces the best results. The texture becomes even more cohesive and the flavors develop more depth. My coffee cheesecake follows a similar principle where time in the fridge really improves everything.
If you’re in an absolute time crunch, you can pop it in the freezer for about two hours instead of refrigerating for four. Just be careful not to freeze it solid. You want it set but still creamy, not rock hard. I’ve done this before potlucks when I forgot to make dessert until the last minute. It works, but refrigerator chilling is definitely superior if you have the time.
One tip I’ve learned through trial and error is to cover the cheesecake loosely with plastic wrap before chilling. Press the wrap directly onto the surface if you want to prevent a skin from forming, or tent it above if you don’t want to mess up your pretty top. This keeps the dessert from absorbing any funky fridge odors and prevents it from drying out.
When you’re ready to serve, you can keep it simple or get creative with toppings. Fresh berries look gorgeous and add a tart contrast. A drizzle of chocolate or caramel sauce makes it feel extra indulgent. Whipped cream rosettes around the edges look professional. Or you could try something completely different like the caramelized top on a cheesecake brulee for a fancy twist. Cherry pie filling turns it into something reminiscent of a classic cherry cheesecake recipe no bake style dessert that everyone recognizes and loves.
The beauty of this cream cheese cool whip recipes approach is that it’s genuinely foolproof. I’ve never seen anyone fail at this as long as they followed the basic steps. The most common mistake is not softening the cream cheese enough, which creates lumps. The second most common mistake is beating the Cool Whip too hard and deflating it. Avoid those two things and you’re golden.
Creative Twists and Additions to Elevate Your Cool Whip Cheesecake
Here’s where things get really fun. Once you’ve mastered the basic cool whip cheesecake, the possibilities stretch out in front of you like an endless dessert buffet.
The no bake cheesecake with pudding and cool whip method completely changed my dessert game when I discovered it about five years ago. My sister-in-law brought this variation to a family reunion, and I literally went back for thirds. The pudding mix adds so much more than just flavor, it creates this incredibly stable, almost custard-like texture that holds up beautifully even in warm weather. You simply prepare one package of instant pudding according to the box directions, let it sit for about five minutes until it thickens, then fold in your softened cream cheese and Cool Whip. No additional sugar needed because the pudding brings plenty of sweetness.
I’ve experimented with nearly every pudding flavor imaginable. Chocolate pudding creates a dessert that tastes like chocolate mousse pie but easier. Cheesecake-flavored pudding might sound redundant, but it actually intensifies that classic cheesecake taste in the best way. Pistachio pudding makes a stunning pale green dessert that tastes sophisticated and nutty, perfect for St. Patrick’s Day or when you want something different. Banana cream pudding mixed with sliced fresh bananas in the filling tastes like the ultimate banana cream pie. Last month, I tried white chocolate pudding with fresh raspberries folded in, and my husband declared it the best thing I’d made all year.
The key with the pudding version is to not overmix once everything comes together. You want to maintain that airy texture from the Cool Whip while getting the added body from the pudding. I fold everything together with maybe fifteen to twenty gentle strokes, just until I don’t see any more streaks. The mixture will look thicker than the basic version, which makes it easier to create layered desserts or pipe into individual serving cups.
Speaking of layers, that’s another creative direction worth exploring. I’ve made desserts where I alternate layers of different cool whip cheesecake flavor options in a clear trifle bowl. Chocolate on the bottom, vanilla in the middle, strawberry on top, with crushed cookies between each layer. It looks absolutely stunning and lets people choose which flavor they want in each bite. The visual impact when you bring that to a party is unbeatable.
Another twist I absolutely love involves swirling in fruit purees or jams. Take about half a cup of seedless raspberry jam, warm it slightly so it’s pourable, then drizzle it over your finished cheesecake filling before you smooth it into the crust. Use a knife or skewer to swirl it through in figure-eight motions. You get these gorgeous marbled patterns and pockets of intense fruit flavor throughout. I’ve done this with everything from strawberry preserves to lemon curd to Nutella. Each version brings something unique.
The whipped cream cheese cheesecake approach takes things in a slightly different direction. Instead of just mixing softened cream cheese with Cool Whip, you actually whip the cream cheese first with sugar until it becomes light and fluffy, almost doubling in volume. This takes about five minutes with an electric mixer on medium-high speed. Then you fold in the Cool Whip. The result is even airier and lighter than the standard method. It’s almost cloud-like in texture. My mom, who usually finds cheesecake too heavy, requests this version specifically because she can eat a whole slice without feeling stuffed.
Crust variations deserve their own mention too. While graham crackers are classic, I’ve branched out considerably over the years. Oreo cookie crusts turn this into something reminiscent of cookies and cream. Vanilla wafer crusts create a more delicate, subtle base. Pretzel crusts with a little extra butter and sugar bring a sweet-salty element that’s incredibly addictive. I made a crust from crushed Biscoff cookies once, and people are still asking me to bring “that cookie butter cheesecake” to gatherings two years later.
By the way, you can skip the crust entirely if you want. I’ve served this filling in individual glasses or mason jars with just a few cookie crumbs sprinkled on top. It looks elegant and modern, plus portion control is built right in. This presentation style works particularly well for dinner parties where you want something that feels upscale without the work.
For those interested in food awareness and understanding how ingredients affect our enjoyment of desserts, experimenting with natural sweeteners or reducing sugar can be enlightening. I’ve successfully made versions with honey or maple syrup instead of granulated sugar, though you need to reduce the liquid slightly elsewhere to compensate. The flavors become more complex and interesting.
Adding extracts opens up a whole world of possibilities. Almond extract in a basic vanilla cheesecake creates something that tastes like almond joy when you top it with chocolate and coconut. Peppermint extract around the holidays with crushed candy canes on top is festive and refreshing. Coconut extract paired with lime juice and a macadamia nut crust tastes like vacation in dessert form. I keep probably eight different extracts in my pantry just for these experiments.
Here are some creative mix-in ideas that have worked beautifully for me:
- Mini chocolate chips folded into the filling for chocolate chip cheesecake
- Crushed Oreos for cookies and cream style
- Finely chopped nuts like pecans or walnuts for crunch and flavor
- Caramel sauce swirled through with a sprinkle of sea salt
- Fresh berries gently folded in or arranged on top
- Peanut butter mixed into the cream cheese before adding Cool Whip
- Espresso powder for a coffee-flavored version
- Shredded coconut toasted until golden
The cool whip no bake cheesecake format is incredibly forgiving when it comes to add-ins. As long as you’re not adding excessive liquid that might prevent setting, you can fold in almost anything. I’ve even added small cubes of pound cake to create a trifle-like texture that’s different and delightful.
Topping options extend far beyond the basic fruit and whipped cream suggestions most recipes give you. I’ve drizzled warm ganache over chilled cheesecake for an elegant finish. Toasted meringue spread on top and lightly torched with a kitchen torch creates a s’mores effect that’s dramatic and delicious. Crushed candy bars, cookie pieces, or even a dusting of cocoa powder all work beautifully.
For holidays and special occasions, themed decorations make these desserts real showstoppers. Around Christmas, I arrange fresh cranberries and sugared rosemary sprigs on top. For Fourth of July, I create a flag pattern with blueberries and strawberry slices. Halloween gets a spiderweb design made with melted chocolate. Valentine’s Day calls for fresh raspberries arranged in a heart shape. These little touches take maybe five extra minutes but make people think you spent hours decorating.
One creative variation I stumbled upon completely by accident was the frozen version. I made a cool whip cheesecake and forgot about it in my garage freezer for three weeks. When I finally remembered and tasted it, I discovered it had transformed into something like an ice cream cake. The texture stayed creamy rather than icy, and it was absolutely delicious eaten frozen. Now I intentionally make frozen versions during summer, slicing them straight from the freezer for a refreshing treat.
The texture when frozen is somewhere between ice cream and frozen mousse. It’s not as hard as ice cream but firmer than the refrigerated version. You can stick popsicle sticks into individual portions before freezing to create cheesecake pops that kids go crazy for. I dip those in melted chocolate and roll them in sprinkles or crushed cookies for an extra special touch.
Honestly, I encourage you to view the basic recipe as a starting point rather than a destination. Think about your favorite flavors and how you might incorporate them. Love key lime pie? Add lime juice and zest with a pretzel crust. Obsessed with tiramisu? Mix in espresso and layer with ladyfinger cookies. Can’t get enough of Boston cream pie? Make a vanilla pudding version with chocolate ganache on top.
The beauty of these cream cheese cool whip recipes is that they’re almost impossible to ruin. Even my wildest experiments have turned out at least decent, and most have been genuinely great. The worst that can happen is you learn what doesn’t work for your taste preferences and adjust next time. That’s how I discovered that mint and lemon don’t play well together, but mint and chocolate are best friends forever.
Keep notes on your variations if you can. I use a little notebook in my kitchen where I jot down what I added, how much, and whether I’d make it again. This has saved me countless times when someone requests “that cheesecake you made last summer with the thing in it” and I can actually remember what I did. Otherwise, I’d never be able to recreate my successes.
If you’re feeling really adventurous, savory cheesecakes are also possible with this method. I’ve made a version with herbs and garlic that served as an appetizer spread rather than dessert. Reduce the sugar significantly, add fresh herbs, maybe some sun-dried tomatoes or caramelized onions, and serve it with crackers. It’s unexpected and impressive for cocktail parties. Though I’ll admit, sweet versions remain my personal favorite.
Don’t be afraid to combine techniques either. Make a pudding version but also swirl in fruit. Use whipped cream cheese and add extracts. Create layers with different flavors and textures. Some of my best desserts have come from throwing multiple ideas together and seeing what happens. My most requested recipe combines chocolate pudding, peanut butter, crushed Reese’s cups, and a pretzel crust. It started as me cleaning out my pantry and became a signature dish.
If you’re looking for even more inspiration and variations, I’ve shared plenty more ideas in my collection of cheesecake recipes that span from classic to completely unconventional. There’s something satisfying about having a whole arsenal of no-bake desserts ready to deploy at a moment’s notice.
The real joy in making these desserts comes from seeing people’s reactions. There’s something magical about watching someone take that first bite, their eyes light up, and hearing them ask for the recipe. It happens every single time I bring one of these to a gathering. And when I tell them how easy it actually was? They’re always shocked. That’s the secret power of the cool whip cheesecake, it delivers impressive results that taste like you’re a professional pastry chef, but the process is so simple that literally anyone can do it.
Start with the basic recipe to build your confidence, then let your creativity run wild. The kitchen is your playground, and this dessert is one of the most forgiving canvases you’ll ever work with. Mix, match, experiment, and have fun with it. That’s what cooking should be about.
Frequently Asked Questions About Cool Whip Cheesecake
Can I use whipped cream instead of Cool Whip in a no-bake cheesecake?
Yes, you absolutely can substitute whipped cream for Cool Whip, though the process requires a bit more effort. You’ll need to whip about two cups of cold heavy cream with about a quarter cup of sugar until stiff peaks form. The key is making sure you don’t overwhip it into butter. Gently fold the whipped cream into your cream cheese mixture just like you would with Cool Whip. The texture will be slightly different, a bit lighter and less stable, so it’s best to serve it within a day or two. Cool Whip contains stabilizers that help it hold up longer in the fridge, which is why many people prefer it for convenience.
How long does a cool whip cheesecake need to chill before serving?
Your cheesecake needs a minimum of four hours in the refrigerator to set properly, but I’ve found that overnight chilling produces the best results. The texture becomes more cohesive and sliceable after about eight hours. If you’re really pressed for time, you can put it in the freezer for about two hours instead, but watch it carefully so it doesn’t freeze solid. The longer it chills within reason, the better the flavors meld together. I’ve kept them in the fridge for up to three days before serving, and they actually improve with time. Just make sure it’s covered so it doesn’t absorb any fridge odors.
Can I add fruit to my cool whip cheesecake?
Fresh fruit works wonderfully with this dessert, though you need to be thoughtful about how you add it. Fresh berries can be folded gently into the filling or arranged beautifully on top just before serving. If you’re adding fruit that releases a lot of juice like strawberries, I recommend adding it as a topping rather than mixing it in, otherwise your filling might become watery. For fruit mixed into the filling, blueberries and raspberries work best because they hold their shape. You can also use fruit purees or jams swirled through the filling for flavor without the texture issues. Banana slices are delicious but should be added right before serving to prevent browning.
Is there a way to make a no bake cheesecake without Cool Whip?
Definitely, and there are several approaches you can take. The most common substitute is freshly whipped heavy cream, which I explained earlier. Another option is to use additional cream cheese and sour cream to create a denser, more traditional cheesecake texture that sets up with the help of gelatin. You can also use mascarpone cheese mixed with whipped cream for an Italian-style version that’s incredibly rich. Greek yogurt works as a substitute too, creating a tangier, slightly less sweet dessert. Each method produces different results, so it depends on what texture and flavor profile you’re aiming for. Cool Whip just happens to be the easiest and most consistent option.
What are some good toppings for a cool whip cheesecake?
The topping possibilities are genuinely endless and depend on your personal taste. Fresh berries are classic and always beautiful, especially mixed berries for color variety. Fruit pie fillings like cherry, blueberry, or strawberry create that bakery-style look. Chocolate ganache, caramel sauce, or hot fudge drizzled on top adds decadence. Crushed cookies, candy bars, or nuts provide texture contrast. Whipped cream rosettes make it look fancy with minimal effort. I also love lemon curd, fresh mint leaves, toasted coconut, or even a simple dusting of powdered sugar. For holidays, themed decorations like candy corn, conversation hearts, or colored sprinkles make it festive and fun.
How do I prevent my no-bake cheesecake from being too runny?
The most common cause of runny cheesecake is not using enough cream cheese or adding too much liquid. Make sure you’re following the proportions in your recipe carefully. Another issue might be that your cream cheese wasn’t fully incorporated before you added the Cool Whip, leaving pockets of liquid. Beat your cream cheese thoroughly until smooth before adding anything else. Also, ensure your Cool Whip is still fresh and hasn’t separated in the container. If your filling seems too soft before chilling, you can fold in a tablespoon of cornstarch or add a packet of unflavored gelatin dissolved in a tablespoon of warm water. The most important factor though is adequate chilling time, at least four hours but preferably overnight.
Can I freeze a cool whip cheesecake for later?
Yes, these cheesecakes freeze beautifully, which makes them perfect for make-ahead entertaining. Wrap the entire cheesecake tightly in plastic wrap, then again in aluminum foil to prevent freezer burn. It’ll keep for up to two months frozen. When you’re ready to serve, transfer it to the refrigerator and let it thaw slowly overnight. Don’t try to thaw it at room temperature or in the microwave, as this can create a watery mess. Interestingly, some people actually prefer eating it partially frozen because it tastes like an ice cream cake. I’ve served it both ways depending on the occasion. Individual slices can also be frozen separately for quick single servings whenever a craving hits.
Why is my cheesecake filling grainy or lumpy?
Graininess or lumps almost always come from cream cheese that wasn’t softened properly before mixing. Cold cream cheese won’t blend smoothly no matter how long you beat it. Take your cream cheese out of the refrigerator at least thirty minutes before you plan to use it, longer if your kitchen is cold. It should be soft enough that you can easily press your finger into it. If you forgot to soften it and you’re in a rush, you can cut it into small cubes to help it soften faster, or microwave it in short five-second bursts, though this risks melting it unevenly. Another potential cause is using powdered sugar that has clumped, so sift it if it’s been sitting in your pantry for a while.
How long will a cool whip cheesecake last in the refrigerator?
A properly stored cool whip cheesecake will stay fresh in the refrigerator for about five to seven days. Keep it covered tightly with plastic wrap or in an airtight container to prevent it from drying out or absorbing other food odors. The texture might become slightly firmer after a few days, but the flavor remains delicious. In fact, I think the flavors actually improve after a day or two as everything has time to meld together. If you notice any signs of separation, watery liquid pooling, or off smells, it’s time to toss it. But honestly, in my house, these desserts rarely last more than two days before someone finishes them off.
Can I make individual servings instead of one large cheesecake?
Individual servings are actually one of my favorite ways to serve this dessert because they look so elegant and professional. You can use mason jars, small glasses, or even plastic cups for casual gatherings. Layer your crust on the bottom, add the filling, chill, and top just before serving. This presentation style is perfect for parties because there’s no slicing required and portion control is automatic. You can also use muffin tins lined with paper cups to create individual mini cheesecakes that are perfect for bake sales or buffets. I’ve even piped the filling into chocolate cups or premade phyllo shells for bite-sized versions. The individual format also lets you create variety, making different flavors so everyone can choose their favorite.
Equipment
- Mixing Bowl
- Electric Mixer
- Rubber Spatula
- 9-inch Pie Pan
- Measuring Cups and Spoons
Ingredients
- 8 oz cream cheese (softened)
- 8 oz Cool Whip
- 0.5 cup granulated sugar
- 1 tsp vanilla extract
- 1 pre-made graham cracker crust
Instructions
- If using a homemade crust, mix crushed graham crackers, melted butter, and sugar, then press into the bottom of a 9-inch pie pan and refrigerate.
- Ensure cream cheese is softened to room temperature.
- In a large mixing bowl, beat the softened cream cheese with sugar until smooth and fluffy.
- Add vanilla extract and any variations like sour cream or lemon juice, and mix until fully incorporated.
- Gently fold in the Cool Whip with a rubber spatula until no white streaks remain.
- Pour filling into the prepared crust and spread evenly.
- Chill the cheesecake in the refrigerator for at least 4 hours (overnight is best).
- Before serving, add desired toppings like fresh fruit, chocolate sauce, or whipped cream.
Notes
Nutrition

Hello! I’m Sarah Mitchell, and I’m passionate about bringing creativity and innovation to baking. My love for baking started in high school when I first tried my hand at decorating cupcakes for a class project. What began as a fun hobby quickly became a full-time passion. I’ve spent the past decade working in bakeries and dessert shops, honing my skills in everything from simple cookies to intricate wedding cakes.
After working in some of the top bakeries across the country, I realized that baking was about more than just following recipes — it was about infusing your personality into each creation. At BakingSecret.com, I love creating recipes that push boundaries while staying true to the heart of classic baking. I specialize in creating delicious and visually stunning pastries that will wow your guests.
When I’m not baking, I enjoy teaching baking classes, trying out new cake decoration techniques, and traveling to find inspiration in global dessert traditions. I’m so excited to share my tips and tricks with you to help elevate your baking game!