
Hoppy Baking! My Cheater’s Easter Cake Bars That Steal the Show
You know those moments when your kids are buzzing with spring energy, you have company coming over, and you need a show-stopping treat that looks like you fussed for hours? That was me last Easter. I stared at a box of cake mix and a bag of pastel candies, and a crazy-simple idea was born. These Easter Cake Mix Cookie Bars are my secret weapon. They’re the cheater’s path to a festive, colorful dessert that gets more “oohs” and “ahhs” than a basket full of bunnies. Let me show you how to make them!
A Sweet Slice of Baking History
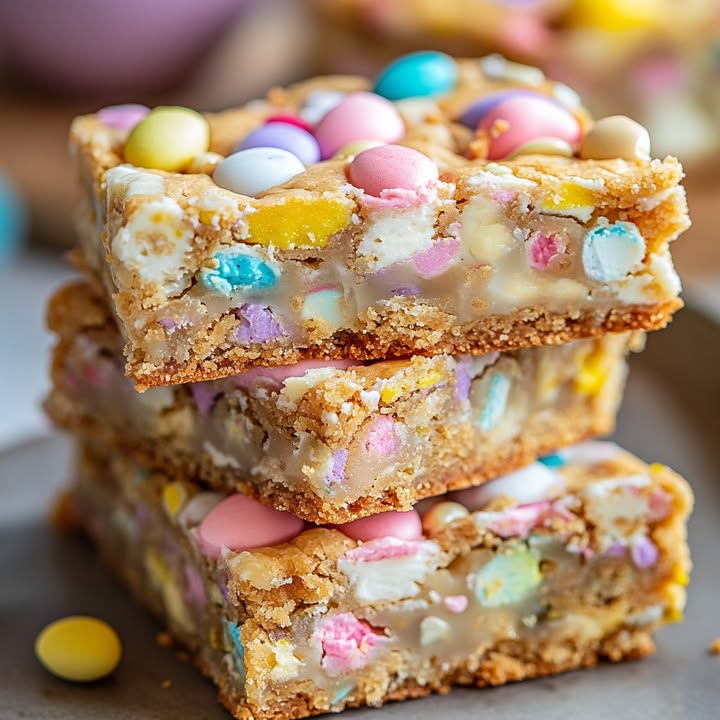
Now, cake mix cookies are a brilliant little hack born from clever home bakers, probably in the mid-20th century when cake mixes first became a pantry staple. The idea is pure genius: take a shortcut, add a few “love it” ingredients, and create something entirely new. My Easter Cake Bars are the festive, spring-fied version of that classic trick. I took the super-simple cookie bar base and loaded it with the colors of the season—pastel M&Ms, bright sprinkles, and creamy white chocolate. It’s a modern spin on tradition, perfect for busy families who still want that homemade magic on their holiday table.
Why You’ll Love These Easter Cookie Bars
Honestly, what’s not to love? First, they are impossibly easy. One bowl, one baking dish, done. They come together faster than you can hide the Easter eggs. Second, they are a total crowd-pleaser. The base is soft and chewy, and every bite is loaded with melty chocolate and a fun, crunchy sprinkle. Plus, that rainbow of pastel colors just makes everyone smile. They’re the perfect bridge between a cookie and a cake, and I promise they’ll become your new spring tradition.
Best Occasions for These Festive Bars
These bars are your go-to for any spring celebration! They’re perfect for Easter brunch, a post-egg-hunt snack, or a sweet gift for neighbors and teachers. I love bringing a pan to a spring potluck or baby shower—the colors fit right in! They’re also fantastic for a simple weekend baking project with kids. No fancy skills are needed, just lots of mixing and sprinkling fun.
Gathering Your Ingredients
Here’s what you need for these simple yet spectacular bars:
- 1 box (15.25 ounce) yellow or white cake mix
- 1/3 cup vegetable oil
- 2 large eggs
- 1 cup pastel M&Ms or candy-coated eggs
- 1/2 cup white chocolate chips
- 1/4 cup pastel sprinkles
- Optional: extra candies and sprinkles for topping
Easy Ingredient Swaps & Substitutions
No pastel M&Ms? No problem! This recipe is wonderfully flexible.
- Cake Mix: Chocolate or funfetti cake mix works great too!
- Oil: You can use melted (and cooled) butter for a richer flavor.
- Candies: Use regular M&Ms, chopped peanut butter cups, or even dried cranberries for a pop of tartness.
- White Chocolate Chips: Swap for milk chocolate, butterscotch, or peanut butter chips.
- Sprinkles: Any sprinkle color or shape will do. Jimmies or nonpareils both work.
How to Make Easter Cake Mix Cookie Bars
Let’s get baking! It’s so simple, you might just have everything done before your oven finishes preheating.
Step 1: Prep Your Pan & Oven
First, get your oven heating to a toasty 350°F (175°C). This gives it plenty of time to reach the perfect temperature. Then, grab your trusty 9×13-inch baking dish. I like to lightly grease it with a bit of butter or cooking spray. For the ultimate easy cleanup, line it with parchment paper, letting the edges hang over the sides. This creates a sling so you can lift the whole block of bars out after baking! Pro tip: Even if you use parchment, a quick spray helps it stick to the pan.
Step 2: Make the Incredibly Easy Dough
In a large mixing bowl, combine the cake mix, vegetable oil, and eggs. Yes, that’s really it! Use a sturdy spoon or a hand mixer on low to blend it all together. You’ll see it quickly transform from a powdery mix into a thick, slightly sticky dough. The aroma of vanilla and cake will start to fill your kitchen already. Don’t overmix—just stir until no dry pockets of cake mix remain.
Step 3: Fold in the Fun
This is the best part! Dump in your cup of cheerful pastel M&Ms, the white chocolate chips, and those glorious pastel sprinkles. Gently fold them into the thick dough with a spatula. It’s like a treasure hunt, spreading the colorful candies and chips throughout. Try to distribute them evenly so every single bar gets a generous share of the goodies. You’ll love how the dough turns from plain to perfectly pastel-speckled.
Step 4: Press & Decorate
Transfer the dough to your prepared pan. This dough is thick, so you’ll need to press it in firmly and evenly with your fingers or the bottom of a measuring cup. Get it into all the corners for uniform baking. Now, for the final festive touch! Press a few extra candies and sprinkles right on top. This isn’t just for looks—it tells everyone exactly what deliciousness is waiting inside.
Step 5: Bake to Golden Perfection
Slide the pan into your preheated oven. Bake for 20-25 minutes. You’re looking for lightly golden edges and a center that looks set and just barely pulling away from the sides. Chef’s Tip: The center might look a *tiny* bit soft—that’s perfect! It will firm up as it cools, giving you a wonderfully chewy bar. Overbaking is the only way to ruin these, so set a timer!
Step 6: The Crucial Cool Down
I know it’s tempting, but you *must* let the pan cool completely on a wire rack before you cut into it. This patience pays off big time. As it cools, the structure sets, the chocolate firms up, and you’ll get clean, neat squares instead of a gooey mess. For super-sharp cuts, I sometimes pop the whole cooled slab into the fridge for 30 minutes before slicing. Then, use a sharp knife to cut into 16 beautiful bars.
Simple Timeline for Success
This recipe is a dream for last-minute bakers.
- Prep Time: 10 minutes (really!)
- Cook Time: 25 minutes
- Cooling Time: 1 hour (the hardest part!)
- Total Time: About 1 hour 35 minutes
- Kcal: Approx. 240 per bar
- Servings: 16 generous bars
My Secret for Ultimate Chewiness
Here’s my little secret: I use the lower end of the baking time, around 20-22 minutes. I take the bars out when the top looks slightly crackled and the edges are just *beginning* to turn golden. The center will look a tad underdone, but it will carry-over cook in the hot pan as it cools. This guarantees a soft, dense, and fantastically chewy texture that everyone adores.
A Fun Fact About Sprinkles
Did you know those colorful sprinkles are sometimes called “jimmies” or “nonpareils”? The tiny round balls are nonpareils, while the short cylindrical ones are jimmies. They’ve been bringing joy to desserts since the 18th century! Using them here isn’t just for color—they add a delightful, subtle crunch to every bite of our Easter Cake Bars.
What You’ll Need to Make Them
- 9×13-inch baking dish
- Large mixing bowl
- Spoon or hand mixer
- Spatula
- Measuring cups
- Wire cooling rack
- Sharp knife for cutting
Storing Your Easter Cake Bars
To keep your bars fresh and delicious, store them in an airtight container at room temperature. They will stay soft and perfect for 3-4 days this way. Just place a sheet of parchment paper between layers if you need to stack them to prevent sticking.
If you want to keep them longer, you can freeze them! Once the bars are completely cooled, cut them and place them in a single layer on a baking sheet to freeze solid. Then, transfer the frozen bars to a freezer bag or container. They’ll keep for up to 2 months. Thaw at room temperature for an hour or pop one in the microwave for a few seconds.
I don’t recommend storing them in the fridge, as it can dry them out. The cool, dry environment of your kitchen countertop is just right. If it’s particularly humid, the fridge is okay for a day, but let them come to room temp before serving for the best texture.
Tips for Baking Success
- Don’t skip the cooling step! It’s essential for clean cuts.
- Feel free to use your hands to mix the dough at the end. It’s often easier than a spoon.
- For extra richness, swap the oil for melted (and cooled) butter.
- If your dough feels too stiff to press, wet your fingertips slightly to prevent sticking.
Pretty Presentation Ideas
Make these bars look like they came from a bakery!
- Stack them on a cake stand with a few faux Easter eggs scattered around.
- Wrap individual bars in clear cellophane with a ribbon for sweet edible gifts.
- Arrange them on a platter with fresh spring flowers like daffodils or tulips (just make sure they’re not touching the food!).
- Drizzle with a little melted white chocolate for an extra fancy finish.
Mix It Up! 6 Tasty Variations
Love this base recipe? Try these fun twists for other holidays or cravings. You can find hundreds of other bar and brownie inspirations in our full collection of dessert bars and brownies.
- Chocolate Lover’s: Use devil’s food cake mix with semi-sweet chips and chocolate candies.
- Lemon Berry Bliss: Use lemon cake mix, dried cranberries or blueberries, and white chips.
- Birthday Party Bars: Use funfetti cake mix and rainbow sprinkles for a year-round treat.
- Peanut Butter Cup: Use chocolate cake mix and fold in chopped peanut butter cups instead of M&Ms.
- Cookies & Cream: Use white cake mix and fold in crushed Oreo pieces.
- Salted Caramel: Use yellow cake mix and press soft caramel bits into the top before baking.
Common Mistakes to Avoid
Mistake 1: Overmixing the Dough
It’s easy to get carried away trying to get every last bit of cake mix incorporated. But overmixing can make your bars tough instead of soft and chewy. You only need to stir until the wet and dry ingredients are just combined and a thick dough forms. A few small lumps of dry mix are okay—they’ll hydrate as the dough sits for a minute. Use a folding motion once you add the candies to keep things light.
Mistake 2: Overbaking the Bars
This is the most common error! Because these bars are made from cake mix, they bake quickly. If you wait until a toothpick comes out completely clean, they’ll be dry and crumbly. Remember, they continue to cook from residual heat as they cool. Pull them out when the edges are a light golden brown and the center looks *just* set, even if it seems a bit soft. It will firm up perfectly.
Mistake 3: Cutting While Warm
I get it—they smell amazing and you want a taste! But if you cut into these bars while they’re still warm, they’ll fall apart into a gooey, crumbly mess. The structure needs time to set as it cools. Let the pan cool on a wire rack for at least an hour. For the cleanest, most professional-looking squares, let them cool completely and then chill the whole pan in the fridge for 30 minutes before slicing with a sharp knife.
Mistake 4: Using the Wrong Size Pan
Using a smaller or larger pan will change the baking time and texture. A 9×13-inch pan is ideal. If you use a smaller pan, the bars will be too thick and the center may not cook through properly. A larger pan will make the bars too thin, causing them to overbake and become crispy instead of soft and chewy. Stick to the recommended size for the best results every time.
Your Easter Cake Bars Questions, Answered
Can I use a different type of cake mix?
Absolutely! This recipe is very versatile. Chocolate, funfetti, lemon, or even spice cake mix would all work wonderfully. Just keep the oil and egg amounts the same. The flavor will change, of course, so pair your mix-ins accordingly. For a chocolate base, try dark chocolate chips and peanut butter candies. For a lemon base, dried blueberries or cranberries are fantastic.
Why are my bars dry or crumbly?
Dry bars usually mean they were baked a few minutes too long. Because the dough starts with a dry mix, it has a shorter window for perfect baking. Also, double-check that you used the correct amounts of oil and eggs. Using melted butter instead of oil can sometimes lead to a slightly crispier texture if overbaked. Next time, set your timer for 20 minutes and check. Remember, proper water intake and overall nutrition includes enjoying treats in moderation, and a perfectly baked bar is a more satisfying treat!
Can I make these without the eggs?
It’s tricky, as the eggs provide both moisture and structure. I haven’t tested a reliable egg-free version for this specific recipe. For a guaranteed egg-free dessert, I’d recommend looking at a no-bake option, like our delightful Reese’s Peanut Butter Cup Pie, which sets beautifully in the fridge without any eggs at all.
Can I double this recipe?
I wouldn’t recommend doubling it in one single bowl, as it would be very hard to mix thoroughly. Instead, make two separate batches and press the dough from each into two separate 9×13 pans. This ensures even mixing and baking. You’ll have plenty to share with friends, family, and maybe even the mail carrier!
My dough is too sticky to press. Help!
No worries! This sometimes happens depending on the brand of cake mix or the size of your eggs. Simply wet your fingers with a little bit of water or oil before you press the dough into the pan. This creates a non-stick barrier and makes spreading the dough much easier. You can also use the bottom of a measuring cup sprayed with a bit of cooking spray to press it down smoothly.
Can I use homemade cake mix instead of a box?
Technically, yes, if you have a homemade “cake mix” blend of flour, sugar, leavening, etc. However, the beauty of this recipe is the convenience and reliable texture of the pre-made mix. The commercial mix has specific stabilizers and a fine texture that creates the perfect chewy-cakey bar. I’d stick with the box for foolproof results.
What’s the best way to cut clean bars?
For picture-perfect squares, patience is key. Let the bars cool completely in the pan. For an extra step, chill the entire pan in the refrigerator for about 30 minutes. Then, use a sharp chef’s knife (not a serrated one) and wipe it clean with a damp paper towel between cuts. You can also use a plastic knife, which surprisingly cuts through dense, chewy bars very cleanly without dragging.
Can I add nuts or other mix-ins?
Of course! Feel free to customize. Chopped pecans or walnuts would add a lovely crunch and are a classic pairing. If you love nuts, you might also enjoy the rich, comforting flavors of our Pecan Pie Bread Pudding. For these bars, just swap out 1/2 cup of the candies for an equal amount of your favorite chopped nuts.
How far in advance can I make these?
You can bake these 1-2 days ahead of your event. Store them in an airtight container at room temperature, and they will stay wonderfully fresh. In fact, I think they taste even better the next day as the flavors meld together. If you need to make them further in advance, the freezer is your friend. They freeze beautifully for up to two months.
Yes, you can! Scoop tablespoon-sized balls of dough onto a parchment-lined baking sheet. Flatten them slightly with your hand or a glass. Bake at 350°F for 8-10 minutes, until the edges are set. They will be softer than traditional cookies but just as delicious. For another fantastic cookie idea that features a fruity center, check out my Buttery Raspberry Crumble Cookies.
So there you have it—my foolproof, joy-bringing recipe for Easter Cake Mix Cookie Bars. They are the absolute definition of easy baking with maximum festive impact. I can’t wait for you to experience the smiles they bring to your table this spring. Happy baking, and have a wonderful, sweet holiday! Don’t forget to explore all our other tempting dessert bar recipes for more inspiration all year long.
Equipment
- Grand bol
- Spatule
- Fouet
- Plaque à pâtisserie
- Papier sulfurisé
Ingredients
- 1 boîte mélange à gâteau (jaune ou blanc)
- 80 ml huile végétale
- 2 œufs
- 150 g M&Ms pastel ou œufs en chocolat
- 90 g pépites de chocolat blanc
- 60 g paillettes pastel
- q.s. bonbons et paillettes supplémentaires pour la décoration
Instructions
- Préchauffez votre four à 175°C et graissez un plat de cuisson de 23x33 cm ou tapissez-le de papier sulfurisé.
- Dans un grand bol, combinez le mélange à gâteau, l'huile végétale et les œufs, en remuant jusqu'à obtenir une pâte épaisse et légèrement collante.
- Incorporez délicatement les M&Ms, les pépites de chocolat blanc et les paillettes jusqu'à ce qu'ils soient bien répartis.
- Pressez la pâte uniformément dans le plat de cuisson préparé et décorez avec des bonbons et paillettes supplémentaires sur le dessus.
- Faites cuire dans le four préchauffé pendant 20-25 minutes jusqu'à ce que les bords soient légèrement dorés.
- Laissez refroidir complètement sur une grille à pâtisserie avant de couper en barres.
Notes
Nutrition

Hi, I’m Olivia Parker, the founder of BakingSecret.com and a lifelong lover of all things sweet and homemade. I grew up in a small town in Oregon, where the smell of fresh cookies in my family’s kitchen sparked my passion for baking. Over the years, I turned that passion into a mission: to help home bakers feel confident, inspired, and creative.
After studying food science and working in several artisan bakeries across the U.S., I decided to create a space where everyone from beginners to seasoned bakers can find reliable recipes, expert tips, and a warm, welcoming community. BakingSecret.com is my way of sharing the magic of baking with the world. When I’m not testing new recipes, you’ll find me exploring farmers’ markets, collecting vintage cookbooks, or perfecting my sourdough technique.