
Triple Chocolate Bliss: A Decadent Treat Worth Every Bite
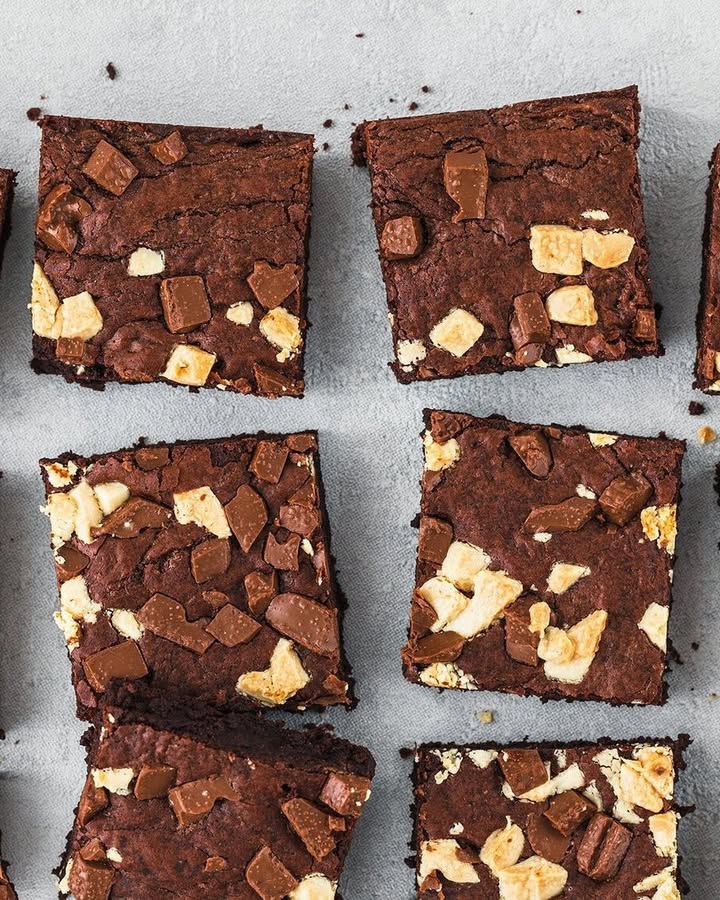
There’s something magical about sinking your teeth into a rich, gooey brownie. But when you add not one, not two, but three kinds of chocolate, it becomes an experience you won’t soon forget. I first made these Triple Chocolate Brownies for a family game night, and let me tell you—they were gone before the first round of Uno was over! The combination of dark, milk, and white chocolate creates layers of flavor that are simply irresistible.
A Little History Behind the Bliss
Brownies have been around since the late 1800s, with their origins often traced back to the United States. Legend has it they were invented by accident when a baker forgot to add baking powder to a chocolate cake recipe. Since then, creative bakers have been experimenting with variations, adding nuts, caramel, or—you guessed it—extra chocolate. My version of Triple Chocolate Bliss is my twist on this classic dessert, inspired by my love for all things chocolatey and indulgent.
Why You’ll Love This Recipe
What makes this recipe stand out? First, it’s incredibly easy to make—even if you’re new to baking. Second, the flavors are bold yet balanced. The bitterness of dark chocolate pairs beautifully with the sweetness of milk and white chocolate. Plus, there’s no need for fancy equipment; just a mixing bowl, spatula, and oven will do. And trust me, once you smell the aroma of melted chocolate wafting through your kitchen, you’ll know you’re onto something special.
Perfect Occasions for Triple Chocolate Bliss
Whether you’re hosting a birthday party, celebrating a holiday, or simply craving a cozy treat on a rainy afternoon, these brownies fit the bill. They’re also perfect for potlucks, bake sales, or as a thoughtful homemade gift. Wrap them up in a pretty box with a ribbon, and watch someone’s face light up when they take their first bite!
Ingredients
- 200 g of dark chocolate
- 125 g butter
- 100 g whole milk chocolate
- 100 g white chocolate
- 100 g of sugar
- 2 eggs
- 120 g flour
- 3 tablespoons of cocoa powder
- 1 pinch of salt
- Some butter for greasing the pan
Substitution Options
If you want to tweak this recipe to suit your taste or pantry, here are some ideas:
- Swap dark chocolate for semi-sweet chocolate if you prefer milder flavors.
- Use coconut oil instead of butter for a dairy-free option.
- Replace white chocolate with chopped hazelnuts or pecans for added crunch.
- For a lower-sugar version, try using a sugar substitute like stevia or erythritol.
Preparation Section
Step 1: Preheat and Prepare
Start by preheating your oven to 180°C (160°C fan-assisted). Grab a small baking sheet measuring 28.5×23 cm and grease it generously with butter. This step ensures your brownies won’t stick and will come out perfectly every time. Pro tip: Line the pan with parchment paper for extra insurance against sticking!
Step 2: Melt That Chocolate
Chop the dark chocolate into small pieces and melt it together with the butter. You can use either a double boiler or the microwave. If you opt for the microwave, heat in short bursts of 20-30 seconds, stirring frequently to avoid burning. Once melted, let the mixture cool slightly—it should still be warm but not hot enough to cook the eggs later. Roughly chop the milk and white chocolate and set them aside for now.
Step 3: Mix the Batter
In a large mixing bowl, combine the melted chocolate-butter mixture with the sugar. Gradually stir in the eggs one at a time, ensuring each egg is fully incorporated before adding the next. In a separate bowl, whisk together the flour, cocoa powder, and pinch of salt. Gently fold this dry mix into the wet ingredients until just combined. Be careful not to overmix, as this can make your brownies dense. Now, fold in about two-thirds of the chopped chocolate chunks for pockets of melty goodness throughout.
Step 4: Bake to Perfection
Pour the batter into your prepared pan and smooth it out with a spatula. Sprinkle the remaining chocolate chunks evenly across the top for a picture-perfect finish. Pop the pan into the preheated oven and bake for about 20 minutes. The edges should look set, while the center remains slightly soft. Chef’s tip: Insert a toothpick into the center—if it comes out with moist crumbs (not wet batter), they’re ready!
Timing
Here’s a quick breakdown of how long everything takes:
- Prep Time: 15 minutes
- Cooking Time: 20 minutes
- Resting Time: 10 minutes (to cool slightly)
- Total Time: Approximately 45 minutes
Chef’s Secret
For an extra layer of decadence, sprinkle a pinch of flaky sea salt on top of the brownies right after they come out of the oven. The contrast between sweet and salty elevates the entire experience. Trust me, your guests will rave about this little trick!
Extra Info
Did you know that white chocolate isn’t technically chocolate? It contains cocoa butter but no cocoa solids, which gives it its creamy texture and mild flavor. Despite this technicality, it plays a vital role in balancing the richness of dark and milk chocolate in our Triple Chocolate Bliss.
Necessary Equipment
To whip up these brownies, you’ll need:
- A baking pan (28.5×23 cm)
- A mixing bowl
- A spatula
- A sharp knife for chopping chocolate
- An oven
Storage Tips
Once cooled, store your brownies in an airtight container at room temperature for up to three days. For longer storage, pop them in the fridge, where they’ll stay fresh for up to a week. If you freeze them, wrap individual slices tightly in plastic wrap and place them in a freezer-safe bag. They’ll keep for up to three months.
When reheating frozen brownies, let them thaw overnight in the fridge, then warm them briefly in the microwave for 10-15 seconds. This brings back their gooey texture without drying them out.
Pro tip: Serve leftovers with a scoop of vanilla ice cream for an instant sundae. Yum!
Tips and Advice
To ensure your brownies turn out perfectly every time, follow these tips:
- Don’t overbake! Remember, they’ll continue to firm up as they cool.
- Use high-quality chocolate for the best flavor.
- Let the melted chocolate cool slightly before adding eggs to prevent scrambling.
Presentation Ideas
Dust your brownies with powdered sugar for a touch of elegance, or drizzle them with melted chocolate for extra flair. Serve them on a rustic wooden board for a cozy vibe, or plate them individually with a sprig of mint for color. Pair with a glass of cold milk or a hot cup of coffee for the ultimate indulgence.
Healthier Alternative Recipes
Want to enjoy Triple Chocolate Bliss guilt-free? Here are six healthier variations:
- Gluten-Free: Swap regular flour for almond flour or gluten-free flour blend.
- Vegan: Replace eggs with flax eggs (1 tbsp ground flaxseed + 2.5 tbsp water per egg) and use vegan chocolate.
- Low-Sugar: Cut the sugar in half and use a natural sweetener like monk fruit.
- Protein-Packed: Add a scoop of chocolate protein powder to the batter.
- Nutty Delight: Stir in chopped almonds or walnuts for added texture and nutrition.
- Fruit Infusion: Mix in dried cherries or raspberries for a fruity twist.
Common Mistakes to Avoid
Mistake 1: Overmixing the Batter
Overmixing can lead to tough, dense brownies instead of soft and fudgy ones. To avoid this, mix until the ingredients are just combined. A few lumps are okay—they’ll disappear during baking.
Mistake 2: Skipping the Cooling Step
Rushing to cut into your brownies too soon can cause them to crumble. Let them cool completely in the pan before slicing for clean, neat squares.
Mistake 3: Using Low-Quality Chocolate
The quality of your chocolate directly impacts the flavor of your brownies. Splurge on good-quality chocolate bars rather than cheap chips for the best results.
FAQ
Can I make these brownies ahead of time?
Absolutely! These brownies taste even better the next day as the flavors meld together. Just store them properly and reheat if desired.
Do I have to use all three types of chocolate?
Nope! While the triple chocolate combo is divine, feel free to adjust based on what you have. Even two types of chocolate will yield delicious results.
Can I add nuts or other mix-ins?
Of course! Chopped nuts, dried fruits, or even marshmallows can add fun textures and flavors.
How do I know when the brownies are done?
Look for set edges and a slightly jiggly center. A toothpick inserted should come out with moist crumbs, not raw batter.
What size pan should I use?
A standard 28.5×23 cm pan works best. Using a larger pan may result in thinner brownies, while a smaller one could lead to uneven baking.
Can I double the recipe?
Yes, doubling is easy. Just make sure your pan is large enough or divide the batter between two pans.
Why did my brownies sink in the middle?
This usually happens if the brownies are underbaked or if the oven temperature is too low. Make sure your oven is calibrated correctly.
Can I freeze the brownies?
Definitely! Wrap individual slices in plastic wrap and freeze for up to three months.
What’s the best way to serve these brownies?
Warm them slightly and pair with vanilla ice cream for a heavenly dessert experience.
Are these brownies kid-friendly?
Kids love them! The combination of textures and flavors appeals to both young and old alike.
Final Thoughts
Triple Chocolate Bliss is more than just a dessert—it’s a celebration of flavor, simplicity, and pure joy. Whether you’re baking for loved ones or treating yourself, these brownies promise to deliver happiness in every bite. So grab your apron, gather your ingredients, and get ready to create a masterpiece that everyone will adore. Happy baking!
Equipment
- Mixing bowl
- Spatula
- Sharp knife for chopping chocolate
- Baking pan (28.5x23 cm)
- Oven
Notes
Nutrition

Hi, I’m Olivia Parker, the founder of BakingSecret.com and a lifelong lover of all things sweet and homemade. I grew up in a small town in Oregon, where the smell of fresh cookies in my family’s kitchen sparked my passion for baking. Over the years, I turned that passion into a mission: to help home bakers feel confident, inspired, and creative.
After studying food science and working in several artisan bakeries across the U.S., I decided to create a space where everyone from beginners to seasoned bakers can find reliable recipes, expert tips, and a warm, welcoming community. BakingSecret.com is my way of sharing the magic of baking with the world. When I’m not testing new recipes, you’ll find me exploring farmers’ markets, collecting vintage cookbooks, or perfecting my sourdough technique.