
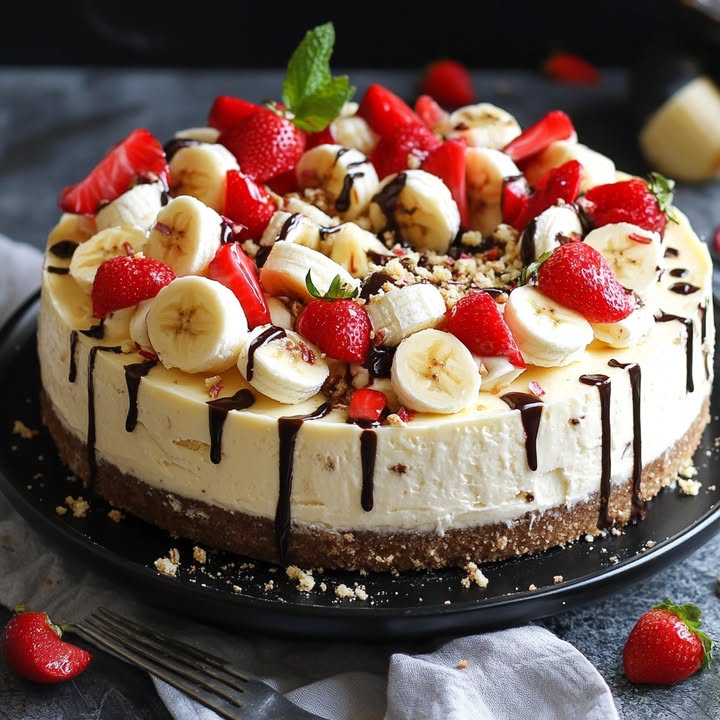
Heavenly No-Bake Banana Split Cheesecake: A Slice of Summer Joy
You know that feeling when the sun is blazing and turning on the oven feels like a terrible, terrible idea? My kids were begging for something sweet, and I was staring at some very ripe bananas. Then, it hit me. What if I combined the creamy dreaminess of a Decadent Banana Cheesecake with the fun of a classic banana split? This no-bake beauty was born out of desperation and a serious sweet tooth, and let me tell you, it disappeared faster than ice cream on a hot day!
From Soda Fountain to Dessert Plate: A Sweet History
The classic banana split, with its bananas, ice cream, and toppings, was invented in a Pennsylvania drugstore in the early 1900s. It’s pure Americana. This recipe is my love letter to that treat, but in a form perfect for a crowd. Instead of scooping ice cream, we use a luscious, no-bake cheesecake filling. It captures all the nostalgia but makes it easy to slice and share. It’s the modern, make-ahead version of a timeless favorite.
Why You’ll Fall in Love with This Decadent Banana Cheesecake
First, there’s zero baking. The oven stays off, and your kitchen stays cool. Second, it’s a texture wonderland—creamy filling, crunchy crust, juicy fruit, and nuts. Third, it’s incredibly forgiving. Ripe bananas? Perfect. Last-minute guests? This dessert saves the day. It’s the kind of recipe that makes you look like a superstar with minimal fuss.
Perfect Occasions for This Showstopper Dessert
This is your secret weapon for so many events! Bring it to a summer potluck or a Fourth of July barbecue. It’s a hit at birthday parties where kids (and adults!) go wild for it. Serve it after a family Sunday dinner for a special treat. Any day you need a dose of pure, uncomplicated joy is the right day for this cake.
What You’ll Need: Ingredients for No-Bake Bliss
Gathering everything is simple. Let’s break it down:
For the Crust:
- 2 cups graham cracker crumbs
- 1/2 cup unsalted butter, melted
For the Filling & Layers:
- 2 (8 ounce) packages cream cheese, softened
- 1/2 cup granulated sugar
- 1 teaspoon vanilla extract
- 1 (8 ounce) tub whipped topping, plus 1 more cup for the top layer
- 2 bananas, sliced
- 1 cup crushed pineapple, well-drained
- 1 cup sliced strawberries
For the Topping:
- 1/2 cup chopped walnuts or pecans
- Chocolate syrup, for drizzling
- Maraschino cherries, for garnish
Smart Swaps: Substitution Options
Don’t stress if you’re missing something! Here are easy swaps:
- Graham Crackers: Use digestive biscuits or vanilla wafers.
- Whipped Topping: Swap with an equal amount of freshly whipped heavy cream sweetened with a little sugar.
- Nuts: Use peanuts for a more classic banana split vibe, or omit for allergies.
- Fruit: Try well-drained mandarin oranges or blueberries instead of strawberries.
Let’s Make It! Step-by-Step Instructions
Step 1: Building the Buttery Base
Grab a medium bowl and mix the graham cracker crumbs with the melted butter. That rich, golden butter will coat every crumb. Now, press this mixture firmly into the bottom of a 9×13-inch dish. I use the bottom of a flat measuring cup to get it nice and even. Pop it in the fridge to set for about 15 minutes. This chilling time helps the crust hold together when we add the filling.
Pro tip: Press the crumbs up the sides a tiny bit to create a shallow wall. It helps contain the creamy filling!
Step 2: Creating the Creamy Cheesecake Heart
In a large bowl, beat the softened cream cheese, sugar, and vanilla until it’s completely smooth. No lumps allowed! This is key for that luxurious Decadent Banana Cheesecake texture. Now, gently fold in the entire 8 – ounce tub of whipped topping. Use a spatula and a light hand to keep the mixture airy and fluffy. Spread this cloud of creaminess evenly over your now-chilled crust.
Chef’s tip: For extra flavor, add a tiny pinch of salt to the cream cheese mixture. It makes all the sweet flavors pop!
Step 3: The Fruit Rainbow Layer
Here comes the colorful, juicy part! Layer your sliced bananas, drained pineapple, and sliced strawberries over the cheesecake layer. I like to pat the pineapple and strawberries with a paper towel to remove excess juice. This prevents a soggy crust. The bright red and yellow against the white filling is just gorgeous. It already looks like a party.
Step 4: The Final Fluffy Coat & Garnish
Take that second cup of whipped topping and spread it gently over the fruit layer. It’s like tucking them into a soft, white blanket. Now, sprinkle the chopped nuts all over. Drizzle that chocolate syrup in zig-zags or swirls—be artistic! Finally, dot the top with cheerful maraschino cherries. It’s not just a garnish; it’s the happy finishing touch!
Step 5: The Crucial Chill Time
This is the hardest part: waiting. You must cover the dish and chill it for at least 4 hours, but overnight is even better. This time allows the flavors to marry and the filling to set perfectly. When you slice into it, you’ll get clean, beautiful layers. Patience rewards you with the perfect slice.
Timing is Everything: Your Schedule
Active prep is a breezy 20 minutes. There’s no cooking time. The magic happens in the fridge over 4 hours of chilling. So, from start to ready-to-eat, plan for about 4 hours and 20 minutes. Perfect for making in the morning for an evening celebration.
A Chef’s Little Secret
For an extra flavor boost, mix a tablespoon of instant vanilla pudding powder (the dry powder!) into the cream cheese filling. It helps stabilize the cream and adds a wonderful depth of vanilla flavor that makes the Decadent Banana Cheesecake taste even more luxurious.
A Fun Slice of Extra Info
The banana split is traditionally served in a long boat-shaped dish called a “banana boat.” While we’re using a rectangular pan, you can serve individual portions in small bowls to mimic that classic presentation. It’s a cute way to personalize servings!
Necessary Equipment
- 9×13-inch baking dish or pan
- Mixing bowls (2)
- Electric hand mixer or stand mixer
- Spatula
- Measuring cups and spoons
How to Store Your Masterpiece
This cheesecake must live in the refrigerator. Cover it tightly with plastic wrap or a lid after serving. The fruit and whipped topping make it too delicate for room temperature.
It will stay at peak deliciousness for about 2-3 days. The bananas will start to brown a little after the first day, but the flavor will still be amazing. The crust may soften slightly by day three, but it’s a trade-off for the juicy fruit.
I do not recommend freezing this version. The high water content in the fresh fruit can create ice crystals and a soggy texture when thawed. It’s best enjoyed fresh from the chill.
My Best Tips & Advice for Success
- Softened Cream Cheese is Non-Negotiable. Take it out of the fridge at least an hour ahead. This prevents a lumpy filling.
- Drain the Pineapple Well. Press it in a fine-mesh strainer or squeeze it in a paper towel. Soggy cake is sad cake.
- Use Ripe, but Not Brown, Bananas. They should be yellow with some spots for the best sweetness and texture.
- Slice the Strawberries Thinly. This makes them easier to layer and eat in every bite.
Presentation Tips to Wow Your Guests
- Serve each slice with an extra drizzle of chocolate and a fresh cherry on the side.
- Sprinkle a little extra crushed graham cracker on the plate for crunch.
- For a fancy touch, use a piping bag to add little whipped topping rosettes on top instead of just spreading it.
- Serve in individual mini trifle dishes for a stunning, personal dessert.
6 Delicious Variations to Try
Love this concept? Here are more ways to play with your Decadent Banana Cheesecake:
- Chocolate Lover’s Dream: Use chocolate graham crackers for the crust. Add mini chocolate chips to the filling and use hot fudge instead of syrup.
- Tropical Escape: Use coconut whipped topping. Layer with bananas, mango, and kiwi. Sprinkle with toasted coconut instead of nuts.
- Berry Blast: Skip the pineapple and bananas. Use a mix of blueberries, raspberries, and blackberries for a bold, berry-filled version.
- Nutella Swirl: Swirl 1/2 cup of Nutella into the cream cheese filling before adding the whipped topping. Keep the banana layer—it’s divine!
- Peanut Butter Cup: Mix 1/2 cup creamy peanut butter into the filling. Use chopped Reese’s cups as a topping with the chocolate drizzle.
- Lighter Version: Use reduced-fat cream cheese and light whipped topping. Sweeten with a sugar substitute. The fruit already adds natural sweetness!
If you’re a cheesecake fanatic, you’ll want to explore our whole collection of no-bake cheesecake recipes for more inspiration. And for another take on banana bliss, check out our classic Decadent Banana Cream Cheesecake, a baked version that’s rich and elegant. Looking for something with cookies? Our Banana Pudding Cheesecake might be your new favorite. And if you love the split concept, this Chocolate Covered Banana Split Cake doubles down on the chocolatey goodness.
Common Mistakes to Avoid
Mistake 1: Using Cold, Hard Cream Cheese
This is the biggest culprit for a lumpy, gritty filling. Cold cream cheese will never blend smoothly with the sugar. Your filling will look curdled, and no amount of mixing will fix it. Always plan ahead and let your blocks of cream cheese sit on the counter until they are soft to the touch. This ensures a silky, dreamy base for your Decadent Banana Cheesecake.
Mistake 2: Not Draining the Canned Pineapple
That extra juice in the can might taste good, but it’s a disaster for your crust. Pouring wet fruit over the creamy layer will cause the juice to seep down and make the bottom crust soggy and mushy. Always drain your crushed pineapple in a strainer, and then give it a gentle press with a paper towel. You want the fruit flavor, not the extra liquid.
Mistake 3: Skipping the Full Chill Time
I know, it’s tempting to cut into it after just an hour or two. But if you do, the layers will slump and run together when you try to slice it. The chilling time is when the whipped topping stabilizes and the whole dessert firms up. Four hours is the minimum; overnight is the gold standard. This patience is what gives you those gorgeous, clean layers in every slice.
Mistake 4: Over-mixing the Whipped Topping
When you fold the whipped topping into the cream cheese, be gentle! Vigorous stirring or using the mixer will deflate the whipped topping. You’ll lose that light, fluffy texture that makes this dessert so refreshing. Use a wide spatula and fold in a “J” motion from the bottom up, just until no white streaks remain. Treat it like a cloud.
Using fresh, high-quality ingredients like ripe fruit and real dairy can also boost the overall nutrient density of your dessert, making your treat a bit more wholesome.
Frequently Asked Questions (FAQ)
Can I make this no-bake cheesecake ahead of time?
Absolutely! This is one of its best features. You can make it completely up to 24 hours in advance. Just cover it tightly and keep it in the refrigerator until you’re ready to serve. In fact, making it the day before allows the flavors to develop even more. The crust might soften a touch, but the trade-off for convenience and flavor is totally worth it. It’s the ultimate stress-free party dessert.
How long will leftovers last in the fridge?
Leftovers will keep well for about 2 to 3 days. Store them covered tightly in the original dish or transfer slices to an airtight container. The bananas will slowly start to brown, but they are safe to eat. The whipped topping may also start to weep a little moisture after a couple of days. For the best texture and appearance, enjoying it within the first 48 hours is ideal.
Can I use fresh whipped cream instead of whipped topping?
Yes, you can! For the equivalent of one 8-ounce tub, you’ll need to whip 1 1/2 cups of heavy whipping cream with 3 tablespoons of powdered sugar and 1 teaspoon of vanilla until stiff peaks form. Fresh whipped cream tastes wonderful, but note that it doesn’t hold its structure as long as stabilized whipped topping. Your dessert may be a bit softer and is best served the same day if using fresh cream.
My crust is too crumbly and won’t hold together. What did I do wrong?
This usually means you didn’t use enough melted butter. The butter is the glue that binds the crumbs. If your crumbs look dry after mixing, add more melted butter, one tablespoon at a time, until the mixture looks like wet sand and holds together when you pinch it. Also, make sure you are pressing it into the pan very firmly. A good, solid press is crucial for a stable base.
Can I freeze this banana split cheesecake?
I do not recommend freezing this specific recipe. The fresh fruit layers (bananas, strawberries, pineapple) contain a lot of water. When frozen and thawed, they will release that water and become very mushy, creating a soggy, watery mess. The texture of the entire dessert will be compromised. It is designed to be a refrigerated, make-ahead dessert, not a frozen one.
What can I use if I don’t have a 9×13 pan?
No problem! You can use two 9-inch pie plates or a 10-inch springform pan. Just be aware that in a springform pan, the layers will be taller. You may need to adjust your fruit layering slightly. The key is to have a dish with sides to contain all the delicious layers. A deep ceramic serving dish would also work beautifully.
How do I prevent the bananas from browning?
To slow down browning, you can toss the banana slices in a little bit of lemon or pineapple juice before layering them. The acid helps. However, since they are buried under another layer of whipped topping and garnishes, a little browning isn’t a huge visual issue. For the absolute best look, assemble as close to serving time as your chill schedule allows.
Is there a way to make this recipe lower in sugar?
You can experiment with lower-sugar options. Use a sugar substitute formulated for baking (like erythritol) in the cream cheese filling. Choose a sugar-free chocolate syrup for drizzling. The fruit provides natural sweetness, so you might find you can reduce the added sugar in the filling by a tablespoon or two without missing it much.
Can I add other fruits?
Of course! Get creative. Sliced peaches, raspberries, or even well-drained mandarin orange segments would be delicious. Just make sure any juicy fruits are patted dry to protect your crust. The classic banana split combo is hard to beat, but seasonal fruits make it fun to customize.
What’s the best way to cut clean slices?
Use a long, thin knife. Run it under very hot water for a moment, wipe it dry with a towel, and then make your cut. The heat helps the knife slide through the creamy layers cleanly. Wipe the knife clean and reheat it between each slice for the most beautiful presentation on every plate.
The Sweet Finale
This Heavenly No-Bake Banana Split Cheesecake is more than just a recipe. It’s a guaranteed smile-maker. It combines the comfort of cheesecake with the playful joy of an ice cream sundae, all without breaking a sweat. I’ve made it for everything from casual weeknights to big celebrations, and it never fails. So grab those ripe bananas and get ready for the easiest, happiest dessert you’ll make all summer.
Equipment
- Mélangeur
- Bol
- Spatule
- Plat de cuisson 9x13 pouces
- Papier sulfurisé
Ingredients
- 2 tasses chapelure de biscuit Graham
- 1/2 tasse beurre non salé, fondu
- 2 paquet(s) fromage à la crème, ramolli
- 1/2 tasse sucre granulé
- 1 cuillère à café extrait de vanille
- 1 tub topping fouetté
- 2 bananes bananes, tranchées
- 1 tasse ananas écrasé, bien égoutté
- 1 tasse fraises, tranchées
- 1/2 tasse noix ou pacanes hachées
- au goût sirop de chocolat, pour arroser
- au goût cerises Maraschino, pour garnir
Instructions
- Dans un bol moyen, mélangez la chapelure de biscuit Graham et le beurre fondu, puis pressez fermement au fond d'un plat de cuisson de 9x13 pouces. Réfrigérez pendant 15 minutes.
- Dans un grand bol, battez le fromage à la crème ramolli, le sucre et l'extrait de vanille jusqu'à ce que le mélange soit lisse. Incorporez le topping fouetté de 8 onces et étalez sur la croûte réfrigérée.
- Ajoutez les tranches de bananes, l'ananas bien égoutté et les fraises tranchées sur la couche de cheesecake.
- Étalez la seconde tasse de topping fouetté sur la couche de fruits, saupoudrez de noix, arrosez de sirop de chocolat et décorez de cerises.
- Couvrez et réfrigérez pendant au moins 4 heures ou toute la nuit.
Notes
Nutrition

Hi, I’m Olivia Parker, the founder of BakingSecret.com and a lifelong lover of all things sweet and homemade. I grew up in a small town in Oregon, where the smell of fresh cookies in my family’s kitchen sparked my passion for baking. Over the years, I turned that passion into a mission: to help home bakers feel confident, inspired, and creative.
After studying food science and working in several artisan bakeries across the U.S., I decided to create a space where everyone from beginners to seasoned bakers can find reliable recipes, expert tips, and a warm, welcoming community. BakingSecret.com is my way of sharing the magic of baking with the world. When I’m not testing new recipes, you’ll find me exploring farmers’ markets, collecting vintage cookbooks, or perfecting my sourdough technique.