
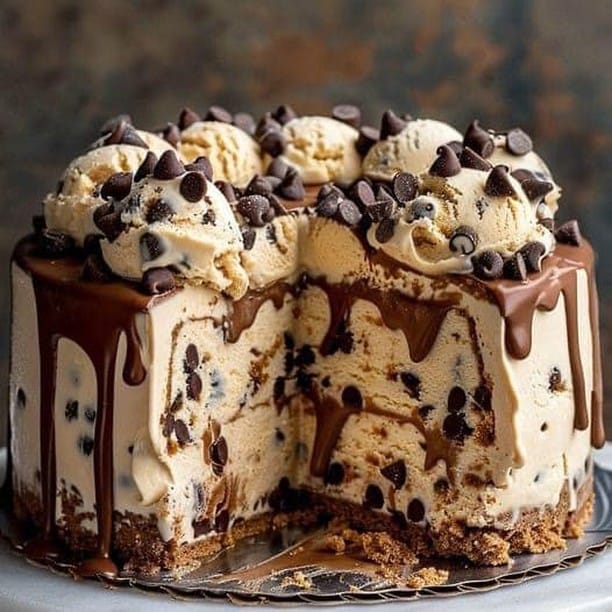
Get Ready for a Choco-licious Treat: Bolo Gelado de Massa de Bolacha e Chocolate
Imagine a cool, creamy, and utterly delightful treat that combines the best of ice cream and cookies. This Chocolate Cookie Ice Cream cake is a dessert that has won my heart and the hearts of my family and friends. It’s a perfect blend of textures and flavors, and it’s as easy to make as it is delicious.
A Brief History and Background
This recipe has roots in traditional Brazilian desserts, but with a modern twist. Bolo gelado, or ice cream cake, is a popular treat in Brazil, and adding chocolate and cookie elements makes it even more irresistible. I first tried this at a friend’s birthday party and was instantly hooked. Since then, I’ve made it countless times, and it never fails to impress.
Why You’ll Love This Recipe
One bite of this Chocolate Cookie Ice Cream cake will have you asking for seconds. The combination of creamy ice cream, crunchy cookies, and rich ganache is a match made in heaven. Plus, it’s incredibly simple to make, making it a go-to dessert for any occasion.
Perfect Occasions to Prepare This Recipe
This dessert is perfect for summer barbecues, birthday parties, or just a cozy night in with the family. Its cool, refreshing texture and rich flavors make it a hit at any event.
Ingredients
- 2 cups of softened chocolate chip cookie dough ice cream
- 1 cup of crushed chocolate cookies
- 1/2 cup of chocolate chips
- 3/4 cup of heavy cream
- 1/4 cup of sugar
- 1 teaspoon of vanilla extract
- 1/4 cup of chocolate ganache
Substitution Options
- If you can’t find cookie dough ice cream, use vanilla ice cream and mix in some extra chocolate chips.
- For a nutty twist, add crushed nuts to the cookie layer.
- You can substitute the chocolate ganache with a homemade chocolate sauce if needed.
Preparation Section
Step 1: Prepare the Mold
Lay out a sheet of parchment paper in the bottom of a springform pan. This will make it easy to remove the cake later. Smooth out the paper to ensure there are no air bubbles.
Step 2: Layer the Ice Cream
Scoop the softened Chocolate Cookie Ice Cream into the pan and spread it evenly using a spatula. Make sure to fill any gaps and create a smooth surface. This will be the base of your cake.
Step 3: Add the Cookie Crumbs
Sprinkle the crushed chocolate cookies over the ice cream layer. Press them gently into the ice cream to help them stick. This adds a lovely crunch and a burst of chocolate flavor.
Step 4: Freeze the Base Layers
Place the pan in the freezer and let it set for about 2 hours. This step is crucial to ensure the layers are firm and don’t mix together when you add the next layer.
Step 5: Whip the Cream
In a mixing bowl, whip the heavy cream, sugar, and vanilla extract until soft peaks form. The cream should be light and fluffy, almost like a cloud.
Step 6: Spread the Whipped Cream
Remove the pan from the freezer and carefully spread the whipped cream over the cookie layer. Use a spatula to create an even layer, making sure to cover the entire surface.
Step 7: Drizzle the Ganache
Drizzle the chocolate ganache over the whipped cream. You can use a spoon or a piping bag to create fun designs. Sprinkle the remaining chocolate chips on top for an extra touch of decadence.
Step 8: Final Freezing
Return the pan to the freezer and let it freeze for another 2-3 hours. This final freeze will help everything set and meld together, creating a cohesive and delicious dessert.
Step 9: Serve and Enjoy
When you’re ready to serve, remove the cake from the freezer and let it sit at room temperature for about 10 minutes. This will make it easier to slice and serve. Cut into slices and enjoy your creation!
Chef’s Tip
For an extra special touch, you can add a sprinkle of sea salt on top of the ganache. The salty-sweet combination is simply divine.
Timing
Prep Time: 30 minutes
Cooking Time: No cooking required
Resting Time: 4-5 hours (freezing time)
Total Time: 5-6 hours
Chef’s Secret
One secret to making this Chocolate Cookie Ice Cream cake stand out is to use high-quality ingredients. Fresh, flavorful ice cream and rich, premium chocolate make all the difference.
Extra Info
Did you know that using different types of cookies can give you a unique taste? For example, try using Oreo cookies for a classic and comforting flavor, or experiment with other chocolate cookie varieties for a new twist.
Necessary Equipment
- Springform pan
- Mixing bowls
- Whisk or electric mixer
- Parchment paper
- Spatula
Storage
To keep your Chocolate Cookie Ice Cream cake fresh, store it in an airtight container in the freezer. It will last for up to 2 weeks, but it’s so delicious that it’s unlikely it will last that long! When you’re ready to serve, let it thaw for a few minutes to soften slightly.
For the best texture, avoid refreezing the cake once it’s been thawed. This can cause ice crystals to form, which can affect the creaminess of the ice cream. Instead, plan to serve it all at once or keep it in the freezer for future treats.
Another tip is to slice the cake into portions before freezing. This way, you can take out only what you need without having to thaw the entire cake. It’s a great way to enjoy a sweet treat without any hassle.
Tips and Advice
- Make sure the ice cream is soft enough to spread easily but not melted. This will help you create a smooth and even layer.
- Use a hot knife to cut the cake. Dip the knife in hot water, dry it off, and then slice. This will give you clean, neat cuts.
- Feel free to get creative with the toppings. Add caramel, nuts, or even a drizzle of berry sauce for a colorful and delicious touch.
Presentation Tips
- Garnish with a dusting of cocoa powder or a sprinkle of confectioner’s sugar for a sophisticated look.
- Add a dollop of whipped cream and a cherry on top of each slice for a classic ice cream parlor feel.
- Use a stencil to create fun designs with the cocoa powder or sprinkles for a personalized touch.
Healthier Alternative Recipes
If you’re looking for a healthier version of this Chocolate Cookie Ice Cream cake, here are six variations to try:
- Fruit and Yogurt Ice Cream Cake: Replace the ice cream with low-fat yogurt and add a variety of fresh fruits for a lighter and more nutritious option. This is a great way to enjoy a sweet treat without the guilt.
- Oat and Brown Sugar Cookie Ice Cream Cake: Use oatmeal cookies instead of chocolate ones and add a layer of brown sugar and butter for a rustic and wholesome dessert. This variation is perfect for those who prefer a less sweet and more earthy flavor.
- Avocado and Chocolate Mousse Cake: Mix avocado with dark chocolate and a touch of honey to create a rich and creamy mousse. This is a surprisingly delicious and healthy alternative. Avocado adds a smooth and silky texture, while the dark chocolate provides antioxidants.
- Matcha and White Chocolate Ice Cream Cake: Swap the chocolate ice cream for a matcha-flavored one and add a white chocolate ganache for a unique and refreshing twist. This is a perfect dessert for tea lovers and those who enjoy a subtle and elegant flavor.
- Banana and Peanut Butter Ice Cream Cake: Use banana ice cream and add a layer of peanut butter for a protein-packed and delicious dessert. This is a favorite among kids and adults alike, and it’s a great way to get a boost of energy.
- Coconut and Raspberry Ice Cream Cake: Combine coconut ice cream with a layer of raspberry puree for a tropical and tangy treat. This is a fantastic option for those who love a fruity and refreshing dessert.
Common Mistakes to Avoid
Mistake 1: Over-Softening the Ice Cream
Over-softening the ice cream can make it too runny, making it difficult to spread and layer. To avoid this, take the ice cream out of the freezer 10-15 minutes before using it. This will give you the right consistency to work with. If it starts to melt, pop it back in the freezer for a few minutes to firm up.
Mistake 2: Not Freezing Layers Properly
Not allowing each layer to freeze properly can result in a messy and uneven cake. Make sure to freeze the base layer for at least 2 hours before adding the next layer. This will help the layers stay in place and give you a beautifully layered dessert.
Mistake 3: Using Too Much Whipped Cream
Using too much whipped cream can overwhelm the other flavors in the cake. Start with a thin layer and add more if needed. Aim for a balance between the cream and the other layers to ensure a well-rounded flavor profile.
Mistake 4: Not Letting the Cake Thaw Before Serving
Serving the cake straight from the freezer can result in a rock-hard dessert that’s difficult to cut and eat. Let the cake sit at room temperature for about 10 minutes before slicing. This will make it easier to handle and enhance the overall texture and flavor.
Mistake 5: Skipping the Parchment Paper
Skipping the parchment paper can make it challenging to remove the cake from the pan. Lining the pan with parchment paper ensures that the cake comes out cleanly and in one piece. This small step can save you a lot of frustration later.
FAQ
Yes, you can use different types of cookies. Try oreo cookies, graham crackers, or even shortbread cookies for a unique twist. Each type of cookie will add a different flavor and texture to your Chocolate Cookie Ice Cream cake.
How long does the cake need to freeze?
The cake needs to freeze for at least 4-5 hours total. This includes 2 hours for the initial layer and 2-3 hours after adding the cream and ganache. This ensures that the cake is fully set and holds its shape.
Can I use a different type of ice cream?
Absolutely! While the recipe calls for chocolate chip cookie dough ice cream, you can use any flavor you like. Vanilla, strawberry, or even mint chocolate chip would be delicious. Just make sure the ice cream is soft enough to spread easily.
What is the best way to store the cake?
The best way to store the Chocolate Cookie Ice Cream cake is in an airtight container in the freezer. It will stay fresh for up to 2 weeks. When you’re ready to serve, let it thaw at room temperature for about 10 minutes before cutting.
Can I make this cake ahead of time?
Yes, you can make this cake ahead of time. In fact, it’s a great option for preparing in advance. Just make sure to store it in the freezer and let it thaw slightly before serving. This way, you can have a delicious dessert ready whenever you need it.
Is there a way to make this recipe dairy-free?
Yes, you can make this recipe dairy-free by using dairy-free ice cream and vegan whipping cream. Look for plant-based alternatives that suit your dietary needs. This will still give you a delicious and creamy dessert without the dairy.
Can I use a regular cake pan instead of a springform pan?
While a springform pan is ideal for easy removal, you can use a regular cake pan. Just line it with parchment paper and be extra careful when removing the cake. A springform pan makes it easier to unmold the cake, but a regular pan can work with a little extra care.
How do I prevent the cake from getting too hard?
To prevent the cake from getting too hard, let it thaw at room temperature for about 10 minutes before serving. This will make it easier to cut and enjoy. If you’re concerned about food safety, refer to the CDC’s guidelines on preventing foodborne illness for additional tips on storing and handling frozen desserts.
Can I add other toppings to the cake?
Yes, you can add other toppings to the cake. Consider adding a drizzle of caramel, a sprinkle of nuts, or even a dollop of berry compote. These additions can add extra flavor and texture to your Chocolate Cookie Ice Cream cake. Feel free to get creative and personalize it to your taste.
What can I do if the cake doesn’t come out of the pan cleanly?
If the cake doesn’t come out cleanly, run a knife around the edge of the pan to loosen it. Then, use a spatula to gently lift the cake from the pan. Make sure the cake is slightly thawed, as this will make it easier to remove without damaging its shape.
Now that you have all the secrets to making this Chocolate Cookie Ice Cream cake, you’re ready to wow your family and friends with a delicious and impressive dessert. Don’t forget to explore our other delightful recipes like the Clementine Cream Mousse and the Refreshing Pineapple Delight for more inspiration. Happy baking!
Equipment
- Springform pan
- Mixing bowls
- Whisk or electric mixer
- Parchment paper
- Spatula
Ingredients
- 2 cups softened chocolate chip cookie dough ice cream
- 1 cup crushed chocolate cookies
- 1/2 cup chocolate chips
- 3/4 cup heavy cream
- 1/4 cup sugar
- 1 tsp vanilla extract
- 1/4 cup chocolate ganache
Instructions
- Lay out a sheet of parchment paper in the bottom of a springform pan.
- Scoop the softened chocolate cookie ice cream into the pan and spread it evenly using a spatula.
- Sprinkle the crushed chocolate cookies over the ice cream layer and press gently to help them stick.
- Place the pan in the freezer and let it set for about 2 hours.
- In a mixing bowl, whip the heavy cream, sugar, and vanilla extract until soft peaks form.
- Spread the whipped cream over the cookie layer in the pan.
- Drizzle the chocolate ganache over the whipped cream and sprinkle the remaining chocolate chips on top.
- Return the pan to the freezer and let it freeze for another 2-3 hours.
- When ready to serve, let the cake sit at room temperature for about 10 minutes before slicing.
Notes
Nutrition

Hi, I’m Olivia Parker, the founder of BakingSecret.com and a lifelong lover of all things sweet and homemade. I grew up in a small town in Oregon, where the smell of fresh cookies in my family’s kitchen sparked my passion for baking. Over the years, I turned that passion into a mission: to help home bakers feel confident, inspired, and creative.
After studying food science and working in several artisan bakeries across the U.S., I decided to create a space where everyone from beginners to seasoned bakers can find reliable recipes, expert tips, and a warm, welcoming community. BakingSecret.com is my way of sharing the magic of baking with the world. When I’m not testing new recipes, you’ll find me exploring farmers’ markets, collecting vintage cookbooks, or perfecting my sourdough technique.