
A Sweet Treat to Savor: Banana Pudding Cheesecake Squares
Imagine a creamy, dreamy cheesecake that marries the best of banana pudding and cheesecake. That’s what you get with these Banana Pudding Cheesecake Squares. They’re a little slice of heaven that my family and friends go crazy for, and I’m excited to share the recipe with you.
The Story Behind the Squares
These squares are a modern twist on a classic. Banana pudding has been a beloved dessert in the South for generations, and cheesecake is a universal favorite. I first tried this fusion at a friend’s potluck, and it was love at first bite. The combination of flavors and textures was so unique and delicious that I knew I had to recreate it at home.
Why You’ll Love This Recipe
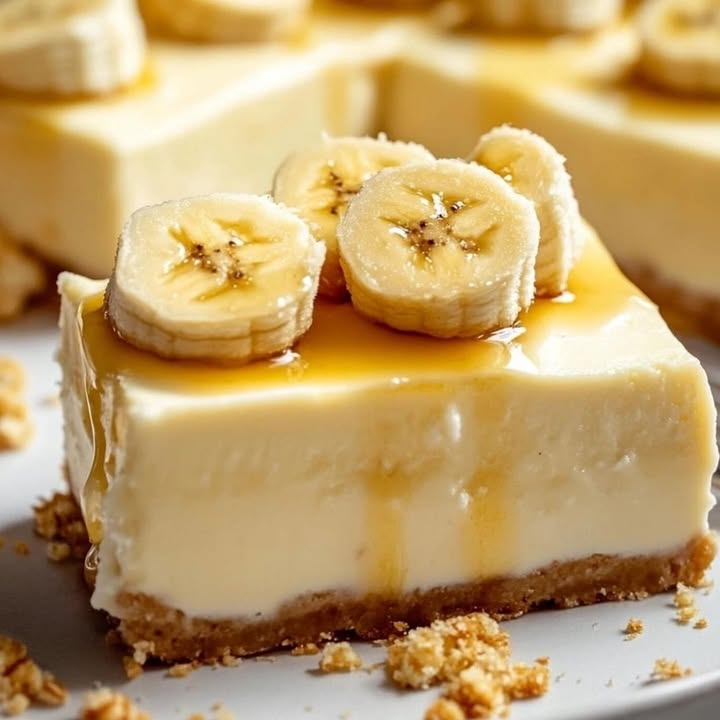
These Banana Pudding Cheesecake Squares are a perfect blend of creamy, sweet, and slightly tangy. The graham cracker crust adds a satisfying crunch, while the mashed bananas give it a fresh, fruity flavor. Best of all, they’re surprisingly easy to make, even for beginners. Plus, they always impress at gatherings!
Perfect Occasions to Prepare This Recipe
These cheesecake squares are perfect for any occasion: from family dinners to holiday parties. They’re a hit at potlucks, too. Make them for a special treat or just because. Trust me, they’ll be gone in no time!
Ingredients
- For the Crust:
- 1 1/2 cups (150g) gluten-free graham cracker crumbs or any cookies you like
- 1/4 cup (50g) firmly packed light brown sugar
- 6 tablespoons (85g) unsalted butter, melted
- For the Filling:
- 16 oz. cream cheese, brought to room temperature
- 14 oz. sweetened condensed milk
- 1/2 cup (113g) sour cream, at room temperature
- 1/2 teaspoon vanilla extract
- 1 cup (227g) mashed bananas
Substitution Options
- Graham cracker crumbs: Use any cookie crumbs you like, such as Oreos or digestive biscuits.
- Brown sugar: Substitute with regular white sugar if needed.
- Bananas: Replace with another fruit puree, like peaches or strawberries, for a different flavor.
Preparation Section
Step 1: Preheat the Oven
Start by preheating your oven to 300°F (150°C). While the oven is warming up, line an 8-inch square baking dish with parchment paper, leaving some overhang on the sides for easy removal later.
Step 2: Prepare the Crust
In a mixing bowl, combine the graham cracker crumbs, brown sugar, and melted butter until well mixed. The mixture should be crumbly but hold together when pressed. Press the mixture evenly into the bottom of the prepared baking dish, making sure it’s well-packed. Pop the crust in the refrigerator to chill while you prepare the filling.
Step 3: Mix the Filling
In a large bowl, use a hand mixer or stand mixer with a paddle attachment to beat the cream cheese until smooth. Add the sweetened condensed milk, sour cream, and vanilla extract. Mix until well combined, scraping down the sides of the bowl as needed. Stir in the mashed bananas, leaving some lumps for texture. The mixture should be thick and creamy, with a delightful banana aroma.
Step 4: Bake the Cheesecake
Pour the filling over the chilled crust, spreading it evenly with a spatula. Bake in the preheated oven for 40 minutes, or until the filling is firm and lightly golden on top. The kitchen will be filled with a wonderful, sweet aroma.
Step 5: Cool and Chill
Allow the cheesecake to cool completely in the baking dish. Once cooled, refrigerate for at least 4 hours to set. The longer it chills, the better the flavors meld together.
Step 6: Slice and Serve
After chilling, lift the cheesecake out of the pan using the parchment overhang. Slice into squares and serve chilled. Drizzle with honey if you want and add sliced fresh bananas for a touch of freshness. Enjoy!
Chef’s Tip
For an extra burst of flavor, sprinkle a little cinnamon on top of the cheesecake squares before serving. It adds a warm, comforting note that complements the banana and cream cheese perfectly.
Timing
Prep Time: 15 minutes | Cooking Time: 40 minutes | Resting Time: 4 hours | Total Time: 5 hours 25 minutes
Chef’s Secret
To make the cheesecake extra creamy, use full-fat cream cheese and sour cream. The fat content contributes to a smoother, more luxurious texture. Trust me, it makes a big difference!
Extra Info
Did you know that bananas are not only delicious but also incredibly nutritious? They’re a great source of potassium, vitamin B6, and fiber. Adding them to your desserts can help you meet your dietary guidelines for essential nutrients. For more information, check out the dietary guidelines.
Necessary Equipment
- 8-inch square baking dish
- Parchment paper
- Mixing bowls
- Hand mixer or stand mixer
- Spatula
- Measuring cups and spoons
Storage
Store the Banana Pudding Cheesecake Squares in an airtight container in the refrigerator. They will keep well for up to 5 days. If you want to freeze them, wrap each square individually in plastic wrap and then place them in a freezer bag. They can be stored in the freezer for up to 3 months. Just thaw them in the fridge overnight before serving.
For the best texture, let the squares come to room temperature for about 15 minutes before eating. This allows the flavors to meld and the texture to soften a bit.
If you have any leftover slices, consider turning them into a parfait by layering them with whipped cream and fresh berries. It’s a fun and delicious way to enjoy the leftovers.
Tips and Advice
- Bring your cream cheese and sour cream to room temperature before mixing. This ensures a smooth, lump-free filling.
- Use ripe but not overly mushy bananas for the best flavor and texture.
- Don’t overmix the filling once you add the mashed bananas. A few lumps are okay and add to the texture.
Presentation Tips
- Garnish with a dollop of whipped cream and a sprinkle of cinnamon.
- Add a fresh banana slice on top of each square for a pop of color.
- Drizzle with caramel sauce or chocolate syrup for a decadent touch.
Healthier Alternative Recipes
If you’re looking for some healthier alternatives, here are six variations you can try:
- Low-Fat Version: Use low-fat cream cheese and sour cream, and substitute the graham cracker crumbs with crushed bran cereal.
- Vegan Version: Swap the cream cheese and sour cream for vegan alternatives, and use a vegan butter substitute for the crust. Use a plant-based sweetened condensed milk or a homemade version.
- No-Bake Version: Instead of baking, use a no-bake cheesecake filling made with cream cheese, powdered sugar, and whipped cream. Chill the squares in the refrigerator until set.
- Keto Version: Use almond flour and a sugar substitute for the crust, and a keto-friendly sweetener for the filling. Add a tablespoon of coconut oil to the crust for a boost of healthy fats.
- Gluten-Free Version: Ensure all your ingredients, including the graham cracker crumbs, are certified gluten-free. This is a great option for those with gluten sensitivities.
- Fruit-Forward Version: Reduce the amount of cream cheese and sour cream and add more mashed bananas and other fruits like strawberries or blueberries for a lighter, fruitier dessert.
Common Mistakes to Avoid
Mistake 1: Overmixing the Crust
Overmixing the crust can lead to a tough, compact texture. To avoid this, mix the ingredients just until they come together. The crust should be crumbly but hold its shape when pressed. Pro tip: Use a fork to gently press the crust into the baking dish for an even layer.
Mistake 2: Not Chilling the Crust
Chilling the crust before adding the filling helps it set and prevents it from getting soggy. If you skip this step, the crust might become too soft and lose its texture. Pro tip: Place the crust in the refrigerator for at least 10 minutes before adding the filling.
Mistake 3: Overbaking the Cheesecake
Overbaking can make the cheesecake dry and tough. The key is to bake it until the edges are set but the center is still slightly jiggly. Pro tip: Check the cheesecake after 35 minutes and continue baking in 5-minute increments until it’s done.
Mistake 4: Not Using Room Temperature Ingredients
Using cold cream cheese and sour cream can result in a lumpy, uneven filling. Bring these ingredients to room temperature before mixing. Pro tip: Take the cream cheese and sour cream out of the fridge about 30 minutes before you start preparing the filling.
Mistake 5: Not Allowing Enough Chilling Time
Not allowing the cheesecake to chill long enough can result in a runny, un-set filling. Make sure to chill the cheesecake for at least 4 hours, or preferably overnight, to ensure it sets properly. Pro tip: Chilling the cheesecake in the coldest part of your fridge will help it set faster.
FAQ
Can I use a different type of crust?
Yes, you can use a different type of cookie crumbs for the crust. Some popular alternatives include Oreos, gingersnaps, or even pretzels for a salty-sweet twist. Just make sure the crumbs are finely ground and well-mixed with the butter.
How do I make the cheesecake filling creamy?
To achieve a creamy filling, use room-temperature cream cheese and sour cream. Beat the cream cheese thoroughly before adding the other ingredients, and mix until smooth. Be careful not to overmix after adding the bananas, as a few lumps are fine and add texture.
Can I make this recipe without an 8-inch square pan?
While an 8-inch square pan is ideal, you can use a round 9-inch pan instead. Just adjust the baking time slightly, as it may take a bit longer to set. Start checking the cheesecake after 35 minutes and continue baking in 5-minute increments until it’s done.
Is this recipe gluten-free?
Yes, this recipe can be made gluten-free by using gluten-free graham cracker crumbs or any other gluten-free cookie crumbs. Just make sure all other ingredients are also gluten-free. This is a great option for those with gluten sensitivities.
Can I use other fruits instead of bananas?
Absolutely! While bananas are a classic, you can experiment with other fruits like peaches, strawberries, or even apples. Just make sure the fruit is pureed and added to the filling in the same way. Each fruit will bring its own unique flavor and texture to the cheesecake.
How do I store the cheesecake squares?
Store the Banana Pudding Cheesecake Squares in an airtight container in the refrigerator. They will keep well for up to 5 days. If you want to freeze them, wrap each square individually in plastic wrap and then place them in a freezer bag. They can be stored in the freezer for up to 3 months.
Can I make this recipe ahead of time?
Yes, you can definitely make this recipe ahead of time. In fact, it’s recommended to chill the cheesecake for at least 4 hours, or preferably overnight, to allow the flavors to meld and the texture to set. Just make sure to cover it tightly with plastic wrap or aluminum foil before refrigerating.
How do I know when the cheesecake is done?
The cheesecake is done when the edges are set but the center is still slightly jiggly. Insert a toothpick into the center; if it comes out clean, the cheesecake is ready. If the toothpick has wet batter on it, bake for a few more minutes. Let it cool completely in the pan before slicing.
What are some creative ways to serve these squares?
You can serve the Banana Pudding Cheesecake Squares with a dollop of whipped cream and a drizzle of caramel sauce. Another idea is to garnish them with fresh fruit, such as sliced bananas or strawberries. You can also add a sprinkle of cinnamon or a dusting of cocoa powder for a finishing touch.
Can I make this recipe vegan?
Yes, you can make this recipe vegan by using vegan cream cheese, sour cream, and sweetened condensed milk. For the crust, use vegan butter and make sure the graham cracker crumbs or cookie crumbs are vegan. The results will be just as delicious and creamy, with a vegan twist.
These Banana Pudding Cheesecake Squares are a delightful addition to any dessert table. They’re easy to make, delicious, and always a crowd-pleaser. Whether you’re a seasoned baker or just starting out, this recipe is a must-try. Don’t forget to explore more delicious cheesecake recipes like the Caramel Apple Cheesecake, Apple Crisp Cheesecake, Lemon Meringue Cheesecake, and Lemon Cheesecake Rolls for more inspiration. Happy baking!
Equipment
- 8-inch square baking dish
- Parchment paper
- Mixing bowls
- Hand mixer or stand mixer
- Spatula
- Measuring cups and spoons
Ingredients
- 1 1/2 cups gluten-free graham cracker crumbs or any cookies you like
- 1/4 cup light brown sugar firmly packed
- 6 tablespoons unsalted butter melted
- 16 oz. cream cheese brought to room temperature
- 14 oz. sweetened condensed milk
- 1/2 cup sour cream at room temperature
- 1/2 teaspoon vanilla extract
- 1 cup mashed bananas
Instructions
- Preheat your oven to 300°F (150°C) and line an 8-inch square baking dish with parchment paper.
- In a mixing bowl, combine the graham cracker crumbs, brown sugar, and melted butter until mixed; press the mixture into the bottom of the baking dish and refrigerate.
- In a large bowl, beat the cream cheese until smooth, then add sweetened condensed milk, sour cream, and vanilla extract; mix well and stir in mashed bananas.
- Pour the filling over the crust and bake for 40 minutes until firm and lightly golden on top.
- Allow the cheesecake to cool completely in the pan, then refrigerate for at least 4 hours.
- Lift the cheesecake out using parchment overhang, slice into squares, and serve chilled, optionally drizzling with honey and adding fresh banana slices.
Notes
Nutrition

Hi, I’m Olivia Parker, the founder of BakingSecret.com and a lifelong lover of all things sweet and homemade. I grew up in a small town in Oregon, where the smell of fresh cookies in my family’s kitchen sparked my passion for baking. Over the years, I turned that passion into a mission: to help home bakers feel confident, inspired, and creative.
After studying food science and working in several artisan bakeries across the U.S., I decided to create a space where everyone from beginners to seasoned bakers can find reliable recipes, expert tips, and a warm, welcoming community. BakingSecret.com is my way of sharing the magic of baking with the world. When I’m not testing new recipes, you’ll find me exploring farmers’ markets, collecting vintage cookbooks, or perfecting my sourdough technique.