
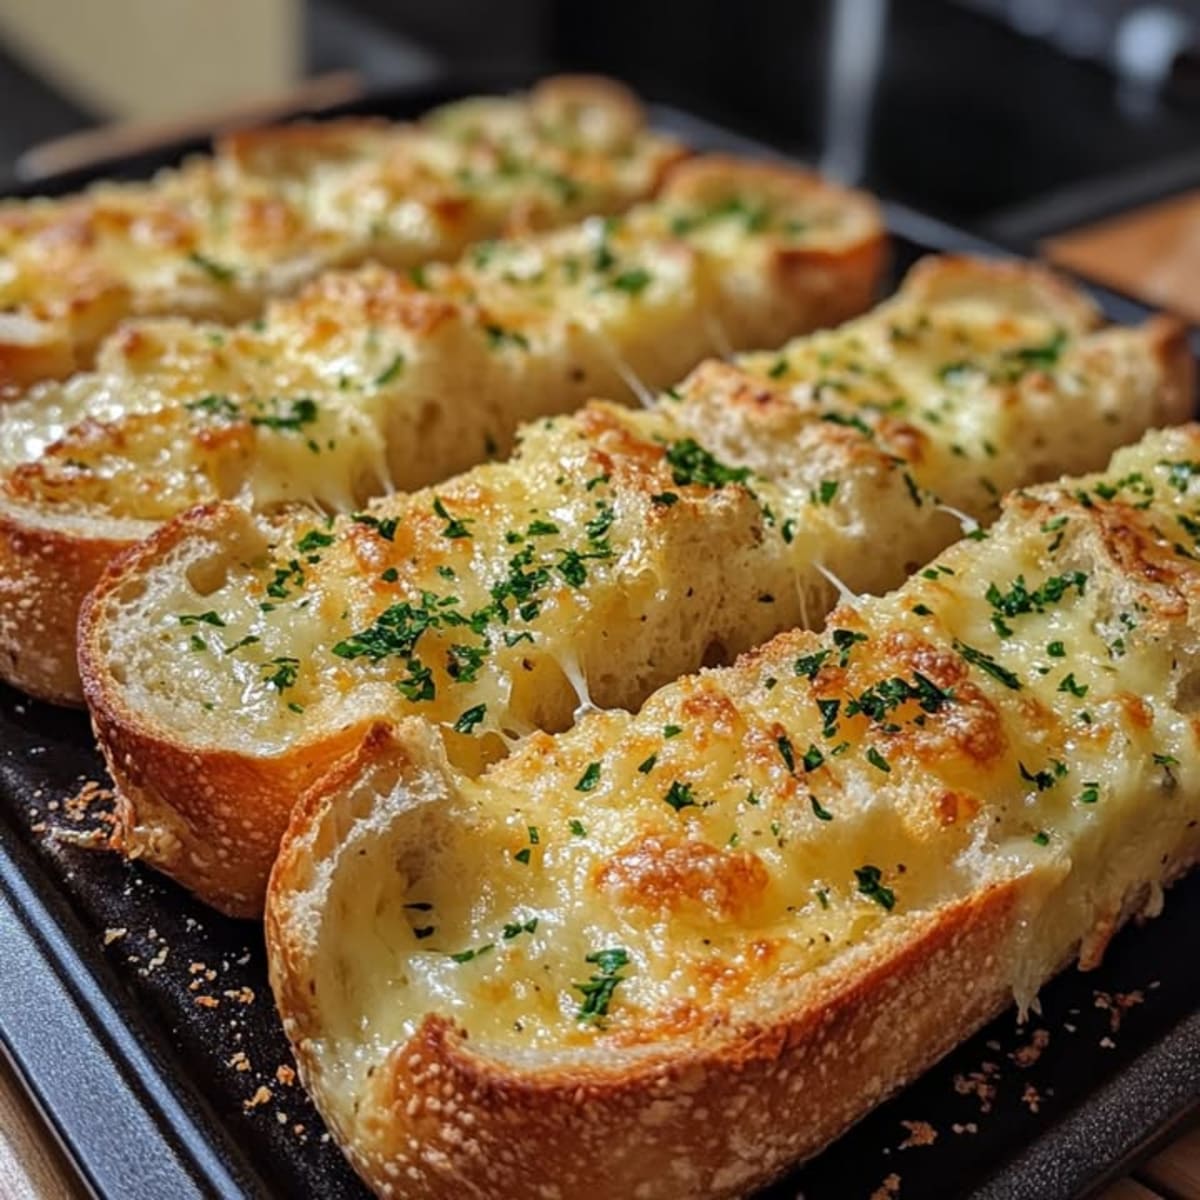
A Flavorful Treat: Easy Garlic Cheese Bread
There’s nothing quite like the aroma of garlic and cheese wafting through the kitchen. I first discovered this Easy Garlic Cheese bread recipe at a friend’s house, and it has been a staple in my home ever since. It’s so simple to make, yet it never fails to impress. Whether you’re hosting a casual get-together or just craving a delicious snack, this recipe is a go-to.
History and Background of Easy Garlic Cheese Bread
Garlic cheese bread is a classic Italian-American dish that has been a favorite for generations. Originally, it was a way to use up day-old bread, but now it’s a beloved comfort food. The combination of garlic and cheese on a crusty loaf is a match made in heaven. In Italy, similar versions are often served as a side dish with pasta, while in the U.S., it’s a popular appetizer and snack.
Why You’ll Love This Recipe
This Easy Garlic Cheese bread is not just about the taste; it’s also about the simplicity. The rich, creamy texture of the cheese and the zesty kick of garlic create a symphony of flavors. Plus, it’s incredibly easy to prepare, making it perfect for last-minute gatherings or a quick family dinner. The best part? Everyone, from kids to adults, loves it!
Perfect Occasions to Prepare This Recipe
This garlicky, cheesy delight is perfect for any occasion. Serve it at a Super Bowl party, a backyard BBQ, or a cozy family movie night. It’s also a great addition to a holiday spread, especially during the winter months when everyone craves something warm and comforting. No matter the event, this bread is sure to be a hit.
Ingredients
- 1 Italian bread loaf
- 1/2 cup unsalted butter, softened
- 1/4 cup parmesan cheese, grated
- 1 cup mozzarella cheese, grated
- 3 garlic cloves, finely chopped
- 2 tablespoons fresh parsley, chopped
- 1/4 teaspoon salt
- 1/4 teaspoon black pepper
Substitution Options
- Butter: Substitute with olive oil for a healthier option.
- Parmesan: Use Romano or Asiago if you prefer.
- Mozzarella: Try cheddar or provolone for a different flavor.
- Fresh parsley: Use dried parsley or basil if fresh herbs are not available.
Preparation Section
Step 1: Preheat Your Oven
Start by preheating your oven to 375°F (190°C). This will ensure your oven is nice and hot, ready to perfectly toast the bread. While the oven is heating up, gather all your ingredients and get ready for some fun in the kitchen.
Step 2: Prepare the Bread
Cut the Italian bread in half lengthwise. Place the two halves, cut side up, on a baking sheet. This step is crucial because it allows the topping to stick to the bread and ensures even cooking. The smell of fresh bread is already making my mouth water!
Step 3: Mix the Topping
In a bowl, mix the softened butter, parmesan, mozzarella, chopped garlic, fresh parsley, salt, and black pepper until well combined. The mixture should be smooth and creamy. The garlic and herbs add a burst of flavor, while the cheeses provide a creamy, melty texture. Pro tip: Softening the butter ahead of time makes it easier to mix.
Step 4: Spread the Topping
Spread the garlic and cheese mixture evenly over the cut sides of the bread. Make sure to cover the entire surface to get the most flavor in every bite. The more you spread, the more delicious it gets! The bread will look like a canvas painted with a creamy, garlicky masterpiece.
Step 5: Bake the Bread
Place the prepared bread in the preheated oven and bake for 10 to 12 minutes, or until the cheese is melted, bubbly, and slightly golden. The aroma of baking cheese and garlic will fill your kitchen, making it hard to resist. Keep an eye on it to avoid burning.
Step 6: Optional Grilling for Extra Crispiness
For an extra crispy top, switch your oven to broil and cook for an additional 1 to 2 minutes. Be careful not to burn it! The broiling step adds a lovely, crispy texture to the top, making each bite even more enjoyable. Chef’s tip: Brush the edges of the bread with a bit of olive oil before broiling for a more golden and crispy edge.
Step 7: Serve Hot
Remove the bread from the oven and cut it into slices. Serve it immediately while it’s still hot and gooey. The bread will be golden and the cheese will be perfectly melted. It’s a true delight for your taste buds. Enjoy it with your family and friends, and watch their faces light up with joy.
Timing
Preparing this Easy Garlic Cheese bread is quick and straightforward. Here’s a breakdown of the times:
- Prep Time: 10 minutes
- Cooking Time: 10-12 minutes
- Total Time: 15-22 minutes
Chef’s Secret
To make this bread even more flavorful, try adding a pinch of red pepper flakes to the cheese mixture. This gives it a slight kick that complements the garlic and cheese beautifully. It’s a small touch that can make a big difference.
Extra Info
Did you know that garlic has been used for both culinary and medicinal purposes for centuries? It’s a key ingredient in the Mediterranean diet, which is known for its health benefits. Adding garlic to your dishes, like this Easy Garlic Cheese bread, can be a tasty way to boost your meal’s nutritional value. For more on the Mediterranean diet, check out this resource.
Necessary Equipment
- Baking sheet
- Bowl for mixing
- Spatula or knife for spreading
- Sharp knife for cutting the bread
Storage
Storing this Easy Garlic Cheese bread is simple. If you have leftovers, wrap them in aluminum foil or place them in an airtight container. Store in the refrigerator for up to 3 days. When you’re ready to enjoy it again, simply reheat it in the oven at 350°F (175°C) for about 5-7 minutes, or until the cheese is melted and the bread is warm.
If you want to freeze it, wrap the bread tightly in plastic wrap and then in aluminum foil. Label it with the date and freeze for up to 3 months. To reheat, let it thaw in the refrigerator overnight and then follow the same reheating instructions.
Pro tip: To keep the bread from getting soggy, place a paper towel between the bread and the wrapper. This absorbs any excess moisture and keeps the bread crispier.
Tips and Advice
- Use room-temperature butter for easier mixing.
- Grate your own cheese for a fresher, creamier texture.
- Finely chop the garlic for a more even distribution of flavor.
- Keep an eye on the bread during the last few minutes of baking to prevent burning.
Presentation Tips
To make this Easy Garlic Cheese bread look even more inviting, garnish it with a sprinkle of extra parsley or a dash of paprika. You can also serve it on a pretty platter with a side of marinara sauce or a drizzle of balsamic glaze. The little touches can make a big difference in how your guests perceive and enjoy the dish.
Healthier Alternative Recipes
If you’re looking for some healthier alternatives, here are six variations you can try:
- Whole Wheat Version: Use whole wheat bread instead of Italian bread for a healthier option. It adds a nutty flavor and more fiber.
- Herbed Parmesan: Substitute mozzarella with feta cheese and add a variety of fresh herbs like thyme and oregano for a fresh, herby twist.
- Vegan Garlic Cheese Bread: Use vegan butter and plant-based cheese. Add a touch of nutritional yeast for a cheesy flavor without the dairy.
- Gluten-Free Garlic Cheese Bread: Use gluten-free bread to make this recipe suitable for those with gluten sensitivities. Just make sure the bread is sturdy enough to hold the toppings.
- Spicy Kick: Add some red pepper flakes or a spicy pepper sauce to the cheese mixture for a spicy version. It’s a great way to add a little heat to your snack.
- Zucchini Cheese Bread: Add some grated zucchini to the cheese mixture for a touch of freshness and extra nutrition. It’s a sneaky way to get more veggies into your diet.
For more delicious and creative recipes, check out our Cheesy Indian Naans, Light Yogurt Muffins, Easy Sausage Breakfast Muffins, and Buttery Muffins Recipe. These recipes are sure to become new favorites in your kitchen.
Common Mistakes to Avoid
Mistake 1: Overcooking the Bread
One common mistake is overcooking the bread, which can lead to a hard, dry, and unappetizing result. To avoid this, keep a close eye on the bread during the last few minutes of baking. If the cheese is melted and the top is golden, it’s done. Pro tip: Set a timer a few minutes shorter than the recommended time and check for doneness.
Mistake 2: Not Softening the Butter
Using cold, hard butter makes it difficult to mix and results in a lumpy, uneven spread. Always soften the butter at room temperature before mixing. This ensures a smooth, creamy consistency that will coat the bread evenly. Pro tip: If you’re in a hurry, you can microwave the butter for a few seconds, but be careful not to melt it completely.
Mistake 3: Using Pre-grated Cheese
While pre-grated cheese is convenient, it often contains additives that prevent clumping, which can affect the texture and flavor. Grating your own cheese, while it takes a bit more effort, results in a fresher, more flavorful bread. The difference in taste is noticeable and worth the extra step. Pro tip: Use a box grater or a food processor to make the job easier.
Mistake 4: Not Chopping the Garlic Finely Enough
Large chunks of garlic in the spread can be overwhelming and may not distribute evenly. Make sure to finely chop the garlic so it blends seamlessly into the butter and cheese mixture. This ensures a balanced, garlicky flavor in every bite. Pro tip: Use a garlic press if you’re short on time and want a perfectly fine mince.
Mistake 5: Not Preheating the Oven
Not preheating the oven can result in uneven cooking and a less-than-ideal texture. Always preheat your oven to the specified temperature before placing the bread inside. This ensures that the bread cooks evenly and achieves the perfect golden, crispy top. Pro tip: Use an oven thermometer to ensure your oven is at the correct temperature, as ovens can vary.
FAQ
Can I use other types of cheese for this recipe?
Yes, you can use other types of cheese. Cheddar, provolone, or even a blend of different cheeses can work well. Just make sure the cheese melts nicely and complements the garlic and parsley.
How do I store leftover garlic cheese bread?
Wrap the bread in aluminum foil or place it in an airtight container. Store it in the refrigerator for up to 3 days. Reheat it in the oven at 350°F (175°C) for about 5-7 minutes, or until the cheese is melted and the bread is warm.
Can I make this recipe with a different type of bread?
Yes, you can use other types of bread, such as French bread or even a baguette. Just make sure the bread is sturdy enough to hold the toppings and has a good crust for a nice texture.
Is there a way to make this recipe vegan?
Absolutely! Use vegan butter and plant-based cheese. Add a touch of nutritional yeast for a cheesy flavor without the dairy. The rest of the ingredients remain the same, and the result is a delicious vegan garlic cheese bread.
Can I freeze this garlic cheese bread?
Yes, you can freeze it. Wrap the bread tightly in plastic wrap and then in aluminum foil. Label it with the date and freeze for up to 3 months. To reheat, let it thaw in the refrigerator overnight and then follow the same reheating instructions.
What can I substitute for fresh parsley?
If you don’t have fresh parsley, you can use dried parsley, basil, or even a bit of oregano. The herbs add a nice, fresh flavor to the bread, so feel free to experiment with what you have on hand.
Can I add other herbs to the topping?
Definitely! You can add herbs like thyme, rosemary, or oregano to the topping for a different flavor profile. Just make sure to finely chop them so they blend well with the cheese and butter mixture.
How do I know when the bread is done?
The bread is done when the cheese is melted, bubbly, and slightly golden. The edges should be crispy, and the top should be a nice, golden color. Keep an eye on it during the last few minutes of baking to avoid burning.
Can I make this recipe ahead of time?
Yes, you can prepare the bread ahead of time. Assemble the bread with the topping and store it in the refrigerator. When you’re ready to serve, simply bake it according to the instructions. This is a great way to save time if you’re preparing for a party.
Is there a way to make this recipe spicier?
Yes, you can add a pinch of red pepper flakes or a spicy pepper sauce to the cheese mixture for a spicier version. Start with a small amount and adjust to your taste. This adds a nice kick to the bread and complements the garlic and cheese flavors.
For more delicious and creative recipes, head over to our recipes section. Whether you’re a seasoned chef or a beginner, you’ll find plenty of inspiration and ideas to whip up something amazing.
Conclusion
There you have it, a simple yet delectable Easy Garlic Cheese bread recipe that’s sure to be a hit at any gathering. With its rich, creamy texture and zesty garlic flavor, it’s a treat for the senses. Give it a try and see why it’s a favorite in my kitchen. Happy baking!
Equipment
- Baking sheet
- Bowl for mixing
- Spatula or knife for spreading
- Sharp knife for cutting the bread
Ingredients
- 1 loaf Italian bread
- 1/2 cup unsalted butter softened
- 1/4 cup parmesan cheese grated
- 1 cup mozzarella cheese grated
- 3 cloves garlic finely chopped
- 2 tbsp fresh parsley chopped
- 1/4 tsp salt
- 1/4 tsp black pepper
Instructions
- Preheat your oven to 375°F (190°C).
- Cut the Italian bread in half lengthwise and place on a baking sheet cut side up.
- In a bowl, mix the softened butter, parmesan, mozzarella, chopped garlic, fresh parsley, salt, and black pepper until well combined.
- Spread the garlic and cheese mixture evenly over the cut sides of the bread.
- Bake the bread in the preheated oven for 10 to 12 minutes until the cheese is melted and slightly golden.
- (Optional) Switch the oven to broil and cook for an additional 1 to 2 minutes for extra crispiness.
- Remove from the oven, cut into slices, and serve hot.
Notes
Nutrition

Hi, I’m Olivia Parker, the founder of BakingSecret.com and a lifelong lover of all things sweet and homemade. I grew up in a small town in Oregon, where the smell of fresh cookies in my family’s kitchen sparked my passion for baking. Over the years, I turned that passion into a mission: to help home bakers feel confident, inspired, and creative.
After studying food science and working in several artisan bakeries across the U.S., I decided to create a space where everyone from beginners to seasoned bakers can find reliable recipes, expert tips, and a warm, welcoming community. BakingSecret.com is my way of sharing the magic of baking with the world. When I’m not testing new recipes, you’ll find me exploring farmers’ markets, collecting vintage cookbooks, or perfecting my sourdough technique.