
Introduction
I’ve always had a soft spot for flavors that surprise and delight. As someone who loves baking, I’m constantly on the lookout for ingredients that bring something new to the table. That’s how I discovered taro—a root vegetable with a unique taste that’s been making waves in the dessert world. Taro isn’t just a fleeting trend; it’s an ingredient with deep roots in many cultures, and it’s now finding its way into modern treats like cupcakes. Today, we’re diving into a taro cupcakes recipe that’s as fun to make as it is to eat.
Taro has been showing up everywhere lately, especially in desserts. From ice cream to cakes, this purple-hued ingredient adds a pop of color and a distinct flavor that’s hard to resist. But what makes taro so special? And why are bakers like me falling in love with it? I’m thrilled to guide you through everything you need to know about using taro in baking. Together, we’ll create taro cupcakes that are moist, flavorful, and unforgettable. Let’s get started!
What is Taro and Why Use It in Baking?
Taro is a starchy root vegetable that’s been a staple in many Asian cuisines for centuries. You might recognize it from dishes like taro chips or bubble tea. It has a slightly nutty, earthy, and sweet flavor that works beautifully in both savory and sweet recipes. In baking, taro brings a unique twist that sets your creations apart.
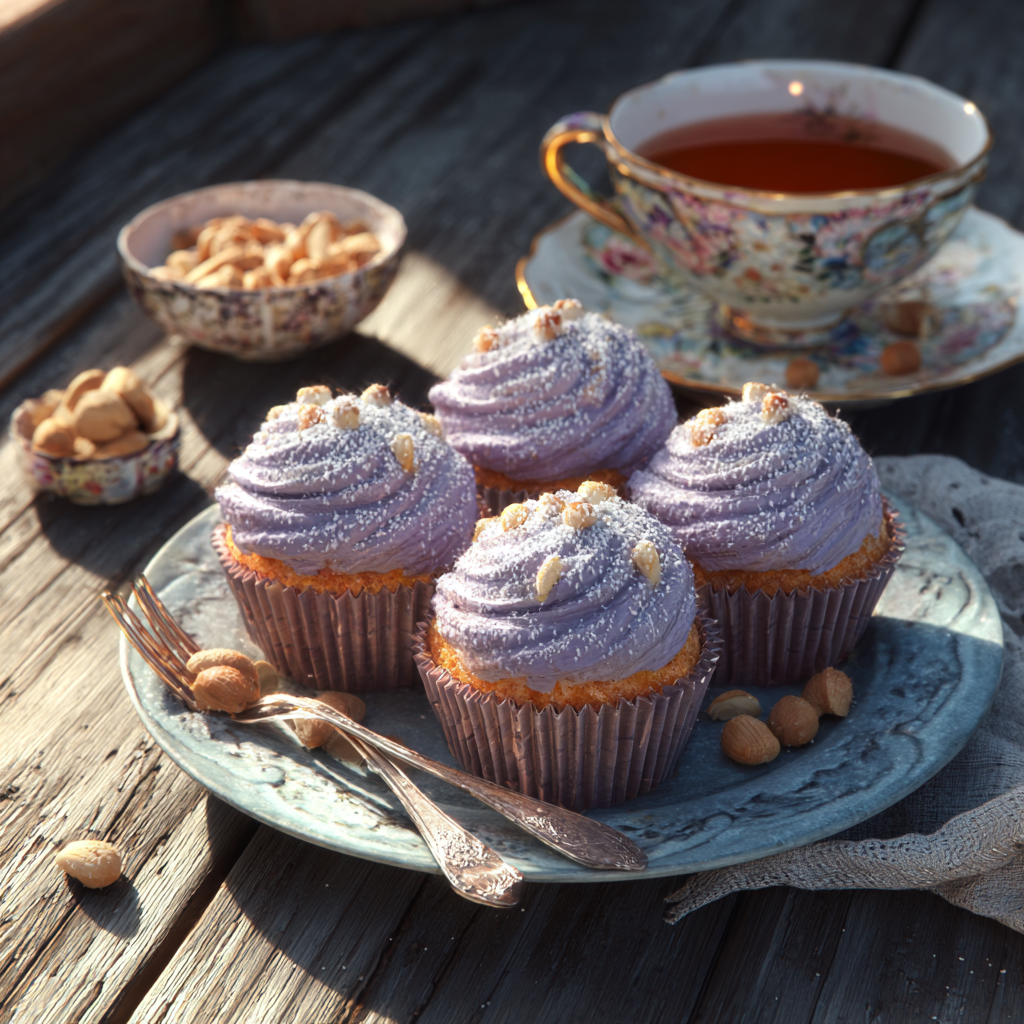
So, what is taro in baking? Simply put, it’s an ingredient that adds depth and richness to desserts. Whether you use taro paste, powder, or even fresh taro, it infuses your baked goods with a subtle sweetness and vibrant color. The natural purple hue of taro makes treats like taro cupcakes visually stunning without needing artificial dyes.
Why is taro perfect for desserts? Its earthy notes balance well with sugar and butter, creating a flavor profile that’s complex yet comforting. Imagine biting into a cupcake that’s not just sweet but also has a hint of something unexpected—something that keeps you coming back for more. That’s the magic of taro.
Ingredients You’ll Need for Taro Cupcakes
Before we dive into the process, let’s talk about what goes into making these delightful taro cupcakes. The key to nailing this recipe lies in understanding the ingredients and how they work together.
First up, what is taro cake made of? The main star here is taro itself. You can use taro paste, which is readily available in Asian grocery stores, or taro powder if you want a simpler option. Both deliver that signature taro flavor and color. Here’s a quick list of the main ingredients you’ll need:
- Taro paste or powder: Adds flavor and color.
- All-purpose flour: Provides structure to the cupcakes.
- Sugar: Sweetens the batter and enhances the taro’s natural sweetness.
- Eggs: Help bind the ingredients together.
- Butter: Makes the cupcakes rich and tender.
- Milk: Adds moisture for a soft crumb.
- Baking powder: Ensures the cupcakes rise properly.
Each of these ingredients plays a role in creating the perfect cupcake. For example, sugar doesn’t just sweeten—it also helps keep the cupcakes moist. Speaking of moisture, one secret to moist cupcakes is using enough liquid in the batter. Milk and butter are essential for achieving that soft, melt-in-your-mouth texture.
If you’re wondering how this compares to other trending flavors, like ube, here’s a quick note. Ube is another purple-colored ingredient often used in desserts. While it has a sweeter, more floral taste, taro leans toward earthy and nutty. Both are fantastic, but today, we’re focusing on taro’s unique charm.
Now that you know what’s involved, you’re probably wondering how easy it is to find these ingredients. Don’t worry—most of them are pantry staples. The taro paste or powder might require a trip to a specialty store, but trust me, it’s worth it. Once you have everything ready, you’re just a few steps away from baking a batch of taro cupcakes that will impress anyone who tries them.

Step-by-Step Instructions for Making Taro Cupcakes
Alright, let’s get into the fun part—actually making these taro cupcakes. Don’t worry if you’re new to baking with taro. I’ll walk you through every step so you can nail it on your first try. Trust me, once you see how straightforward this process is, you’ll be hooked.
First things first: preparing your batter. If you’re using taro paste, make sure it’s softened slightly before you start. This helps it blend smoothly into the batter. For those opting for taro powder, whisk it into the dry ingredients to avoid clumping. Here’s a little trick—I like to mix the taro paste with a bit of milk before adding it to the rest of the batter. It ensures the flavor and color are evenly distributed. Funny enough, I learned this hack after my first batch turned out a little uneven. Live and learn, right?
Mixing is where most people trip up, so let me save you from that mistake. The key is to mix gently. Overmixing can lead to dense cupcakes, and nobody wants that. Start by creaming the butter and sugar until they’re light and fluffy—it should look like something you’d happily eat with a spoon. Then, add the eggs one at a time, letting each one fully incorporate before moving on to the next. By the way, room temperature eggs make a huge difference here. They blend more easily and help keep the batter smooth.
Once your wet ingredients are ready, gradually fold in the dry ingredients. I recommend sifting the flour and baking powder beforehand to avoid lumps. Mix just until everything comes together. Remember, a few streaks are fine; overmixing is the real enemy. Oh, and if you’re looking for a dairy-free option, check out this dairy free cupcake recipe for some inspiration.
Now, onto baking. Preheat your oven to 350°F (175°C) and line your cupcake tin with paper liners. Fill each liner about two-thirds full—any more, and they might overflow. Bake for about 18–20 minutes, or until a toothpick inserted into the center comes out clean. Every oven is different, so keep an eye on them. Pro tip: Rotate the pan halfway through baking to ensure even cooking.
Speaking of moist cupcakes, what’s the secret? Honestly, it’s a combination of small but important details. Using buttermilk instead of regular milk adds extra tenderness. If you don’t have buttermilk, no worries—you can make a quick substitute by adding a teaspoon of lemon juice or vinegar to regular milk. Another trick is not overmixing, as I mentioned earlier. Finally, let the cupcakes cool completely before frosting. Cooling allows the crumb to set properly, which keeps them from getting soggy later.
Flavor Pairings and Variations
Here’s the thing about taro—it plays well with others. Its earthy, nutty flavor pairs beautifully with tropical notes like coconut or creamy elements like vanilla. Imagine biting into a taro cupcake topped with coconut cream frosting. Sounds dreamy, doesn’t it? You could also try adding shredded coconut to the batter for extra texture. Just saying, it’s a combo worth experimenting with.
By the way, since we’re talking about purple desserts, let’s touch on ube. People often ask, “What is in an ube cupcake?” Well, ube is another purple root vegetable, but its flavor leans sweeter and more floral compared to taro’s earthiness. While both are fantastic, they bring different vibes to the table. If you’re curious, take a peek at this purple yam cupcake recipe for a twist on the theme.
Want to get creative? Add a drop of purple food coloring to enhance the natural hue of your taro cupcakes. Sure, taro already has a gorgeous lavender shade, but sometimes a little boost makes them pop even more. And don’t forget about frosting options! Cream cheese frosting is always a winner, but you could also try whipped vanilla buttercream or even a tangy lime glaze. The possibilities are endless.
Funny story: I once made a batch of taro cupcakes for a friend’s birthday and decided to experiment with flavors. I added a splash of almond extract to the batter, and wow—it took the whole thing to another level. Moral of the story? Don’t be afraid to tweak recipes to suit your taste. Baking is all about having fun and making it your own.
Decorating Your Taro Cupcakes
Okay, confession time—I’m kind of obsessed with decorating cupcakes. Presentation matters, especially if you’re planning to share your creations on social media. Let’s talk about how to make your taro cupcakes look as good as they taste.
For starters, frosting is your best friend. A classic swirl of cream cheese frosting never disappoints. To achieve those picture-perfect peaks, use a piping bag fitted with a star tip. Hold the bag at a slight angle and apply steady pressure while swirling upward. Easy, right? If you’re feeling fancy, sprinkle some toasted coconut flakes or edible glitter on top for a finishing touch. Trust me, people will think you spent hours on them.
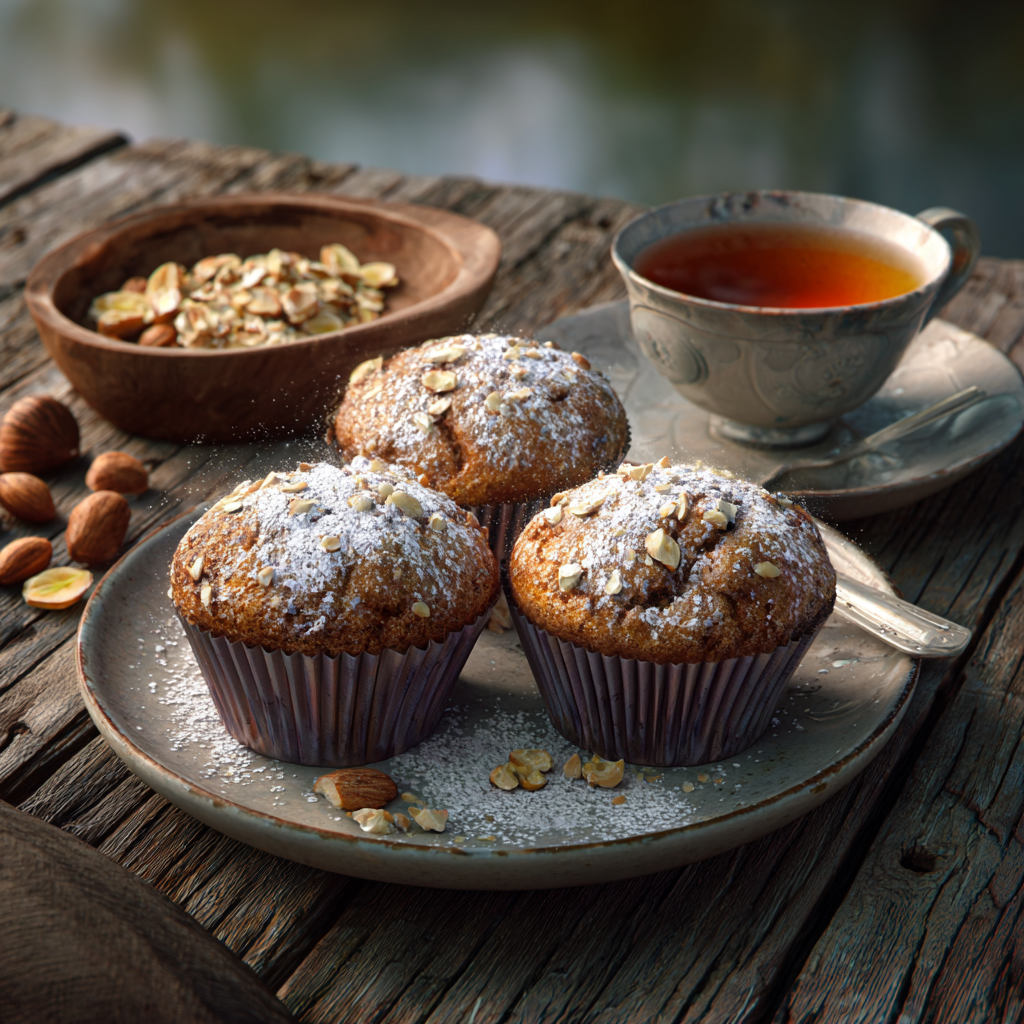
If you’re going for simplicity, dusting powdered sugar over the cupcakes works wonders too. It gives them a clean, elegant look without much effort. Or, if you’re feeling adventurous, drizzle a contrasting sauce like melted white chocolate or caramel across the tops. These little details can elevate your cupcakes from homemade to bakery-worthy.
Oh, and here’s a random tip: pay attention to the liners. Plain white ones are fine, but colorful or patterned liners can instantly jazz up your presentation. I once used pastel purple liners for a batch, and they looked absolutely stunning against the vibrant cupcakes.
One last note—if you’re catering to dietary restrictions, consider checking out this milk free cupcake recipe or this lactose free cupcake recipe. Both offer great alternatives for folks who need to skip dairy but still want delicious treats.
To wrap this section up, remember that baking is as much about creativity as it is about technique. Whether you stick to the basics or go all out with decorations, your taro cupcakes will shine because you put love into them. Now, grab your apron and get started—I can’t wait to hear how they turn out!
Tips for Perfecting Your Taro Cupcakes
Okay, so you’ve got the basics down—batter mixed, cupcakes baked, and frosting swirled. But let’s say you’re aiming for perfection. Maybe your first batch came out a little dry, or perhaps the texture wasn’t as light and airy as you’d hoped. Don’t worry; it happens to all of us. Here’s how to troubleshoot those common issues and make sure your next batch of taro cupcakes is absolutely flawless.
First up, dryness. I know—it’s the worst. Nothing ruins a cupcake faster than biting into something that feels like sandpaper. Funny enough, this often happens when people overbake. Keep an eye on the timer, and don’t be afraid to pull them out a minute or two early if you suspect they’re done. A toothpick should come out clean but not bone-dry. Another culprit? Over-measuring flour. I always fluff my flour with a fork before spooning it into the measuring cup. Packing it in too tightly can throw off the moisture balance.
Dense cupcakes are another common hiccup. If your cupcakes feel more like bricks than clouds, overmixing might be the issue. Remember what I said earlier about gentle folding? Yeah, that’s key. Once the dry ingredients hit the wet, mix just until combined. Think of it like folding egg whites into a soufflé—you want to keep things light and airy. Oh, and here’s a pro tip: room temperature ingredients really do make a difference. Cold butter or eggs can sabotage your batter’s texture before it even hits the oven.
Let’s talk about ingredient quality for a second. Not all taro pastes are created equal. Some are sweeter, others more earthy. If you’re using powder, check the expiration date—it loses potency over time. Fresh, high-quality ingredients always shine through in the final product. And while we’re at it, don’t skimp on the butter or milk. These are what give your cupcakes that melt-in-your-mouth feel. Substituting water for milk? You’ll notice the difference. Trust me.
By the way, have you thought about experimenting with flavors? I mentioned coconut earlier, but what about adding a hint of citrus? A teaspoon of lime zest could brighten up the earthy taro flavor and add a refreshing twist. Or maybe toss in some mini chocolate chips for a fun surprise. The beauty of baking is that there’s no “wrong” way to do it—as long as it tastes good, you’re winning. Try different combinations until you find your favorite version of this taro cupcakes recipe.
FAQ Section
Q: What is taro cake made of?
A: Taro cake typically includes taro paste or powder as the star ingredient, along with staples like flour, sugar, eggs, and butter. The taro adds both flavor and that gorgeous purple hue. Some recipes might call for additional ingredients like coconut milk or vanilla extract to enhance the taste. If you’re making cupcakes, the process is similar but scaled down into individual portions.
Q: What is in an ube cupcake?
A: Ube cupcakes share some similarities with taro cupcakes, but the main difference lies in the flavor profile. Ube has a sweeter, almost floral taste compared to taro’s nutty, earthy notes. Both are purple-hued root vegetables, but ube tends to be brighter in color and pairs well with rich, creamy frostings. Think of ube as the sweeter cousin of taro—they’re related but bring their own unique vibes to the table.
Q: What is the secret to moist cupcakes?
A: Moisture comes from a few key factors: using wet ingredients effectively, avoiding overbaking, and ensuring proper mixing techniques. For example, swapping regular milk for buttermilk or adding a bit of yogurt can work wonders. Also, resist the urge to open the oven door while baking—those temperature fluctuations can mess with your cupcakes’ rise. And remember, patience pays off. Let them cool completely before frosting to avoid sogginess.
Q: What is taro in baking?
A: In baking, taro serves as a versatile ingredient that brings both flavor and visual appeal. Its slightly sweet, nutty taste complements other ingredients like vanilla or coconut beautifully. Plus, its natural purple color means you can skip artificial dyes. Whether you’re making cakes, cupcakes, or even cookies, taro adds a unique twist that sets your creations apart.
Q: Can I use fresh taro instead of paste or powder?
A: Absolutely! Fresh taro can be boiled, mashed, and incorporated into your batter. However, it requires a bit more prep work since you’ll need to cook and puree it first. If you’re short on time, taro paste or powder is a convenient alternative that still delivers great results. Just adjust the liquid content in your recipe accordingly.
Q: How do I store leftover taro cupcakes?
A: Store them in an airtight container at room temperature for up to two days. After that, pop them in the fridge to extend their shelf life. To keep the frosting intact, place parchment paper between layers if stacking. Want to freeze them? Wrap each cupcake individually in plastic wrap and store in a freezer-safe bag for up to three months.
Q: Why did my cupcakes sink in the middle?
A: Sinking usually happens when the structure of the cupcake isn’t strong enough to hold its shape. This could be due to underbaking, opening the oven door too soon, or not enough leavening agents (like baking powder). Double-check your measurements and give the cupcakes a few extra minutes in the oven next time.
Q: Can I make these cupcakes gluten-free?
A: Yes! Swap the all-purpose flour for a gluten-free blend, preferably one with xanthan gum. The rest of the recipe stays the same. I’ve had great success with gluten-free versions of this taro cupcakes recipe, and no one could tell the difference. Just make sure to measure carefully to avoid altering the texture.
Q: What frosting pairs best with taro cupcakes?
A: Cream cheese frosting is a classic choice because it balances the earthy taro flavor without overpowering it. Coconut cream frosting works beautifully too, especially if you’re going for tropical vibes. For something simpler, try a vanilla buttercream or even a dusting of powdered sugar.
Q: Where can I find more creative cupcake ideas?
A: Head over to our cakes and cupcakes category for tons of inspiration. From seasonal flavors to unique twists, there’s something for everyone. Who knows? You might discover your next big baking adventure right there.
Final Thoughts
Baking is such a joyful experience, isn’t it? There’s something magical about taking simple ingredients and turning them into something extraordinary. With this taro cupcakes recipe, I hope you feel inspired to step outside your comfort zone and try something new. Whether you stick to the basics or go wild with flavors and decorations, the most important thing is to have fun with it.
So grab your apron, roll up your sleeves, and get baking. And hey, if you end up creating something amazing, I’d love to hear about it. Share your results with me—I’m always excited to see how others put their spin on recipes. Happy baking, and remember: the kitchen is your playground. Go explore!
Equipment
- Cupcake tin
- Mixing bowls
- Whisk
- Measuring cups and spoons
- Piping bag (for frosting)
- Toothpick
Ingredients
- 200 g taro paste or powder
- 200 g all-purpose flour
- 150 g sugar
- 3 eggs
- 100 g butter
- 100 ml milk
- 1 tsp baking powder
Instructions
- Preheat the oven to 350°F (175°C) and line the cupcake tin with paper liners.
- If using taro paste, soften it slightly; if using taro powder, whisk it with the dry ingredients.
- Cream the butter and sugar together until light and fluffy.
- Add the eggs one at a time, fully incorporating each before adding the next.
- Mix the taro paste with a little milk to ensure even distribution.
- Gradually fold in the sifted flour and baking powder, mixing just until combined.
- Fill each cupcake liner about two-thirds full and bake for 18-20 minutes.
- Check for doneness by inserting a toothpick in the center; it should come out clean.
- Allow the cupcakes to cool completely before frosting.
Notes
Experiment with flavor pairings like coconut or add a splash of almond extract for a twist.
Decorate with cream cheese frosting, whipped vanilla buttercream, or a dusting of powdered sugar for visual appeal.
Store leftover cupcakes in an airtight container for up to two days at room temperature, or refrigerate for longer shelf life. Freezing is also an option—wrap them individually and place in a freezer-safe bag for up to three months.
Nutrition

Hi, I’m Olivia Parker, the founder of BakingSecret.com and a lifelong lover of all things sweet and homemade. I grew up in a small town in Oregon, where the smell of fresh cookies in my family’s kitchen sparked my passion for baking. Over the years, I turned that passion into a mission: to help home bakers feel confident, inspired, and creative.
After studying food science and working in several artisan bakeries across the U.S., I decided to create a space where everyone from beginners to seasoned bakers can find reliable recipes, expert tips, and a warm, welcoming community. BakingSecret.com is my way of sharing the magic of baking with the world. When I’m not testing new recipes, you’ll find me exploring farmers’ markets, collecting vintage cookbooks, or perfecting my sourdough technique.