
Why This Blackberry Cream Cheese Cheesecake is a Must-Try
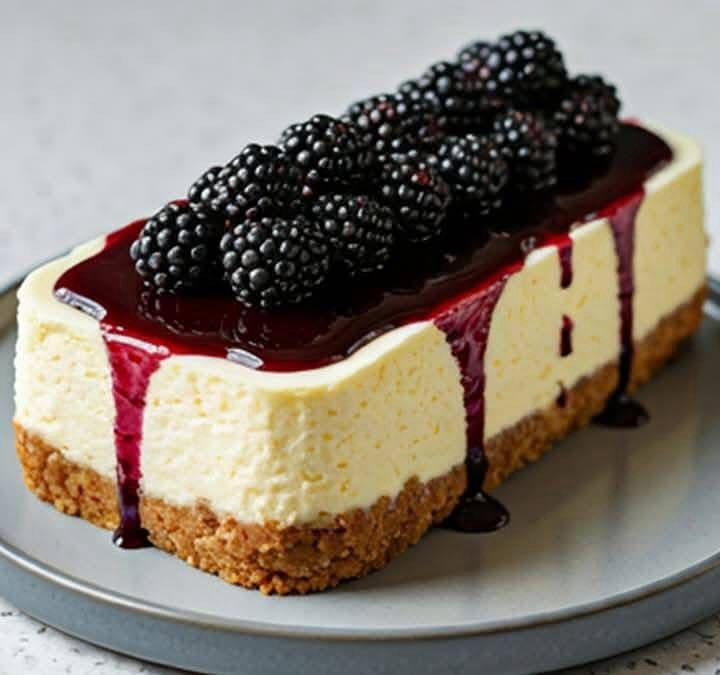
There’s something magical about cheesecake. Maybe it’s the creamy texture, the rich flavors, or how it always feels like a celebration on a plate. I first made this Blackberry Cream Cheese Cheesecake for a family gathering, and let me tell you—it was love at first bite. The tartness of blackberry jam pairs perfectly with the velvety cream cheese filling, while the buttery cookie crust adds just the right crunch. It’s simple, elegant, and oh-so-delicious.
A Little Background on This Cheesecake
Cheesecake has been around for centuries, with its origins tracing back to ancient Greece. But this version? It’s my twist on tradition. Growing up, my grandma used to make plain cheesecakes topped with strawberry preserves. One day, I decided to experiment with blackberry jam instead. The result? A flavor explosion that turned into a family favorite. Now, I make it whenever I want to impress guests or treat myself to something special.
Why You’ll Fall in Love With This Recipe
This Blackberry Cream Cheese Cheesecake is a winner for so many reasons. First, it’s super easy to make—no fancy equipment needed. Second, the combination of tangy blackberries and creamy cheese is downright addictive. Plus, it’s versatile enough for any occasion, from casual dinners to holiday feasts. Trust me, once you try it, you’ll be making it on repeat.
Perfect Occasions to Whip Up This Dessert
Need a dessert for Thanksgiving? Done. Want something sweet for a summer barbecue? Perfect. This cheesecake works wonders for birthdays, potlucks, or even a quiet evening at home. It’s the kind of dish that makes people smile, no matter the occasion.
Ingredients You’ll Need
- 1 can (397 g) of condensed milk
- 1 can (400 ml) of evaporated milk
- 1 bar (approx. 300 g) of Philadelphia-type cream cheese
- 3 eggs
- 170 g of Maria or Digestive-type cookies
- 1 bar (90 g) of melted butter
- 6 cups of blackberry jam
Substitution Options
If you’re missing an ingredient, don’t worry—I’ve got you covered. Swap the Philadelphia cream cheese for any full-fat cream cheese brand. For the cookies, graham crackers work just as well. And if blackberry jam isn’t available, try raspberry or blueberry jam for a similar fruity kick.
Step 1: Preparing the Cheesecake Base
Start by preheating your oven to 180°C (350°F). While it heats up, crush those cookies into a fine, sandy texture. I like using a food processor, but a ziplock bag and rolling pin do the trick too. Mix the crushed cookies with melted butter until it resembles wet sand. Press this mixture firmly into the bottom of your mold to create a sturdy base. Pro tip: Use the bottom of a glass to press it down evenly.
Step 2: Making the Creamy Filling
In a blender, combine the eggs, condensed milk, evaporated milk, and cream cheese. Blend until smooth and creamy. Pour this luscious mixture over the cookie base, spreading it out gently. The filling should look silky and uniform. Pro tip: Make sure the cream cheese is at room temperature for easier blending.
Step 3: Baking to Perfection
Bake the cheesecake for 30 minutes or until the center is set but still slightly jiggly. Keep an eye on it—you don’t want it to overbake. Once done, let it cool completely before refrigerating. This step is crucial for achieving that perfect texture. Pro tip: Place a baking tray with water on the lower rack to prevent cracking.
Step 4: Adding the Finishing Touches
After chilling the cheesecake for at least 30 minutes, spread a generous layer of blackberry jam on top. The vibrant purple color contrasts beautifully with the pale filling. Chef’s tip: Warm the jam slightly before spreading for a smoother finish.
Timing Breakdown
- Prep Time: 20 minutes
- Cooking Time: 30 minutes
- Resting Time: 30 minutes (plus cooling)
- Total Time: Approximately 1 hour 20 minutes
Chef’s Secret
For an extra burst of flavor, add a teaspoon of vanilla extract to the filling. It enhances the creaminess without overpowering the blackberry topping.
An Interesting Fact About Blackberries
Did you know blackberries are packed with antioxidants? They’re not only delicious but also great for boosting your immune system. So, indulging in this cheesecake is practically a health decision!
Necessary Equipment
- Blender or food processor
- Mixing bowls
- Measuring cups and spoons
- Oven-safe baking mold
- Spatula
Storage Tips
To keep your cheesecake fresh, store it in the fridge. Cover it tightly with plastic wrap or place it in an airtight container. It should last up to 4 days. If you need to freeze it, wrap individual slices in parchment paper and then foil. Thaw them in the fridge overnight before serving.
Never leave your cheesecake out at room temperature for more than two hours. Dairy products spoil quickly, and we don’t want any tummy troubles.
For best results, serve chilled. The flavors meld together beautifully after a night in the fridge.
Tips and Advice
Always grease your baking mold to prevent sticking. Use a water bath during baking to ensure even cooking. And remember, patience is key—let the cheesecake cool completely before slicing.
Presentation Ideas
- Garnish with fresh blackberries and mint leaves for a pop of color.
- Dust powdered sugar lightly over the top for a touch of elegance.
- Serve slices on colorful plates for a festive look.
Healthier Alternatives
Here are six ways to lighten up this recipe:
- Low-Fat Option: Use low-fat cream cheese and skimmed evaporated milk.
- Sugar-Free: Replace condensed milk with a sugar-free alternative.
- Gluten-Free: Use gluten-free cookies for the base.
- Vegan Version: Substitute cream cheese with cashew-based alternatives and use plant-based butter.
- No-Bake: Skip the oven and use gelatin to set the filling.
- Fruit Swap: Try mango or peach jam instead of blackberry.
Common Mistakes to Avoid
Mistake 1: Overmixing the Filling
Overmixing introduces air bubbles, which can cause cracks during baking. Mix just until combined. Practical tip: Use a spatula for the final mix to avoid excess air.
Mistake 2: Skipping the Water Bath
A water bath ensures even heat distribution, preventing cracks. Don’t skip it! Practical tip: Wrap the mold in foil to prevent leaks.
Mistake 3: Rushing the Cooling Process
Letting the cheesecake cool gradually prevents sinking or cracking. Be patient—it’s worth it.
FAQs About Blackberry Cream Cheese Cheesecake
Can I use frozen blackberries?
Absolutely! Just cook them down with a bit of sugar to make homemade jam.
How do I know when the cheesecake is done?
The edges will be set, but the center should still have a slight jiggle. It will firm up as it cools.
What size mold should I use?
A standard 9-inch round mold works perfectly for this recipe.
Can I make this ahead of time?
Yes! It actually tastes better the next day, making it ideal for meal prep.
Why did my cheesecake crack?
Cracks often happen due to overbaking or rapid cooling. Use a water bath and let it cool slowly.
Is this recipe kid-friendly?
Definitely! Kids love the creamy texture and fruity topping.
Can I use a different type of jam?
Of course! Raspberry, blueberry, or strawberry jam would all work well.
How long does it last in the fridge?
Up to 4 days if stored properly.
Do I have to chill it?
Yes, chilling firms up the filling and enhances the flavors.
Can I freeze leftovers?
Yes, wrap slices individually and freeze for up to 2 months.
Final Thoughts
This Blackberry Cream Cheese Cheesecake is more than just a dessert—it’s a celebration of flavors, textures, and memories. Whether you’re baking for loved ones or treating yourself, this recipe promises to delight. So grab your apron, gather your ingredients, and get ready to create something truly special. Happy baking!
Equipment
- Blender or food processor
- Mixing bowls
- Spatula
- Oven-safe baking mold
- Measuring cups and spoons
Ingredients
- 1 can condensed milk
- 1 can evaporated milk
- 1 bar (approx.) Philadelphia-type cream cheese (approx. 300 g)
- 3 units eggs
- 170 g Maria or Digestive-type cookies
- 1 bar melted butter (90 g)
- 6 cups blackberry jam
Instructions
- Preheat your oven to 180°C (350°F).
- Crush the cookies into a fine texture and mix with melted butter until it resembles wet sand.
- Press the cookie mixture firmly into the bottom of your mold to form the base.
- In a blender, combine the eggs, condensed milk, evaporated milk, and cream cheese, blending until smooth and creamy.
- Pour the mixture over the cookie base, spreading it out evenly.
- Bake the cheesecake for 30 minutes or until the center is set but slightly jiggly, then let it cool completely before refrigerating.
- After chilling the cheesecake for at least 30 minutes, spread a layer of blackberry jam on top.
Notes
Nutrition

Hi, I’m Olivia Parker, the founder of BakingSecret.com and a lifelong lover of all things sweet and homemade. I grew up in a small town in Oregon, where the smell of fresh cookies in my family’s kitchen sparked my passion for baking. Over the years, I turned that passion into a mission: to help home bakers feel confident, inspired, and creative.
After studying food science and working in several artisan bakeries across the U.S., I decided to create a space where everyone from beginners to seasoned bakers can find reliable recipes, expert tips, and a warm, welcoming community. BakingSecret.com is my way of sharing the magic of baking with the world. When I’m not testing new recipes, you’ll find me exploring farmers’ markets, collecting vintage cookbooks, or perfecting my sourdough technique.