
Why This Soft Milk Bread Will Become Your New Favorite
There’s something magical about the smell of freshly baked bread wafting through the house. It’s like a warm hug for your soul, isn’t it? A few months ago, I decided to try my hand at making Soft Milk Bread, and oh boy, it was love at first bite. The texture is so tender, it practically melts in your mouth. Whether you’re a seasoned baker or just starting out, this recipe is foolproof and delivers results that will make you feel like a kitchen superstar. Trust me, once you bake this bread, your family will beg you to make it again and again.
A Little History Behind Soft Milk Bread
Milk bread, also known as Hokkaido milk bread, has its roots in Japan but has since become a global favorite. Traditionally, it’s made using a special technique called the “tangzhong method,” which involves cooking part of the flour with liquid to create a paste. This method makes the bread incredibly soft and gives it a long shelf life. My version skips the tangzhong step to keep things simple while still delivering that signature pillowy texture. When I first made this bread, I served it at a family brunch, and even my picky nephew couldn’t stop munching on it. It’s a recipe that bridges generations and brings people together.
Why You’ll Love This Recipe
What makes this Soft Milk Bread stand out? First, it’s ridiculously easy to make. No fancy techniques or equipment needed—just a bowl, some basic ingredients, and a bit of patience. Second, the flavor is mild yet rich, thanks to the butter and milk. It pairs perfectly with sweet toppings like jam or savory spreads like cream cheese. Lastly, the bread stays soft for days, unlike many homemade loaves that turn stale quickly. It’s versatile, comforting, and downright delicious.
Perfect Occasions to Bake This Bread
This Soft Milk Bread is perfect for any occasion—or no occasion at all! Whip it up for a cozy weekend breakfast, pack slices for school lunches, or serve it at a holiday brunch. I’ve even brought it to potlucks, where it vanished within minutes. Its softness and subtle sweetness make it a crowd-pleaser, whether you’re feeding kids, adults, or both.
Ingredients You’ll Need
Here’s what you’ll need to create this heavenly bread:
- 500 g of wheat flour
- 10 g of salt
- 50 g of sugar
- 10 g of dry yeast
- 2 eggs
- 200 ml of warm milk
- 100 g of melted butter
- 100 ml of warm water
- 1 egg (for brushing)
Substitution Options
Don’t have all the ingredients? No worries! Here are some swaps you can make:
- Wheat flour: Use all-purpose flour if whole wheat isn’t your thing.
- Milk: Any plant-based milk works great for a dairy-free option.
- Butter: Substitute with margarine or coconut oil.
- Eggs: Replace with flax eggs (1 tbsp ground flaxseed + 3 tbsp water per egg).
Step-by-Step Preparation
Step 1: Activate the Yeast
Start by activating the yeast. In a small bowl, mix the warm water, a pinch of sugar, and the dry yeast. Let it sit for about 10 minutes until it becomes frothy. This step is crucial because it ensures your bread will rise properly. Pro tip: Make sure the water is warm, not hot—around 110°F (43°C) is ideal. If it’s too hot, it’ll kill the yeast, and we don’t want that!
Step 2: Mix the Dough
In a large mixing bowl, combine the flour, salt, and sugar. Add the eggs, warm milk, melted butter, and activated yeast mixture. Stir everything together until a sticky dough forms. The aroma of butter and milk blending with the flour is pure comfort. Don’t worry if it looks messy—this is just the beginning of your bread journey.
Step 3: Knead the Dough
Kneading is where the magic happens. Transfer the dough to a lightly floured surface and knead for 10–15 minutes until it’s smooth and elastic. You’ll know it’s ready when it stops sticking to your hands. Cover the dough with a clean kitchen towel and let it rest for 1–2 hours, or until it doubles in size. Watching the dough puff up is oddly satisfying, like watching a sleeping baby breathe.
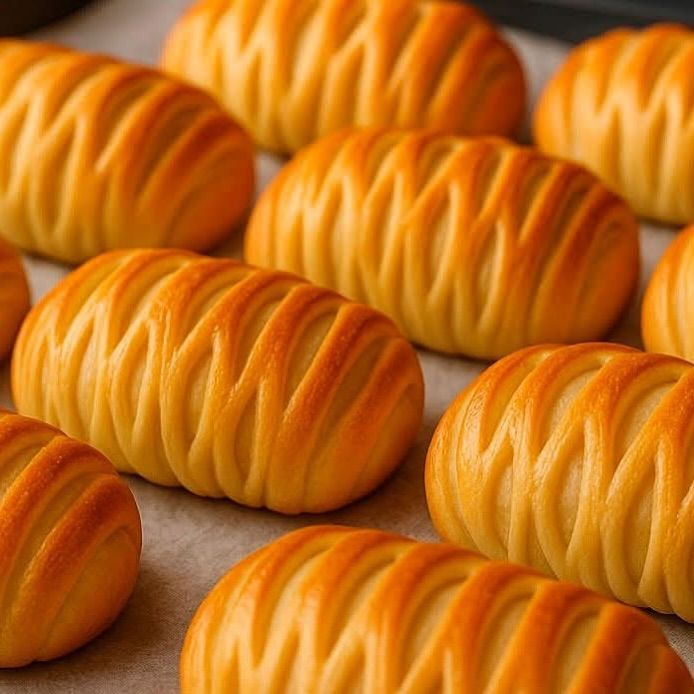
Step 4: Shape the Buns
Once the dough has risen, punch it down gently to release the air. Divide it into 10 equal portions and shape them into buns. For a fun twist, use a sharp knife to make a spiral cut on top of each bun. Place them on a baking tray lined with parchment paper and let them rise again for 30–45 minutes. This second rise ensures your bread will be light and airy.
Step 5: Bake to Perfection
Preheat your oven to 356°F (180°C). Brush the tops of the buns with a beaten egg for that golden glow. Bake for 20–25 minutes until they’re beautifully browned. The smell during baking is intoxicating—like a bakery in your own home. Once done, transfer the buns to a cooling rack and let them cool slightly before digging in.
Chef’s Secret
Here’s a little trick I learned: adding a splash of vanilla extract to the dough enhances the flavor and gives it an extra layer of warmth. It’s subtle but makes a big difference. Try it next time!
Timing Breakdown
- Prep Time: 30 minutes
- Rising Time: 2–2.5 hours
- Baking Time: 20–25 minutes
- Total Time: About 3 hours
Extra Info
Did you know that milk bread is often used in Japanese-style sandwiches? Its softness makes it perfect for delicate fillings like egg salad or fruit jams. I once made tiny sandwiches with this bread for a tea party, and they were a hit!
Necessary Equipment
To make this Soft Milk Bread, you’ll need:
- A large mixing bowl
- A rolling pin (optional)
- A baking tray
- Parchment paper
- An oven
Storage Tips
Store your Soft Milk Bread in an airtight container at room temperature for up to 3 days. To keep it fresher longer, place a slice of bread inside the container—it helps retain moisture. For extended storage, freeze the bread in zip-top bags for up to a month. Just thaw it at room temperature when you’re ready to enjoy it again.
If you live in a humid area, avoid leaving the bread uncovered, as it can absorb moisture and become soggy. On the flip side, overly dry environments can make it stale faster, so always seal it tightly.
Reheating is simple: pop a slice in the toaster or microwave for a few seconds to restore its softness. It’s almost like having freshly baked bread all over again!
Tips and Advice
- Use a kitchen scale for precise measurements. Baking is a science, after all!
- Let the dough rise in a warm, draft-free spot to speed up the process.
- Don’t skip the second rise—it’s key to achieving that light texture.
Presentation Ideas
Serve your Soft Milk Bread with flair! Arrange the buns in a basket lined with a colorful cloth for a rustic look. Pair them with small bowls of jam, honey, or whipped cream cheese for a charming spread. Or slice them open and fill them with fresh fruit and cream for an elegant dessert option.
Healthier Alternative Recipes
Want to tweak this recipe? Here are six variations:
- Whole Wheat Version: Replace half the wheat flour with whole wheat for added fiber.
- Low-Sugar Option: Cut the sugar in half and add a teaspoon of cinnamon for flavor.
- Vegan Delight: Use plant-based milk, margarine, and flax eggs.
- Herb-Infused Bread: Add dried herbs like rosemary or thyme for a savory twist.
- Gluten-Free Adaptation: Swap the wheat flour with a gluten-free blend.
- Chocolate Chip Surprise: Fold mini chocolate chips into the dough for a sweet treat.
Common Mistakes to Avoid
Mistake 1: Killing the Yeast
Using water that’s too hot can kill the yeast, leaving your dough flat and dense. Always check the temperature before adding the yeast. Aim for lukewarm water—think baby-bottle warm.
Mistake 2: Skipping the Second Rise
The second rise might seem optional, but it’s essential for achieving that fluffy texture. Rushing this step will result in denser bread. Patience pays off here!
Mistake 3: Overflouring the Dough
Adding too much flour while kneading can make the bread tough. Stick to the recipe measurements and only use enough flour to prevent sticking.
Mistake 4: Underbaking
Bread that’s underbaked will be gummy inside. Check for doneness by tapping the bottom—if it sounds hollow, it’s ready. If not, give it a few more minutes.
Mistake 5: Storing Improperly
Leaving bread uncovered leads to staleness, while sealing it in plastic when it’s still warm traps moisture and causes sogginess. Always cool completely before storing.
Frequently Asked Questions
Can I use instant yeast instead of dry yeast?
Yes, you can! Instant yeast doesn’t require activation, so you can add it directly to the dry ingredients. Just reduce the amount slightly, as it’s more potent than dry yeast.
How do I know if my dough has risen enough?
Your dough should double in size during each rise. Gently press it with your finger—if the indentation stays, it’s ready. If it springs back quickly, let it rise a bit longer.
Why is my bread dense?
Dense bread usually happens due to insufficient rising or overflouring. Make sure your yeast is active, and avoid adding extra flour unless absolutely necessary.
Can I freeze the dough?
Absolutely! After shaping the buns, wrap them individually in plastic wrap and freeze. When you’re ready to bake, let them thaw and rise before proceeding.
What’s the best way to reheat the bread?
For quick reheating, toast slices in a toaster or oven. You can also wrap a slice in a damp paper towel and microwave it for 10–15 seconds to restore softness.
Can I add fillings to the bread?
Of course! Try folding raisins, nuts, or chocolate chips into the dough before shaping. Or stuff the buns with cream cheese or Nutella for a decadent twist.
Is this bread suitable for sandwiches?
Definitely! Its soft texture makes it ideal for both sweet and savory sandwiches. Try it with peanut butter and banana or turkey and avocado.
How can I make the bread sweeter?
Increase the sugar slightly or brush the baked buns with a simple syrup (equal parts sugar and water, heated until dissolved).
Can I use bread flour instead of wheat flour?
Yes, bread flour will give the bread a chewier texture, while wheat flour keeps it softer. Both work well, so choose based on your preference.
What if I don’t have a stand mixer?
No problem! You can knead the dough by hand—it’s a great workout and connects you to the process. Just be patient and consistent.
Final Thoughts
This Soft Milk Bread is more than just a recipe—it’s a labor of love that brings joy to everyone who tastes it. Whether you’re baking for yourself or sharing it with loved ones, this bread is sure to become a staple in your kitchen. So grab your apron, roll up your sleeves, and get ready to create something truly special. Happy baking!
Equipment
- Large mixing bowl
- Baking tray
- Parchment paper
- Oven
- Cooling rack
Ingredients
- 500 g wheat flour
- 10 g salt
- 50 g sugar
- 10 g dry yeast
- 2 eggs
- 200 ml warm milk
- 100 g melted butter
- 100 ml warm water
- 1 egg (for brushing)
Instructions
- In a small bowl, mix the warm water, a pinch of sugar, and the dry yeast. Let it sit for about 10 minutes until it becomes frothy.
- In a large mixing bowl, combine the flour, salt, and sugar. Add the eggs, warm milk, melted butter, and activated yeast mixture. Stir until a sticky dough forms.
- Transfer the dough to a lightly floured surface and knead for 10–15 minutes until smooth and elastic. Cover and let it rest for 1–2 hours until doubled in size.
- Punch down the dough gently, divide it into 10 equal portions, and shape into buns. Place on a baking tray lined with parchment paper and let them rise again for 30–45 minutes.
- Preheat your oven to 356°F (180°C). Brush the tops of the buns with a beaten egg and bake for 20–25 minutes until golden brown. Transfer to a cooling rack.
Notes
Nutrition

Hi, I’m Olivia Parker, the founder of BakingSecret.com and a lifelong lover of all things sweet and homemade. I grew up in a small town in Oregon, where the smell of fresh cookies in my family’s kitchen sparked my passion for baking. Over the years, I turned that passion into a mission: to help home bakers feel confident, inspired, and creative.
After studying food science and working in several artisan bakeries across the U.S., I decided to create a space where everyone from beginners to seasoned bakers can find reliable recipes, expert tips, and a warm, welcoming community. BakingSecret.com is my way of sharing the magic of baking with the world. When I’m not testing new recipes, you’ll find me exploring farmers’ markets, collecting vintage cookbooks, or perfecting my sourdough technique.