

Why You’ll Love This Red Velvet Cake Ice Cream Recipe
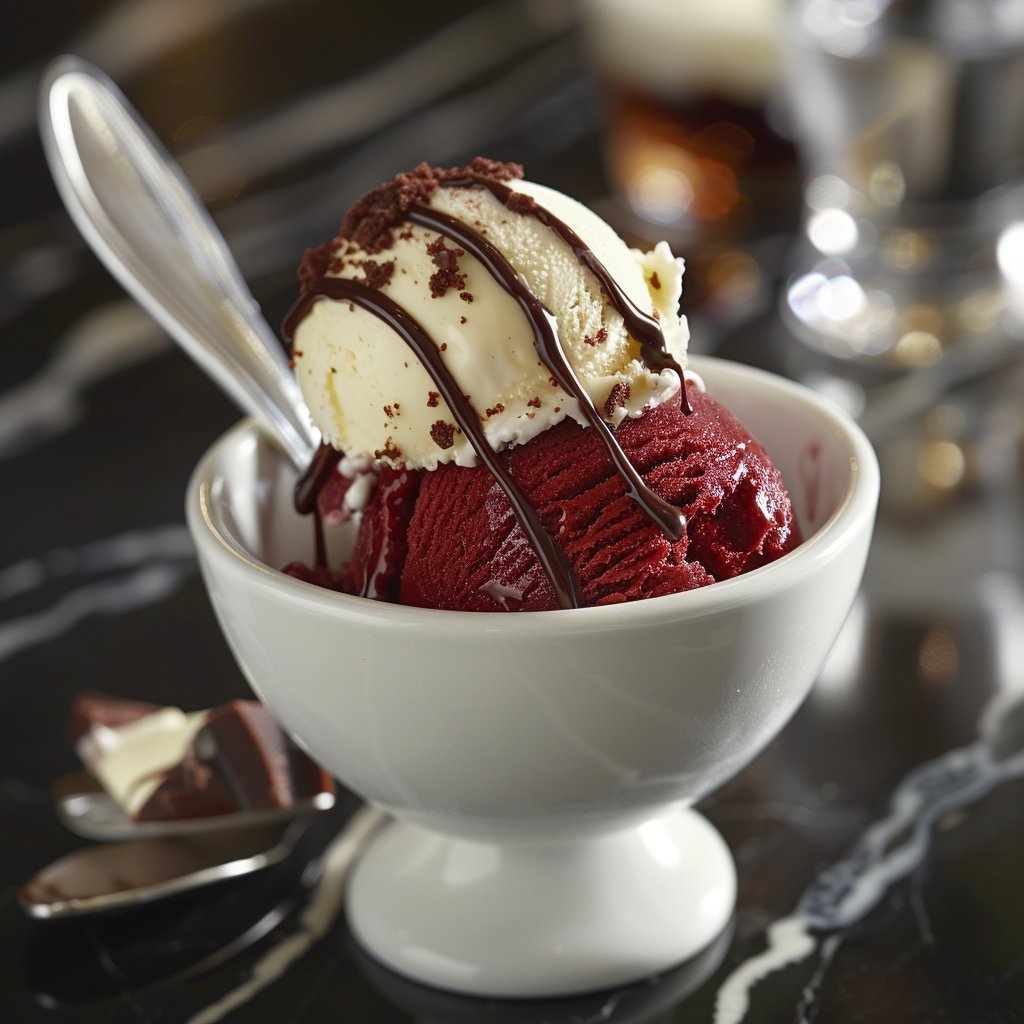
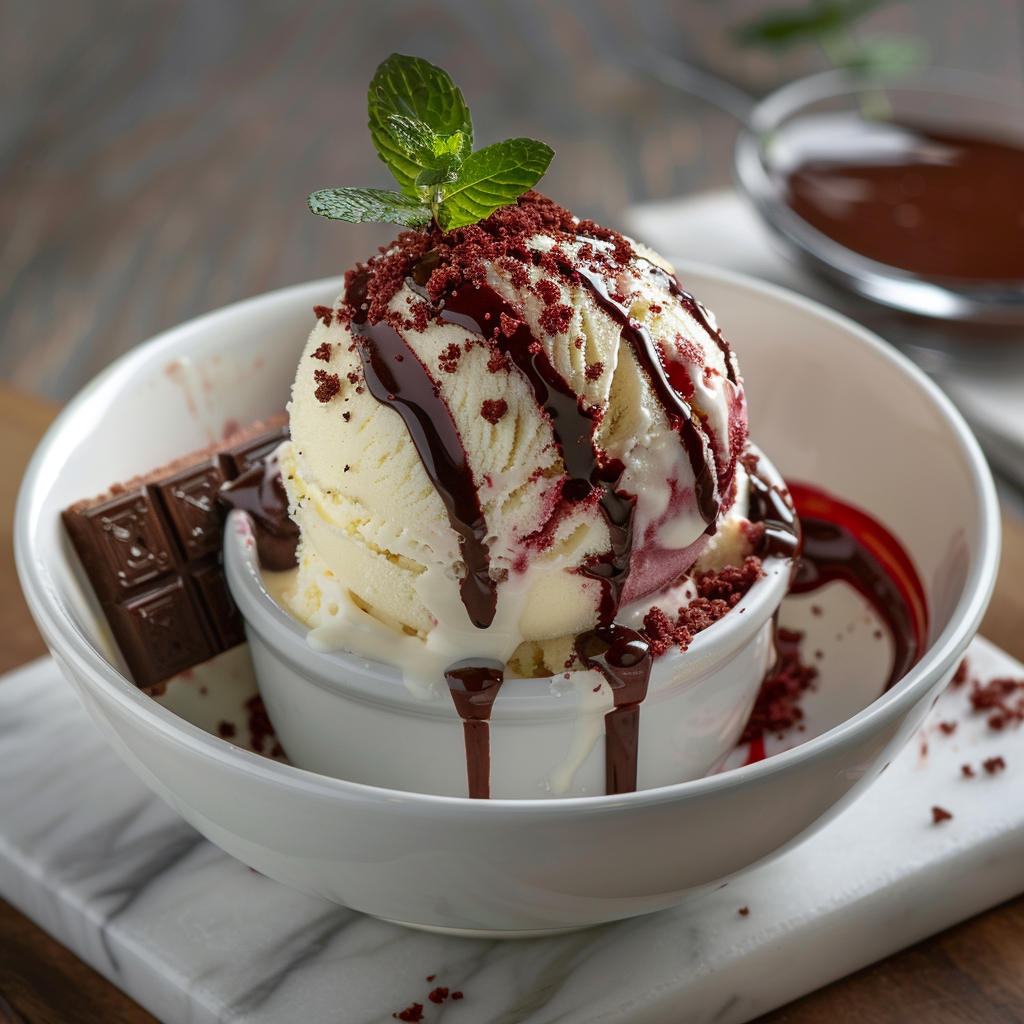
There’s something magical about red velvet cake. Maybe it’s the deep crimson color, or perhaps it’s that rich cocoa flavor paired with tangy cream cheese icing. Either way, it’s a classic that never gets old. But what if I told you there’s a way to take this beloved dessert to the next level? Enter red velvet cake ice cream. Picture creamy vanilla ice cream swirled with chunks of moist red velvet cake and ribbons of cream cheese frosting. Sounds dreamy, right? I first made this for a summer barbecue, and let me tell you—it was gone before the burgers were even off the grill.
A Little History: From Cake to Ice Cream
Red velvet cake has been around since the early 1900s, but its popularity soared in the 1940s thanks to its dramatic color and luxurious taste. It wasn’t until recently that brands like Blue Bell and Turkey Hill started turning this classic into ice cream. Even big names like Ben & Jerry’s jumped on board, offering their own versions of red velvet cake ice cream. While some people swear by store-bought options like Blue Bunny red velvet ice cream, I’m here to tell you that making it at home is where the real magic happens.
Why You’ll Fall Head Over Heels for This Recipe
This recipe is perfect for anyone who loves bold flavors but doesn’t want to spend hours in the kitchen. The combination of velvety ice cream, soft cake pieces, and sweet-tangy frosting creates layers of texture and taste. Plus, it’s a great way to use up leftover cake (if you ever have any!). Whether you’re a fan of red velvet cake ice cream Blue Bell or curious about Ben & Jerry’s red velvet target offerings, this homemade version will leave you speechless.
Perfect Occasions to Whip Up This Treat
This dish shines during holidays like Valentine’s Day or Christmas, thanks to its festive red hue. It’s also a showstopper at birthday parties, baby showers, or casual get-togethers. Honestly, though, you don’t need a special occasion to indulge in red velvet cake ice cream. Sometimes, a random Tuesday night calls for something extraordinary.
Ingredients You’ll Need
- 2 cups heavy cream
- 1 cup whole milk
- 3/4 cup granulated sugar
- 1 tablespoon pure vanilla extract
- 1 teaspoon red food coloring
- 1/2 teaspoon cocoa powder
- 1 cup chopped red velvet cake (store-bought or homemade)
- 1/2 cup cream cheese frosting (homemade or store-bought)
Substitution Options
- Use coconut milk instead of whole milk for a dairy-free option.
- Swap granulated sugar with honey or maple syrup for a natural sweetener.
- If you can’t find red velvet cake, try using chocolate cake with a splash of red dye.
Step 1: Prepare the Ice Cream Base
In a medium saucepan, combine the heavy cream, whole milk, and sugar. Heat over medium heat, stirring constantly until the sugar dissolves completely. Don’t let it boil—just warm enough to bring all the ingredients together. Once dissolved, remove from heat and stir in the vanilla extract, red food coloring, and cocoa powder. The mixture should turn a beautiful shade of burgundy, just like your favorite cake. Pro tip: Use gel-based food coloring for a vibrant hue without altering the texture.
Step 2: Chill the Mixture
Pour the liquid base into a bowl and cover it with plastic wrap. Place it in the fridge for at least two hours, or better yet, overnight. Chilling ensures the mixture sets properly when churned later. Patience is key here! Trust me, the wait makes the final product smoother and creamier.
Step 3: Assemble the Swirls
Once chilled, pour the base into your ice cream maker and churn according to the manufacturer’s instructions. While it churns, prepare your mix-ins. Cut the red velvet cake into bite-sized cubes and set aside. Warm the cream cheese frosting slightly so it becomes easy to drizzle. When the ice cream reaches a soft-serve consistency, fold in the cake pieces and swirl in the frosting. It’s messy but oh-so-worth it!
Step 4: Freeze Until Firm
Transfer the ice cream to an airtight container and freeze for another four hours—or until firm. This step locks in all those delicious flavors and textures. Chef’s tip: Press a piece of parchment paper directly onto the surface before sealing the container. It prevents ice crystals from forming and keeps your ice cream scoopable.
Timing Breakdown
- Prep Time: 15 minutes
- Cooking Time: 5 minutes
- Resting Time: 6+ hours (includes chilling and freezing)
- Total Time: Approximately 7 hours
Chef’s Secret
To enhance the cocoa notes in your red velvet cake ice cream, add a pinch of espresso powder to the base. It intensifies the chocolate flavor without overpowering the other ingredients.
Extra Info
Did you know that red velvet cake gained fame during World War II due to rationing? Bakers couldn’t access ingredients like butter or eggs easily, so they got creative with beet juice to achieve the signature red color. While we’re not adding beets to our ice cream, it’s fun to think about how far this dessert has come!
Necessary Equipment
- Ice cream maker
- Saucepan
- Mixing bowls
- Airtight freezer-safe container
Storage Tips
Store your red velvet cake ice cream in the coldest part of your freezer. Avoid placing it near the door, as temperature fluctuations can cause melting and refreezing. For long-term storage, press plastic wrap directly onto the surface before closing the lid. This trick helps maintain freshness for up to two weeks.
If you notice ice crystals forming, don’t panic. Simply let the ice cream sit out for five minutes before scooping. The texture might not be perfect, but the taste will still shine through.
Lastly, resist the urge to dig in too soon after making it. Allowing the ice cream to fully freeze ensures maximum creaminess and flavor payoff.
Tips and Advice
For best results, use high-quality cocoa powder and fresh ingredients. If you’re short on time, consider no-churn methods by whipping the cream and folding it into sweetened condensed milk. And remember, practice makes perfect. Don’t worry if your first batch isn’t flawless—it’s still going to taste amazing.

Presentation Ideas
- Serve in waffle cones for a fun twist.
- Garnish with extra frosting and sprinkles.
- Pair with fresh berries for a pop of color.
Healthier Alternatives
1. Low-Sugar Version: Replace granulated sugar with stevia or monk fruit sweetener.
2. Dairy-Free Delight: Swap heavy cream and milk with full-fat coconut milk.
3. Protein-Packed Option: Add a scoop of vanilla protein powder to the base.
4. Gluten-Free Goodness: Ensure your red velvet cake is gluten-free.
5. Vegan Vibes: Use plant-based milk, cream, and frosting.
6. No-Churn Hack: Skip the ice cream maker and whip cream manually.
Mistake 1: Overmixing the Frosting
One common mistake is mixing the frosting too vigorously into the ice cream. This breaks down the swirls and makes the texture uneven. Instead, gently fold it in with a spatula to preserve those beautiful streaks of flavor. Pro tip: Less is more when it comes to swirling.
Mistake 2: Skipping the Chill Time
Rushing the chilling process leads to icy ice cream. Always chill the base thoroughly before churning. This step ensures a smooth, creamy consistency every time.
Mistake 3: Using Old Cake
Stale cake won’t give you the moist bites you crave. If your cake is dry, revive it by brushing it lightly with simple syrup before chopping it up.
FAQs About Red Velvet Cake Ice Cream
What ice cream goes best with red velvet cake?
Vanilla or cheesecake-flavored ice creams pair beautifully with red velvet cake because they complement the rich cocoa and tangy frosting without overpowering them.
Is red velvet ice cream a thing?
Absolutely! Brands like Blue Bell and Ben & Jerry’s have popularized red velvet cake ice cream, proving it’s a real crowd-pleaser.
What brand of ice cream has red velvet?
Look for Turkey Hill, Blue Bell, or Ben & Jerry’s for store-bought options. However, nothing beats homemade!
What does red velvet ice cream taste like?
It tastes like a creamy blend of cocoa, vanilla, and cream cheese frosting with bursts of soft cake. Think decadent yet refreshing.
Where can I find Ben & Jerry’s red velvet ice cream near me?
Check local grocery stores or Target. If unavailable, try their website for delivery options.
Why did Blue Bunny discontinue their red velvet ice cream?
While official reasons aren’t clear, limited-edition flavors often rotate based on demand and production costs.
Can I make red velvet cake ice cream without an ice cream maker?
Yes! Use a no-churn method by whipping cream and folding it into sweetened condensed milk.
How do I prevent ice crystals in my ice cream?
Cover the surface with plastic wrap or parchment paper before freezing. Store in the coldest part of your freezer.
What’s the difference between red velvet cake ice cream and red velvet ice cream?
The former includes actual cake pieces, while the latter focuses solely on the flavor profile.
Can I use boxed cake mix for this recipe?
Of course! Boxed mixes work great if you’re short on time. Just bake according to package instructions.
Final Thoughts
Creating red velvet cake ice cream at home is easier than you might think, and the results are absolutely worth it. With its rich flavors, creamy texture, and endless customization possibilities, this dessert is sure to become a family favorite. So grab your apron, gather your ingredients, and let’s make something unforgettable together. Happy scooping!
Equipment
- Ice cream maker
- Saucepan
- Mixing bowls
- Airtight freezer-safe container
- Spoon for stirring
Ingredients
- 2 cups heavy cream
- 1 cup whole milk
- ¾ cup granulated sugar
- 1 tablespoon pure vanilla extract
- 1 teaspoon red food coloring
- ½ teaspoon cocoa powder
- 1 cup chopped red velvet cake store-bought or homemade
- ½ cup cream cheese frosting homemade or store-bought
Instructions
- In a medium saucepan, combine heavy cream, whole milk, and sugar; heat over medium heat, stirring until sugar dissolves, then remove from heat.
- Stir in vanilla extract, red food coloring, and cocoa powder until mixture turns a burgundy color.
- Pour the mixture into a bowl, cover with plastic wrap, and chill in the fridge for at least two hours or overnight.
- Pour the chilled base into your ice cream maker and churn according to the manufacturer's instructions.
- While churning, prepare your mix-ins: cut red velvet cake into cubes and warm cream cheese frosting to drizzle.
- When the ice cream reaches a soft-serve consistency, fold in the cake pieces and swirl in the frosting.
- Transfer the ice cream to an airtight container and freeze for at least four hours until firm.
Notes
Nutrition

Hi, I’m Olivia Parker, the founder of BakingSecret.com and a lifelong lover of all things sweet and homemade. I grew up in a small town in Oregon, where the smell of fresh cookies in my family’s kitchen sparked my passion for baking. Over the years, I turned that passion into a mission: to help home bakers feel confident, inspired, and creative.
After studying food science and working in several artisan bakeries across the U.S., I decided to create a space where everyone from beginners to seasoned bakers can find reliable recipes, expert tips, and a warm, welcoming community. BakingSecret.com is my way of sharing the magic of baking with the world. When I’m not testing new recipes, you’ll find me exploring farmers’ markets, collecting vintage cookbooks, or perfecting my sourdough technique.