
Why Chocolate Cream Delight is a Showstopper
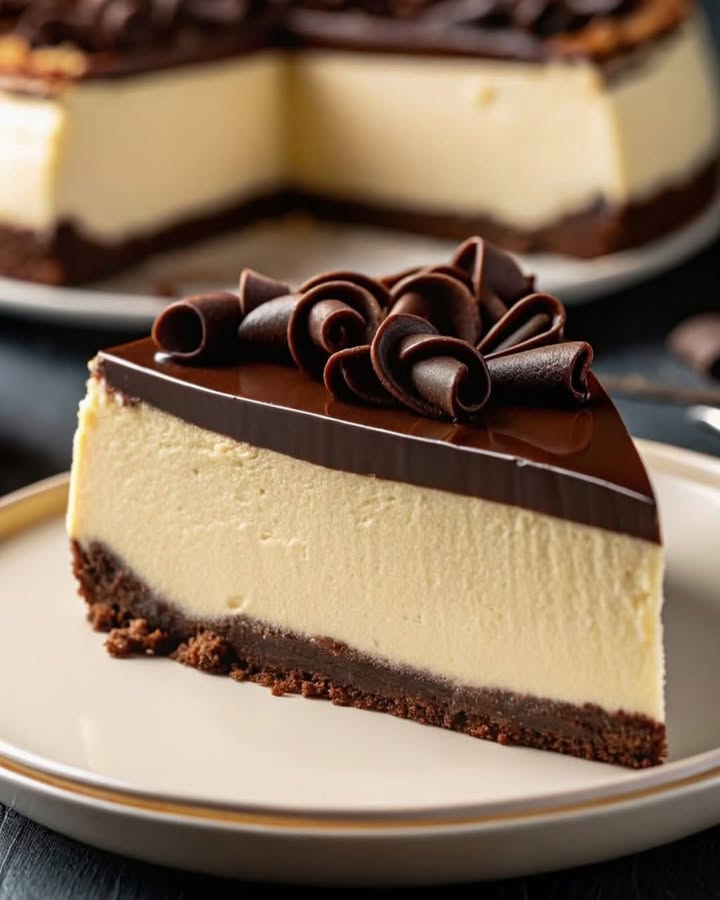
There’s something magical about chocolate, isn’t there? Whether it’s a simple bar or an elaborate dessert, chocolate has the power to make any moment feel special. A few months ago, I made this Chocolate Cream Delight for my best friend’s birthday, and let me tell you—it was love at first bite. The combination of a buttery cookie base, velvety cream filling, and glossy chocolate glaze wowed everyone at the table. It’s rich yet balanced, elegant yet easy to make. And guess what? You can whip it up too!
A Little History Behind This Sweet Treat
While this recipe might seem modern, layered desserts like this one have been around for centuries. Think of French pastries or Italian tiramisu—layers of texture and flavor are timeless. My version draws inspiration from classic no-bake cheesecakes but swaps out heavy ingredients for lighter cream and chocolate. Over time, I’ve tweaked the recipe to suit family gatherings, potlucks, and even quiet nights with a cup of tea. Every time I serve it, someone asks for the recipe—and that makes me smile.
Why You’ll Love This Recipe
What sets this Chocolate Cream Delight apart is its simplicity. No fancy equipment or hours of baking required. Just mix, chill, and assemble. Plus, the flavors are universally loved. The crunchy cookie base contrasts beautifully with the smooth cream layer, while the shiny chocolate glaze adds a touch of drama. Whether you’re a seasoned baker or just starting out, this recipe will boost your confidence in the kitchen.
Perfect Occasions to Prepare This Recipe
This cake is perfect for birthdays, anniversaries, or holiday parties. Imagine slicing into it during Thanksgiving or Christmas dinner—it’s sure to impress. But don’t save it only for big events! It’s equally delightful for cozy movie nights or afternoon coffee breaks. Trust me, once you try it, you’ll find excuses to bake it again and again.
Ingredients
Here’s everything you need to create this masterpiece:
- For the base:
- 200 g digestive cookies or María cookies
- 100 g melted butter
- For the cream:
- 500 ml milk
- 200 ml whipping cream
- 3 egg yolks
- 100 g sugar
- 1 teaspoon vanilla essence
- 3 tablespoons cornstarch
- For the chocolate glaze:
- 150 g dark or semi-sweet chocolate
- 100 ml whipping cream
- 1 tablespoon butter
Substitution Options
Not all kitchens are stocked the same, so here are some swaps:
- If you don’t have digestive cookies, graham crackers work perfectly.
- Swap whole milk with almond or oat milk for a dairy-free option.
- Use coconut oil instead of butter if needed.
- Milk chocolate can replace dark chocolate for a sweeter finish.
Step 1: Prepare the Base
Start by crushing those cookies into fine crumbs—I use a food processor, but a ziplock bag and rolling pin do the trick too. Mix the crumbs with melted butter until they resemble wet sand. Press this mixture firmly into a removable-bottom cake pan (20-23 cm). Pro tip: Use the back of a spoon or a glass to press it evenly. Pop it in the fridge for 30 minutes to set.
Step 2: Prepare the Cream
Now comes the fun part—the creamy filling! Heat the milk and whipping cream on medium heat until it starts to simmer. Meanwhile, whisk the egg yolks and sugar until pale and creamy. Dissolve the cornstarch in a splash of cold milk before adding it to the yolk mixture. Slowly pour this into the hot milk, stirring constantly. Keep stirring for 5-7 minutes until the mixture thickens enough to coat the back of a spoon. Add the vanilla essence and let it cool completely. This step smells heavenly, trust me.
Step 3: Prepare the Chocolate Glaze
Melt the chocolate gently with the whipping cream in the microwave or over a double boiler. Stir until smooth and glossy. Add the butter last; it gives the glaze that extra shine. Chef’s tip: Let the glaze sit for a few minutes before spreading—it won’t slide off the cake.
Step 4: Assemble the Cake
Spread the cooled cream over the chilled cookie base. Pour the chocolate glaze on top and smooth it out with a spatula. Refrigerate the cake for at least 4 hours—or better yet, overnight. Patience pays off here because the longer it chills, the easier it is to slice.
Step 5: Serve and Enjoy
When ready, unmold the cake carefully. Decorate with fresh berries or chocolate shavings for a pop of color. Slice it up and watch everyone dig in. There’s nothing quite like seeing smiles light up as forks dive in!
Timing
- Prep Time: 30 minutes
- Cooking Time: 15 minutes
- Chilling Time: 4 hours
- Total Time: Approximately 5 hours
Chef’s Secret
To prevent cracks in the glaze, ensure both the cream and glaze are at room temperature before assembling. Also, warming your knife under hot water helps achieve clean slices.
Extra Info
Did you know that dark chocolate contains antioxidants? That’s right—eating a slice of this cake isn’t just indulgent; it’s good for your soul (and maybe your health)!
Necessary Equipment
You’ll need:
- Removable-bottom cake pan
- Whisk
- Spatula
- Microwave or double boiler
Storage Tips
Once assembled, store the cake in the fridge covered with plastic wrap or in an airtight container. It stays fresh for up to 3 days. For longer storage, freeze individual slices wrapped tightly in parchment paper and foil. Thaw them in the fridge overnight when you’re ready to enjoy.
Freezing works wonders for busy weeks. Just label each slice with the date so you don’t forget how long it’s been sitting there. Remember, moisture is the enemy, so keep it well-sealed.
Lastly, always bring the cake to room temperature before serving. Cold desserts lose their full flavor potential, and we want every bite to sing.
Tips and Advice
– Always sift your cornstarch to avoid lumps in the cream.
– Taste-test the chocolate glaze—you deserve it!
– Don’t rush the chilling process. A well-set cake is easier to handle.
Presentation Ideas
Dress up your Chocolate Cream Delight with flair:
- Dust powdered sugar through a stencil for a decorative touch.
- Top with edible flowers for a rustic vibe.
- Serve with a dollop of whipped cream on the side.
Healthier Alternatives
Want to lighten things up? Try these variations:
- Low-Sugar Version: Use stevia or monk fruit sweetener instead of sugar.
- Vegan Option: Substitute plant-based butter and cream.
- Gluten-Free Base: Swap regular cookies for gluten-free ones.
- Fruit Twist: Layer sliced bananas or strawberries between the cream and glaze.
- White Chocolate Glaze: Replace dark chocolate with white for a sweeter finish.
- Spiced Cream: Add cinnamon or nutmeg to the cream for warmth.
Common Mistakes to Avoid
Mistake 1: Skipping the Chilling Time
Rushing the chilling process leads to a sloppy mess. Give the layers time to firm up. Pro tip: Set a timer so you don’t forget.
Mistake 2: Overmixing the Cream
Overmixing can cause the cream to curdle. Stir gently and stop as soon as it thickens.
Mistake 3: Using Low-Quality Chocolate
Cheap chocolate often tastes waxy. Invest in good-quality chocolate for the best results.
FAQ
Absolutely! Store-bought cookies save time and still taste great. Just crush them finely for the base.
How do I fix a runny glaze?
If the glaze is too thin, refrigerate it briefly to thicken. If it’s too thick, add a splash of warm cream.
Can I make this ahead?
Yes! Make it a day in advance and store it in the fridge. It actually tastes better after resting.
What size pan should I use?
A 20-23 cm removable-bottom pan works best. Adjust quantities if using a larger pan.
Is this kid-friendly?
Kids adore this cake! Leave out the coffee-flavored chocolate if making it for younger ones.
Can I freeze leftovers?
Definitely. Wrap slices individually and freeze for up to a month. Thaw in the fridge overnight.
What if I don’t have a removable-bottom pan?
Line a regular pan with parchment paper for easy removal. Grease the sides lightly for extra help.
Why does my cream taste eggy?
Eggy flavors happen if the yolks aren’t tempered properly. Add the hot milk slowly while whisking.
Can I add nuts to the base?
Yes! Crushed almonds or hazelnuts pair beautifully with chocolate.
How do I prevent air bubbles in the glaze?
Tap the pan gently on the counter after pouring the glaze to release trapped air.
Final Thoughts
This Chocolate Cream Delight is more than just a dessert—it’s a celebration of flavors, textures, and shared moments. Whether you’re baking for a crowd or treating yourself, this cake promises joy in every bite. So grab your apron, gather your ingredients, and let’s create something unforgettable together.
Equipment
- Removable-bottom cake pan
- Whisk
- Spatula
- Microwave or double boiler
- Large bowl
Ingredients
- 200 g digestive cookies
- 100 g butter
- 500 ml milk
- 200 ml whipping cream
- 3 egg yolks
- 100 g sugar
- 1 teaspoon vanilla essence
- 3 tablespoons cornstarch
- 150 g dark or semi-sweet chocolate
- 100 ml whipping cream (for glaze)
- 1 tablespoon butter (for glaze)
Instructions
- Crush the cookies into fine crumbs and mix with melted butter until it resembles wet sand. Press into a removable-bottom cake pan and refrigerate for 30 minutes.
- Heat milk and whipping cream until simmering. Whisk egg yolks and sugar until pale, then add dissolved cornstarch. Pour into hot milk while stirring until thickened, then add vanilla essence and cool completely.
- Melt chocolate with whipping cream and stir until smooth. Add butter and let sit before spreading.
- Spread cooled cream over the cookie base, pour chocolate glaze on top, and refrigerate for at least 4 hours or overnight.
- Unmold, decorate with fresh berries or chocolate shavings, slice, and serve.
Notes
Nutrition

Hi, I’m Olivia Parker, the founder of BakingSecret.com and a lifelong lover of all things sweet and homemade. I grew up in a small town in Oregon, where the smell of fresh cookies in my family’s kitchen sparked my passion for baking. Over the years, I turned that passion into a mission: to help home bakers feel confident, inspired, and creative.
After studying food science and working in several artisan bakeries across the U.S., I decided to create a space where everyone from beginners to seasoned bakers can find reliable recipes, expert tips, and a warm, welcoming community. BakingSecret.com is my way of sharing the magic of baking with the world. When I’m not testing new recipes, you’ll find me exploring farmers’ markets, collecting vintage cookbooks, or perfecting my sourdough technique.