
Why You’ll Fall in Love with Caramel Chocolate Brownies
Picture this: a warm, gooey bite of chocolatey goodness topped with a luscious caramel drizzle that melts in your mouth. Sounds dreamy, right? That’s exactly what happened when I first made these Caramel Chocolate Brownies. My family couldn’t stop raving about them, and neither could I! Whether you’re baking for a special occasion or just craving something sweet, this recipe is sure to become a favorite.
A Little History Behind the Magic
Brownies have been around since the late 1800s, but adding caramel takes them to a whole new level. This combo reminds me of my grandma’s Sunday baking sessions—she always had a knack for combining simple ingredients into pure magic. Over time, bakers started experimenting with toppings like nuts, frosting, and caramel. The result? A dessert that feels both nostalgic and excitingly modern.
Why You’ll Love This Recipe
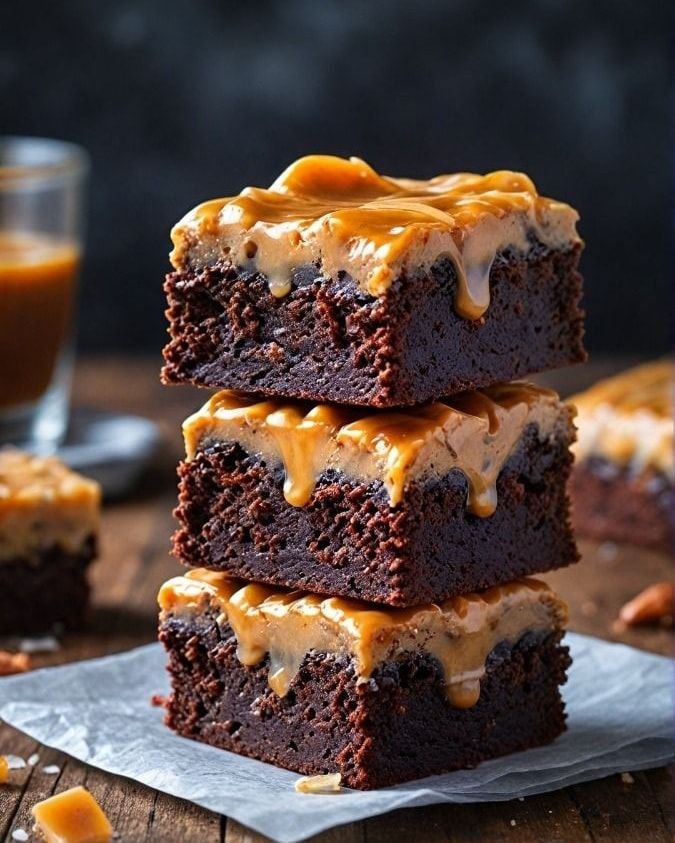
This recipe is perfect because it balances rich chocolate with buttery caramel. The brownie base is fudgy and dense, while the caramel adds a creamy sweetness. Plus, it’s easy enough for beginner bakers but impressive enough to wow guests. Did I mention how heavenly your kitchen will smell while these bake?
Perfect Occasions for Caramel Chocolate Brownies
From birthday parties to cozy movie nights, these brownies fit any occasion. They’re great for potlucks, holiday gatherings, or even as a thoughtful homemade gift. One batch never lasts long at my house!
Ingredients List
Brownies:
- 1 and 1/2 cups of wheat flour
- 1 cup of sugar
- 6 tablespoons of cocoa powder
- 1/2 cup melted butter
- 4 eggs
- 1 tablespoon of vanilla extract
- 1 pinch of salt
Caramel Coverage:
- 1 cup of sugar
- 1/2 cup of sour cream
- 1/4 cup butter
- 1 tablespoon of vanilla extract
Substitution Options
If you don’t have wheat flour, all-purpose works just fine. For a dairy-free version, swap butter with coconut oil and use plant-based sour cream. Instead of regular sugar, try brown sugar for a deeper flavor. And if you’re out of vanilla extract, almond extract can be a fun twist.
Preparation Steps
Step 1: Preheat and Prep
Start by preheating your oven to 180°C (350°F). While it heats up, grab your mixing bowls and measure out all the ingredients. Having everything ready makes the process smoother. Trust me; there’s nothing worse than realizing you forgot to melt the butter halfway through!
Step 2: Mix the Dry Ingredients
In a large bowl, whisk together the wheat flour, sugar, cocoa powder, and a pinch of salt. This dry mixture smells so chocolaty—it’s hard not to sneak a taste! Pro tip: Sift the cocoa powder to avoid lumps and ensure a smooth batter.
Step 3: Combine Wet and Dry
Add the melted butter, eggs, and vanilla extract to the dry mix. Stir until everything comes together into a thick, glossy batter. It should look dark and decadent, almost like molten chocolate lava. Don’t overmix—it’s okay if it’s slightly streaky.
Step 4: Bake the Brownies
Pour the batter into a greased brownie pan and spread it evenly. Pop it in the oven for 25-30 minutes. Keep an eye on them; they’re done when a toothpick inserted comes out with a few moist crumbs. Chef’s tip: Underbake slightly for extra fudginess.
Step 5: Make the Caramel Sauce
While the brownies cool, make the caramel sauce. In a saucepan, combine sugar, sour cream, and butter. Cook over medium heat, stirring constantly until golden and creamy. Add the vanilla extract at the end for a fragrant finish. Be patient—it’s worth it!
Step 6: Assemble Your Masterpiece
Once the brownies are completely cool, pour the warm caramel sauce over the top. Spread it gently to cover the surface. Let it set before slicing. Your kitchen will smell amazing, and your patience will pay off with every bite.
Timing Breakdown
- Prep Time: 15 minutes
- Cooking Time: 30 minutes
- Resting/Cooling Time: 30 minutes
- Total Time: 1 hour 15 minutes
Chef’s Secret
For an extra touch, sprinkle sea salt flakes on top of the caramel before it sets. The salty crunch pairs beautifully with the sweetness, creating a flavor explosion.
Extra Info
Did you know caramel dates back to medieval times? People used to boil sugar syrup until it turned amber-colored. Today, we’ve refined the technique, but the joy of caramel remains timeless.
Necessary Equipment
- Mixing bowls
- Whisk or spatula
- Brownie pan
- Saucepan
- Toothpick or skewer
Storage Tips
Store your Caramel Chocolate Brownies in an airtight container at room temperature for up to three days. If you live in a warm climate, refrigerate them to prevent the caramel from becoming too sticky.
For longer storage, wrap individual slices in plastic wrap and freeze. They’ll stay fresh for up to two months. Just thaw at room temperature before serving.
If reheating, pop a slice in the microwave for 10 seconds to bring back that gooey texture.
Tips and Advice
- Use high-quality cocoa powder for the best flavor.
- Don’t rush the caramel-making process—low and slow is key.
- Let the brownies cool completely before adding the caramel to prevent it from sinking in.
Presentation Ideas
- Serve on a platter with a dusting of powdered sugar.
- Garnish with chopped nuts or chocolate shavings.
- Pair with a scoop of vanilla ice cream for a restaurant-worthy dessert.
Healthier Alternatives
Gluten-Free Version
Swap wheat flour with almond flour or gluten-free all-purpose flour. These alternatives keep the texture soft and chewy.
Vegan Option
Replace eggs with flax eggs (1 tbsp ground flaxseed + 2.5 tbsp water per egg) and use vegan butter and sour cream.
Low-Sugar Twist
Use stevia or monk fruit sweetener instead of sugar for both the brownies and caramel.
Protein-Packed Recipe
Add a scoop of chocolate protein powder to the batter for a post-workout treat.
Nutty Delight
Mix chopped pecans or walnuts into the batter for added crunch.
Fruit Fusion
Stir dried cranberries or cherries into the caramel for a fruity twist.
Common Mistakes to Avoid
Mistake 1: Overmixing the Batter
Overmixing leads to tough brownies. Mix just until combined to keep them soft and fudgy. Pro tip: Use a light hand when folding in wet ingredients.
Mistake 2: Burning the Caramel
Caramel burns quickly once it starts to darken. Stay close to the stove and stir continuously. Keep the heat medium-low for better control.
Mistake 3: Cutting Too Soon
Patience is key here. Cutting warm brownies results in messy slices. Let them cool completely, or chill briefly in the fridge for clean cuts.
FAQ
Can I double the recipe?
Absolutely! Simply double all the ingredients and use a larger pan. Adjust baking time slightly if needed.
How do I know when the caramel is ready?
The caramel is ready when it turns a deep amber color and coats the back of a spoon. It should also thicken slightly as it cools.
What if I don’t have sour cream?
You can substitute Greek yogurt or heavy cream for similar results. Both add richness to the caramel.
Can I make these ahead of time?
Yes, these brownies can be made a day in advance. Store them covered at room temperature or chilled in the fridge.
Do I need a stand mixer?
Nope! A simple whisk or spatula works perfectly for this recipe. Save the fancy gadgets for another day.
Why did my caramel seize?
Seizing happens if liquid is added too quickly. Always stir gently and gradually when incorporating ingredients into hot caramel.
Can I add chocolate chips?
Of course! Fold mini chocolate chips into the batter for melty pockets of chocolate throughout the brownies.
Is wheat flour necessary?
Not at all. All-purpose or gluten-free flour works just as well. Experiment to find your preference.
Why are my brownies dry?
Dry brownies often result from overbaking. Check them early and remove them when a toothpick comes out slightly gooey.
Can kids help with this recipe?
Definitely! Kids love helping mix ingredients and drizzle caramel. Just supervise closely during stovetop steps.
Final Thoughts
These Caramel Chocolate Brownies are more than just a dessert—they’re a celebration of flavors and textures. Whether you’re baking for loved ones or treating yourself, this recipe promises happiness in every bite. So grab your apron, gather your ingredients, and get ready to create something truly unforgettable. Happy baking!
Equipment
- Mixing bowls
- Whisk or spatula
- Brownie pan
- Saucepan
- Toothpick or skewer
Ingredients
- 1.5 cups wheat flour
- 1 cup sugar
- 6 tablespoons cocoa powder
- 0.5 cup butter, melted
- 4 eggs
- 1 tablespoon vanilla extract
- 1 pinch salt
- 1 cup sugar (for caramel)
- 0.5 cup sour cream
- 0.25 cup butter (for caramel)
- 1 tablespoon vanilla extract (for caramel)
Instructions
- Preheat your oven to 180°C (350°F) and prepare your mixing bowls.
- In a large bowl, whisk together the wheat flour, sugar, cocoa powder, and a pinch of salt.
- Add the melted butter, eggs, and vanilla extract to the dry mixture and stir until combined.
- Pour the batter into a greased brownie pan and spread it evenly.
- Bake in the oven for 25-30 minutes, then check for doneness with a toothpick.
- For the caramel sauce, combine sugar, sour cream, and butter in a saucepan; cook over medium heat until golden and creamy.
- Add vanilla extract to the caramel sauce, stir, then pour over the cooled brownies and let it set.
Notes
Nutrition

Hi, I’m Olivia Parker, the founder of BakingSecret.com and a lifelong lover of all things sweet and homemade. I grew up in a small town in Oregon, where the smell of fresh cookies in my family’s kitchen sparked my passion for baking. Over the years, I turned that passion into a mission: to help home bakers feel confident, inspired, and creative.
After studying food science and working in several artisan bakeries across the U.S., I decided to create a space where everyone from beginners to seasoned bakers can find reliable recipes, expert tips, and a warm, welcoming community. BakingSecret.com is my way of sharing the magic of baking with the world. When I’m not testing new recipes, you’ll find me exploring farmers’ markets, collecting vintage cookbooks, or perfecting my sourdough technique.