
Why This Cookie Dough Bliss Is a Game Changer
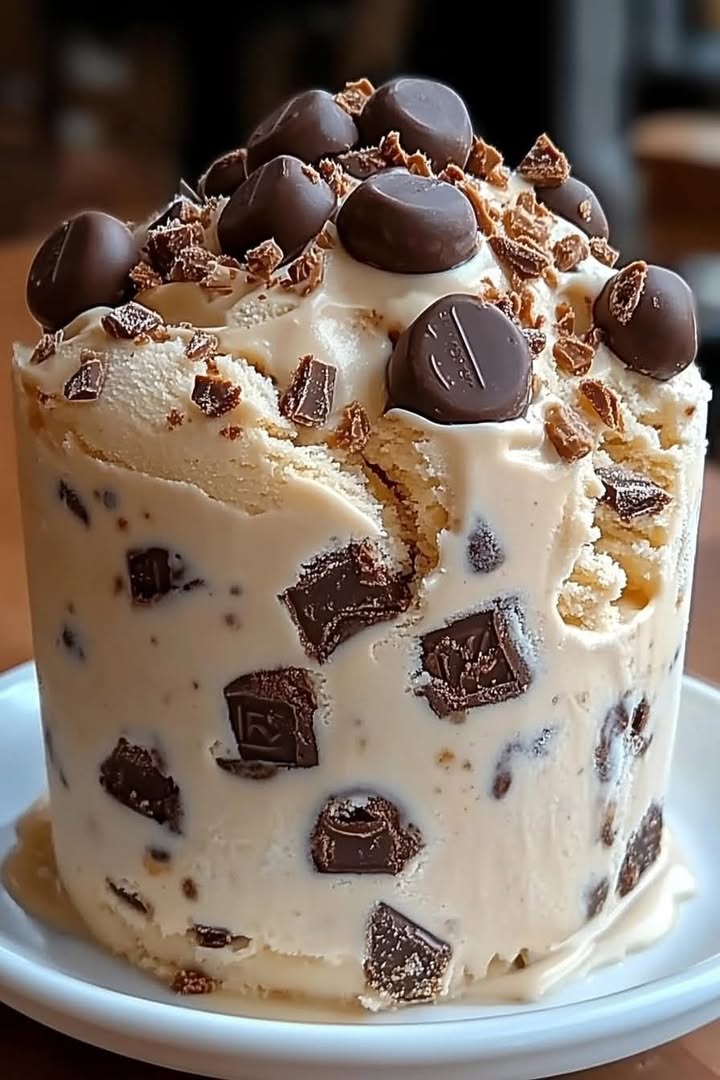
Picture this: it’s a hot summer afternoon, and you’re craving something cold, creamy, and utterly indulgent. Enter Cookie Dough Snickers & Reeses Ice Cream, the ultimate dessert that will make your taste buds do a happy dance. I first made this treat for a family barbecue last summer, and let me tell you, it was gone in minutes. The combination of chewy cookie dough, crunchy Snickers, and rich Reeses peanut butter cups is pure magic. Every scoop feels like a warm hug wrapped in chocolatey goodness.
A Little History Behind This Sweet Creation
This recipe is my modern twist on classic ice cream flavors. Growing up, I always loved sneaking bites of raw cookie dough while baking with my mom. But raw eggs? No thanks! That’s why I created an edible cookie dough version that’s safe and oh-so-delicious. Adding Snickers and Reeses was inspired by my husband’s love for all things chocolate and peanut butter. It’s like taking the best parts of your childhood candy stash and blending them into one dreamy dessert.
Why You’ll Fall Head Over Heels for This Recipe
What makes this Cookie Dough Bliss so irresistible? First, it’s packed with layers of flavor—creamy ice cream, gooey cookie dough, and chunks of your favorite candies. Second, it’s surprisingly easy to make, even if you’ve never tried homemade ice cream before. Plus, it’s customizable! Whether you’re a die-hard Snickers fan or can’t get enough of Reeses, you can tweak it to suit your cravings. Trust me, once you try this, store-bought ice cream just won’t cut it anymore.
Perfect Occasions to Whip Up This Treat
This ice cream is perfect for any occasion—or no occasion at all! Serve it at birthday parties, holiday gatherings, or casual weekend get-togethers. It’s also a fantastic way to impress guests after a dinner party. Personally, I love making it for movie nights. There’s nothing better than curling up on the couch with a big bowl of Cookie Dough Bliss while watching your favorite flicks.
Ingredients You’ll Need
- 2 cups heavy cream
- 1 cup whole milk
- ½ cup sugar
- 1 tsp vanilla extract
- A pinch of salt
- ½ cup mini chocolate chips
- ½ cup Snickers bars, chopped
- ½ cup Reeses peanut butter cups, chopped
For the Edible Cookie Dough:
- ½ cup softened butter
- ½ cup brown sugar
- 1 cup all-purpose flour (heat-treated)
- 1 tsp vanilla extract
- 2 tbsp milk
- ½ cup mini chocolate chips
Substitution Options
If you’re looking to switch things up, here are some ideas:
- Swap Snickers for Milky Way bars for a caramel twist.
- Use dark chocolate chips instead of mini ones for a richer flavor.
- Replace Reeses with Nutella drizzles for a hazelnut kick.
- Try almond milk and coconut cream for a dairy-free base.
Step 1: Make the Cookie Dough
Start by mixing softened butter and brown sugar until they’re light and fluffy. This step is crucial because it creates the perfect texture for your cookie dough. Add vanilla extract, milk, and heat-treated flour (this kills any bacteria), then fold in mini chocolate chips. Roll the dough into small chunks and pop them in the freezer. Pro tip: Freezing the dough makes it easier to mix into the ice cream later without melting.
Step 2: Prepare the Ice Cream Base
In a large bowl, whisk together heavy cream, whole milk, sugar, vanilla extract, and a pinch of salt. Keep whisking until the mixture is smooth and the sugar has dissolved. Chill the base in the fridge for at least two hours. Why? A cold base ensures your ice cream churns evenly and achieves that dreamy consistency we all crave.
Step 3: Churn & Mix-Ins
Pour the chilled mixture into your ice cream maker and churn according to the manufacturer’s instructions. In the last few minutes of churning, add the frozen cookie dough chunks, chopped Snickers, and Reeses. Watching these goodies swirl into the creamy base is almost as satisfying as eating the final product. Chef’s tip: Don’t overmix; you want those candy pieces to stay chunky for maximum impact.
Step 4: Freeze & Serve
Transfer the churned ice cream to an airtight container and freeze for 4-6 hours. Patience is key here—rushing this step will leave you with soft-serve rather than firm scoops. Once it’s ready, grab a spoon and dig in. The contrast between the cool ice cream and the chewy cookie dough is simply divine.
Timing Breakdown
- Prep Time: 30 minutes
- Cooking Time: None (no cooking required!)
- Resting Time: 2 hours chilling + 4-6 hours freezing
- Total Time: Approximately 7 hours
Chef’s Secret
Here’s a little trick I learned: toast your mini chocolate chips lightly before adding them to the cookie dough. It enhances their flavor and gives the dough a deeper chocolate aroma. Your family won’t know what hit them!
Extra Info
Did you know that Reeses were invented in 1928 by Harry Burnett Reese? They started as a humble peanut butter cup and have since become a global phenomenon. Combining them with Snickers and cookie dough feels like paying homage to decades of candy innovation.
Necessary Equipment
To make this recipe, you’ll need:
- An ice cream maker
- A whisk or electric mixer
- A spatula
- Airtight containers for freezing
Storage Tips
Store your Cookie Dough Bliss in an airtight container to prevent freezer burn. Press a piece of parchment paper directly onto the surface of the ice cream before sealing the lid. This trick keeps it fresh and prevents ice crystals from forming. For long-term storage, label the container with the date—it should last up to three months in the freezer.
If you notice the ice cream becoming too hard, let it sit at room temperature for 5-10 minutes before scooping. This softens it just enough for easy serving.
Finally, keep it away from strong-smelling foods in the freezer. Ice cream can absorb odors, which might affect its flavor. Nobody wants garlic-flavored ice cream, right?
Tips and Advice
Want to take your Cookie Dough Bliss to the next level? Try layering crushed peanuts or caramel sauce between scoops for added crunch and sweetness. Another pro tip: Use high-quality ingredients. Fresh cream and real vanilla extract make a noticeable difference in taste.
Presentation Ideas
Serve your ice cream in waffle cones for a fun, retro vibe. Garnish with extra mini chocolate chips or a drizzle of chocolate syrup for visual appeal. For special occasions, arrange scoops in a sundae glass and top with whipped cream, sprinkles, and a cherry.
Healthier Alternatives
Looking for lighter options? Here are six variations:
- Low-Sugar Version: Use sugar substitutes like stevia or monk fruit in both the ice cream base and cookie dough.
- Dairy-Free Delight: Swap heavy cream and milk for coconut cream and almond milk.
- Gluten-Free Goodness: Use gluten-free flour in the cookie dough.
- Vegan Vibes: Opt for plant-based butter and non-dairy chocolate chips.
- Fruit-Filled Fun: Replace candies with diced strawberries or mango chunks.
- Protein-Packed Power: Add a scoop of protein powder to the ice cream base.
Mistake 1: Skipping the Heat-Treatment Step
One common mistake is skipping the heat-treatment process for the flour in the cookie dough. Raw flour can contain harmful bacteria, so toasting it in the oven for a few minutes eliminates this risk. Pro tip: Spread the flour on a baking sheet and bake at 350°F for 5 minutes, stirring halfway through.
Mistake 2: Overmixing the Ice Cream Base
Overmixing the base can incorporate too much air, leaving you with icy ice cream. Stir gently until the sugar dissolves, but don’t go overboard. Remember, less is more when it comes to achieving that velvety texture.
Mistake 3: Not Freezing Long Enough
Rushing the freezing process is another pitfall. If you skip the 4-6 hour freeze, your ice cream will be too soft to scoop properly. Be patient—it’s worth the wait!
FAQ Section
Can I make this without an ice cream maker?
Absolutely! Pour the mixture into a shallow dish, freeze for an hour, then stir vigorously every 30 minutes until it reaches the desired consistency. Repeat this process 3-4 times for best results.
How do I heat-treat flour safely?
Spread flour on a baking sheet and bake at 350°F for 5 minutes, stirring halfway through. Let it cool completely before using. This simple step ensures your cookie dough is safe to eat.
Can I use regular chocolate chips instead of mini ones?
Yes, but mini chips distribute more evenly throughout the ice cream. Regular-sized chips work fine if that’s what you have on hand.
Is this recipe kid-friendly?
Definitely! Kids love helping roll the cookie dough into balls and sprinkling in the mix-ins. Just supervise during the heat-treatment step for safety.
Can I double the recipe?
Of course! Doubling works perfectly, though you may need to churn in batches depending on your ice cream maker’s capacity.
What if I don’t have Snickers or Reeses?
No problem! Substitute with other candies like M&Ms, Kit Kats, or Rolos. Get creative and tailor it to your preferences.
How long does it last in the freezer?
Stored properly, your Cookie Dough Bliss will stay fresh for up to three months. After that, the flavor may start to fade.
Can I add nuts to the mix?
Yes! Chopped peanuts or almonds pair beautifully with the flavors in this ice cream. Just be mindful of nut allergies if serving to others.
Why is my ice cream grainy?
Graininess often happens when sugar isn’t fully dissolved. Whisk the base thoroughly before chilling to avoid this issue.
Yes! Make the dough up to a week in advance and store it in the freezer. Simply thaw slightly before mixing it into the ice cream.
Final Thoughts
There you have it—your guide to creating the most decadent Cookie Dough Snickers & Reeses Ice Cream. Whether you’re hosting a party or treating yourself to a solo dessert night, this recipe promises pure bliss in every bite. So grab your ingredients, fire up that ice cream maker, and get ready to experience sweet perfection. Happy scooping!
Equipment
- Ice cream maker
- Whisk or electric mixer
- Spatula
- Airtight containers for freezing
- Mixing bowl
Ingredients
- 2 cups heavy cream
- 1 cup whole milk
- ½ cup sugar
- 1 tsp vanilla extract
- a pinch salt
- ½ cup mini chocolate chips
- ½ cup Snickers bars, chopped
- ½ cup Reeses peanut butter cups, chopped
Instructions
- Make the edible cookie dough by mixing softened butter and brown sugar until light and fluffy.
- Add vanilla extract, milk, and heat-treated flour; fold in mini chocolate chips.
- Roll the dough into small chunks and freeze.
- Prepare the ice cream base by whisking together heavy cream, whole milk, sugar, vanilla extract, and a pinch of salt until smooth.
- Chill the mixture in the fridge for at least two hours.
- Once chilled, pour the mixture into the ice cream maker and churn according to manufacturer's instructions.
- In the last few minutes of churning, add frozen cookie dough chunks, chopped Snickers, and Reeses.
- Transfer the churned ice cream to an airtight container and freeze for 4-6 hours.
Notes
Nutrition

Hi, I’m Olivia Parker, the founder of BakingSecret.com and a lifelong lover of all things sweet and homemade. I grew up in a small town in Oregon, where the smell of fresh cookies in my family’s kitchen sparked my passion for baking. Over the years, I turned that passion into a mission: to help home bakers feel confident, inspired, and creative.
After studying food science and working in several artisan bakeries across the U.S., I decided to create a space where everyone from beginners to seasoned bakers can find reliable recipes, expert tips, and a warm, welcoming community. BakingSecret.com is my way of sharing the magic of baking with the world. When I’m not testing new recipes, you’ll find me exploring farmers’ markets, collecting vintage cookbooks, or perfecting my sourdough technique.