
Why This No Bake Cheesecake Recipe Is a Game Changer
Picture this: It’s a hot summer afternoon, and you’re craving something sweet but don’t want to turn on the oven. That’s exactly how I stumbled upon this No Bake Cheesecake recipe. Creamy, dreamy, and oh-so-easy, it quickly became my go-to dessert for family gatherings. What makes it special? You only need a handful of ingredients, and it’s ready in no time. Plus, it’s so versatile—you can top it with anything from fresh berries to chocolate shavings. Trust me, once you try it, you’ll wonder why you ever baked cheesecakes the old-fashioned way!
A Little History Behind No Bake Cheesecake
Did you know that cheesecake has been around for centuries? The ancient Greeks are said to have invented it, serving it at the first Olympic games in 776 BC. Fast forward to today, and we’ve got countless versions, including this modern twist: the No Bake Cheesecake. Unlike its baked cousin, this version skips the hassle of water baths and cracked tops. Instead, it relies on whipped cream and chilled setting to create a light, airy texture. I tested this recipe during a busy holiday season, and it was a hit! My friends couldn’t believe it wasn’t baked.
Why You’ll Love This No Bake Cheesecake Recipe
This recipe is perfect for anyone who loves rich, creamy desserts but doesn’t want to spend hours in the kitchen. Here’s why it’s a winner:
- No oven required: Perfect for hot days or small kitchens.
- Foolproof: Even if you’re new to baking, this recipe is hard to mess up.
- Creamy texture: The filling is smooth, light, and melts in your mouth.
- Versatile: Customize it with your favorite toppings.
Perfect Occasions to Whip Up This Dessert
Whether it’s a birthday party, potluck, or just a cozy night in, this No Bake Cheesecake fits the bill. I love making it for summer barbecues because it’s refreshing and doesn’t require heating up the house. It’s also a lifesaver during the holidays when ovens are occupied with other dishes. Plus, it looks fancy enough to impress guests, even though it’s super easy to make.
Ingredients You’ll Need
Here’s what you’ll need to make this magical dessert:
For the Crust:
- 30 Oreos (leave the cream inside)
- 6 tablespoons unsalted butter, melted
For the Cheesecake Filling:
- 3 8-ounce blocks (678g) cream cheese, at room temperature
- ½ cup (85g) powdered sugar
- 1 cup (237ml) heavy whipping cream
- 1 teaspoon vanilla extract
- Whipped cream for garnish (optional)
Substitution Options
Not everyone has the same pantry staples, so here are some swaps you can make:
- Oreos: Use any chocolate sandwich cookie or graham crackers for the crust.
- Cream cheese: Substitute with mascarpone for an even creamier texture.
- Heavy whipping cream: Coconut cream works well for a dairy-free option.
- Powdered sugar: Swap with honey or maple syrup for a natural sweetener.
Preparation Steps
Step 1: Prepare the Crust
Start by crushing those Oreos into fine crumbs. I like using a food processor, but if you don’t have one, a ziplock bag and rolling pin work just as well. Once they’re crushed, mix in the melted butter until the crumbs resemble wet sand. Press this mixture firmly into the bottom and halfway up the sides of a 9-inch springform pan. Chill it in the fridge while you tackle the filling. Pro tip: Use the back of a spoon or a flat-bottomed glass to press the crust evenly.
Step 2: Make the Cheesecake Filling
In a large mixing bowl, beat the room-temperature cream cheese until it’s smooth and free of lumps. Add the powdered sugar and mix until creamy. Then, pour in the vanilla extract and heavy whipping cream. Keep mixing until stiff peaks form—this is key to achieving that light, airy texture. Imagine the soft hum of the mixer blending everything into a cloud-like filling. Chef’s tip: Make sure your cream cheese is truly at room temperature; otherwise, you might end up with lumps.
Step 3: Assemble and Chill
Pour the fluffy cheesecake filling into the prepared crust, smoothing the top with a spatula. Pop it into the fridge for at least 2 hours, or until it’s set. This chilling time is crucial—it allows the flavors to meld and the filling to firm up. Just before serving, add a dollop of whipped cream on top if you’re feeling fancy. Slice and enjoy the creamy goodness!
Timing Breakdown
Here’s how long each step takes:
- Prep time: 15 minutes
- Chilling time: 2 hours
- Total time: 2 hours and 15 minutes
Chef’s Secret
To take your No Bake Cheesecake to the next level, sprinkle a pinch of sea salt on top. The salt enhances the sweetness and balances the richness of the cream cheese. Trust me, it’s a game changer!
Extra Info
Fun fact: Did you know that Philadelphia Cream Cheese isn’t actually from Philadelphia? It was first made in New York in 1872 and named after the city to evoke quality and tradition. Now it’s a staple in cheesecake recipes worldwide!
Necessary Equipment
You don’t need much to make this recipe:
- Food processor or ziplock bag and rolling pin
- Mixing bowls
- Hand mixer or stand mixer
- 9-inch springform pan
- Spatula
Storage Tips
This cheesecake keeps beautifully in the fridge. Store it in an airtight container or cover it with plastic wrap to prevent it from absorbing odors. It stays fresh for up to 5 days. If you want to freeze it, wrap individual slices in plastic wrap and place them in a freezer-safe bag. They’ll last for up to 2 months. Thaw frozen slices in the fridge overnight before serving.
Pro tip: Always let the cheesecake come to room temperature for about 15 minutes before slicing. This ensures clean cuts and enhances the flavor.
If you’re bringing it to a party, transport it in the springform pan to avoid damaging the crust. Just pop it into the fridge at your destination until it’s time to serve.
Tips and Advice
Here are a few tricks to make your No Bake Cheesecake even better:
- Use high-quality cream cheese for the best flavor.
- Don’t skip the chilling time—it’s essential for setting the filling.
- If you’re short on time, pop the cheesecake in the freezer for 30 minutes to speed up the process.
Presentation Ideas
Make your cheesecake look as good as it tastes with these ideas:
- Top with fresh berries for a pop of color.
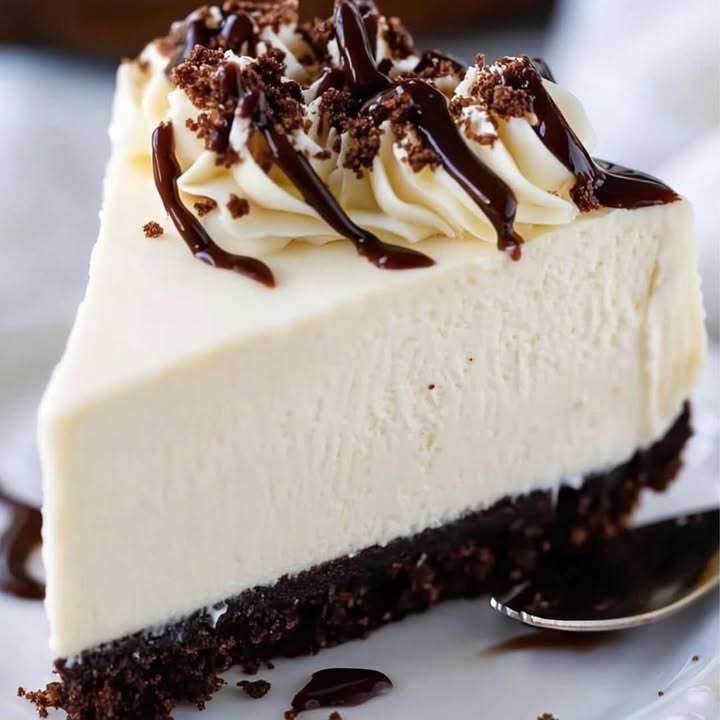
- Drizzle chocolate or caramel sauce over the slices.
- Add a sprinkle of crushed nuts or cookie crumbs for texture.
Healthier Alternative Recipes
Looking for a lighter version? Try these variations:
- Low-Sugar Cheesecake: Replace powdered sugar with a sugar substitute like stevia.
- Dairy-Free Cheesecake: Use coconut cream and vegan cream cheese.
- Gluten-Free Cheesecake: Swap Oreos for gluten-free cookies in the crust.
- Protein-Packed Cheesecake: Add a scoop of vanilla protein powder to the filling.
- Fruit-Infused Cheesecake: Blend fresh fruit like strawberries into the filling.
- Mini Cheesecakes: Use a muffin tin to make bite-sized portions.
Common Mistakes to Avoid
Mistake 1: Using Cold Cream Cheese
One of the biggest mistakes people make is using cream cheese straight from the fridge. Cold cream cheese won’t blend smoothly, leaving lumps in your filling. To avoid this, let it sit at room temperature for at least an hour before starting. Pro tip: Cut the cream cheese into cubes to speed up the softening process.
Mistake 2: Skipping the Chilling Time
Rushing the chilling process is another common error. Without enough time in the fridge, the filling won’t set properly, and your slices will be a gooey mess. Patience is key here—plan ahead and let it chill for at least 2 hours.
Mistake 3: Overmixing the Filling
While it’s important to mix until stiff peaks form, overmixing can deflate the filling and ruin its airy texture. Stop as soon as the peaks hold their shape. A quick visual check can save you from this pitfall.
FAQs
Can I use homemade whipped cream instead of store-bought?
Absolutely! Homemade whipped cream adds a fresh touch. Just whip heavy cream with a bit of sugar and vanilla until stiff peaks form.
How do I prevent the crust from crumbling?
Make sure the Oreo crumbs are evenly coated with melted butter. Press the mixture firmly into the pan to help it hold together.
Can I make this recipe in advance?
Yes! This cheesecake can be made up to 2 days ahead and stored in the fridge. It actually tastes better after resting overnight.
What can I use instead of Oreos?
Graham crackers or chocolate wafer cookies work great as substitutes for the crust.
How do I know when the filling is ready?
The filling should be thick and hold its shape when you lift the beaters. Stiff peaks are your goal!
Can I freeze this cheesecake?
Definitely! Wrap individual slices in plastic wrap and freeze for up to 2 months. Thaw in the fridge before serving.
Why is my cheesecake too soft?
If it’s too soft, it probably didn’t chill long enough. Give it more time in the fridge or a quick stint in the freezer.
Can I add fruit to the filling?
Yes! Blend fresh fruit like strawberries or mangoes and fold them gently into the filling before chilling.
What size pan should I use?
A 9-inch springform pan is ideal. If you don’t have one, a regular pie dish works too, but the crust may be thinner.
How do I get clean slices?
Run a sharp knife under hot water, then dry it before slicing. Repeat between cuts for perfectly clean edges.
Final Thoughts
This No Bake Cheesecake is proof that simplicity and flavor can go hand in hand. Whether you’re a seasoned baker or a kitchen newbie, this recipe is sure to become a favorite. So grab your ingredients, crank up your favorite playlist, and treat yourself to a slice of creamy perfection. Happy baking!
Equipment
- Food processor or ziplock bag and rolling pin
- Mixing bowls
- Hand mixer or stand mixer
- 9-inch springform pan
- Spatula
Ingredients
- 30 units Oreos (leave the cream inside)
- 6 tablespoons unsalted butter, melted
- 3 8-ounce blocks cream cheese, at room temperature (678g total)
- ½ cup powdered sugar
- 1 cup heavy whipping cream
- 1 teaspoon vanilla extract
- to taste Whipped cream for garnish (optional)
Instructions
- Crush the Oreos into fine crumbs using a food processor or a ziplock bag and rolling pin.
- Mix the crushed Oreos with melted butter until the mixture resembles wet sand.
- Press the mixture firmly into the bottom and halfway up the sides of a 9-inch springform pan, then chill in the fridge.
- In a large mixing bowl, beat the room-temperature cream cheese until smooth and lump-free.
- Add the powdered sugar to the cream cheese and mix until creamy.
- Pour in the vanilla extract and heavy whipping cream, then mix until stiff peaks form.
- Pour the cheesecake filling into the prepared crust and smooth the top with a spatula.
- Chill the cheesecake in the fridge for at least 2 hours, until set.
- Before serving, add a dollop of whipped cream on top, then slice and enjoy!
Notes
Nutrition

Hi, I’m Olivia Parker, the founder of BakingSecret.com and a lifelong lover of all things sweet and homemade. I grew up in a small town in Oregon, where the smell of fresh cookies in my family’s kitchen sparked my passion for baking. Over the years, I turned that passion into a mission: to help home bakers feel confident, inspired, and creative.
After studying food science and working in several artisan bakeries across the U.S., I decided to create a space where everyone from beginners to seasoned bakers can find reliable recipes, expert tips, and a warm, welcoming community. BakingSecret.com is my way of sharing the magic of baking with the world. When I’m not testing new recipes, you’ll find me exploring farmers’ markets, collecting vintage cookbooks, or perfecting my sourdough technique.