
Cozy Winter Treats: Meet the Piped Hot Cocoa Cookies
Picture this: it’s a chilly winter evening, and you’re curled up by the fireplace with a steaming mug of hot cocoa. Now imagine all that chocolatey goodness baked into a tender cookie topped with gooey marshmallows and a drizzle of rich chocolate. Sounds dreamy, right? That’s exactly what these Piped Hot Cocoa Cookies are—pure magic in every bite! I first made these for a holiday cookie exchange last year, and they were an instant hit. Friends kept asking for the recipe, and my kids declared them their new favorite snack. Trust me, once you try these Cocoa Cookie Delights, you’ll be hooked too!
A Little History Behind the Sweetness
Hot cocoa has been warming hearts for centuries, dating back to the ancient Mayans who sipped on spiced chocolate drinks. Fast forward to today, and we’ve turned this cozy drink into cookies that look as good as they taste. The piping technique gives these cookies a fun twist, making them look like mini hot cocoa mugs or swirls of joy. I love how this recipe bridges tradition and creativity—it’s like sipping nostalgia but in cookie form!
Why You’ll Love These Cocoa Cookie Delights
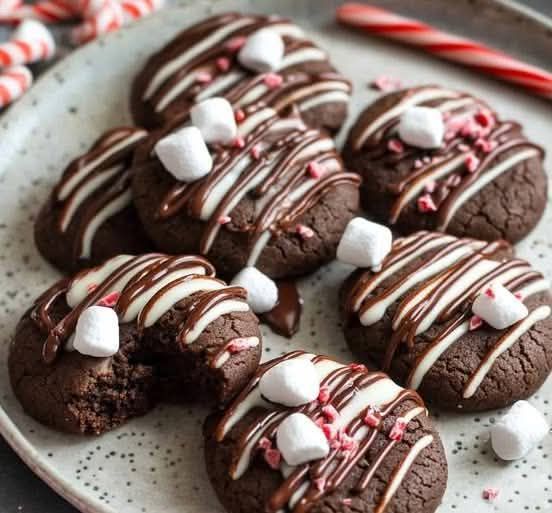
These cookies are everything you want in a dessert: soft, chocolatey, and topped with mini marshmallows for that extra touch of whimsy. They’re easy to make, even if you’re not a baking pro, and the piping step adds a fancy flair without much effort. Plus, they’re perfect for sharing (or hoarding—I won’t judge). Whether you’re baking for family, friends, or just yourself, these cookies will bring smiles all around.
Perfect Occasions for These Cocoa Cookie Delights
Need a show-stopping dessert for your next holiday party? These cookies are it. They’re also great for cookie swaps, school bake sales, or simply enjoying with a cup of coffee on a lazy Sunday afternoon. Honestly, there’s no bad time to whip up a batch of these Cocoa Cookie Delights. They’re especially delightful during the winter months when everyone craves something warm and comforting.
Ingredients for Your Cocoa Cookie Adventure
Here’s what you’ll need to create these magical treats:
- For the Cookies:
- 1 cup (2 sticks) unsalted butter, softened
- ¾ cup powdered sugar, sifted
- 1 large egg yolk
- 1 tsp vanilla extract
- 2 cups all-purpose flour, sifted
- ½ cup unsweetened cocoa powder
- ¼ tsp salt
- For Decoration:
- 1 cup semisweet chocolate chips, melted
- Mini marshmallows
- Crushed candy canes (optional)
Substitution Options
If you’re out of certain ingredients or looking to switch things up, here are some ideas:
- Use coconut oil instead of butter for a dairy-free option.
- Swap the semisweet chocolate chips for dark or milk chocolate based on your preference.
- Replace crushed candy canes with sprinkles or edible glitter for a different festive touch.
Step 1: Make the Cookie Dough
Start by preheating your oven to 350°F (175°C) and lining your baking sheets with parchment paper. In a large bowl, beat the softened butter and powdered sugar until light and fluffy—this should take about 2-3 minutes. The mixture will turn pale and airy, which is key for a tender cookie texture. Next, add the egg yolk and vanilla extract, mixing until smooth. In another bowl, whisk together the flour, cocoa powder, and salt. Gradually incorporate the dry ingredients into the wet mixture until a soft dough forms. Pro tip: Don’t overmix; stop as soon as the dough comes together to keep the cookies tender.
Step 2: Pipe the Cookies
Transfer the dough to a piping bag fitted with a large star tip or open tip. If you don’t have a piping bag, a sturdy zip-top bag with the corner snipped off works just fine. Pipe spirals or “hot cocoa cup shapes” onto the prepared baking sheets, spacing them about 2 inches apart. This step is where the fun begins—you can get creative with your designs! If the dough feels stiff, let it rest for 5-10 minutes or add a teaspoon of milk to soften it slightly.
Step 3: Bake
Bake the cookies for 10-12 minutes, or until the edges are just set. Keep an eye on them—they shouldn’t brown too much. Let the cookies cool on the baking sheet for 5 minutes before transferring them to a wire rack to cool completely. The aroma of chocolate wafting through your kitchen will make it hard to wait, but trust me, patience pays off!
Step 4: Decorate
Once the cookies are completely cool, it’s time to decorate. Drizzle them generously with melted chocolate using a spoon or piping bag. Top each cookie with mini marshmallows and, if you’re feeling festive, sprinkle some crushed candy canes on top. Allow the chocolate to set before serving so the decorations stay intact. Chef’s tip: Pop the decorated cookies in the fridge for 5-10 minutes to speed up the setting process.
Timing Breakdown
- Prep Time: 20 minutes
- Cooking Time: 12 minutes per batch
- Resting Time: 5 minutes (for dough consistency)
- Total Time: About 45 minutes
Chef’s Secret
For an extra-rich flavor, toast the cocoa powder lightly in a dry skillet over low heat before adding it to the dough. This enhances its natural chocolate notes and adds depth to the cookies.
An Interesting Fact About Cocoa
Did you know that cocoa contains flavonoids, antioxidants that may boost heart health? So while these cookies are definitely a treat, you can feel a tiny bit better knowing there’s a hint of goodness in every bite!
Necessary Equipment
- Piping bag and star tip (or zip-top bag)
- Mixing bowls
- Electric mixer
- Baking sheets
- Parchment paper
- Wire cooling rack
Storage Tips
To keep your cookies fresh, store them in an airtight container at room temperature for up to 5 days. Avoid stacking them directly on top of each other to prevent the marshmallows from getting squished. If you live in a humid area, consider placing a piece of parchment paper between layers to maintain their texture. For longer storage, freeze the undecorated cookies in a freezer-safe bag for up to 3 months. Simply thaw and decorate when ready to serve.
Tips and Advice
Here are a few tricks to elevate your Cocoa Cookie Delights:
- Chill the dough for 15-20 minutes before piping to make it easier to handle.
- Experiment with different toppings like chopped nuts or caramel drizzle.
- Use high-quality cocoa powder for the best flavor.
Presentation Ideas
- Serve the cookies on a tiered dessert stand for a bakery-worthy display.
- Add a dusting of powdered sugar for a snowy effect.
- Package them in clear cellophane bags tied with ribbon for gifting.
Healthier Alternative Recipes
If you’re looking to lighten up this recipe, here are six variations to try:
- Gluten-Free Option: Substitute the all-purpose flour with a gluten-free flour blend.
- Vegan Version: Use vegan butter and replace the egg yolk with a tablespoon of plant-based yogurt.
- Low-Sugar Recipe: Swap the powdered sugar for a sugar substitute like erythritol.
- Protein-Packed Cookies: Add a scoop of chocolate protein powder to the dough.
- Spiced Cocoa Cookies: Mix in a pinch of cinnamon and nutmeg for a warm, spicy kick.
- Fruit-Topped Cookies: Skip the marshmallows and top with dried cranberries or cherries.
Common Mistakes to Avoid
Mistake 1: Overmixing the Dough
Overmixing can lead to tough cookies instead of soft, tender ones. To avoid this, mix the dough just until the ingredients come together. A few streaks of flour are okay—they’ll disappear as you finish blending.
Mistake 2: Skipping the Sifting Step
Sifting the powdered sugar and flour ensures a smooth dough and prevents lumps. It might seem like an extra step, but it makes a big difference in texture. Pro tip: Use a fine-mesh sieve if you don’t have a sifter.
Mistake 3: Decorating Before Cooling
If you drizzle chocolate or add marshmallows while the cookies are still warm, the toppings will melt and slide off. Always let the cookies cool completely before decorating.
FAQ
Can I use salted butter instead of unsalted?
Yes, but reduce the added salt to ⅛ teaspoon to balance the flavor.
Practice piping uniform shapes and chill the dough briefly before baking to help the cookies hold their form.
What if I don’t have a piping bag?
No worries! A zip-top bag with the corner snipped off works perfectly as a makeshift piping bag.
It’s better to freeze the undecorated cookies since the marshmallows may lose their texture after thawing.
This could be due to overly soft butter or skipping the chilling step. Make sure your butter is softened but not melted, and chill the dough if needed.
Do I have to use candy canes?
Not at all! Feel free to skip them or use sprinkles, crushed cookies, or other festive toppings.
Can I double the recipe?
Absolutely! Just ensure your mixer can handle the larger quantities, or split the dough into two batches.
Stored in an airtight container, they’ll stay fresh for up to 5 days at room temperature.
What’s the best way to melt chocolate?
Microwave it in 30-second intervals, stirring between each, or use a double boiler for gentle heating.
Definitely! Kids love helping pipe the dough and decorate with marshmallows and sprinkles.
Final Thoughts
There’s something truly special about these Piped Hot Cocoa Cookies. They’re not just cookies—they’re little bundles of happiness that bring warmth and joy to anyone lucky enough to taste them. Whether you’re baking for the holidays or just because, these Cocoa Cookie Delights are sure to become a cherished favorite. So grab your piping bag, crank up the Christmas tunes, and let’s get baking!
Equipment
- Piping bag (or zip-top bag)
- Large mixing bowls
- Electric mixer
- Baking sheets
- Parchment paper
- Wire cooling rack
Ingredients
- 1 cup unsalted butter softened
- ¾ cup powdered sugar sifted
- 1 large egg yolk
- 1 tsp vanilla extract
- 2 cups all-purpose flour sifted
- ½ cup unsweetened cocoa powder
- ¼ tsp salt
- 1 cup semisweet chocolate chips melted (for decoration)
- q.s. mini marshmallows for decoration
- q.s. crushed candy canes optional, for decoration
Instructions
- Preheat your oven to 350°F (175°C) and line baking sheets with parchment paper.
- Beat the softened butter and powdered sugar until light and fluffy (2-3 minutes).
- Add egg yolk and vanilla extract, mixing until smooth.
- In another bowl, whisk together flour, cocoa powder, and salt.
- Gradually incorporate the dry ingredients into the wet mixture until a soft dough forms, being careful not to overmix.
- Transfer dough to a piping bag fitted with a large star tip or use a zip-top bag with the corner snipped off.
- Pipe spirals or “hot cocoa cup shapes” onto prepared baking sheets, spacing them about 2 inches apart.
- Bake the cookies for 10-12 minutes or until edges are just set.
- Let cookies cool on the baking sheet for 5 minutes before transferring to a wire rack.
- Once cool, drizzle cookies with melted chocolate and top with mini marshmallows and optional crushed candy canes.
- Allow the chocolate to set before serving.
Notes
Nutrition

Hi, I’m Olivia Parker, the founder of BakingSecret.com and a lifelong lover of all things sweet and homemade. I grew up in a small town in Oregon, where the smell of fresh cookies in my family’s kitchen sparked my passion for baking. Over the years, I turned that passion into a mission: to help home bakers feel confident, inspired, and creative.
After studying food science and working in several artisan bakeries across the U.S., I decided to create a space where everyone from beginners to seasoned bakers can find reliable recipes, expert tips, and a warm, welcoming community. BakingSecret.com is my way of sharing the magic of baking with the world. When I’m not testing new recipes, you’ll find me exploring farmers’ markets, collecting vintage cookbooks, or perfecting my sourdough technique.