
Why This Chocolate Raspberry Delight is a Must-Try
Let me tell you, there’s something magical about rolling up a cake. The first time I made this Chocolate Raspberry Swiss Roll, my kitchen turned into a scene from a rom-com—flour everywhere, sticky fingers, and a lot of giggles. But when I sliced into that soft, chocolatey roll filled with sweet-tart raspberry goodness, it was all worth it. This dessert is like a warm hug wrapped in elegance. Perfect for special occasions or just because, it’s a showstopper that’s easier to make than it looks!
A Little Sweet History
The Swiss roll has been around for ages, but its exact origin is as mysterious as the number of times I’ve licked the bowl while making this recipe. Some say it dates back to Victorian England, while others credit a Swiss baker. Regardless, it’s a timeless classic that’s traveled through kitchens worldwide. My version adds a modern twist with rich cocoa and fresh raspberries. It’s become a family favorite, especially at birthday parties where everyone fights over the last slice.
Why You’ll Love This Recipe
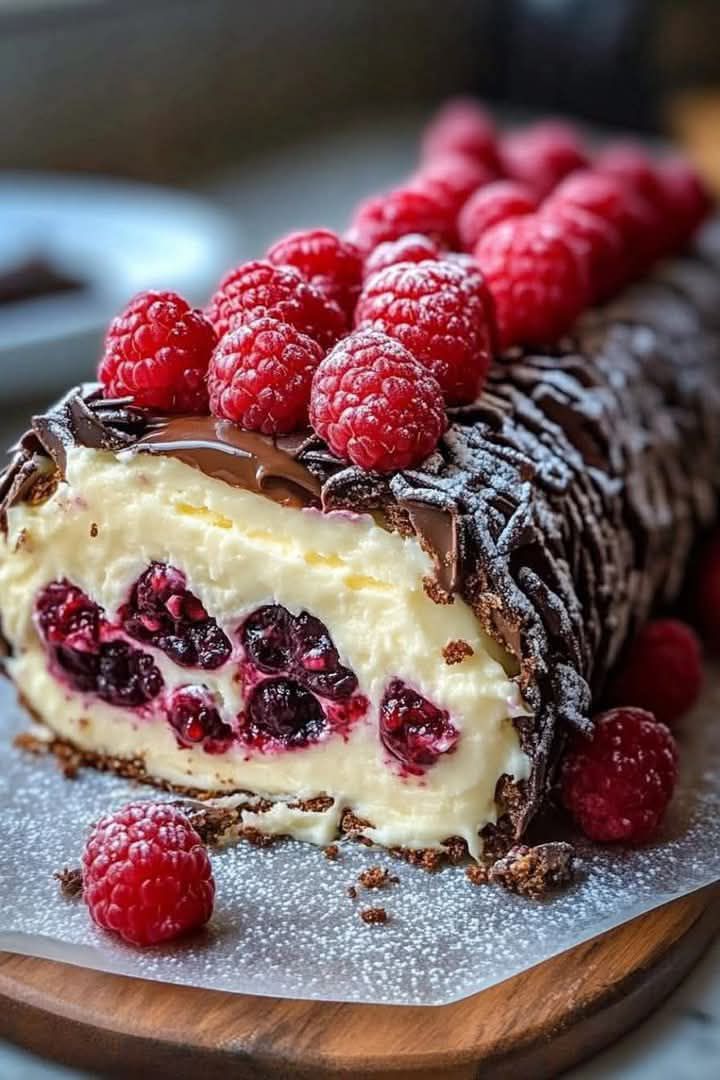
This Chocolate Raspberry Delight is a dream come true. The sponge cake is light and airy, almost melting in your mouth, while the raspberry filling bursts with tangy sweetness. And let’s not forget the whipped cream—it ties everything together like a fluffy cloud. Plus, it’s surprisingly simple to make! Even if you’re new to baking, this recipe will guide you step by step.
Perfect Occasions to Whip Up This Treat
Whether it’s Valentine’s Day, a holiday feast, or just a random Tuesday night craving, this Chocolate Raspberry Swiss Roll fits the bill. Bring it to a potluck, serve it at a bridal shower, or surprise your book club with a slice. Trust me, no one will guess how easy it was to make!
Ingredients
- For the Chocolate Sponge Cake:
- 4 large eggs
- ¾ cup (100g) granulated sugar
- 1 tsp vanilla extract
- ½ cup (65g) all-purpose flour
- ¼ cup (30g) unsweetened cocoa powder
- 1 tsp baking powder
- ¼ tsp salt
- ⅓ cup (60ml) warm water
- For the Raspberry Filling:
- 1½ cups (360g) fresh raspberries (or frozen, thawed)
- ⅓ cup (50g) granulated sugar
- 1 tbsp lemon juice
- 1 tsp cornstarch mixed with 2 tsp cold water (optional, for thickening)
- For the Whipped Cream:
- 1 cup (240ml) heavy cream
- 2 tbsp powdered sugar
- 1 tsp vanilla extract
- For Decoration (optional):
- Extra fresh raspberries
- Chocolate shavings or curls
- Powdered sugar for dusting
Substitution Options
No fresh raspberries? No problem! Use frozen ones or even store-bought raspberry jam. Swap out the heavy cream for coconut cream if you want a dairy-free option. For a gluten-free version, replace the all-purpose flour with almond flour or another gluten-free blend. And if you’re feeling adventurous, try adding a splash of liqueur like Chambord to the filling for an adult twist.
Step 1: Prepare the Chocolate Sponge Cake
Start by preheating your oven to 350°F (175°C). Grease and line a 10×15-inch jelly roll pan with parchment paper. In a mixing bowl, beat the egg yolks and sugar until pale and fluffy—it’s like watching clouds form in a bowl! Add the vanilla extract and mix well. Sift in the flour, cocoa powder, baking powder, and salt, folding gently so the batter stays light. In another bowl, whip the egg whites until they hold soft peaks, then fold them into the batter. Pour the mixture into the pan and spread it evenly. Bake for 12-15 minutes until the cake springs back when touched. Pro tip: Don’t skip the parchment paper—it makes rolling a breeze!
Step 2: Make the Raspberry Filling
In a saucepan, combine the raspberries, sugar, and lemon juice. Cook over medium heat, stirring occasionally, until the berries break down and release their juices—about 5-7 minutes. If you prefer a thicker filling, stir in the cornstarch slurry and cook for another minute or two. Let it cool completely before using. Chef’s tip: Taste the filling as you go and adjust the sugar to balance the tartness.
Step 3: Whip Up the Cream
Chill your mixing bowl and beaters beforehand—it helps the cream whip faster. Beat the heavy cream, powdered sugar, and vanilla extract until stiff peaks form. Imagine fluffy white clouds ready to hug your cake layers. Set aside until assembly time.
Step 4: Assemble the Swiss Roll
Once the cake is cool, unroll it carefully and spread a layer of whipped cream on top. Spoon the cooled raspberry filling over the cream, spreading it evenly. Now comes the fun part: roll the cake back up without the towel, seam-side down. Place it on a serving platter and frost the top with more whipped cream. Garnish with fresh raspberries, chocolate shavings, or a dusting of powdered sugar. Voilà—you’ve got yourself a masterpiece!
Timing
Prep Time: 30 minutes
Cooking Time: 15 minutes
Resting Time: 1 hour (chilling)
Total Time: About 1 hour 45 minutes
Chef’s Secret
If the cake cracks while rolling, don’t panic! A little powdered sugar or extra whipped cream can hide those imperfections. Remember, rustic charm is always in style.
Extra Info
Raspberries are packed with antioxidants, making this dessert not only delicious but also a tiny bit healthy. Fun fact: Raspberries belong to the rose family, which explains their delicate fragrance.
Necessary Equipment
You’ll need a jelly roll pan, parchment paper, a mixing bowl, a whisk or electric mixer, a saucepan, and a spatula. Having a clean kitchen towel handy is also a lifesaver for rolling the cake.
Storage Tips
Store your Chocolate Raspberry Swiss Roll in the fridge, covered with plastic wrap or in an airtight container. It stays fresh for up to two days, though it’s best enjoyed within the first 24 hours. Keep it away from strong-smelling foods to prevent flavor transfer.
If you need to freeze it, wrap it tightly in plastic wrap and foil. Thaw overnight in the fridge before serving. Just note that the texture might change slightly after freezing.
For optimal taste, bring the cake to room temperature for 15-20 minutes before slicing. This allows the flavors to shine and the textures to soften.
Tips and Advice
To avoid a soggy cake, pat the raspberries dry before cooking them. Use a serrated knife to cut clean slices without squishing the roll. And remember, practice makes perfect—don’t be discouraged if your first attempt isn’t flawless.
Presentation Ideas
- Dust the plate with cocoa powder for a dramatic effect.
- Add mint leaves for a pop of color.
- Serve with a drizzle of raspberry coulis or melted chocolate.
Healthier Alternatives
1. Low-Sugar Version: Replace granulated sugar with a sugar substitute like stevia or monk fruit.
2. Gluten-Free Option: Use almond flour instead of all-purpose flour.
3. Vegan Twist: Substitute eggs with flax eggs and use coconut cream for the filling.
4. Protein-Packed: Add a scoop of protein powder to the sponge cake batter.
5. Berry Medley: Mix raspberries with blueberries or strawberries for variety.
6. Nutty Crunch: Fold chopped nuts into the whipped cream for added texture.
Mistake 1: Overmixing the Batter
Overmixing deflates the air bubbles, leaving you with a dense cake. To avoid this, fold the ingredients gently and stop as soon as everything is combined. Pro tip: Use a spatula instead of a whisk for folding.
Mistake 2: Skipping the Parchment Paper
Without parchment paper, the cake sticks to the pan, making rolling nearly impossible. Always line your pan properly—it’s a small step that saves big headaches.
Mistake 3: Rushing the Cooling Process
Rolling the cake while it’s still hot can cause it to tear. Let it cool slightly before rolling, and chill the assembled roll for at least an hour before slicing.
FAQ
Can I use frozen raspberries?
Absolutely! Just thaw and drain them before using to prevent excess moisture in the filling.
How do I keep the cake from cracking?
Roll the cake immediately after baking while it’s still warm. This trains it to hold its shape later.
Can I make this ahead of time?
Yes, you can prepare the components a day in advance and assemble the roll just before serving.
What if I don’t have a jelly roll pan?
Use a rimmed baking sheet of similar size. Adjust the baking time slightly if needed.
Is this recipe kid-friendly?
Definitely! Kids love helping with the rolling and decorating parts.
Can I add alcohol to the filling?
Of course! A splash of Chambord or Grand Marnier adds a sophisticated touch.
How do I fix a cracked roll?
Frost generously with whipped cream—it hides flaws beautifully.
Can I use other berries?
Strawberries or blackberries work wonderfully too.
Why does my whipped cream look grainy?
You might have overwhipped it. Start again with fresh cream and stop whipping once stiff peaks form.
How long can I store leftovers?
Keep leftovers in the fridge for up to two days. Beyond that, the texture may degrade.
Final Thoughts
This Chocolate Raspberry Swiss Roll is more than just a dessert—it’s a celebration of flavors, textures, and creativity. Whether you’re baking for loved ones or treating yourself, it’s sure to bring joy to anyone lucky enough to take a bite. So grab your apron, turn on some music, and let’s get rolling!
Equipment
- Jelly roll pan
- Whisk or electric mixer
- Spatula
- Mixing bowl
- Saucepan
Ingredients
- 4 large eggs
- ¾ cup granulated sugar
- 1 tsp vanilla extract
- ½ cup all-purpose flour
- ¼ cup unsweetened cocoa powder
- 1 tsp baking powder
- ¼ tsp salt
- ⅓ cup warm water
- 1½ cups fresh raspberries or frozen, thawed
- ⅓ cup granulated sugar
- 1 tbsp lemon juice
- 1 tsp cornstarch mixed with 2 tsp cold water (optional, for thickening)
- 1 cup heavy cream
- 2 tbsp powdered sugar
- 1 tsp vanilla extract
Instructions
- Preheat your oven to 350°F (175°C) and line a 10x15-inch jelly roll pan with parchment paper.
- In a bowl, beat the egg yolks and sugar until pale and fluffy, then mix in the vanilla extract.
- Sift in the flour, cocoa powder, baking powder, and salt; fold gently to keep the batter light.
- In another bowl, whip the egg whites until soft peaks form, then fold into the batter.
- Pour the mixture into the pan, spread evenly, and bake for 12-15 minutes until it springs back when touched.
- To make the raspberry filling, combine raspberries, sugar, and lemon juice in a saucepan and cook over medium heat for 5-7 minutes until a thick mixture forms.
- Allow the raspberry filling to cool completely.
- Chill the mixing bowl and beaters, then whip the heavy cream with powdered sugar and vanilla until stiff peaks form.
- Once the cake is cool, spread a layer of whipped cream on top and spoon over the cooled raspberry filling evenly.
- Roll the cake back up, seam-side down, and place it on a serving platter. Frost the top with more whipped cream and garnish as desired.
Notes
Ensure raspberries are dry before cooking to avoid a soggy filling.
Leftovers can be stored in the fridge for up to two days, but it's best enjoyed within the first 24 hours.
For an extra touch, consider adding a splash of liqueur to the filling or trying other berries for variation.
Nutrition

Hi, I’m Olivia Parker, the founder of BakingSecret.com and a lifelong lover of all things sweet and homemade. I grew up in a small town in Oregon, where the smell of fresh cookies in my family’s kitchen sparked my passion for baking. Over the years, I turned that passion into a mission: to help home bakers feel confident, inspired, and creative.
After studying food science and working in several artisan bakeries across the U.S., I decided to create a space where everyone from beginners to seasoned bakers can find reliable recipes, expert tips, and a warm, welcoming community. BakingSecret.com is my way of sharing the magic of baking with the world. When I’m not testing new recipes, you’ll find me exploring farmers’ markets, collecting vintage cookbooks, or perfecting my sourdough technique.