
Why This Strawberry Vanilla Ice Cream Is a Must-Try
Picture this: it’s a warm summer afternoon, and the kids are running around the yard. You step outside with a bowl of homemade Strawberry Vanilla Ice Cream, and suddenly, you’re the hero of the day. This recipe is my go-to for family gatherings because it’s creamy, fruity, and oh-so-refreshing. The combination of sweet strawberries and fragrant vanilla bean is like a hug in dessert form. Trust me, once you try this, store-bought ice cream will feel like a distant memory.
A Little History Behind This Sweet Treat
Ice cream has been around for centuries, but the pairing of strawberries and vanilla feels timeless. Vanilla beans were once so precious that they were reserved for royalty. Strawberries, on the other hand, have always been a symbol of summer. I first made this recipe when my best friend asked me to bring dessert to a barbecue. I wanted something simple yet impressive. After a few tweaks, this Strawberry Vanilla Bean Ice Cream was born. It’s become a staple at every summer party since!
Why You’ll Love This Recipe
This ice cream is all about balance. The rich, silky vanilla custard pairs perfectly with the juicy bursts of strawberry. It’s not overly sweet, making it a crowd-pleaser for both kids and adults. Plus, it’s surprisingly easy to make! No fancy gadgets are required—just a little patience and love. Whether you’re a seasoned home cook or a beginner, this recipe will make you feel like a pro.
Perfect Occasions to Whip Up This Dessert
Summer picnics? Check. Birthday parties? Absolutely. A quiet evening on the porch? You bet. This Strawberry Vanilla Ice Cream is versatile enough for any occasion. I’ve served it at holiday dinners, backyard barbecues, and even as a midnight snack (don’t judge!). It’s also a great way to impress guests without spending hours in the kitchen.
Ingredients
- 2 cups fresh strawberries, hulled and sliced
- 1 cup granulated sugar
- 1 vanilla bean, split and seeds scraped, or 1 tsp vanilla extract
- 2 cups heavy cream
- 1 cup whole milk
- 6 large egg yolks
Substitution Options
If you can’t find fresh strawberries, frozen ones work just fine. For a dairy-free version, swap the heavy cream and whole milk with coconut cream and almond milk. Instead of granulated sugar, try honey or maple syrup for a natural sweetener. And if vanilla beans are out of your budget, vanilla extract is a great alternative.
Step 1: Prep the Strawberries
Start by cooking down those gorgeous red strawberries with sugar and vanilla. As they simmer, your kitchen will fill with the most amazing aroma—like a mix of candy and sunshine. Stir occasionally until the berries soften and release their juices. This step is crucial for building that bold strawberry flavor. Pro tip: Let the mixture cool completely before using it. Patience pays off here!
Step 2: Heat the Cream Mixture
In another saucepan, gently warm the heavy cream and whole milk. Keep the heat low to avoid scorching. You want it to be warm enough to dissolve the flavors but not boiling. Imagine the creamy liquid turning into a blank canvas, ready to absorb all the goodness from the vanilla and eggs. Once it simmers lightly, remove it from the heat and set aside.
Step 3: Make the Custard Base
Now comes the fun part—whisking the egg yolks! Beat them until they’re smooth and slightly thickened. Slowly pour the warm cream mixture into the yolks while whisking constantly. This process, called tempering, ensures the eggs don’t scramble. Picture the yolks transforming into a golden river of custard potential. Chef’s tip: Use a silicone spatula for scraping every last bit of yolk.
Step 4: Thicken the Custard
Pour the custard back into the saucepan and cook over low heat. Stir continuously—it’s like giving the custard a gentle massage. You’ll know it’s ready when it thickens enough to coat the back of a spoon. Think of it as a velvety blanket, wrapping your taste buds in comfort. Be careful not to overcook, or you’ll end up with scrambled eggs instead of ice cream.
Step 5: Strain and Chill
Strain the custard through a fine-mesh sieve to catch any lumps. This step ensures your ice cream will be silky smooth. Transfer it to a clean bowl and let it cool to room temperature before refrigerating. Cooling the custard is key to achieving that perfect texture later. Pro tip: Place plastic wrap directly on the surface to prevent a skin from forming.
Step 6: Churn the Ice Cream
Once chilled, pour the custard into your ice cream maker and churn according to the manufacturer’s instructions. As the ice cream starts to firm up, swirl in the cooled strawberry mixture. Watch as streaks of ruby-red fruit dance through the creamy vanilla base. If you don’t have an ice cream maker, no worries—I’ll share a hack later!
Step 7: Freeze and Serve
Transfer the churned ice cream to an airtight container and freeze for 24 hours. This resting period allows the flavors to meld and the texture to firm up. When you’re ready to serve, scoop it into bowls or cones. Garnish with extra strawberries or a drizzle of syrup for a wow factor. Each bite is pure bliss—creamy, fruity, and utterly satisfying.
Timing
Prep Time: 20 minutes
Cooking Time: 15 minutes
Chilling Time: 2–3 hours
Total Time: About 4 hours, including freezing
Chef’s Secret
For an extra burst of flavor, macerate the strawberries in sugar for 30 minutes before cooking. This draws out their natural juices and intensifies their sweetness. Your taste buds will thank you!
Extra Info
Did you know that vanilla is the second-most expensive spice in the world after saffron? That’s why using real vanilla beans makes such a difference. They add a depth of flavor that extracts simply can’t match.
Necessary Equipment
- Ice cream maker (optional)
- Saucepan
- Fine-mesh sieve
- Whisk
- Airtight container for freezing
Storage
Store your Strawberry Vanilla Ice Cream in an airtight container in the freezer. Make sure the lid seals tightly to prevent freezer burn. For best results, consume within two weeks. After that, the texture may start to change slightly.
To keep the ice cream soft and scoopable, place a piece of parchment paper directly on the surface before sealing the container. This trick helps minimize ice crystals. If the ice cream hardens too much, let it sit at room temperature for 5–10 minutes before serving.
Never store ice cream near strong-smelling foods like onions or garlic. The porous nature of ice cream can absorb odors, ruining its delicate flavor.
Tips and Advice
- Use ripe, in-season strawberries for the best flavor.
- Reserve some diced strawberries to fold in during the last few minutes of churning for added texture.
- If you’re short on time, chill the custard in an ice bath to speed up cooling.
Presentation Tips
- Serve in waffle cones for a playful touch.
- Garnish with fresh mint leaves for a pop of color.
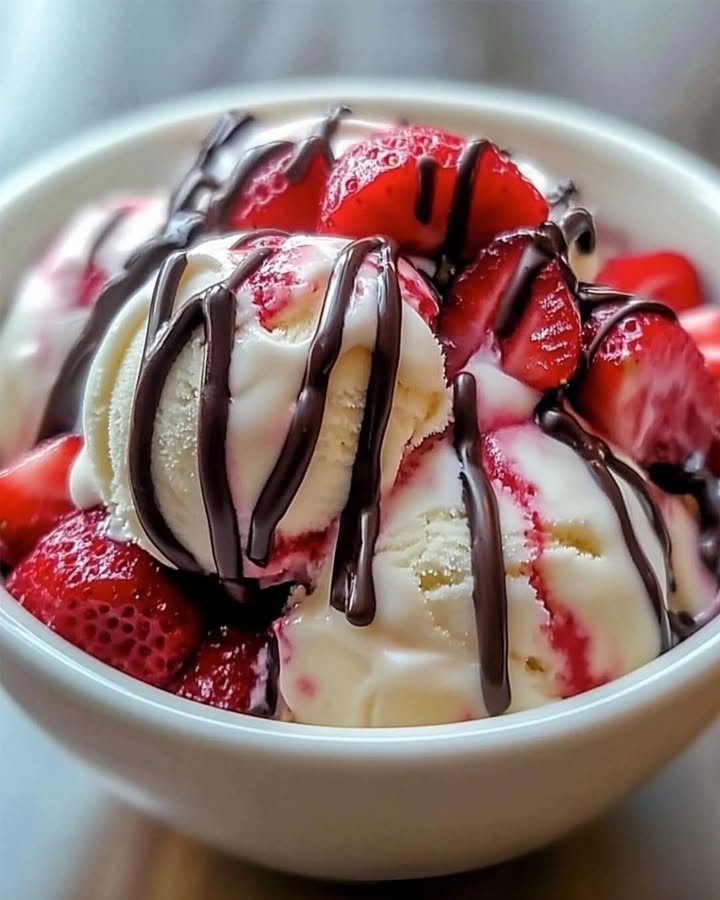
- Drizzle with chocolate syrup or caramel for extra indulgence.
Healthier Alternative Recipes
Looking for lighter options? Try these variations:
- Low-Sugar Version: Replace granulated sugar with a sugar substitute like stevia or monk fruit.
- Dairy-Free Delight: Use coconut cream and almond milk instead of heavy cream and whole milk.
- Protein-Packed Twist: Add a scoop of vanilla protein powder to the custard base.
- No-Churn Option: Whip heavy cream until stiff peaks form, then fold in sweetened condensed milk and strawberries.
- Frozen Yogurt Style: Substitute Greek yogurt for half the cream for a tangy twist.
- Vegan Treat: Use cashew cream and coconut milk for a plant-based delight.
Common Mistakes to Avoid
Mistake 1: Overcooking the Custard
One common error is letting the custard boil, which causes the eggs to curdle. Keep the heat low and stir constantly. If you notice any lumps, strain the mixture through a fine-mesh sieve. Practical tip: Use a thermometer to ensure the custard stays below 180°F.
Mistake 2: Skipping the Chilling Step
Rushing the chilling process can ruin the texture of your ice cream. Always refrigerate the custard until it’s completely cold. This ensures a smooth, creamy result. Practical tip: Plan ahead and prep the custard the night before.
Mistake 3: Not Using Fresh Ingredients
Using old or low-quality ingredients can dull the flavors. Opt for fresh strawberries and real vanilla beans whenever possible. Your taste buds will notice the difference!
FAQ
Can I make this recipe without an ice cream maker?
Absolutely! Pour the mixture into a shallow dish, freeze it, and stir every 30 minutes until set. While it won’t be as smooth as churned ice cream, it’s still delicious.
How long does this ice cream last?
Stored properly, it lasts up to two weeks. However, it tastes best within the first week.
Can I use frozen strawberries?
Yes, thaw them first and drain any excess liquid to avoid a watery texture.
What if I don’t have vanilla beans?
Vanilla extract works well, but for a more intense flavor, consider adding a pinch of vanilla bean paste.
Is this recipe kid-friendly?
Definitely! Kids love helping mash the strawberries and watch the ice cream churn. Just supervise them around hot stoves.
Can I double the recipe?
Yes, but make sure your ice cream maker can handle the larger volume. Otherwise, churn in batches.
How do I prevent ice crystals?
Press parchment paper onto the surface of the ice cream before freezing. This keeps air out and prevents crystals from forming.
Can I add other fruits?
Of course! Try raspberries, blueberries, or peaches for a fun twist.
Why is my ice cream grainy?
Graininess often happens if the sugar isn’t fully dissolved. Make sure to stir the custard thoroughly while cooking.
What’s the best way to serve this ice cream?
Scoop it into bowls or cones and garnish with fresh strawberries or a drizzle of syrup. For a fancy touch, serve it alongside warm brownies or cookies.
Final Thoughts
This Homemade Strawberry Vanilla Bean Ice Cream is a labor of love, but the rewards are worth every minute. With its creamy texture, vibrant flavors, and endless versatility, it’s sure to become a family favorite. So grab those strawberries, fire up your stove, and treat yourself to a scoop (or three) of pure happiness. Happy churning!
Equipment
- Ice Cream Maker optional
- Saucepan
- Fine-mesh sieve
- Whisk
- Airtight container for freezing
Ingredients
- 2 cups fresh strawberries hulled and sliced
- 1 cup granulated sugar
- 1 vanilla bean split and seeds scraped, or 1 tsp vanilla extract
- 2 cups heavy cream
- 1 cup whole milk
- 6 large egg yolks
Instructions
- Cook down the strawberries with sugar and vanilla until soft and juicy, then let cool completely.
- Warm the heavy cream and whole milk in another saucepan without boiling.
- Whisk the egg yolks until smooth, then temper by slowly pouring in the warm cream mixture while whisking.
- Pour the custard back into the saucepan and cook over low heat, stirring continuously until thickened.
- Strain the custard through a fine-mesh sieve into a clean bowl and let cool to room temperature before refrigerating.
- Once chilled, churn the custard in an ice cream maker and swirl in the cooled strawberry mixture.
- Transfer the churned ice cream to an airtight container and freeze for 24 hours before serving.
Notes
Nutrition

Hi, I’m Olivia Parker, the founder of BakingSecret.com and a lifelong lover of all things sweet and homemade. I grew up in a small town in Oregon, where the smell of fresh cookies in my family’s kitchen sparked my passion for baking. Over the years, I turned that passion into a mission: to help home bakers feel confident, inspired, and creative.
After studying food science and working in several artisan bakeries across the U.S., I decided to create a space where everyone from beginners to seasoned bakers can find reliable recipes, expert tips, and a warm, welcoming community. BakingSecret.com is my way of sharing the magic of baking with the world. When I’m not testing new recipes, you’ll find me exploring farmers’ markets, collecting vintage cookbooks, or perfecting my sourdough technique.