
A Decadent Dessert That’s Easier Than You Think
Picture this: it’s a warm summer evening, and you’re hosting friends for dinner. Everyone’s stuffed from the main course, but when you bring out a chilled slice of No-Bake Black Forest Berry Cheesecake, eyes light up like fireworks. This dessert is my go-to showstopper. Why? Because it’s rich, creamy, and bursting with fresh berry goodness—without turning on the oven. Trust me, once you try this decadent berry cheesecake, it’ll become your secret weapon for impressing guests (or treating yourself).
The Story Behind the Sweetness
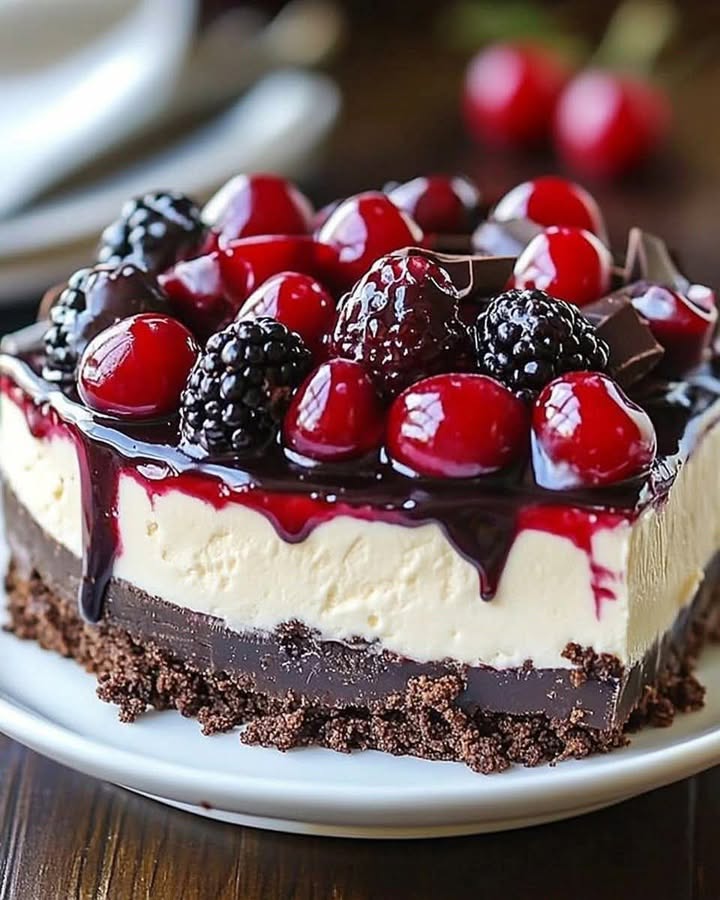
The Black Forest cake hails from Germany, where layers of chocolate sponge, whipped cream, and cherries create pure magic. My version keeps the spirit alive but swaps the sponge for a no-bake chocolate crust and adds a medley of berries for a modern twist. I first made this recipe during a heatwave when baking felt impossible. The result? A hit! Friends couldn’t believe it wasn’t baked—it’s that good.
Why You’ll Love This Recipe
This decadent berry cheesecake is all about balance. The buttery chocolate crust sets the stage, while the velvety cheesecake filling steals the show. Top it off with a glossy berry sauce, and you’ve got a dessert that’s as beautiful as it is delicious. Plus, no oven means less stress. Whether you’re a seasoned baker or a kitchen newbie, this recipe will make you look like a pro.
Perfect Occasions to Whip Up This Dessert
From birthday parties to holiday gatherings, this cheesecake fits right in. It’s perfect for summer barbecues when you want something refreshing yet indulgent. Need a gift for a host? Wrap slices in parchment paper and tie them with ribbon—they’re sure to be a hit. Honestly, even a random Tuesday night deserves a slice of this beauty.
Ingredients
- For the Crust:
- 2 cups chocolate cookie crumbs (about 24 cookies, finely crushed)
- 1/3 cup unsalted butter, melted
- For the Cheesecake Filling:
- 16 oz cream cheese, softened
- 1 cup powdered sugar
- 1 tsp vanilla extract
- 1 1/2 cups heavy whipping cream, cold
- 1/3 cup melted dark chocolate, cooled slightly
- For the Berry Topping:
- 1 1/2 cups mixed berries (cherries, raspberries, and blackberries, fresh or frozen)
- 1/4 cup granulated sugar
- 1 tbsp lemon juice
- 1 tbsp cornstarch mixed with 2 tbsp water
- For Garnish (Optional):
- Chocolate shavings or curls
- Whipped cream
- Fresh berries
Substitution Options
- Swap chocolate cookies for graham crackers if you prefer a lighter crust.
- Use coconut oil instead of butter for a dairy-free option.
- Replace heavy cream with coconut cream for a vegan-friendly filling.
- If fresh berries aren’t available, frozen ones work just fine—just thaw them first.
Step 1: Prepare the Crust
Mixing chocolate cookie crumbs with melted butter feels like playing in mud—but tastier! Press the mixture into your springform pan firmly; think of it as giving the cheesecake a sturdy foundation. Pop it in the freezer while you tackle the filling. Pro tip: Use the bottom of a glass to press the crust evenly—it’s faster and neater.
Step 2: Make the Cheesecake Filling
Beat the cream cheese, powdered sugar, and vanilla until smooth—it should look like clouds in a bowl. In another bowl, whip the heavy cream until stiff peaks form. Folding these two together creates a dreamy texture that’s light yet luxurious. Add the melted chocolate last for a swirl of richness. Spread it over the crust and chill—it’s patience time!
Step 3: Prepare the Berry Topping
Cooking down berries with sugar and lemon juice fills your kitchen with the sweetest aroma. Stir gently so the berries keep their shape. Once thickened, let the topping cool completely before using. Chef’s tip: Taste as you go! Adjust the sugar based on how tart your berries are.
Step 4: Assemble the Cheesecake
After chilling, release the cheesecake from its pan carefully—it’s delicate but worth it. Spoon the cooled berry topping over the top, letting it cascade down the sides. Garnish with chocolate shavings, extra berries, or a dollop of whipped cream. Voilà, you’ve created edible art!
Timing
- Prep Time: 30 minutes
- Cooking Time: 10 minutes (for the berry topping)
- Resting Time: 6+ hours (chilling)
- Total Time: About 7 hours
Chef’s Secret
For an extra wow factor, drizzle melted white chocolate over the finished cheesecake. It adds elegance and pairs beautifully with the dark chocolate crust.
Extra Info
Did you know cherries are packed with antioxidants? They not only taste amazing but also boost your health. Talk about guilt-free indulgence!
Necessary Equipment
- 9-inch springform pan
- Mixing bowls
- Electric mixer or whisk
- Spatula
- Saucepan
Storage
This decadent berry cheesecake keeps well in the fridge for up to 3 days. Cover it tightly with plastic wrap to prevent it from absorbing other flavors. For longer storage, freeze individual slices wrapped in foil—they’ll last up to a month. Thaw overnight in the fridge before serving.
If you’re taking it to a party, transport it in its pan. Keep it chilled until ready to serve. And don’t forget to pack the garnishes separately!
Leftovers? Lucky you! Enjoy a slice straight from the fridge—it’s divine when cold. Or let it sit at room temperature for 10 minutes for a softer texture.
Tips and Advice
- Make sure your cream cheese is truly softened—it blends better.
- Chill your mixing bowl and beaters before whipping cream for fluffier results.
- Don’t rush the chilling process. Patience pays off here!
Presentation Tips
- Serve on a pretty cake stand for maximum impact.
- Add a sprig of mint for a pop of color.
- Drizzle berry sauce around each plate for restaurant-style flair.
Healthier Alternative Recipes
Want to lighten things up? Try these variations:
- Low-Sugar Version: Use monk fruit sweetener instead of sugar.
- Vegan Option: Substitute cream cheese and whipped cream with plant-based alternatives.
- Gluten-Free Twist: Use gluten-free cookies for the crust.
- Protein-Packed: Blend Greek yogurt into the filling for added protein.
- Fruit-Only Topping: Skip the cooked topping and use fresh berries only.
- Nutty Crust: Add crushed almonds or hazelnuts to the crust for crunch.
Mistake 1: Skipping the Chilling Step
Impatience can ruin this cheesecake. Without proper chilling, the filling won’t set, and you’ll end up with a mess. Pro tip: Plan ahead and make it the night before serving.
Mistake 2: Overmixing the Whipped Cream
Overwhipping turns cream into butter—not what we want here. Stop mixing as soon as you see stiff peaks forming.
Mistake 3: Using Warm Chocolate
Adding hot chocolate to the filling can melt the cream cheese mixture. Always let it cool slightly before folding it in.
Mistake 4: Not Pressing the Crust Firmly
A loose crust crumbles easily. Press it down firmly to ensure it holds together when sliced.
FAQ
Absolutely! Store-bought crumbs save time and still deliver great flavor.
How do I prevent the cheesecake from sticking to the pan?
Line the bottom of your springform pan with parchment paper for easy removal.
Can I make the berry topping ahead of time?
Yes! Store it in an airtight container in the fridge for up to 3 days.
What if I don’t have a springform pan?
No worries! Use a regular pie dish, though removing slices might be trickier.
Is this cheesecake kid-friendly?
Kids love it! Just omit the alcohol if adding any optional liqueurs.
Can I double the recipe?
Definitely. Use a larger pan or divide between two smaller ones.
How do I know when the berry topping is thick enough?
It should coat the back of a spoon without dripping too much.
Can I freeze the entire cheesecake?
Yes, but freeze it whole first, then wrap tightly to avoid freezer burn.
What berries work best?
Cherries, raspberries, and blackberries are classic choices, but blueberries or strawberries also shine.
Nope! Toasting isn’t necessary since the crust firms up in the freezer.
Final Thoughts
This No-Bake Black Forest Berry Cheesecake is more than just a dessert—it’s a celebration of flavors, textures, and simplicity. Whether you’re making it for a crowd or just because, it’s guaranteed to bring smiles. So grab those ingredients, roll up your sleeves, and treat yourself to a slice of decadence. Happy baking (or rather, no-baking)!
Equipment
- Mixing bowls
- Electric mixer or whisk
- Spatula
- 9-inch springform pan
- Saucepan
Ingredients
- 2 cups chocolate cookie crumbs (about 24 cookies, finely crushed)
- 1/3 cup unsalted butter melted
- 16 oz cream cheese softened
- 1 cup powdered sugar
- 1 tsp vanilla extract
- 1 1/2 cups heavy whipping cream cold
- 1/3 cup melted dark chocolate cooled slightly
- 1 1/2 cups mixed berries (cherries, raspberries, and blackberries, fresh or frozen)
- 1/4 cup granulated sugar
- 1 tbsp lemon juice
- 1 tbsp cornstarch mixed with 2 tbsp water
Instructions
- Prepare the crust by mixing chocolate cookie crumbs with melted butter and pressing the mixture into a springform pan. Freeze while preparing the filling.
- Make the cheesecake filling by beating cream cheese, powdered sugar, and vanilla until smooth, then whip heavy cream until stiff peaks form. Fold them together and add melted dark chocolate last.
- Prepare the berry topping by cooking mixed berries with sugar and lemon juice, then thicken with cornstarch slurry and cool completely.
- Assemble the cheesecake by spreading the berry topping over the chilled cheesecake and garnish as desired.
Notes
Nutrition

Hi, I’m Olivia Parker, the founder of BakingSecret.com and a lifelong lover of all things sweet and homemade. I grew up in a small town in Oregon, where the smell of fresh cookies in my family’s kitchen sparked my passion for baking. Over the years, I turned that passion into a mission: to help home bakers feel confident, inspired, and creative.
After studying food science and working in several artisan bakeries across the U.S., I decided to create a space where everyone from beginners to seasoned bakers can find reliable recipes, expert tips, and a warm, welcoming community. BakingSecret.com is my way of sharing the magic of baking with the world. When I’m not testing new recipes, you’ll find me exploring farmers’ markets, collecting vintage cookbooks, or perfecting my sourdough technique.