
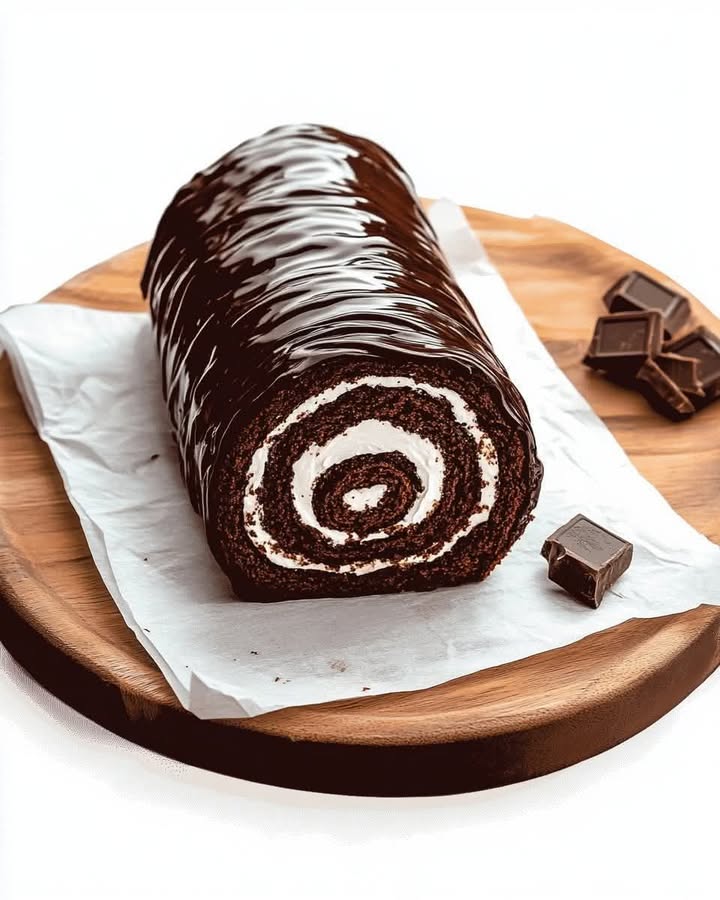
Why This Chocolate Cake Roll Is a Must-Try
Let me tell you a little story. Last Christmas, I decided to try my hand at a Chocolate Cake Roll. My family had always gone for the classic layered cakes, but I wanted something different—something that would make everyone say, “Wow!” Let me just say, this dessert did not disappoint. The rich chocolate flavor paired with a creamy filling was an absolute showstopper. And guess what? It’s easier to make than it looks! Whether you’re a seasoned baker or just starting out, this recipe is a winner.
A Little History of the Chocolate Cake Roll
The Chocolate Cake Roll has its roots in European baking traditions, particularly Swiss and French rolled cakes. These desserts were designed to be both beautiful and practical, perfect for celebrations or afternoon tea. Over time, they became popular in American kitchens, especially during the holidays. I love how this dessert combines old-world charm with modern flair. When I first made it, I felt like I was channeling my inner Julia Child!
Why You’ll Love This Recipe
This Chocolate Cake Roll is all about balance. The cake is light and airy, while the filling—whether you choose whipped cream or ganache—is rich and indulgent. Plus, it’s surprisingly simple to make. No need for fancy equipment or hours of prep. You can whip this up in an afternoon and still have time to relax before your guests arrive. Trust me, once you try it, it’ll become a go-to dessert.
Perfect Occasions for a Chocolate Cake Roll
This dessert is perfect for any celebration. Bring it to a holiday dinner, a birthday party, or even a casual weekend brunch. It’s also a great option for potlucks because it’s easy to slice and share. I once brought this Chocolate Cake Roll to a friend’s housewarming, and it was the star of the dessert table. Everyone loved how elegant it looked and how delicious it tasted.
Ingredients
- For the Chocolate Cake:
- 3/4 cup (95 g) all-purpose flour
- 1/4 cup (25 g) unsweetened cocoa powder
- 1 teaspoon baking powder
- 1/4 teaspoon salt
- 4 large eggs, separated
- 3/4 cup (150 g) granulated sugar, divided
- 1 teaspoon vanilla extract
- 1/4 cup (60 ml) milk
- Powdered sugar for dusting
- For the Filling:
- 1 cup (240 ml) heavy whipping cream
- 2 tablespoons powdered sugar
- 1 teaspoon vanilla extract
- OR 8 oz (225 g) chocolate ganache (optional alternative filling)
- For the Chocolate Glaze (Optional):
- 1/2 cup (120 ml) heavy cream
- 4 oz (115 g) semi-sweet chocolate, chopped
Substitution Options
If you want to switch things up, here are some ideas:
- Use almond milk instead of regular milk for a dairy-free option.
- Swap the whipped cream filling with mascarpone cheese for a tangy twist.
- Replace the semi-sweet chocolate in the glaze with dark chocolate for a richer flavor.
Step 1: Prepare the Pan
Start by preheating your oven to 350°F (175°C). Line a 15×10-inch jelly roll pan with parchment paper. Make sure to grease the paper lightly so the cake doesn’t stick. Pro tip: Dust the greased paper with a bit of flour for extra insurance. This step ensures your Chocolate Cake Roll will come out smoothly later.
Step 2: Make the Chocolate Cake
In a small bowl, whisk together the flour, cocoa powder, baking powder, and salt. In another bowl, beat the egg yolks and half of the sugar until pale and thick—it should look almost like lemon curd. Stir in the vanilla and milk. Now, beat the egg whites until foamy, then gradually add the rest of the sugar. You’ll know it’s ready when stiff peaks form. Fold everything together gently to keep the batter light and airy. Pour it into the pan and spread evenly.
Step 3: Bake
Bake the cake for 10-12 minutes. You’ll know it’s done when the top springs back when touched lightly. While it’s still warm, turn it out onto a kitchen towel dusted with powdered sugar. Peel off the parchment paper and roll the cake tightly with the towel. This helps the cake hold its shape as it cools. Chef’s tip: Don’t skip the rolling step—it’s key to preventing cracks later.
Step 4: Make the Filling
For the whipped cream filling, beat the heavy cream, powdered sugar, and vanilla until stiff peaks form. If you’re using ganache, let it cool until it’s spreadable. Both options are divine, so it’s really up to your mood. Spread the filling evenly over the cooled cake once you unroll it.
Step 5: Assemble the Roll
Carefully re-roll the cake without the towel, starting from the short end. Place it seam-side down on a serving plate. If you’re adding the optional glaze, heat the cream until simmering, pour it over the chopped chocolate, and stir until smooth. Drizzle it over the cake for a glossy finish. Chill the roll for at least an hour before slicing.
Timing
- Prep Time: 20 minutes
- Cooking Time: 12 minutes
- Resting Time: 1 hour
- Total Time: About 1 hour and 30 minutes
Chef’s Secret
To prevent cracks, roll the cake while it’s still warm. The towel acts as a guide, helping the cake “remember” its shape. This trick works like magic every time!
Extra Info
Did you know that rolling cakes dates back to the 19th century? They were often served at tea parties because they were easy to slice and share. Fun fact: The first printed recipe for a rolled cake appeared in an 1852 cookbook!
Necessary Equipment
- Jelly roll pan
- Parchment paper
- Mixing bowls
- Electric mixer
- Kitchen towel
- Spatula
Storage
Store your Chocolate Cake Roll in the fridge, covered with plastic wrap or in an airtight container. It will stay fresh for up to three days. For longer storage, freeze the cake without the glaze. Wrap it tightly in plastic wrap and foil, then thaw overnight in the fridge before serving.
If you’ve added fresh berries to the filling, eat the cake within 24 hours for the best flavor. Berries can release moisture, which might affect the texture.
When reheating slices, pop them in the microwave for 10 seconds. The warmth brings out the chocolate aroma and makes the filling extra creamy.
Tips and Advice
- Don’t overmix the batter—it can make the cake dense.
- Chill the bowl and beaters before whipping the cream for a fluffier result.
- Dust the cake with powdered sugar before rolling to prevent sticking.
Presentation Tips
- Garnish with fresh berries and mint leaves for a pop of color.
- Drizzle melted chocolate or caramel sauce over the top for extra flair.
- Serve slices on individual plates with a dollop of whipped cream.
Healthier Alternative Recipes
Looking for ways to lighten up your Chocolate Cake Roll? Try these variations:
- Gluten-Free: Use almond flour instead of all-purpose flour.
- Low-Sugar: Substitute monk fruit sweetener for granulated sugar.
- Vegan: Replace eggs with flax eggs and use coconut cream for the filling.
- Protein-Packed: Add a scoop of chocolate protein powder to the batter.
- Fruit-Filled: Swap the filling with mashed bananas or pureed raspberries.
- Nutty Twist: Fold chopped nuts into the batter for added crunch.
Mistake 1: Skipping the Rolling Step
Many people skip rolling the cake while it’s warm, thinking it’s unnecessary. But trust me, this step is crucial. Without it, the cake is more likely to crack when you assemble it later. Pro tip: Use a clean kitchen towel and plenty of powdered sugar to make rolling easier.
Mistake 2: Overbaking the Cake
Overbaking makes the cake dry and brittle, which can lead to cracks. Set a timer and check the cake at the 10-minute mark. It’s done when the top springs back when touched lightly. Remember, the cake will continue to cook slightly as it cools.
Mistake 3: Rushing the Chilling Process
Patience is key! Skipping the chilling step can make the cake difficult to slice cleanly. Give it at least an hour in the fridge to set properly. This ensures clean, beautiful slices every time.
FAQ
Can I make this recipe ahead of time?
Absolutely! You can bake the cake a day in advance and store it wrapped in plastic wrap. Just add the filling and glaze before serving.
What’s the best way to cut a Chocolate Cake Roll?
Use a sharp serrated knife and wipe it clean between cuts. This keeps the slices neat and prevents smudging.
Can I freeze this dessert?
Yes, you can freeze the unfilled cake for up to a month. Thaw it overnight in the fridge before assembling.
How do I fix a cracked cake?
No worries! A generous drizzle of chocolate glaze or a dusting of powdered sugar can hide most cracks. Nobody will notice!
Can I use a different pan size?
Stick to the recommended 15×10-inch jelly roll pan. A larger pan will make the cake too thin, while a smaller one will make it too thick.
Is this recipe kid-friendly?
Definitely! Kids love helping with the rolling and decorating steps. Just supervise them around the hot oven.
What if I don’t have parchment paper?
You can grease and flour the pan instead, but parchment paper makes removal much easier. It’s worth investing in a roll!
Can I use store-bought ganache?
Of course! Store-bought ganache saves time and still tastes great. Look for high-quality brands for the best results.
How do I know when the whipped cream is ready?
Whip the cream until it forms stiff peaks. Be careful not to overwhip, or it will turn into butter.
What’s the difference between ganache and whipped cream filling?
Ganache is richer and denser, while whipped cream is light and airy. Choose based on your preference or occasion.
Final Thoughts
This Chocolate Cake Roll is more than just a dessert—it’s a labor of love. From the rich chocolate cake to the creamy filling, every bite is pure bliss. Whether you’re making it for a special occasion or just because, this recipe is sure to impress. So grab your apron, gather your ingredients, and let’s get baking!
Equipment
- Jelly roll pan
- Mixing bowls
- Electric mixer
- Kitchen towel
- Spatula
Ingredients
- 95 g all-purpose flour
- 25 g unsweetened cocoa powder
- 1 tsp baking powder
- 1/4 tsp salt
- 150 g granulated sugar, divided
- 1 tsp vanilla extract
- 60 ml milk
- 240 ml heavy whipping cream
- 2 tablespoons powdered sugar for the filling
- 1 tsp vanilla extract for the filling
- 120 ml heavy cream (for glaze) optional
- 115 g semi-sweet chocolate, chopped for glaze
Instructions
- Preheat your oven to 350°F (175°C) and line a 15x10-inch jelly roll pan with parchment paper, greasing it lightly.
- In a small bowl, whisk together the flour, cocoa powder, baking powder, and salt.
- In another bowl, beat the egg yolks with half the sugar until pale and thick, then stir in the vanilla and milk.
- Beat the egg whites until foamy, then gradually add the remaining sugar until stiff peaks form.
- Gently fold the egg whites into the yolk mixture, then add the flour mixture, folding to keep the batter airy.
- Pour the batter into the prepared pan and spread evenly.
- Bake for 10-12 minutes until the top springs back when touched lightly.
- Turn the cake onto a kitchen towel dusted with powdered sugar and peel off the parchment paper.
- Roll the cake tightly with the towel and let it cool.
- For the filling, beat the heavy cream, powdered sugar, and vanilla until stiff peaks form, or prepare the ganache.
- Once cooled, unroll the cake and spread the filling evenly over it.
- Carefully re-roll the cake without the towel, seam-side down on a serving plate.
- If using, heat the cream for the glaze, pour over chopped chocolate, and stir until smooth; drizzle over the cake.
- Chill the roll for at least an hour before slicing.
Notes
Nutrition

Hi, I’m Olivia Parker, the founder of BakingSecret.com and a lifelong lover of all things sweet and homemade. I grew up in a small town in Oregon, where the smell of fresh cookies in my family’s kitchen sparked my passion for baking. Over the years, I turned that passion into a mission: to help home bakers feel confident, inspired, and creative.
After studying food science and working in several artisan bakeries across the U.S., I decided to create a space where everyone from beginners to seasoned bakers can find reliable recipes, expert tips, and a warm, welcoming community. BakingSecret.com is my way of sharing the magic of baking with the world. When I’m not testing new recipes, you’ll find me exploring farmers’ markets, collecting vintage cookbooks, or perfecting my sourdough technique.