
Why This No-Bake Orange Cheesecake is a Must-Try
Picture this: It’s a warm summer afternoon, and you’re craving something sweet, creamy, and refreshing. That’s when I stumbled upon this No-Bake Orange Cheesecake, and let me tell you—it’s been a game-changer in my kitchen! With its zesty citrus kick and melt-in-your-mouth texture, this dessert has quickly become a family favorite. Whether it’s for a casual get-together or a fancy dinner party, this cheesecake never fails to impress.
A Little History Behind the Magic
This recipe reminds me of those classic creamsicle popsicles we all loved as kids. You know, the ones with that perfect balance of tangy orange and creamy vanilla? Well, this No-Bake Orange Cheesecake takes that nostalgia to the next level. It’s like a grown-up version of your childhood treat but with a touch of elegance. The no-bake method isn’t just convenient—it also keeps the flavors fresh and vibrant, making it a modern twist on traditional cheesecakes.
Why You’ll Fall in Love with This Recipe
First off, this cheesecake is ridiculously easy to make. No oven? No problem! Plus, the combination of orange juice and zest adds a burst of sunshine to every bite. The creamy filling paired with the buttery graham cracker crust is pure bliss. And did I mention it’s perfect for hot days? Since it’s chilled, it’s light and refreshing—a total crowd-pleaser!
Perfect Occasions for This Cheesecake
This No-Bake Orange Cheesecake is versatile enough for any occasion. Serve it at a summer BBQ, bring it to a potluck, or whip it up for a cozy family dessert night. It’s also a hit during holidays like Easter or Mother’s Day when citrus flavors are in season. Honestly, you don’t even need a special event—sometimes, treating yourself is reason enough!
Ingredients You’ll Need
- For the crust:
- 2 cups graham cracker crumbs
- 1/2 cup unsalted butter, melted
- 1/4 cup granulated sugar
- For the filling:
- 24 oz (680g) cream cheese, softened
- 1 cup powdered sugar
- 1 teaspoon vanilla extract
- 1/2 cup orange juice
- Zest of 1 orange
- 1 cup whipped cream
- Orange food coloring (optional)
- For decoration:
- Whipped cream
- Orange slices
- Orange zest
Substitution Options
If you’re out of certain ingredients, don’t worry! Here are some swaps:
- Use digestive biscuits instead of graham crackers for the crust.
- Swap margarine for butter if needed.
- Replace orange juice with lemon or lime juice for a different citrus twist.
- Use coconut cream instead of whipped cream for a dairy-free option.
Step 1: Prepare the Crust
Start by mixing your graham cracker crumbs, melted butter, and sugar in a bowl. The mixture should resemble wet sand—it’s so satisfying to see it come together! Press this into the bottom of a 9-inch springform pan. Make sure it’s packed tightly; this will be the sturdy base that holds all that creamy goodness. Chill the crust in the fridge while you work on the filling. Pro tip: Use the back of a spoon or a flat-bottomed glass to press the crust evenly.
Step 2: Prepare the Filling
In a large bowl, beat the softened cream cheese until it’s smooth and lump-free. Add powdered sugar and vanilla extract, mixing until everything is well combined. This step is crucial because a smooth filling means a silky final product. Imagine the creamy texture melting in your mouth—it’s worth the effort!
Step 3: Add Orange Flavor
Now comes the fun part: adding the orange juice and zest. Gradually pour in the juice while mixing, and watch how the color brightens. If you want a more vibrant look, add a drop or two of orange food coloring. The aroma of fresh orange zest will fill your kitchen—it’s like sunshine in a bowl!
Step 4: Incorporate Whipped Cream
Gently fold in the whipped cream until fully incorporated. Be careful not to overmix—you want to keep that airy texture. Picture fluffy clouds blending into your creamy orange mixture. Chef’s tip: Chill your mixing bowl before whipping the cream for extra stability.
Step 5: Assemble the Cheesecake
Pour the filling over the chilled crust and spread it evenly. Smooth the top with a spatula for a professional finish. Pop it in the fridge for at least 4 hours—or overnight if you can wait that long. Trust me, patience pays off here!
Step 6: Decorate
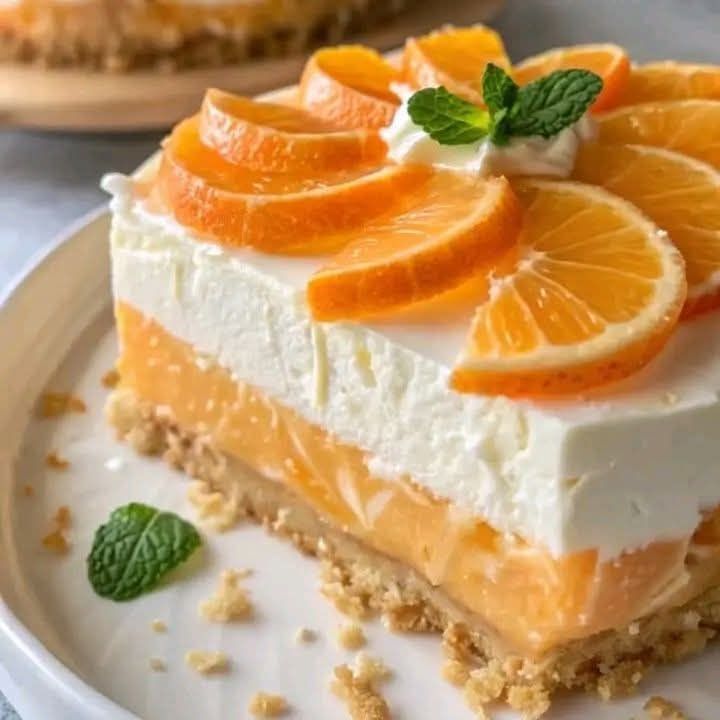
Once set, remove the cheesecake from the pan and get creative with decorations. Dollop whipped cream around the edges, arrange orange slices on top, and sprinkle some zest for a pop of color. It’s like giving your dessert a little makeover!
Step 7: Serve
Slice and serve chilled. Each bite will transport you to a sunny orchard. Enjoy your No-Bake Orange Cheesecake guilt-free—it’s worth every calorie!
Timing Breakdown
Prep time: 20 minutes
Chilling time: 4 hours
Total time: Approximately 4 hours and 20 minutes
Chef’s Secret
To enhance the orange flavor, let the zest sit with the sugar for a few minutes before mixing. This process releases the essential oils, intensifying the citrus aroma.
Extra Info
Did you know that oranges are one of the most popular fruits worldwide? Their juicy sweetness makes them a staple in desserts, drinks, and savory dishes alike. Fun fact: Oranges are believed to have originated in Southeast Asia thousands of years ago!
Necessary Equipment
- 9-inch springform pan
- Mixing bowls
- Electric mixer or whisk
- Spatula
- Zester or grater
Storage Tips
This No-Bake Orange Cheesecake stores beautifully in the fridge. Cover it tightly with plastic wrap or transfer slices to an airtight container. It stays fresh for up to 3 days, though I doubt it’ll last that long!
If you live in a warm climate, avoid leaving the cheesecake out for too long. The creamy filling can soften quickly at room temperature.
For longer storage, freeze individual slices wrapped in parchment paper and placed in a freezer-safe bag. They’ll keep for up to a month. Just thaw in the fridge before serving.
Tips and Advice
Here are a few pointers to elevate your cheesecake:
- Make sure your cream cheese is truly softened for a lump-free filling.
- Don’t skip chilling the crust—it helps it hold its shape.
- Experiment with other citrus fruits like lemon or lime for variety.
Presentation Ideas
- Garnish with edible flowers for a touch of elegance.
- Serve slices on colorful plates for a festive vibe.
- Add a drizzle of chocolate sauce for contrast.
Healthier Alternatives
Looking to lighten things up? Try these variations:
- Low-Sugar Version: Use a sugar substitute like stevia or monk fruit.
- Vegan Option: Substitute cream cheese with cashew-based cream cheese.
- Gluten-Free: Swap graham crackers for gluten-free cookies.
- Lightened-Up: Replace whipped cream with Greek yogurt.
- Dairy-Free: Use coconut cream and dairy-free margarine.
- Fruit Swirl: Mix in pureed mango or passionfruit for extra flavor.
Common Mistakes to Avoid
Mistake 1: Skipping the Chilling Time
Rushing the chilling process can result in a soft, un-set cheesecake. Patience is key here. Let it chill for at least 4 hours to achieve the perfect texture. Pro tip: Plan ahead and make it the night before serving.
Mistake 2: Overmixing the Filling
Overmixing can deflate the whipped cream, leaving your filling dense instead of light and airy. Fold gently and stop as soon as everything is combined.
Mistake 3: Using Stale Graham Crackers
Old crackers won’t give you the same buttery crunch. Always check the expiration date or toast them lightly to refresh their flavor.
FAQ
Can I use store-bought whipped cream?
Absolutely! Store-bought whipped cream works great if you’re short on time. Just make sure it’s fresh and not overly sweetened.
How do I prevent cracks in my cheesecake?
Since this is a no-bake recipe, cracking isn’t usually an issue. However, ensure your filling is smooth and evenly spread to avoid uneven settling.
Can I make this ahead of time?
Yes! In fact, making it a day in advance gives the flavors time to meld. Store it in the fridge until ready to serve.
What if I don’t have a springform pan?
You can use a regular pie dish, though removing slices might be trickier. Line it with parchment paper for easier removal.
Is this cheesecake kid-friendly?
Definitely! Kids love the creamy texture and citrusy flavor. Plus, it’s fun to decorate together.
Can I double the recipe?
Of course! Simply double all ingredients and use a larger pan or two smaller ones.
How do I know when it’s set?
The cheesecake should feel firm to the touch and slice cleanly. If it’s still too soft, chill it longer.
Can I freeze leftovers?
Yes, freezing works well. Wrap slices individually and thaw in the fridge before enjoying.
What tools do I need?
A springform pan, electric mixer, and zester are essential for this recipe.
Can I add alcohol to the filling?
For an adult twist, try adding a splash of Grand Marnier or Cointreau for extra depth.
Final Thoughts
This No-Bake Orange Cheesecake is proof that simple recipes can create extraordinary moments. Whether you’re baking for loved ones or treating yourself, this dessert is sure to bring smiles all around. So grab those ingredients, channel your inner chef, and enjoy the magic of citrus-infused indulgence!
Equipment
- Mixing bowls
- Electric mixer or whisk
- Spatula
- 9-inch springform pan
- Zester or grater
Ingredients
- 2 cups graham cracker crumbs
- 1/2 cup unsalted butter, melted
- 1/4 cup granulated sugar
- 24 oz cream cheese, softened
- 1 cup powdered sugar
- 1 teaspoon vanilla extract
- 1/2 cup orange juice
- 1 unit orange, zest of 1 orange
- 1 cup whipped cream
- orange food coloring (optional)
Instructions
- Mix graham cracker crumbs, melted butter, and sugar in a bowl and press into the bottom of a 9-inch springform pan. Chill the crust.
- In a large bowl, beat softened cream cheese until smooth and lump-free. Add powdered sugar and vanilla extract and mix until combined.
- Gradually add orange juice and zest to the cream cheese mixture, mixing until combined. Add food coloring if desired.
- Gently fold in whipped cream until fully incorporated to maintain airy texture.
- Pour the filling over the chilled crust and spread evenly. Chill for at least 4 hours or overnight.
- Once set, decorate with whipped cream, orange slices, and orange zest.
- Slice and serve chilled.
Notes
Nutrition

Hi, I’m Olivia Parker, the founder of BakingSecret.com and a lifelong lover of all things sweet and homemade. I grew up in a small town in Oregon, where the smell of fresh cookies in my family’s kitchen sparked my passion for baking. Over the years, I turned that passion into a mission: to help home bakers feel confident, inspired, and creative.
After studying food science and working in several artisan bakeries across the U.S., I decided to create a space where everyone from beginners to seasoned bakers can find reliable recipes, expert tips, and a warm, welcoming community. BakingSecret.com is my way of sharing the magic of baking with the world. When I’m not testing new recipes, you’ll find me exploring farmers’ markets, collecting vintage cookbooks, or perfecting my sourdough technique.