
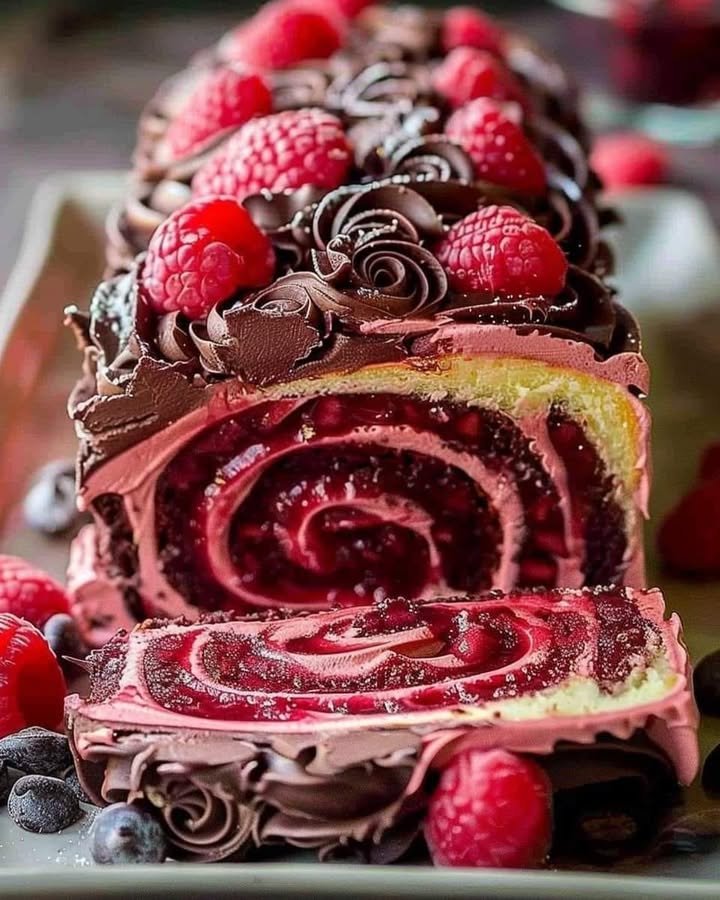
Picture-Perfect: The Ultimate Chocolate and Strawberry Dream
You know that feeling when you crave something truly special? Not just a nibble, but a full-on, fork-clinking, eyes-rolling-back moment of bliss. That’s what this Decadent Chocolate Strawberry Delight is all about. I created this towering beauty for my mom’s birthday last year, and let me tell you, it was pure love at first bite. The rich, fudgy layers, the sweet-tart strawberry surprise in the middle, and that creamy chocolate buttercream… it’s the kind of cake that makes people ask, “You MADE this?!” Let’s make some magic, shall we?
From Simple Snack to Show-Stopping Gâteau
The marriage of chocolate and strawberry isn’t new. Think about it—some of the best treats, like a simple chocolate-dipped strawberry, are built on this perfect combination! Our version elevates that classic duo into a grand layer cake. It takes the familiar comfort of a rich chocolate cake and layers it with a fresh, homemade strawberry compote. This isn’t just a cake; it’s a celebration of textures and tastes. It’s the modern upgrade for when a simple brownie just won’t do.
Why You’ll Fall for This Decadent Chocolate Strawberry Delight
This recipe is a winner in my book for three big reasons. First, it’s incredibly show-offy but secretly straightforward. The batter comes together like a dream. Second, the flavor balance is *everything*. The deep, dark chocolate cake perfectly cuts through the bright, sweet strawberry filling. And third? You can make it your own. Don’t have a certain pan? No problem. We’ll talk about swaps and tricks. It’s the perfect project for a weekend afternoon that ends in the best kind of reward.
When to Bring Out This Showstopper
This cake was born for celebration. It’s your secret weapon for birthdays, anniversaries, Mother’s Day, or a fancy “just because” Sunday dinner. It even shines as the grand finale for a Valentine’s Day meal. Honestly, I’ve also been known to bake the layers just for us at home. We’ll snack on one layer plain and build the other into the full masterpiece. No special occasion is really needed when cake is on the table.
What You’ll Need
For the Chocolate Cake:
- 1 ¾ cups all-purpose flour
- 1 ½ cups sugar
- ¾ cup unsweetened cocoa powder
- 1 ½ tsp baking powder
- 1 ½ tsp baking soda
- 1 tsp salt
- 2 large eggs
- 1 cup whole milk
- ½ cup vegetable oil
- 2 tsp vanilla extract
- 1 cup boiling water
For the Strawberry Filling:
- 2 cups fresh strawberries, hulled and sliced
- ⅓ cup sugar
- 2 tbsp cornstarch
- 2 tbsp water
For the Chocolate Buttercream Frosting:
- 1 cup unsalted butter, softened
- 3 cups powdered sugar
- ½ cup unsweetened cocoa powder
- 2-3 tbsp heavy cream
- 1 tsp vanilla extract
No Problem! Easy Ingredient Swaps
Ran out of something? Let’s get creative:
- Milk: Any milk you have works—2%, almond, or oat milk.
- Cocoa Powder: Dutch-processed or natural will both work beautifully here.
- Strawberry Filling: You can use frozen strawberries in a pinch. No need to thaw, just add a few extra minutes to the cooking time.
- Buttercream: If you’re short on heavy cream, whole milk or even a splash of strawberry juice can thin the frosting.
Creating Your Decadent Chocolate Strawberry Delight
Step 1: Bake the Perfect Chocolate Cake Layers
Start by heating your oven to 350°F (175°C). Grease and flour two 9-inch round cake pans. This little step is like insurance for a clean release later. In a large bowl, whisk together the flour, sugar, cocoa, baking powder, baking soda, and salt. You’ll see a beautiful, rich brown powder form. Add the eggs, milk, oil, and vanilla. Mix with an electric mixer on medium until the batter is smooth and silky. Now, slowly pour in the boiling water. The batter will become thin—this is what makes the cake so incredibly moist! Divide the batter evenly between your pans. Bake for 30-35 minutes. Pro tip: The cake is done when a toothpick poked in the center comes out with just a few moist crumbs, not wet batter. Let the cakes cool completely in the pans before you try to remove them.
Step 2: Cook Up the Luscious Strawberry Filling
While the cakes cool, let’s make the fruity heart of our cake. In a medium saucepan, combine the strawberries, sugar, cornstarch, and water. Turn the heat to medium and stir it all together. As it heats up, the strawberries will start to break down and let out their juices. Keep stirring! The mixture will bubble and thicken into a gorgeous, glossy, jammy filling. This usually takes about 5-7 minutes. Take it off the heat and let it cool completely. It will thicken even more as it sits.
Step 3: Whip Up the Silky Chocolate Buttercream
Time for the frosting, the crowning glory! In a large bowl, beat the softened butter with an electric mixer for 2-3 minutes until it’s pale and creamy. Gradually add the powdered sugar and cocoa powder, mixing on low at first so you don’t get a sugar cloud in your kitchen! Add the vanilla and 2 tablespoons of heavy cream. Beat it all on high speed for another 2-3 minutes. The frosting will become light, fluffy, and dreamily spreadable. If it seems too thick, add more cream, a teaspoon at a time.
Step 4: Assemble Your Masterpiece
This is the fun part! Place one cooled cake layer on your serving plate. Spread the completely cooled strawberry filling over the top, leaving just a small border around the edge. Gently place the second cake layer on top. Now, use an offset spatula or a butter knife to frost the entire outside of the cake with your chocolate buttercream. Don’t worry about it being perfect—a rustic, swoopy look is full of charm!
Step 5: Decorate and Serve with Pride
Now for the final touches. I love to crown the top with a ring of fresh, whole strawberries. You could also add chocolate shavings, a drizzle of leftover strawberry filling, or a sprinkle of edible gold dust. Use a long, sharp knife to slice it. Wipe the knife clean between cuts for perfect pieces. Serve it up and get ready for the compliments to roll in!
Chef’s tip: For super clean slices, pop the frosted cake in the fridge for 20-30 minutes before you cut into it. This firms everything up beautifully.
Timing is Everything
- Prep Time: 30 minutes
- Bake Time: 35 minutes
- Cooling Time: 1 hour (this is crucial!)
- Frosting & Assembly Time: 20 minutes
- Total Time: About 2 hours 30 minutes
The Secret to Unbeatable Moisture
Here’s my little secret weapon: the boiling water. Adding hot liquid to the cake batter does two magical things. First, it “blooms” the cocoa powder, deepening its chocolate flavor intensely. Second, it helps create an ultra-tender, moist crumb that stays that way for days. Don’t be scared by the thin batter—it’s the key to a cake so good, you won’t need a glass of milk.
A Berry Fun Fact
Did you know that strawberries are the only fruit with seeds on the outside? Each berry can have about 200 tiny seeds! While they add a delightful texture to our filling, they’re also packed with fiber and vitamin C, boosting the nutrient density of this indulgent treat. It’s a little dose of sunshine in every slice.
Your Baking Toolbox
You don’t need fancy gear for this. Here’s the essentials:
- Two 9-inch round cake pans
- Mixing bowls (large and medium)
- Electric hand mixer or stand mixer
- Whisk and spatulas
- Medium saucepan
- Cooling rack (or your stovetop works!)
- Offset spatula or butter knife for frosting
How to Keep Your Cake Fresh and Fabulous
If, by some miracle, you have leftovers, you can store this cake at room temperature for up to one day. Cover it loosely with a cake dome or an overturned bowl to protect it.
For longer storage, the refrigerator is your best friend. The cake will stay fresh and moist for 3-4 days. Just make sure it’s in an airtight container or tightly wrapped in plastic wrap so it doesn’t pick up any fridge smells.
You can also freeze the unfrosted cake layers individually! Wrap each cooled layer tightly in plastic wrap and then in foil. They’ll keep for up to 3 months. Thaw overnight in the fridge, then frost and fill as usual.
More Tips for Baking Bliss
- Room Temp is Key: Bring your eggs, milk, and butter to room temperature. This helps everything blend together smoothly for a uniform texture.
- Measure Flour Right: Spoon the flour into your measuring cup and level it off. Don’t scoop directly from the bag—you’ll pack in too much and get a dry cake.
- Cool the Cakes Completely: I can’t stress this enough. A warm cake will melt the filling and make the frosting a runny mess. Patience pays off.
Style It Your Way
Presentation is half the fun! Try these ideas:
- Create a “naked cake” look by scraping off most of the frosting to reveal the layers.
- Add a white chocolate drip down the sides for extra drama.
- Arrange the fresh strawberries in a beautiful rosette pattern on top.
- Use a piping bag with a star tip to make decorative swirls of frosting around the top edge.
Explore More Cake Adventures
If you loved this creation, you’re in for a treat exploring more decadent cakes and cupcakes on the site. It’s my go-to source for inspiration when I want to try something new. Speaking of inspiration, if you’re craving that same chocolate-strawberry magic in a different form, you must try our incredible Chocolate Strawberry Cheesecake. It’s a creamy, dreamy alternative. And for nights when you need a cozy, no-fuss treat, this Slow Cooker Chocolate Pecan Turtles recipe is a lifesaver. For a tropical twist, a slice of Pineapple Mango Heavenly Cake is pure sunshine. And when only the ultimate chocolate fix will do, these individual Molten Chocolate Cakes are surefire showstoppers.
Common Mistakes to Avoid
Mistake 1: Adding the Strawberry Filling While It’s Warm
This is the biggest trap! That beautiful, glossy strawberry filling is hot when it comes off the stove. If you spread it on a cake layer right away, it will turn your cake soggy and make the frosting slide right off. Always, always let the filling cool completely to room temperature. You can even pop it in the fridge to speed things up. A cool, thick filling stays put and creates perfect layers.
Mistake 2: Overmixing the Cake Batter
Once you add the dry ingredients to the wet, you want to mix just until everything is combined. Overmixing, especially with an electric mixer, develops the gluten in the flour. This can lead to a tough, dense cake instead of a soft, tender crumb. When you add the boiling water, mix gently by hand with a spatula just until the batter is uniform. It’s okay if it’s thin!
Mistake 3: Not Letting the Cake Layers Cool Completely
I know it’s tempting to rush. You want to see the final product! But frosting a warm cake is a recipe for disaster. The heat will melt the butter in your frosting, making it greasy, thin, and nearly impossible to work with. It can also cause the layers to slide apart. Let the cakes cool in their pans for 10 minutes, then turn them out onto a wire rack to cool all the way through. Touch the top—it should feel completely cool.
Mistake 4: Using Cold Butter for the Frosting
Cold, hard butter will never become light and fluffy. It will make your frosting lumpy and difficult to spread. Your butter should be softened to room temperature. To test, gently press your finger into the stick. It should make an indentation easily but shouldn’t be melted or oily. This usually takes about 30-60 minutes on the counter, depending on your kitchen’s warmth.
Your Questions, Answered
Can I make this cake a day ahead?
Absolutely, and it might even taste better! You can bake the cake layers and make the filling the day before. Wrap the cooled cake layers tightly in plastic wrap and store them at room temperature. Keep the filling in a sealed container in the fridge. The next day, make your frosting, let the filling come to room temperature, and assemble. This “staged” approach makes the whole process feel much easier and is perfect for entertaining.
My frosting is too thick. What can I do?
Don’t worry, this is an easy fix! A too-thick frosting is usually just in need of more liquid. Add a tiny bit more heavy cream or milk, just one teaspoon at a time. Beat it well after each addition until you reach your desired spreadable consistency. Be patient—it’s easy to add more liquid, but you can’t take it out.
Can I use cake mix instead of making it from scratch?
You sure can. To keep the spirit of the recipe, use a devil’s food or dark chocolate cake mix. Follow the box directions, but consider adding that extra teaspoon of vanilla extract for a homemade touch. The real star will still be your homemade strawberry filling and chocolate buttercream. It’s a great shortcut for a busy day.
Why did my strawberry filling turn out runny?
A runny filling usually means the cornstarch didn’t get activated properly. Make sure you’re cooking it over medium heat and stirring constantly until it comes to a full boil and thickens. The mixture needs to bubble for about a minute to “cook” the starch. Also, letting it cool completely is part of the thickening process, so be patient.
Can I use frozen strawberries?
Yes, frozen strawberries work perfectly. There’s no need to thaw them first—just add them frozen to the saucepan. You may need to cook the filling for a couple of extra minutes since they’ll release more water as they thaw in the pan. The end result will be just as delicious.
How do I get my cake layers flat instead of domed?
A slight dome is normal, but for flat layers, try using cake strips. You soak fabric strips in water, wrap them around the outside of the cake pans, and they help the cake bake evenly. If you don’t have them, you can also gently press down the dome with your hands after the cakes have cooled for about 10 minutes, using a towel to protect your fingers.
What’s the best way to hull strawberries?
You can buy a special huller, but a simple straw works wonders! Push the straw through the bottom tip of the strawberry up through the stem and leafy top. The core and leaves will pop right out. It’s fast, easy, and wastes very little of the berry.
My cakes stuck to the pan. How can I prevent this?
A good prep is key. After greasing the pan with butter or shortening, add a tablespoon of flour. Shake and tilt the pan until the flour coats every greased surface, then tap out the excess. This “grease and flour” method creates a non-stick barrier. Also, let the cakes cool in the pan for the full 10 minutes before turning them out.
Is there a dairy-free version of this recipe?
You can definitely make swaps! Use your favorite non-dairy milk (like almond or oat) in the cake and a plant-based butter in the frosting. For the heavy cream in the frosting, a full-fat canned coconut cream is a great substitute. The texture and flavor will be just a little different, but still wonderfully decadent.
Can I turn this into cupcakes?
This recipe makes fantastic cupcakes! Fill lined cupcake tins about 2/3 full. Bake at 350°F for 18-22 minutes. Let them cool completely. To fill them with strawberry goodness, use a small spoon or a cupcake corer to remove a bit of the center from the top of each cupcake. Spoon in some cooled strawberry filling, then frost with the chocolate buttercream on top.
Go Ahead, Take a Slice of Joy
There you have it—my all-time favorite Decadent Chocolate Strawberry Delight. It’s a labor of love that fills your kitchen with the best smells and your table with happy faces. Remember, baking is about the joy of creating something delicious, not perfection. So even if your layers aren’t perfectly even or your frosting is a little rustic, it will taste incredible because you made it. Now, go preheat that oven and treat yourself to a slice of pure happiness. You deserve it! Don’t forget to share your beautiful creations—and save a piece for the baker.
Equipment
- Deux moules à gâteau de 9 pouces
- Grand bol
- Fouet
- Spatule
- Papier sulfurisé
Ingredients
- 1 ¾ tasse farine tout usage
- 1 ½ tasse sucre
- ¾ tasse cacao en poudre non sucré
- 1 ½ cuil. à café poudre à lever
- 1 ½ cuil. à café bicarbonate de soude
- 1 cuil. à café sel
- 1 tasse lait entier
- ½ tasse huile végétale
- 2 cuil. à café extrait de vanille
- 1 tasse eau bouillante
Instructions
- Préchauffez le four à 175°C (350°F) et graissez ou farinez deux moules à gâteau de 9 pouces.
- Mélangez la farine, le sucre, le cacao, la poudre à lever, le bicarbonate de soude et le sel dans un grand bol.
- Ajoutez les œufs, le lait, l'huile et l'extrait de vanille; mélangez avec un batteur électrique jusqu'à obtenir un mélange lisse.
- Versez lentement l'eau bouillante et mélangez jusqu'à ce que le tout soit homogène (la pâte sera liquide).
- Divisez la pâte entre les moules préparés et faites cuire pendant 30-35 minutes ou jusqu'à ce qu'un cure-dent en ressorte avec des miettes humides.
- Laissez les gâteaux refroidir complètement dans les moules.
- Dans une casserole moyenne, combinez les fraises, le sucre, la fécule de maïs et l'eau; faites chauffer à feu moyen tout en remuant jusqu'à épaississement (environ 5-7 minutes). Laissez refroidir complètement.
- Battez le beurre ramolli dans un grand bol pendant 2-3 minutes jusqu'à obtenir une consistance crémeuse.
- Ajoutez progressivement le sucre en poudre et le cacao, en mélangeant à basse vitesse, puis ajoutez la vanille et la crème épaisse. Battez jusqu'à ce que le mélange soit léger et aéré, en ajoutant plus de crème si nécessaire pour l'étalement.
- Assemblez le gâteau en plaçant une couche sur un plat de service, recouvrez de garniture aux fraises, puis ajoutez la seconde couche.
- Gâteau glacer l'extérieur avec le beurre au chocolat en utilisant une spatule décalée.
- Décorez avec des fraises fraîches ou des copeaux de chocolat selon vos envies.
- Pour des tranches plus propres, réfrigérez le gâteau pendant 20-30 minutes avant de servir.
Notes
Nutrition

Hi, I’m Olivia Parker, the founder of BakingSecret.com and a lifelong lover of all things sweet and homemade. I grew up in a small town in Oregon, where the smell of fresh cookies in my family’s kitchen sparked my passion for baking. Over the years, I turned that passion into a mission: to help home bakers feel confident, inspired, and creative.
After studying food science and working in several artisan bakeries across the U.S., I decided to create a space where everyone from beginners to seasoned bakers can find reliable recipes, expert tips, and a warm, welcoming community. BakingSecret.com is my way of sharing the magic of baking with the world. When I’m not testing new recipes, you’ll find me exploring farmers’ markets, collecting vintage cookbooks, or perfecting my sourdough technique.