
My Secret to the Ultimate Strawberry Cheesecake Delight
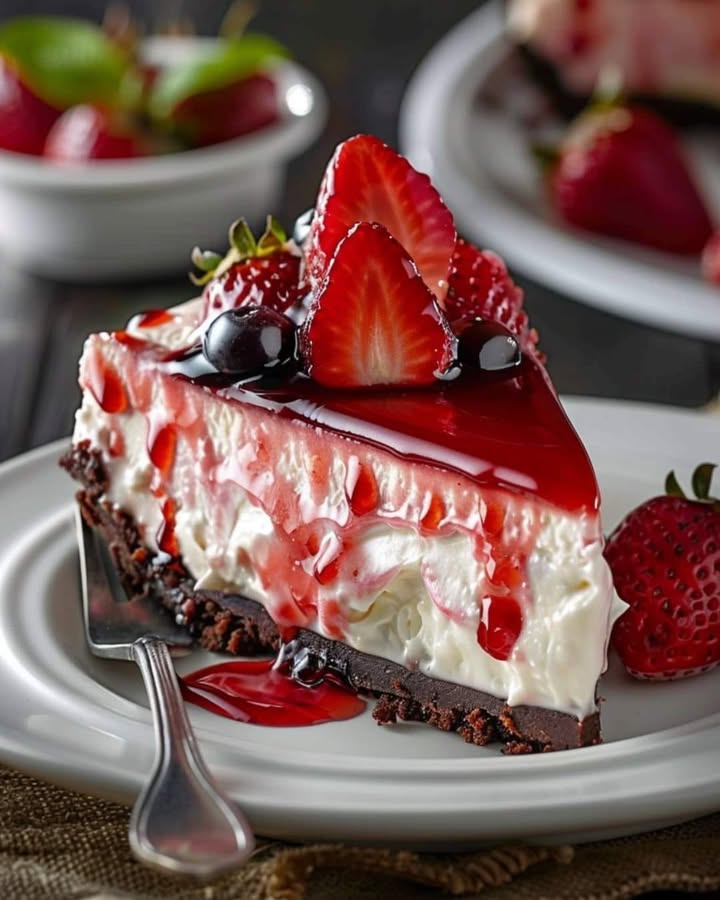
There’s a moment of pure, blissful silence that happens when I serve this cheesecake. The kind of hush that’s only broken by the gentle clink of forks and happy sighs. This Strawberry Cheesecake Delight is my family’s most requested dessert, and I’m convinced it’s because of the perfect balance. A buttery crust holds a cloud of creamy filling, all topped with a sunny, sweet-tart strawberry glaze. It feels fancy but is surprisingly doable. Let me show you how to make this showstopper that’s sure to steal the show at your next gathering.
A Slice of Cheesecake History
Believe it or not, the idea of cheesecake goes way back to ancient Greece! Athletes at the first Olympic Games were served a simple version for energy. Our modern, creamy American cheesecake is a far cry from that, thanks to the invention of cream cheese in the 1800s. I love the tradition of it. For me, this Strawberry Cheesecake Delight is a modern classic. It takes that rich New York-style base and crowns it with a fresh fruit topping that just sings of summer. Every bite is a little taste of history, made bright and beautiful with strawberries.
Why You’ll Fall in Love With This Recipe
This isn’t just any dessert. It’s a guaranteed smile-maker. The texture is everything—silky smooth filling that melts on your tongue, a crisp graham cracker bite, and that lush strawberry layer. It’s the perfect make-ahead treat, so you’re not stressed on the day of your party. Most importantly, it’s made with love and simple, real ingredients you can feel good about. One slice of this Strawberry Cheesecake, and you’ll understand why it’s a recipe I’ve trusted for years.
When to Whip Up This Strawberry Dream
This cheesecake turns any day into a celebration. It’s perfect for birthday parties, Mother’s Day brunch, or a romantic Valentine’s dinner. I love bringing it to summer potlucks because it’s always a hit. It’s also my secret weapon for when I need a “wow factor” dessert without last-minute fuss. Honestly, a quiet Sunday afternoon with a cup of coffee and a slice of this Strawberry Cheesecake Delight is a pretty perfect occasion, too.
What You’ll Need for Your Strawberry Cheesecake Delight
For the Crust:
- 2 cups graham cracker crumbs (about 15 full sheets)
- 1/4 cup granulated sugar
- 1/2 cup unsalted butter, melted
For the Cheesecake Filling:
- 3 (8 oz) packages full-fat cream cheese, softened
- 1 cup granulated sugar
- 3 large eggs, at room temperature
- 1/4 cup sour cream
- 1 tsp pure vanilla extract
For the Strawberry Topping:
- 2 cups fresh strawberries, hulled and chopped
- 1/2 cup granulated sugar
- 1 tbsp cornstarch
- 2 tbsp water
Easy Ingredient Swaps
No worries if you’re missing something! Here are my favorite swaps:
- Graham Crackers: You can use digestive biscuits or even vanilla wafers for the crust.
- Sour Cream: Plain, full-fat Greek yogurt works beautifully.
- Fresh Strawberries: Frozen strawberries work great for the topping. No need to thaw, just add a couple extra minutes of cooking time.
- Springform Pan: In a pinch, a deep 9-inch pie dish will work, but slicing clean wedges is trickier.
Making Your Strawberry Cheesecake Delight: A Step-by-Step Journey
Step 1: Prepare the Crust
First, get that oven preheating to a cozy 325°F (163°C). While it warms up, let’s make the crust. In a medium bowl, combine the graham cracker crumbs and sugar. Pour in the melted, golden butter. Use a fork to mix it all together until it looks like wet sand and holds together when you pinch it. Dump the crumbs into your springform pan. Use a flat-bottomed cup or glass to firmly press them into an even layer across the bottom and just a bit up the sides. This forms a sturdy, flavorful bowl for our filling. Pro tip: Bake this crust for 10 minutes to set it. This helps prevent a soggy bottom later!
Step 2: Make the Cheesecake Filling
Now for the star of the show: the filling. In a large bowl, beat the softened cream cheese and sugar together with an electric mixer. Beat it on medium speed until it’s completely smooth and no lumps remain. The sugar should be fully dissolved. This patience is key for a creamy texture. Add the eggs one at a time, beating well after each one until just combined. Finally, mix in the cool, tangy sour cream and that fragrant splash of vanilla. The scent is heavenly! The filling will be thick, velvety, and perfectly pourable.
Step 3: Bake the Cheesecake to Perfection
Gently pour that luscious filling over your slightly cooled crust. Smooth the top with a spatula. Place the pan in the center of your preheated oven. Bake for 50-60 minutes. You’re looking for the edges to be set and puffed, but the center (about a 3-inch circle) should still have a slight jiggle when you gently shake the pan. It will firm up as it cools. This is the secret to avoiding a dry, cracked cheesecake. When it’s done, turn the oven off, crack the door open with a wooden spoon, and let it cool slowly inside for 1 hour.
Step 4: Prepare the Luscious Strawberry Topping
While the cheesecake cools, let’s make the gorgeous red topping. In a small saucepan, toss together the chopped strawberries and sugar. In a tiny dish, mix the cornstarch and water into a smooth slurry. Pour this into the strawberry mixture. Cook this over medium heat, stirring often. Watch as the berries release their juices and the mixture starts to bubble and thicken into a shiny, glossy glaze. It will coat the back of your spoon. Remove it from the heat and let it cool completely to room temperature.
Step 5: Assemble and Chill
Once your cheesecake is fully cooled to room temperature, run a thin knife around the inside edge of the pan to loosen it. This helps prevent cracks as it chills. Now, carefully spoon the cooled strawberry topping over the center of the cheesecake. Use the back of the spoon to spread it evenly, leaving a little border of creamy white filling visible around the edges—it’s so pretty! Chef’s tip: For the absolute best texture and flavor, cover the pan and refrigerate your Strawberry Cheesecake Delight for at least 4 hours, but overnight is even better. The wait is worth it!
Your Cheesecake Timeline
- Prep Time: 30 minutes
- Cook Time: 60 minutes
- Cooling Time (in oven): 1 hour
- Chilling Time: 4 hours minimum (overnight best)
- Total Time: About 6.5 hours (mostly hands-off)
My #1 Chef’s Secret
All your ingredients, especially the cream cheese, eggs, and sour cream, MUST be at room temperature. I take them out about 2 hours before I start. This is the single best trick to prevent a lumpy filling and ensures everything blends into a smooth, dreamy consistency without the need to overmix (which can incorporate too much air and cause cracks).
A Berry Fun Fact
Did you know the average strawberry has about 200 tiny seeds on its outside? Those little specks are the actual fruits! Each one holds the potential for a new plant. When choosing berries for your Strawberry Cheesecake Delight, look for ones that are fragrant, bright red, and have fresh green caps. Their natural sweetness is the key to a topping that doesn’t need much help from sugar to shine.
If you love the combination of chocolate and strawberry, you must explore our recipe for a Decadent Chocolate Cake with Fresh Strawberry Filling—it’s another stunning crowd-pleaser!
Your Kitchen Toolbox
- 9-inch springform pan
- Electric hand mixer or stand mixer
- Mixing bowls (large and medium)
- Small saucepan
- Measuring cups and spoons
- Rubber spatula
- Wire cooling rack
How to Store Your Masterpiece
This cheesecake must be stored in the refrigerator. Keep it covered tightly with plastic wrap or in an airtight container. Properly stored, your Strawberry Cheesecake Delight will stay fresh and delicious for up to 5 days.
For longer storage, you can freeze it! Freeze the whole cheesecake or individual slices. First, freeze it uncovered on a baking sheet for about 2 hours until solid. Then, wrap it tightly in several layers of plastic wrap and a final layer of aluminum foil. It will keep well for up to 2 months.
To serve a frozen cheesecake, thaw it overnight in the refrigerator. This slow thawing helps retain the perfect creamy texture. You can also quickly thaw a single slice on the counter for about 30 minutes if you’re in a hurry for a sweet treat.
Tips For Cheesecake Success
- Don’t open the oven door during the first 45 minutes of baking! Sudden temperature changes can cause cracks.
- Use a water bath for ultimate creaminess. Wrap the bottom of your springform pan in heavy-duty foil, place it in a roasting pan, and pour hot water into the roasting pan until it comes halfway up the sides of the springform.
- If small cracks do form, don’t panic! The beautiful strawberry topping will cover them right up.
- For clean slices, dip a sharp knife in hot water and wipe it clean between each cut.
Pretty Presentation Ideas
- Garnish each slice with a whole fresh strawberry and a sprig of mint.
- Add a dollop of fresh whipped cream on the side.
- For a dinner party, serve on individual plates drizzled with a little extra strawberry sauce or a balsamic glaze.
- Add texture with a sprinkle of toasted sliced almonds or crumbled shortbread cookies around the plate.
Delicious Variations to Try
Once you master this classic, the world is your oyster! Here are six fun twists on the Strawberry Cheesecake Delight:
- No-Bake Strawberry Cheesecake: Perfect for hot days. Use gelatin to set the filling in the fridge.
- Mini Cheesecakes: Bake the filling in a muffin tin lined with cupcake liners for perfect individual portions.
- Strawberry Swirl Cheesecake: Instead of topping, swirl some strawberry puree directly into the filling before baking for a marbled effect.
- Mixed Berry Bliss: Use a combo of strawberries, raspberries, and blueberries for the topping.
- Chocolate-Dipped Strawberry Cheesecake: Add 1/2 cup of melted dark chocolate to the filling and use a chocolate graham cracker crust.
- Lemon-Strawberry Cheesecake: Add the zest of one lemon to the filling for a bright, zingy contrast to the sweet berries.
For a completely different but equally tropical dessert adventure, check out our sunshine-packed Pineapple Mango Heavenly Cake recipe.
Common Mistakes to Avoid
Mistake 1: Using Cold Ingredients
This is the biggest culprit for a lumpy, dense cheesecake. Cream cheese straight from the fridge is too hard to blend smoothly. Cold eggs and sour cream can also cause the mixture to curdle or separate. Always plan ahead and let your dairy ingredients and eggs sit on the counter for 1-2 hours before you start baking. They should feel cool to the touch, not cold. This simple step ensures a perfectly silky filling.
Mistake 2: Overmixing the Batter
Once you add the eggs, less is more! Overbeating incorporates too much air into the batter. This air expands in the oven and then collapses as the cheesecake cools, leading to cracks and a puffy, less dense texture. After adding each egg, mix just until it disappears into the batter. Use a low speed on your mixer for this step, and finish mixing by hand with a spatula if needed.
Mistake 3: Overbaking the Cheesecake
A cheesecake is done when the center is still a bit wobbly, not when it’s completely firm. It will continue to cook from residual heat as it cools. If you bake it until the center is solid like a cake, it will be dry and likely crack. Use the visual test: the edges should be set and slightly puffed, but a 2-3 inch circle in the center should jiggle gently when you tap the pan. Trust the process and the carryover cooking.
Mistake 4: Skipping the Gradual Cool-Down
Slamming a hot cheesecake from the oven onto a cold counter is a shock to its system. This rapid temperature change is a major cause of sinking and cracking. The slow cool-down in the turned-off oven with the door ajar is not a suggestion—it’s a crucial step! It allows the cheesecake to settle gently and finish setting without stress. Be patient during this hour; it makes all the difference.
Mistake 5: Cutting into a Warm Cheesecake
I know it’s tempting, but you must wait! The cheesecake needs that long chill in the fridge to fully set its structure. Cutting into it before it’s completely chilled will result in a gooey, messy slice that falls apart. The flavor also improves and melds together as it rests. Make it the day before you need it. Slicing into a perfectly chilled Strawberry Cheesecake Delight is a beautiful reward for your patience.
Remember, quality ingredients make a difference. Some research suggests that diets rich in anti-inflammatory foods, like the berries in our topping, can support overall wellness. You can read more about the connection between inflammation and diet at Healthline for helpful insights.
Your Strawberry Cheesecake Questions, Answered
Can I use frozen strawberries for the topping?
Absolutely! Frozen strawberries work very well. There’s no need to thaw them first. Just add the frozen berries directly to the saucepan with the sugar. You may need to cook the topping for an extra 2-3 minutes to help some of the extra liquid evaporate and reach the right thick, glossy consistency. The flavor is still fantastic, making this a great year-round dessert option.
Why did my cheesecake crack in the center?
Cheesecake cracks are usually caused by one of three things: too much air whipped into the batter (overmixing), a sudden temperature change (like opening the oven door early or cooling too quickly), or overbaking. The good news is that a cracked cheesecake still tastes amazing! And in this recipe, the lush strawberry topping will hide any imperfections beautifully. Following the tips for room temp ingredients, minimal mixing after adding eggs, and the slow oven cool-down will help prevent cracks.
Do I really need a springform pan?
For the cleanest, easiest serving, yes, a springform pan is highly recommended. The removable sides allow you to release the cheesecake without having to flip it upside down. If you don’t have one, you can use a 9-inch deep-dish pie plate. You’ll just need to serve it directly from the dish, and slicing perfect wedges can be a little trickier, but it will still be delicious!
How can I tell if the cheesecake is done baking without a thermometer?
The “jiggle test” is your best friend. At the 50-minute mark, gently shake the oven rack. The edges of the cheesecake should look set and may be slightly puffed. The center (about the size of a lemon) should have a slight, soft jiggle, like Jell-O. It should not be liquidy, but it should definitely move. Remember, it will continue to firm up as it cools in the turned-off oven and later in the fridge.
Can I make this cheesecake ahead of time?
Yes, and I actually encourage it! Cheesecake needs time to chill and set fully, and its flavor improves overnight. You can bake and top the cheesecake up to two days before you plan to serve it. Just keep it tightly covered in the refrigerator. This makes it the ultimate stress-free dessert for parties and holidays.
My topping is too runny. How can I fix it?
If your strawberry glaze hasn’t thickened enough, you likely need to cook it a bit longer. Mix 1 more teaspoon of cornstarch with 1 tablespoon of cold water into a smooth slurry. Stir this into the simmering strawberry mixture and cook for another 2-3 minutes until it bubbles and thickens. Let it cool completely before adding it to the cheesecake, as it will thicken more as it cools.
Is there a way to make a lighter version of this cheesecake?
You can make some adjustments for a lighter version, but the texture will change. Use reduced-fat cream cheese and sour cream. Be aware that low-fat dairy has more water and stabilizers, which can lead to a softer, less firm filling. The crust can be made with a little less butter. For a truly different light treat, our refreshing Fruit and Cottage Cheese Jelly Dessert is a wonderful option.
Can I freeze the finished cheesecake?
You can! Freeze the topped and chilled cheesecake whole or in slices. First, flash-freeze it uncovered on a baking sheet for 2 hours until solid. Then, wrap it very tightly in several layers of plastic wrap and a layer of foil. It will keep for 1-2 months. Thaw it overnight in the refrigerator before serving for the best texture.
What’s the difference between this and a no-bake cheesecake?
A baked cheesecake, like this one, has a rich, dense, and creamy custard-like texture from the eggs cooking in the oven. A no-bake cheesecake uses whipped cream or gelatin to set a lighter, fluffier filling in the refrigerator. Both are delicious! This baked version has a more classic, indulgent feel and that signature slightly browned top around the edges.
What should I serve with strawberry cheesecake?
It’s wonderful all on its own! For an extra treat, a little freshly whipped cream or a scoop of vanilla bean ice cream is heavenly. A cup of strong coffee or a glass of dessert wine like a Moscato d’Asti also pairs beautifully. For chocolate lovers, you could even drizzle the plate with a bit of the sauce from our decadent Molten Chocolate Cake.
I have so many more cheesecake ideas and tips over in my collection of cheesecake recipes if you fall in love with baking them like I have.
Time to Slice into Happiness
There you have it—my heartwarming, foolproof path to the most incredible Strawberry Cheesecake Delight. From that buttery first crunch to the last creamy, berry-filled bite, this dessert is pure joy on a plate. It has seen me through birthdays, barbecues, and just-because Tuesdays. Gather your ingredients, take a deep breath, and bake with love. I can’t wait for you to experience that moment of happy silence at your own table. Now, go preheat that oven and get ready for some serious compliments!
Equipment
- Grand bol
- Fouet électrique
- Spatule en caoutchouc
- Moule à charnière
- Grille de refroidissement
Ingredients
- 2 tasses chapelure de biscuits Graham
- 1/4 tasse sucre granulé pour la croûte
- 1/2 tasse beurre non salé fondu
- 3 paquets fromage à la crème plein gras, ramolli
- 1 tasse sucre granulé pour la garniture
- 3 grands œufs à température ambiante
- 1/4 tasse crème aigre
- 1 cuil. extrait de vanille
- 2 tasses fraises fraîches dépouillées et hachées
- 1/2 tasse sucre granulé pour le glaçage
- 1 cuil. fécule de maïs
- 2 cuil. eau
Instructions
- Préchauffez le four à 163°C (325°F).
- Dans un bol moyen, combinez les miettes de biscuits Graham et 1/4 tasse de sucre, ajoutez le beurre fondu et mélangez jusqu'à obtenir une texture de sable humide.
- Appuyez fermement sur le mélange au fond d'un moule à charnière et faites cuire pendant 10 minutes.
- Dans un grand bol, battez le fromage à la crème et 1 tasse de sucre jusqu'à obtenir une texture lisse, ajoutez les œufs un par un en mélangeant bien après chaque ajout.
- Mélangez la crème aigre et la vanille jusqu'à ce que le tout soit combiné.
- Versez la garniture sur la croûte refroidie et égalisez le dessus.
- Faites cuire pendant 50-60 minutes jusqu'à ce que les bords soient fixés mais que le centre ait un léger mouvement.
- Éteignez le four, entrouvrir la porte et laissez le cheesecake refroidir lentement pendant 1 heure.
- Dans une petite casserole, combinez les fraises hachées et 1/2 tasse de sucre, puis mélangez la fécule de maïs et l'eau dans un petit plat et ajoutez à la casserole.
- Cuisinez à feu moyen jusqu'à ce que le mélange épaississe et devienne lustré, puis laissez refroidir à température ambiante.
- Une fois le cheesecake refroidi, passez un couteau autour des bords et versez le glaçage aux fraises sur la garniture.
- Réfrigérez le cheesecake pendant au moins 4 heures (idéalement toute la nuit) avant de couper en tranches.
Notes
Nutrition

Hi, I’m Olivia Parker, the founder of BakingSecret.com and a lifelong lover of all things sweet and homemade. I grew up in a small town in Oregon, where the smell of fresh cookies in my family’s kitchen sparked my passion for baking. Over the years, I turned that passion into a mission: to help home bakers feel confident, inspired, and creative.
After studying food science and working in several artisan bakeries across the U.S., I decided to create a space where everyone from beginners to seasoned bakers can find reliable recipes, expert tips, and a warm, welcoming community. BakingSecret.com is my way of sharing the magic of baking with the world. When I’m not testing new recipes, you’ll find me exploring farmers’ markets, collecting vintage cookbooks, or perfecting my sourdough technique.