
The Ultimate Chocolate Strawberry Delight
There’s a memory that always makes me smile: my daughter’s birthday, rain pouring outside, and a last-minute desperate need for a spectacular cake. That day, this Chocolate Cake with Chocolate Shavings and Strawberry Sauce was born. It wasn’t just a dessert. It became a family legend. The rich chocolate paired with the bright, tangy strawberry creates a dance of flavors so perfect, it feels like a celebration every time you bake it. Let’s make that magic happen in your kitchen.
A Little Story Behind This Chocolate Strawberry Cake
Chocolate and strawberry are a classic duo, like best friends who always make each other better. I think their pairing goes back to elegant afternoon teas and fancy dessert tables. My modern twist adds a silky chocolate buttercream and a fresh strawberry sauce. It moves away from overly sweet jam. This version celebrates the fruit’s natural brightness. It’s a nod to tradition with a fresh, homemade heart. Every bite tells a story of simple, good things.
Why You Will Absolutely Adore This Recipe
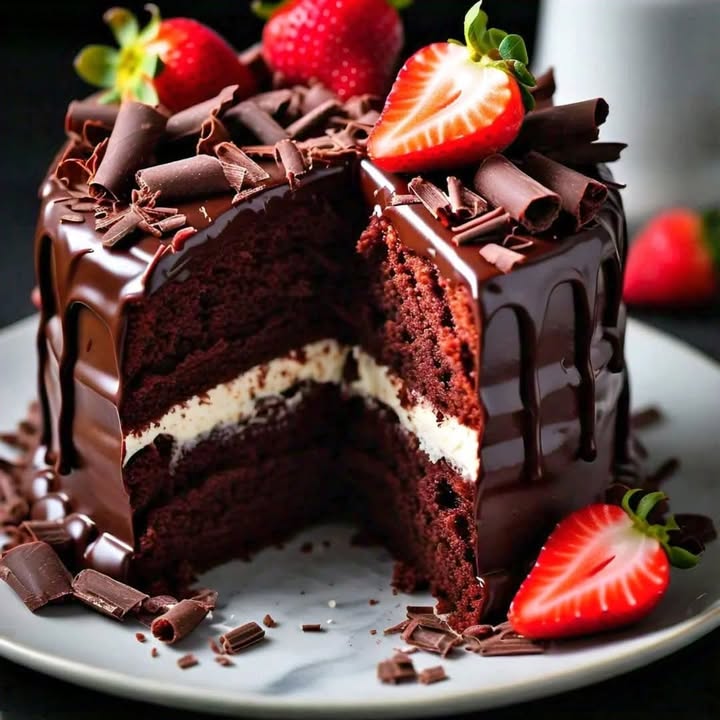
First, it’s stunning. The dark cake, creamy frosting, red sauce, and delicate chocolate shavings look like a professional bakery creation. But the real secret? It’s surprisingly straightforward. The steps are clear and the results are reliable. The flavors are deep and complex, yet familiar and comforting. It’s the kind of cake that makes people pause, take a bite, and simply say “Wow.” You’ll feel like a superstar baker, and trust me, you deserve that feeling.
Perfect Moments for Your Chocolate Strawberry Delight
This cake isn’t just for birthdays. It’s for any moment worth a sweet mark. Think of romantic anniversary dinners, where sharing a slice feels special. It’s perfect for summer picnics, bringing a touch of elegance outdoors. Bake it for a weekend family dinner to turn a regular meal into an event. It’s also a wonderful gift for a friend needing a pick-me-up. A homemade cake speaks volumes of love and care.
Everything You Need: Ingredient List
Gathering good ingredients is the first step to a great cake. Here’s your shopping list:
- For the Chocolate Cake: All-purpose flour, granulated sugar, baking powder, salt, unsalted butter, eggs, vanilla extract, unsweetened cocoa powder.
- For the Chocolate Buttercream: Cream cheese, unsalted butter, powdered sugar, vanilla extract, unsweetened cocoa powder.
- For the Strawberry Sauce: Fresh strawberries, granulated sugar, lemon juice.
- For Assembly: Chocolate shavings (from a high-quality chocolate bar).
Smart Swaps: Substitution Options
Don’t stress if you’re missing something! Cooking is about creativity.
- Cocoa Powder: Use natural or Dutch-processed. Dutch-processed gives a darker, smoother flavor.
- Butter: If using salted butter, simply omit the added salt in the recipe.
- Cream Cheese: Full-fat is best for frosting stability, but reduced-fat can work.
- Strawberries: Frozen strawberries work perfectly for the sauce. Just thaw and slice them.
- Flour: For a gluten-free version, use a trusted gluten-free all-purpose flour blend.
Crafting Your Chocolate Strawberry Delight
Follow these steps and breathe—it’s going to be wonderful.
Step 1: Prep Your Pans and Oven
Start by preheating your oven to 350°F (175°C). This ensures a consistent baking temperature from the start. Take your three 9-inch round cake pans and grease them generously with butter or shortening. Then, dust them with a light coat of flour, tapping out the excess. This little ritual prevents the cake from sticking disastrously. It guarantees clean, beautiful layers ready for stacking. Pro tip: You can use parchment paper circles for extra insurance against sticking.
Step 2: Create the Chocolate Cake Batter
In a large bowl, whisk together your dry ingredients: flour, sugar, baking powder, salt, and that glorious cocoa powder. The cocoa will smell deeply chocolatey already. In another bowl, beat the softened butter until it’s pale and fluffy. Add the eggs one at a time, followed by the vanilla. Now, gently combine the dry mix with the wet mix. Stir until just unified. Overmixing can make the cake tough, so stop when no flour streaks remain. The batter will be thick, dark, and promising.
Step 3: Divide and Bake the Layers
Pour your rich batter evenly into the three prepared pans. Use a spatula to spread it smoothly. Place them in the preheated oven. Bake for 25 to 30 minutes. The magical test is the toothpick: insert it into the center of a layer. If it comes out clean or with a few moist crumbs, it’s done. The cakes will be fragrant and spring back lightly when touched. Let them cool completely in the pans before removing. Rushing this can cause breakage.
Step 4: Make the Chocolate Buttercream
While the cakes cool, make the frosting. Beat the softened cream cheese and butter together until completely smooth and creamy. Gradually add the powdered sugar and cocoa powder. The mix will transform from pale to a rich chocolate brown. Finish with the vanilla extract. Beat until the frosting is light, fluffy, and holds its shape. Chef’s tip: If your kitchen is warm, pop the finished buttercream in the fridge for 15 minutes. It will firm up slightly, making spreading easier.
Step 5: Prepare the Fresh Strawberry Sauce
This sauce is a bright star. Slice your strawberries and place them in a small saucepan. Add the sugar and lemon juice. Cook over medium heat for about 8-10 minutes, stirring often. The berries will break down, releasing their juices and creating a lovely, syrupy sauce. Let it cool completely before using. The sauce should be thick enough to spoon but still flowable. Its vibrant red color will pop against the chocolate.
Step 6: Assemble Your Masterpiece
Place your first cake layer on a serving plate. Spread a generous layer of chocolate buttercream over it. Drizzle a portion of the strawberry sauce on top. Repeat with the second and third layers. Once stacked, you can frost the entire outside of the cake or leave it rustic with just the layers filled. Finally, sprinkle the top with elegant chocolate shavings. Use a vegetable peeler on a cool chocolate bar for perfect curls. The contrast is breathtaking.
Timing Your Baking Success
- Prep Time: 30 minutes
- Baking Time: 25-30 minutes
- Cooling Time: 1 hour (for cakes)
- Frosting & Sauce Prep: 20 minutes
- Assembly Time: 15 minutes
- Total Time (approx.): 2 hours 20 minutes
My Secret Chef’s Tip
The absolute best trick for a moist cake? Brush each cooled cake layer with a simple syrup. Mix equal parts sugar and water, heat until dissolved, and let cool. Brush a thin layer on each cake round before frosting. It adds a touch of sweetness and keeps the cake incredibly moist for days, even under that rich frosting.
A Fun Slice of Extra Info
Did you know the combination of chocolate and strawberry is scientifically pleasing? Chocolate contains compounds that enhance the fruity, sweet notes of berries. It’s not just tradition—it’s chemistry! This explains why the pairing feels so perfectly balanced and satisfying to our taste buds.
Necessary Equipment Checklist
- Three 9-inch round cake pans
- Mixing bowls (large and medium)
- Electric hand mixer or stand mixer
- Measuring cups and spoons
- Whisk and spatulas
- Small saucepan for strawberry sauce
- Cooling rack
- Vegetable peeler for chocolate shavings
How to Store Your Chocolate Strawberry Cake
If you need to store the cake before serving, cover it loosely with plastic wrap or place it in a cake carrier. Keep it in the refrigerator. The cold will preserve the buttercream and strawberry sauce beautifully. It’s best enjoyed within 3 days for peak freshness.
For longer storage, you can freeze individual cake layers. Wrap them tightly in plastic wrap and then foil. Thaw in the refrigerator overnight before assembling. The buttercream can also be frozen separately in an airtight container.
Remember, the strawberry sauce is best made fresh. It can be refrigerated for up to 2 days, but may lose its vibrant texture over time. For the best presentation and taste, assemble the cake the day you plan to serve it.
Golden Advice for the Best Results
- Use High-Quality Cocoa: This is the soul of your cake. A good cocoa powder makes a huge difference in depth of flavor.
- Don’t Overmix the Batter: Mix until ingredients are just combined. Overworking develops gluten, leading to a dense cake.
- Chill the Cake Before Assembling: Cooled cake layers are much easier to handle and frost. They won’t crumble or slide.
- Let the Strawberry Sauce Cool Completely: A hot sauce will melt your buttercream and make assembly messy.
Presentation Tips to Impress Your Guests
- Drizzle extra strawberry sauce on the plate under each slice for a restaurant-style look.
- Use fresh strawberry halves alongside the chocolate shavings on top for extra color.
- Pipe small buttercream rosettes around the base of the cake for a finished touch.
- Serve with a dollop of whipped cream on the side for those who love extra creaminess.
Healthier Alternative Recipe Variations
Love the flavor but want a lighter twist? Here are six inspired variations:
- Reduced-Sugar Version: Cut the sugar in the cake by ¼ cup and use a sugar substitute in the frosting. The berries’ natural sweetness will shine.
- Whole Wheat Flour: Substitute half the all-purpose flour with whole wheat flour for added fiber and a nutty undertone.
- Greek Yogurt Frosting: Swap cream cheese for Greek yogurt in the buttercream. It adds protein and a tangy flavor.
- Vegan Chocolate Cake: Use plant-based butter, egg substitutes, and dairy-free cream cheese. The result is surprisingly rich.
- Sugar-Free Strawberry Sauce: Cook the strawberries with a touch of maple syrup or a natural sugar-free sweetener.
- Mini Cupcake Version: Bake the batter in mini cupcake tins. Top with a small swirl of buttercream and a dot of sauce. Perfect for portion control.
Common Mistakes to Avoid
Mistake 1: Using Cold Butter and Eggs
This is a common haste. Cold butter doesn’t blend smoothly into the batter, leading to a dense texture. Cold eggs can also curdle the mixture. Always use softened butter (room temperature for about 30 minutes) and room-temperature eggs. This small patience ensures a smooth, well-emulsified batter that bakes up light and fluffy.
Mistake 2: Overbaking the Cake Layers
The fear of an uncooked cake often leads to dry cake. Overbaking evaporates the moisture, leaving a crumbly, sad layer. Trust the toothpick test at the minimum baking time. If it comes out clean, the cake is done. Remember, cakes continue to cook a bit as they cool in the pan.
Mistake 3: Adding Warm Strawberry Sauce
Pouring warm or hot sauce onto your buttercream is a recipe for a meltdown. The heat will liquefy the frosting, causing it to slide off and making your layers messy. Always let the strawberry sauce cool completely to room temperature, or even chill it slightly, before assembling. This keeps your beautiful layers distinct and stable.
Mistake 4: Not Tasting the Cocoa Powder First
Cocoa powder quality varies wildly. Using a bland or low-quality cocoa can result in a flat, uninspiring chocolate flavor. Before you bake, taste a tiny pinch of your cocoa. It should be deeply chocolatey and pleasant. If it tastes dull, consider upgrading. The cocoa is the heart of this Chocolate Strawberry Delight.
Frequently Asked Questions (FAQ)
Can I make this cake in advance?
Absolutely! You can bake the cake layers up to two days ahead. Wrap them tightly in plastic wrap once cooled and store at room temperature. The buttercream can be made a day ahead and kept refrigerated. Let it soften at room temperature before re-beating to spread. For the best freshness, assemble the full cake the day you plan to serve it. The strawberry sauce is best made fresh, but can be refrigerated for a day.
What’s the best way to get chocolate shavings?
Use a good-quality chocolate bar that’s slightly cool but not cold. A warm room will soften it too much. Hold the bar firmly and use a clean, sharp vegetable peeler. Drag the peeler along the edge or flat side of the bar to create curls or shavings. If the chocolate breaks into flakes, that’s fine too—they’re beautiful. For a different look, you can also use a microplane grater for finer, powdery shavings.
My buttercream turned out runny. How can I fix it?
A runny buttercream often comes from ingredients being too warm or from undermixing. First, ensure your butter and cream cheese were properly softened, not melted. If it’s already made, chill the entire bowl of frosting in the refrigerator for 20-30 minutes. Then, re-beat it with your mixer. The cold will firm up the fats and the beating will reintroduce structure. You can also add a bit more sifted powdered sugar to thicken it.
Can I use frozen strawberries for the sauce?
Yes, frozen strawberries are a great option, especially when fresh aren’t in season. Thaw them completely and then slice or chop them. You might need to simmer the sauce a few minutes longer as frozen berries often release more water. The flavor will still be excellent. Just be sure to let the sauce cool fully before using it on your cake.
How do I prevent my cake layers from doming in the center?
A dome happens when the oven heat hits the edges of the pan first, causing them to rise faster. To minimize this, you can use cake strips. These are fabric strips you soak in water and wrap around the outside of the pans. They keep the edges cooler, promoting even rising. Also, try lowering your oven temperature by 25°F and baking a bit longer. This gentle heat encourages a flatter top.
Is there a substitute for cream cheese in the frosting?
If you don’t like or can’t have cream cheese, mascarpone cheese is a lovely, rich substitute. For a dairy-free version, use a high-quality dairy-free cream cheese alternative. You can also make a traditional chocolate buttercream using just butter, powdered sugar, cocoa, and milk or cream. The flavor will be different—more like a classic frosting—but still delicious.
Why are three cake pans recommended?
Using three pans gives you thinner, more elegant layers that bake faster and more evenly. It also creates more surfaces for frosting and filling, enhancing the flavor experience in each bite. If you only have two pans, you can bake two thicker layers. Just increase the baking time by 5-10 minutes and watch the toothpick test carefully. You’ll then slice each layer horizontally to create four thinner layers.
How can I make a smoother strawberry sauce?
For a completely smooth, jam-like sauce without bits of berry, you can blend the cooked sauce after it cools. Use an immersion blender or transfer it to a regular blender. Pulse until smooth. If you prefer a seedless sauce, you can strain it through a fine mesh sieve after blending. This gives a very polished, glossy finish perfect for elegant drizzling.
Can I add other fruits to this cake?
The chocolate base is a wonderful partner for many fruits. Raspberries are a natural alternative, as mentioned in the variations. You could also try a cherry sauce, or even a passion fruit curd for a tropical twist. The key is balancing the tartness of the fruit with the sweet, rich chocolate. Feel free to explore and make your own signature combination!
Where does the nutrition information come from?
The nutrition per serving is an estimate based on standard ingredient data and a specific serving size. It’s a helpful guide for balance. Remember, enjoying treats is part of a happy life. For more guidance on including sweets within a balanced diet, you can find great resources on planning healthy meals.
This Chocolate Strawberry Delight is more than a recipe. It’s a project of love, a centerpiece for joy, and a guaranteed way to make someone’s day brighter. The process is fun, the result is stunning, and the taste is unforgettable. I hope it becomes a treasured recipe in your home, just like it is in mine. For more inspiring ideas and sweet projects, explore our full collection of cake and cupcake recipes.
Now, imagine the scene: the cake is on the table, the chocolate shavings glistening, the strawberry sauce a bright ruby red. You slice into it, revealing the perfect layers. The first bite is deep chocolate, then creamy frosting, then a burst of tangy strawberry. It’s harmony. It’s happiness. It’s your kitchen, filled with the wonderful smell of baking and the sound of happy people. That’s the real reward. So go ahead, preheat your oven, and start creating that moment today.
More Baking Adventures to Try
If you loved this layered cake adventure, you might enjoy other stunning desserts. Try a show-stopping Red Velvet Oreo Cheesecake for a fun, colorful twist. For a nutty and exotic flavor, the Pistachio Baklava Cheesecake is truly unique. If vibrant colors delight you, our Fluffy Dragon Fruit Cake is a visual and tasty masterpiece. And for a deeply spiced, cozy treat, the Decadent Molasses Spice Cake is perfect for holiday gatherings.
Equipment
- Grand bol
- Fouet
- Spatule
- Plaque à pâtisserie
- Papier sulfurisé
Ingredients
- 4 œufs
- 180 g sucre
- 40 g cacao en poudre
- 200 g farine tout usage
- 10 g poudre à lever
- 1 g sel
- 250 g beurre non salé
- 200 g crème fouettée
- 30 g chocolat râpé pour la décoration
- q.s. sucre glace pour saupoudrer
- q.s. cacao en poudre pour saupoudrer
- q.s. sauce aux fraises pour le décor
Instructions
- Préchauffez votre four à 175°C (350°F) et graissez trois moules à gâteau ronds de 9 pouces avec du beurre ; farinez les moules.
- Dans un grand bol, fouettez ensemble la farine, le sucre, la poudre à lever, le sel et le cacao en poudre.
- Dans un autre bol, battez le beurre ramolli jusqu'à ce qu'il soit pâle et mousseux. Ajoutez les œufs un à un, puis la vanille.
- Incorporez le mélange sec avec le mélange humide, en remuant jusqu'à ce que juste mélangé.
- Versez la pâte uniformément dans les moules préparés et faites cuire pendant 25-30 minutes.
- Laissez refroidir les gâteaux dans les moules complètement avant de les retirer.
- Pour le glaçage, battez le fromage à la crème et le beurre jusqu'à obtenir une consistance lisse, puis ajoutez progressivement le sucre glace et le cacao ; terminez avec la vanille.
- Pour la sauce aux fraises, tranchez les fraises, ajoutez le sucre et le jus de citron, et faites cuire à feu moyen pendant 8-10 minutes jusqu'à ce que ce soit sirupeux. Laissez refroidir complètement.
- Pour assembler, superposez le gâteau avec le beurre chocolat et la sauce aux fraises, puis recouvrez l'extérieur et le dessus de copeaux de chocolat.
Notes
Nutrition

Hi, I’m Olivia Parker, the founder of BakingSecret.com and a lifelong lover of all things sweet and homemade. I grew up in a small town in Oregon, where the smell of fresh cookies in my family’s kitchen sparked my passion for baking. Over the years, I turned that passion into a mission: to help home bakers feel confident, inspired, and creative.
After studying food science and working in several artisan bakeries across the U.S., I decided to create a space where everyone from beginners to seasoned bakers can find reliable recipes, expert tips, and a warm, welcoming community. BakingSecret.com is my way of sharing the magic of baking with the world. When I’m not testing new recipes, you’ll find me exploring farmers’ markets, collecting vintage cookbooks, or perfecting my sourdough technique.