
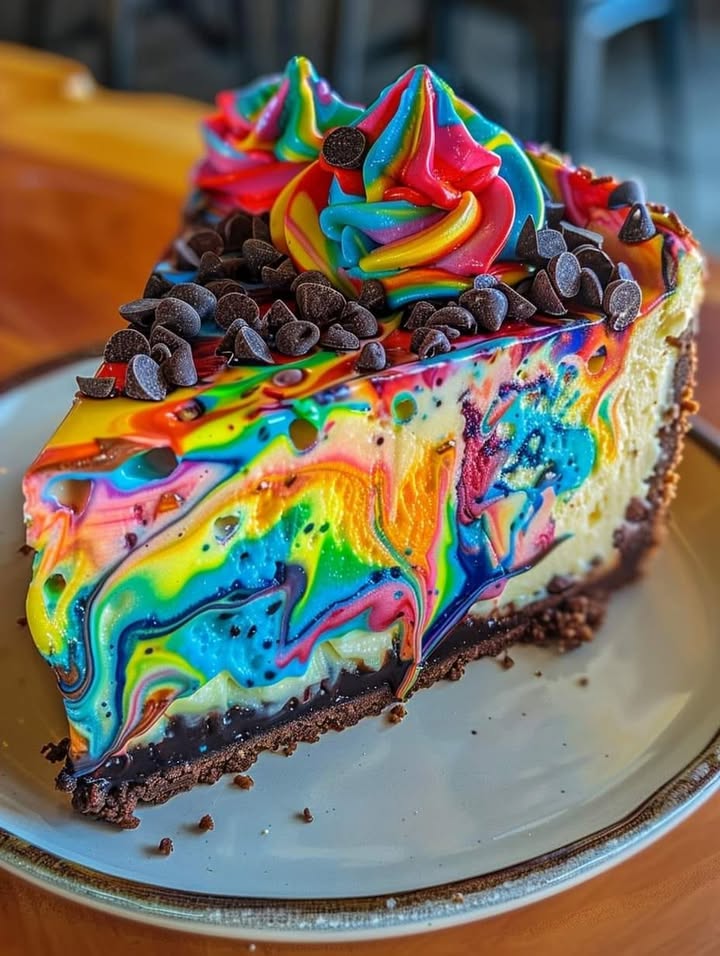
The Rainbow Cheesecake Delight: A Slice of Joy!
I spent a whole weekend trying to create a cheesecake that would make my niece’s birthday unforgettable. The result? This stunning Rainbow Cheesecake Delight! It’s not just a cheesecake; it’s a celebration on a plate. The swirls of color hidden inside, combined with pockets of melted chocolate, turn every slice into a surprise. It’s the perfect mix of creamy, crunchy, and overwhelmingly joyful.
From Classic to Colorful: The Story of Cheesecake
Cheesecake has a long, rich history, from ancient Greece to New York delis. But the fun, modern twist of adding vibrant colors took off with the rise of social media. Bakers began creating stunning visual feasts. This Rainbow Cheesecake Delight is my take on that trend. It blends the timeless, creamy texture we all love with a burst of playful, swirling colors. It’s a nod to tradition with a splash of today’s fun.
Why This Rainbow Cheesecake Will Be Your New Favorite
You’ll love this recipe because it’s a total crowd-pleaser. The taste is classic and rich. The look is absolutely magical. It’s surprisingly simple to make, too. Separating the filling and coloring it is like a fun art project. And the final reveal, when you cut into that first slice and see the rainbow swirls, is pure baking happiness.
Perfect Occasions for Your Rainbow Cheesecake Delight
This cheesecake is made for celebrations! It’s a star at birthday parties, especially kids’ parties. It brings a bright spot to potlucks and holiday gatherings like Easter or Pride events. Any day you want to add a dose of color and cheer to your table is the right day for this Rainbow Cheesecake Delight.
Ingredients You’ll Need for Your Rainbow Cheesecake Delight
Gathering your ingredients is the first step to magic. Here’s everything you need for this colorful dessert.
- For the Crust:
- 2 cups of chocolate cookie crumbs (about 20 cookies)
- 6 tablespoons of unsalted butter, melted
- For the Cheesecake Filling:
- 3 (8-ounce) packages of cream cheese, softened
- 1 cup of granulated sugar
- 3 large eggs
- 1 teaspoon of vanilla extract
- 1/3 cup of heavy cream
- Food coloring (red, orange, yellow, green, blue, purple)
- 1 cup of semi-sweet chocolate chips
- For Decorating:
- Whipped cream
- Rainbow sprinkles
- More chocolate chips
Smart Substitution Options
No worries if you’re missing an item! Here are some easy swaps:
- Cookie crumbs: Use graham crackers or any plain sweet cookie.
- Butter: Margarine can work, but the flavor will be slightly different.
- Heavy cream: Full-fat sour cream can add a nice tangy richness.
- Food coloring: Gel colors give the best vibrant result, but liquid dyes will work too (you may need more).
- Chocolate chips: Chopped chocolate bars or even white chocolate chips are fun alternatives.
Creating Your Rainbow Cheesecake Delight: Step-by-Step
Step 1: Make the Chocolate Crust
Start by turning those cookies into fine crumbs. I love using my food processor—it’s quick and gives a uniform texture that packs together nicely. Pour the crumbs into a bowl and add the melted butter. Mix it until every crumb is coated and looks like dark, wet sand. Press this mixture firmly into the bottom of your springform pan. A flat-bottomed glass helps get it even and tight. This crust is the foundation for your rainbow masterpiece.
Step 2: Prepare the Creamy Filling Base
In a large bowl, beat the softened cream cheese until it’s completely smooth. This is key! Any lumps now will stay lumps later. Slowly add the sugar and beat again until it’s fully combined. Then, add the eggs one at a time, mixing well after each. Finally, pour in the vanilla extract and heavy cream. The mixture will become silky, pale, and beautifully creamy. This is your blank canvas for the rainbow.
Step 3: Create the Rainbow Swirls
This is the fun part! Divide the filling evenly into six smaller bowls. Add a different food coloring to each bowl and stir until the color is vibrant and uniform. I use gel colors for their intensity. Now, take your springform pan with the crust. Dollop spoonfuls of each colored filling randomly over the crust. Don’t try to make patterns—the randomness creates the best swirls. Sprinkle the cup of chocolate chips all over the colored dollops.
Step 4: Swirl and Bake
Take a knife or a thin spatula. Gently drag it through the colored dollops in wide, sweeping circles. You want to blend them slightly, but not too much—you should still see distinct colors. This creates the mesmerizing swirl effect. Pro tip: don’t over-swirl! Place the pan in the preheated oven. As it bakes, the colors will set and the chocolate chips will melt into little pockets of goodness. The aroma filling your kitchen is heavenly.
Step 5: Cool, Chill, and Decorate
Once baked, let the cheesecake cool completely in the pan on a wire rack. This prevents cracks from sudden temperature changes. Then, refrigerate it for at least 4 hours, preferably overnight. This patience makes the texture perfect. Before serving, run a knife around the edge and release the springform pan. Pipe some whipped cream on top, shower it with rainbow sprinkles and extra chocolate chips for a festive finish.
Timing Your Rainbow Cheesecake Creation
Here’s a quick guide to managing your time for this recipe:
- Prep Time: 30 minutes (for crust, filling, and coloring)
- Bake Time: 45-55 minutes
- Cooling Time: 1 hour (at room temperature)
- Chilling Time: 4 hours minimum (overnight is best)
- Total Time: About 6 hours 15 minutes (plus chilling)
Chef’s Secret for the Ultimate Rainbow Cheesecake Delight
My secret is in the swirling technique. Use a long, thin knife or a skewer. Insert it deep, right down to the crust. Then make loose, lazy “S” shapes across the entire surface. This pulls the colors from the bottom up through the top, creating swirls that run through the entire slice, not just the surface. It looks professional and is so easy!
A Little Extra Rainbow Fun Fact
The idea of rainbow cakes really gained popularity as a way to celebrate diversity and joy. Each color in this cheesecake can represent something special—red for love, green for growth, blue for calm. It’s a dessert that’s not just tasty but also meaningful.
Necessary Equipment
You don’t need fancy tools, but these will make your life easier:
- 9-inch springform pan
- Food processor or rolling pin (for crumbs)
- Large mixing bowl
- Electric mixer (hand or stand)
- Six small bowls for coloring
- Spatula or knife for swirling
- Wire cooling rack
How to Store Your Rainbow Cheesecake Delight
Once decorated, your cheesecake should be stored in the refrigerator. Cover it loosely with plastic wrap or place it in a large airtight container. The cold environment keeps the cream cheese filling firm and fresh. This also prevents the whipped cream topping from deflating or weeping.
For longer storage, you can freeze the cheesecake before decorating. Wrap the entire chilled cheesecake tightly in two layers of plastic wrap and then a layer of aluminum foil. Freeze for up to one month. Thaw it overnight in the refrigerator before adding your final decorations and serving.
Leftover slices are just as good! Store individual slices in small airtight containers in the fridge for up to 5 days. The colors and texture will hold up beautifully, making for a delightful treat any day of the week.
Tips and Advice for a Perfect Cheesecake
- Always use room temperature cream cheese. It blends smoothly without lumps.
- Don’t over-beat the filling after adding the eggs. This can incorporate too much air and cause cracking.
- For a super smooth top, place a pan of water in the oven while baking. The steam helps.
- If you see small cracks forming, don’t panic! Your whipped cream and sprinkles will cover them.
Presentation Tips to Wow Your Guests
Make your slice the star of the table!
- Serve on a stark white plate to highlight the colors.
- Add a drizzle of chocolate sauce on the plate around the slice.
- Place a fresh berry or mint leaf next to it for a natural touch.
- For a party, make a whole “rainbow” of slices arranged in color order on a large platter.
Healthier Alternative Recipes
Love the idea but want a lighter option? Try these twists on the Rainbow Cheesecake Delight:
- Greek Yogurt Swap: Replace half the cream cheese with full-fat Greek yogurt. It adds protein and a tangy flavor while reducing overall fat.
- Natural Colorants: Use fruit powders (like beet powder for red, spirulina for green) instead of food coloring for a natural rainbow.
- Sugar Reduction: Cut the granulated sugar by 25% and add a touch of maple syrup or honey for flavor.
- Nut Crust: Make a crust with finely ground nuts (almonds, pecans) and a bit of coconut oil instead of cookies and butter.
- Mini Cheesecakes: Bake in a muffin tin for portion control. Perfect for kids’ parties!
- Vegan Version: Use vegan cream cheese, coconut cream, and agar agar as a setting agent. It’s a whole new world of delicious!
Common Mistakes to Avoid
Mistake 1: Using Cold Cream Cheese
This is the number one reason for a lumpy, uneven filling. Cold cream cheese simply won’t blend smoothly with the other ingredients. No matter how long you beat it, those little lumps will remain. To avoid this, take your cream cheese out of the fridge at least an hour before you start baking. Let it sit on the counter until it’s soft and spreadable. Pro tip: you can even cut it into chunks to speed up the softening process.
Mistake 2: Over-Swirling the Colors
It’s so tempting to keep mixing those beautiful colors together! But if you swirl too much, you’ll end up with a muddy, blended mess instead of clear, distinct rainbow streaks. Remember, you’re aiming for a marbled effect. Gently drag your knife through the filling just 4 or 5 times across the pan. Stop when you can still see each color clearly. Think “gentle blending,” not “mixing.”
Mistake 3: Skipping the Long Chill Time
Patience is the secret ingredient for cheesecake. If you try to cut it before it’s fully chilled, it will be too soft, might fall apart, and won’t have that perfect creamy firmness. The cheesecake needs time to set. The minimum is 4 hours in the fridge, but I always recommend overnight. This slow chill allows the texture to become dreamy and sliceable. Plan ahead for this step.
Mistake 4: Baking at Too High a Temperature
Cheesecake is a gentle creature. A too-hot oven will cause it to puff up, crack, and even brown too quickly on top before the center is done. Always use a moderate oven temperature, around 325°F (163°C). This allows for gradual, even cooking. If your oven runs hot, consider placing a baking sheet on the rack above the cheesecake to shield it from direct heat, a technique similar to the shielding effect used in broiling.
Frequently Asked Questions
Can I make this Rainbow Cheesecake Delight without a springform pan?
A springform pan is highly recommended because it has a removable side, making it easy to release the fragile cheesecake without damaging it. If you don’t have one, you can use a regular 9-inch cake pan. You’ll need to line the bottom with parchment paper for easy removal. To serve, you would carefully lift the chilled cheesecake out by the parchment. It’s a bit trickier, but it can work. The crust might not hold as firmly, so be extra gentle when pressing it into the pan.
What kind of food coloring works best for vibrant swirls?
Gel food coloring is the best choice for this recipe. Gel colors are concentrated, so you need less to achieve bright, bold hues. They also don’t add extra liquid to your filling, which helps maintain the proper texture. Liquid food colors can be used, but you may need to add more to get the same intensity, which could slightly thin the batter. Start with a small amount of gel color, mix, and add more until you get the shade you love.
How do I prevent my cheesecake from cracking on top?
Cracks often happen from sudden temperature changes or over-baking. To prevent them: avoid over-mixing the batter after adding eggs, as this adds air. Bake in a moderate oven, not too hot. Don’t open the oven door during the first half of baking. Let the cheesecake cool gradually in the oven with the door cracked open for an hour after turning off the heat. Finally, always chill it slowly in the fridge. If a small crack appears, your whipped cream topping will cover it beautifully!
Absolutely! Store-bought chocolate cookie crumbs are a great shortcut. Just make sure they are fine and uniform. If you buy whole cookies to crush yourself, a food processor is fastest. You can also place them in a zip-top bag and roll with a rolling pin. The key is fine crumbs so they pack together tightly with the butter. This creates a solid base that won’t fall apart when you slice the cheesecake.
Is it possible to make this recipe ahead of time?
Yes, this cheesecake is actually better made ahead! The long chill time is essential. You can bake it, cool it, and refriger it fully wrapped up to two days before serving. Add the whipped cream and sprinkles decoration the day you plan to serve it. This makes it perfect for parties—you do the work ahead and just add the festive finish when guests arrive.
Can I freeze the Rainbow Cheesecake Delight?
You can freeze it successfully for up to one month. Freeze the cheesecake before decorating. Once it’s fully chilled, wrap it tightly in plastic wrap (two layers) and then aluminum foil. Thaw it overnight in the refrigerator. Then, add your fresh whipped cream and sprinkles. The texture will remain creamy, and the colors will stay vibrant. Freezing is a great way to save a slice for a later celebration.
My colors aren’t very bright. What went wrong?
This usually means you didn’t use enough food coloring or used a weaker liquid type instead of gel. Gel colors are more potent. Also, make sure you are dividing the filling evenly so each color portion has enough batter to show up. If your batter looks pale after mixing, add a bit more gel color until it’s the shade you want. Remember, the colors will bake together, so they need to be strong individually to stand out after swirling.
What can I use instead of chocolate chips in the filling?
Chocolate chips are wonderful, but you can experiment! Try white chocolate chips for a contrast, or chopped peanut butter cups for a sweet surprise. Even chopped nuts like toasted pecans or almonds add a nice crunch. If you love fruit, try folding in a handful of dried cherry pieces or mini strawberry bits. Just keep any additions to about 1 cup so the filling isn’t overwhelmed.
Why do I need to add the eggs one at a time?
Adding eggs one at a time ensures each egg is fully incorporated into the thick cream cheese mixture. If you dump all three in together, they might not blend evenly, leading to bits of unmixed egg or an uneven texture. This step also helps you avoid over-beating. Mix just until each egg is combined, then add the next. This method gives you a smoother, more homogeneous filling.
Can I make mini rainbow cheesecakes instead of one large one?
Yes! Mini cheesecakes are fun and perfect for parties. Use a muffin tin lined with paper liners. Make the crust and press a small amount into each liner. Divide your colored filling among the cups, add a few chocolate chips to each, and swirl gently with a toothpick. Bake at the same temperature for about 18-20 minutes. They chill faster too. You’ll have a whole batch of individual Rainbow Cheesecake Delights!
If you love the creamy, joyful experience of this dessert, you’ll find plenty more inspiration in our full collection of creative cheesecake recipes. From classic New York style to fruity no-bake versions, there’s a whole world to explore.
Your Slice of Happiness is Ready!
Baking this Rainbow Cheesecake Delight is more than just following a recipe. It’s about creating a moment of pure joy. The process is fun, the result is stunning, and the taste is downright delicious. Whether for a special birthday or just to brighten a regular weekend, this cheesecake delivers. So gather your colors, soften your cream cheese, and get ready to make something truly magical. Every slice is a celebration. Happy baking!
Equipment
- Grand bol
- Fouet
- Spatule
- Moule à charnière de 9 pouces
- Râpe
Ingredients
- 2 tasses miettes de biscuits en chocolat environ 20 biscuits
- 6 cuillères à soupe beurre non salé fondu
- 24 oz fromage à la crème ramolli (3 paquets de 8 oz)
- 1 tasse sucre
- 3 œufs grands
- 1 cuillère à café extrait de vanille
- 1/3 tasse crème épaisse
- q.s. colorant alimentaire rouge, orange, jaune, vert, bleu, violet
- 1 tasse pépites de chocolat mi-sucré
Instructions
- Préparez la croûte en mélangeant les miettes de biscuits en chocolat et le beurre fondu, puis pressez dans un moule à charnière de 9 pouces.
- Dans un grand bol, battez le fromage à la crème ramolli jusqu'à ce qu'il soit lisse, puis ajoutez le sucre et battez jusqu'à ce que le mélange soit homogène.
- Ajouter les œufs un à un, suivi de la vanille et de la crème épaisse, en mélangeant jusqu'à obtenir une consistance crémeuse et lisse.
- Divisez la garniture en six bols, en ajoutant différentes couleurs de colorant alimentaire à chaque bol et en remuant jusqu'à ce qu'elles soient vives.
- Déposez des cuillerées de chaque garniture colorée au hasard sur la croûte et saupoudrez de pépites de chocolat.
- En utilisant un couteau ou une spatule, tourbillonnez doucement les couleurs pour créer un effet captivant.
- Faites cuire dans un four préchauffé pendant 45 à 55 minutes, puis refroidissez sur une grille.
- Réfrigérez pendant au moins 4 heures, de préférence toute la nuit, avant de décorer avec de la crème fouettée, des paillettes arc-en-ciel et des pépites de chocolat.
Notes
Nutrition

Hi, I’m Olivia Parker, the founder of BakingSecret.com and a lifelong lover of all things sweet and homemade. I grew up in a small town in Oregon, where the smell of fresh cookies in my family’s kitchen sparked my passion for baking. Over the years, I turned that passion into a mission: to help home bakers feel confident, inspired, and creative.
After studying food science and working in several artisan bakeries across the U.S., I decided to create a space where everyone from beginners to seasoned bakers can find reliable recipes, expert tips, and a warm, welcoming community. BakingSecret.com is my way of sharing the magic of baking with the world. When I’m not testing new recipes, you’ll find me exploring farmers’ markets, collecting vintage cookbooks, or perfecting my sourdough technique.