
< I need to write an article about the Ultimate Galaxy Ice Cream Cake. I will start with an engaging introduction, then follow the structure provided. I will include personal anecdotes, use a motivating and funny tone, and naturally integrate the keywords. I will also add the internal links as specified. First, I need to write the introduction. I'll start with a personal story about making this cake for my nephew's space-themed birthday party. It was a huge hit, and the kids loved the colors and sprinkles. Then I'll briefly present the recipe and what makes it special. Next, I'll write about the history or background. Since this is a modern creation, I'll talk about the trend of galaxy-themed desserts and how this cake fits into that. Then, I'll explain why you'll love this recipe. I'll mention the flavors, simplicity, and how impressive it looks. After that, I'll list the perfect occasions to prepare this recipe. I'll include birthdays, summer parties, and holiday gatherings. I'll present the ingredients in an ordered list. I'll provide substitution options. For the preparation section, I'll break it into steps with h3 headings. Each step will be a paragraph with sensory details and tips. I'll include timing, chef's secret, extra info, necessary equipment, storage, tips and advice, presentation tips, healthier alternative recipes, and common mistakes. I'll also add the internal links to the other recipes. Now, I'll write the article step by step.
Introduction
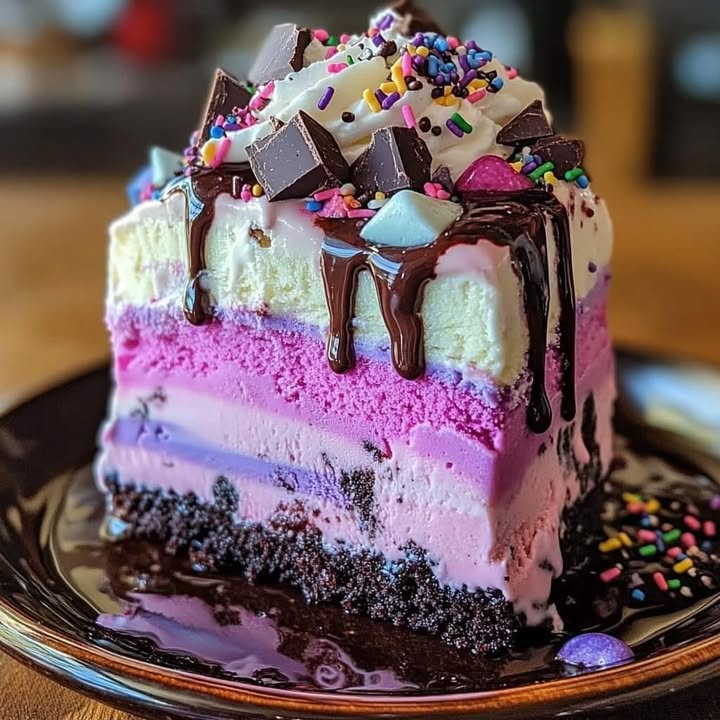
Have you ever looked up at a clear night sky and wished you could taste the stars? I know, it sounds a little silly, but that’s exactly the feeling I was chasing when I created this Ultimate Galaxy Ice Cream Cake for my nephew’s space-themed birthday party. The moment I unveiled it, with its swirls of deep blue and purple, shimmering edible glitter, and a sprinkle of star-shaped sprinkles, the kids’ eyes went as wide as full moons. It was the centerpiece of the party, and honestly, the adults were just as excited to dig in. This isn’t just a dessert; it’s a conversation starter, a showstopper, and a guaranteed way to make any occasion feel out of this world.
A Stellar Dessert Born from a Wish
This Galaxy Ice Cream Delight didn’t come from an old family cookbook. It was born from a Pinterest board full of galaxy cakes and a 7-year-old’s dream of a “space party.” I saw all these beautiful, intricate galaxy cakes that looked like they needed a pastry degree to make. I wanted that wow factor without the stress. So, I took the idea of a galaxy and made it easy. Instead of complicated frostings, I used the natural colors of sherbet. Instead of airbrushing, I used glitter and sprinkles. The result? A stunning, no-bake masterpiece that feels like a cosmic celebration on a plate. It’s a modern twist on the classic ice cream cake, perfect for today’s fun-loving families.
Why You’ll Absolutely Adore This Galaxy Ice Cream Cake
First, it’s gorgeous. The marbled layers look like a nebula, and the glitter makes it sparkle like a real galaxy. Second, it’s a flavor explosion. You get the classic richness of chocolate and vanilla, then a fun, fruity punch from the sherbet. The crushed cookies add a delightful crunch. Best of all, it’s a no-bake, make-ahead dream. You do the fun part (the layering!), then the freezer does all the hard work. It’s the ultimate dessert for anyone who wants to impress without the stress.
Perfect Occasions for This Cosmic Treat
This cake is your secret weapon for any event that needs a touch of magic. It’s a must-have for space-themed birthday parties, of course. But it’s also perfect for summer barbecues, Fourth of July celebrations, or as a dazzling finale to a holiday feast. I’ve even made it for a simple family movie night when we watched a sci-fi film—it turned a regular Tuesday into a special event! It’s a guaranteed crowd-pleaser for any gathering, big or small.
Ingredients for Your Galaxy Ice Cream Delight
- 1.5 qt vanilla ice cream, softened
- 1.5 qt chocolate ice cream, softened
- 1 cup blue raspberry sherbet, softened
- 1 cup grape sherbet, softened
- 1 cup crushed chocolate cookies
- 1/2 cup hot fudge sauce
- 1/2 cup caramel sauce
- 1 cup whipped cream
- 1/2 cup edible glitter
- 1/2 cup star-shaped sprinkles
Substitution Options
No blue raspberry sherbet? Use blackberry or blueberry sorbet. Out of grape sherbet? Try black cherry or boysenberry. For a nuttier crunch, swap chocolate cookies for Oreos or graham crackers. If you’re out of hot fudge, chocolate syrup works. No caramel? Try dulce de leche or butterscotch. For a dairy-free version, use your favorite plant-based ice creams and whipped topping. The galaxy is your oyster!
How to Create Your Ultimate Galaxy Ice Cream Cake
Step 1: Layer the Ice Creams
First, let’s build our universe! Grab your trusty 9-inch springform pan—it’s your spaceship for this mission. Start with a generous layer of softened vanilla ice cream. Spread it smoothly; this is your cosmic base. Next, add a layer of rich chocolate, creating a beautiful contrast. Then, the real magic: dollop the softened blue raspberry and grape sherbet. Don’t mix them completely; you want gorgeous swirls of deep purple and electric blue, just like a real galaxy. Use a spatula to gently marble the colors together for that perfect nebula effect. Pro tip: Let each ice cream sit on the counter for about 10-15 minutes to soften. This makes spreading a dream and prevents icy chunks.
Step 2: Add Crushed Cookies
Now for a little texture. Sprinkle the crushed chocolate cookies evenly over the top of your beautiful sherbet layer. Imagine this as a field of asteroid crumbs scattered across a colorful planet. The cookies will add a wonderful crunch against the creamy ice cream. They also soak up a little moisture from the layers below, becoming a delicious, slightly chewy surprise in every bite. This step is simple but adds a whole new dimension to the cake.
Step 3: The Big Freeze
This is the most important step! Gently slide your creation into the freezer. This is where the magic solidifies. Let it freeze for at least 4 hours, but overnight is even better. This long freeze is crucial. It allows all the layers to become one firm, cohesive cake. This makes it so much easier to slice and serve later. Trust me, waiting is the hardest part!
Step 4: Top with Sauces
Once your cake is as firm as a frozen moon, it’s time to decorate! Take it out of the freezer. Drizzle the hot fudge and caramel sauce in a free-form pattern over the top. Let the sauces drip down the sides a little. It creates a beautiful, messy, and delicious look. The dark fudge and golden caramel look like streams of stardust against the colorful sherbet. It’s okay if it’s not perfect. The galaxy is wonderfully chaotic!
Step 5: Decorate Your Galaxy
This is my favorite part. Spread a fluffy cloud of whipped cream over the top. This is the Milky Way of your dessert! Now, the real sparkle. Generously sprinkle the edible glitter over the whipped cream. It will shimmer like a billion tiny stars. Finally, add the star-shaped sprinkles. They look like constellations. The cake now looks like a piece of the night sky. It’s almost too beautiful to eat… almost!
Step 4: The Final Freeze
Almost there! Pop the cake back into the freezer for a final 30 minutes. This short chill sets the whipped cream and sauces. It makes the cake perfect for slicing. This last freeze is the secret to clean, beautiful slices. It keeps the layers from smushing together. Now, the hardest part is over. You can finally enjoy your stellar masterpiece!
Timing
This cake is all about planning. The active prep time is about 20 minutes of fun layering. But the real work is done by the freezer. You’ll need at least 4 hours for the initial freeze, but I always recommend doing it the day before. That way, you’re not tempted to peek! The final decorative freeze is just 30 minutes. So, in total, you’re looking at about 4 hours and 50 minutes from start to finish, but most of that is hands-off chilling time.
Chef’s Secret
My secret for the most vibrant galaxy layers? Don’t over-soften the sherbet! Let it soften just enough to be pliable, but still quite cold. This way, when you layer it with the other ice creams, the colors stay distinct and don’t bleed into a muddy mess. You want those beautiful, swirling cosmic clouds, not a purple-brown puddle!
Extra Info
Did you know the idea for galaxy-themed food is often credited to the 2015 “Unicorn Food” trend? It all started with brightly colored smoothie bowls and rainbow cakes. Then, someone looked at the deep, mysterious colors of space and thought, “I want to eat that!” And thus, the galaxy dessert was born. It’s a fun reminder that food can be a playful and creative art form, not just fuel. Plus, the glitter is just plain fun—it makes everyone feel like a kid again!
Necessary Equipment
- 9-inch springform pan (your trusty spaceship!)
- Large mixing bowls
- Rubber spatula or offset spatula for smoothing
- Measuring cups and spoons
- Freezer space (the most important tool of all!)
Storage
This cake is a freezer queen! Once fully assembled and decorated, it needs to live in the freezer. Keep it tightly covered with plastic wrap or, even better, place it in a large, airtight container. This prevents freezer burn and keeps those cosmic flavors locked in. It also stops the cake from picking up any other freezer smells. No one wants their galaxy tasting like leftover chili!
For the best texture, I recommend enjoying it within one week. This ensures the ice cream stays creamy and the cookies don’t get too hard. After a week, the cake is still safe to eat. However, the quality might start to change. The ice cream could become icy or the sauces might crystallize a bit.
If you have leftovers after serving, wrap the remaining slices individually in plastic wrap. Then, place them in a freezer bag. This makes for easy single servings later. Just take a slice out, let it sit for a few minutes, and you’re ready for a quick trip to the stars!
Tips and Advice
First, let your ice creams and sherbets soften just enough to spread. If they melt, they’ll refreeze with ice crystals. Second, use a hot knife to slice the cake. Run your knife under hot water and dry it before each cut. This gives you perfect, clean slices. Third, if you want a super sharp look, freeze the cake between each decorative step. This keeps the layers neat and defined.
Presentation Tips
To make your Galaxy Ice Cream Cake truly shine, try these ideas. Serve it on a dark blue or black plate. It makes the colors pop like a real night sky. Use a cake stand for a grand display. Add a few extra star sprinkles around the plate. You can even add a tiny rocket toy for a fun touch. It’s all about creating a little universe on your dessert table!
Healthier Alternative Recipes
Want to enjoy the galaxy with a lighter twist? Here are six stellar variations to try.
- Frozen Yogurt Galaxy Cake: Swap all ice creams for low-fat Greek yogurt frozen treats. Use natural fruit purees for the blue and purple colors. It’s a protein-packed, tangy delight that still looks cosmic.
- “Light Side of the Moon” Sorbet Cake: Use only fruit sorbets. They are naturally fat-free and bursting with real fruit flavor. It’s a refreshing and vibrant option for a hot day.
- No-Sugar-Added Galaxy Delight: Choose sugar-free ice creams and sherbets. Use a sugar-free hot fudge and caramel sauce. The result is just as sweet and dazzling, without the sugar rush.
- Nutty Asteroid Field Cake: Use a base of banana “nice cream” for a natural, creamy texture. Add in chopped almonds and walnuts for crunch. Drizzle with a date-based caramel sauce for a healthy, decadent finish.
- Dairy-Free Cosmic Cake: Use coconut milk or almond milk-based ice creams. Top with coconut whipped cream. This makes it perfect for those with lactose intolerance or following a vegan lifestyle.
- Mini Galaxy Cupcakes: Make individual portions in a muffin tin. Use silicone liners for easy removal. This is great for portion control and makes serving at parties a breeze.
Common Mistakes to Avoid
Even space explorers can slip up! Here are a few common mistakes to avoid. First, don’t use rock-hard ice cream straight from the freezer. It will be impossible to spread and will tear the layers. Second, don’t skip the softening step for the sherbet. It’s tempting to just scoop it in, but softened sherbet creates those dreamy galaxy swirls. Third, don’t forget to let the sauces cool a bit before drizzling. If they’re too hot, they’ll melt the ice cream and make a soupy mess. Fourth, don’t rush the final freeze. Those 30 minutes are what keep your whipped cream from sliding off when you cut it. It’s the difference between a cosmic masterpiece and a delicious puddle!
Equipment
- Grand bol
- Spatule
- Spatule décalée
- Moule à charnière de 9 pouces
- Cuillère à mesurer
Ingredients
- 1.5 qt crème glacée à la vanille, ramollie
- 1.5 qt crème glacée au chocolat, ramollie
- 1 tasse sorbet framboise bleue, ramolli
- 1 tasse sorbet au raisin, ramolli
- 1 tasse biscuits au chocolat écrasés
- 1/2 tasse sauce chocolat chaud
- 1/2 tasse sauce caramel
- 1 tasse crème fouettée
- 1/2 tasse glitter comestible
- 1/2 tasse paillettes en forme d'étoile
Instructions
- Tapissez le fond d'un moule à charnière de 9 pouces avec de la crème glacée à la vanille ramollie.
- Ajoutez une couche de crème glacée au chocolat ramollie sur le dessus de la crème glacée à la vanille.
- Déposez le sorbet framboise bleue et le sorbet au raisin sur le dessus, puis marbrer doucement pour un effet tourbillonnant.
- Parsemez les biscuits au chocolat écrasés uniformément sur la couche de sorbet.
- Placez le moule au congélateur pendant au moins 4 heures, ou toute la nuit pour de meilleurs résultats.
- Une fois congelé, nappez le dessus de sauce chocolat chaud et de sauce caramel.
- Étalez la crème fouettée sur le gâteau et saupoudrez généreusement de glitter comestible.
- Décorez avec des paillettes en forme d'étoile.
- Remettez le gâteau au congélateur pendant 30 minutes supplémentaires pour le faire prendre.
Notes
Nutrition

Hi, I’m Olivia Parker, the founder of BakingSecret.com and a lifelong lover of all things sweet and homemade. I grew up in a small town in Oregon, where the smell of fresh cookies in my family’s kitchen sparked my passion for baking. Over the years, I turned that passion into a mission: to help home bakers feel confident, inspired, and creative.
After studying food science and working in several artisan bakeries across the U.S., I decided to create a space where everyone from beginners to seasoned bakers can find reliable recipes, expert tips, and a warm, welcoming community. BakingSecret.com is my way of sharing the magic of baking with the world. When I’m not testing new recipes, you’ll find me exploring farmers’ markets, collecting vintage cookbooks, or perfecting my sourdough technique.