
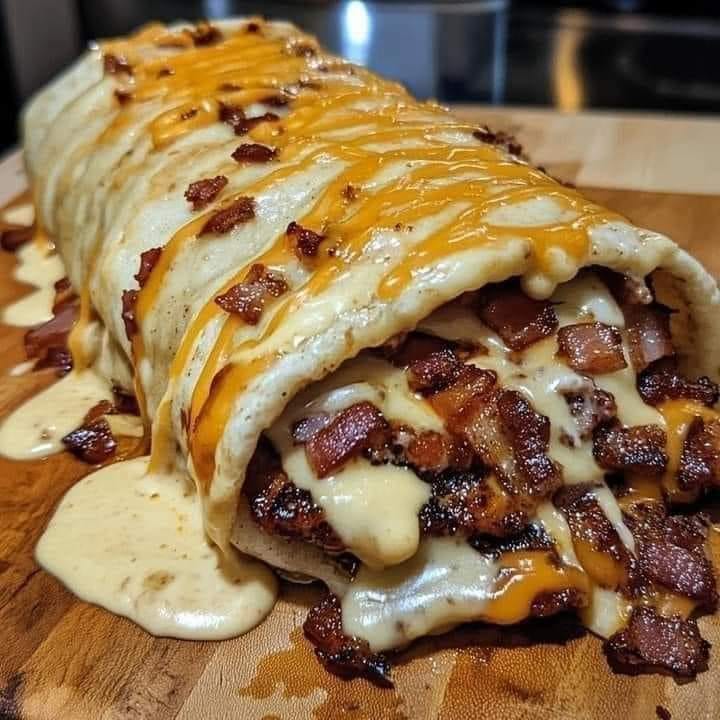
The Bacon Cheeseburger Burrito: Your New Favorite Food Mashup
Let’s be honest. Some days, you just need a hug in food form. My kids call this burrito a “happy tornado,” and I totally get it. It takes everything magical about a bacon cheeseburger—the sizzle, the cheese, the smoky saltiness—and wraps it all up in a warm, crispy tortilla blanket. It’s a flavor bomb that solves the “what’s for dinner?” question with a joyful, “This!”.
From Drive-Thru to Your Kitchen: A Burrito Love Story
I first dreamed up this Bacon Cheeseburger Burrito recipe on a chaotic Tuesday. We were debating burgers versus burritos, and I thought, “Why choose?” I grabbed some ground beef, a pack of bacon, and my biggest skillet. The result was an instant family legend. This dish isn’t about fancy origins; it’s about American comfort food fusion at its best. It takes the classic burger and gives it a fun, portable twist that’s perfect for modern, busy lives. It’s my go-to for turning an ordinary night into a little celebration.
Why You’ll Fall in Love With This Bacon Cheeseburger Burrito
You will adore this recipe because it’s pure, uncomplicated joy. It’s incredibly fast, clocking in at under 30 minutes. The ingredients are simple and likely already in your fridge. The creamy cheese sauce melds with the crispy bacon and savory beef in every single bite. It’s a crowd-pleaser that satisfies even the pickiest eaters. Plus, it’s wonderfully versatile—you can add your favorite burger toppings right inside!
When to Whip Up This Flavor-Packed Burrito
This recipe shines at so many moments! It’s fantastic for casual weekend dinners with the family. It’s a surefire hit for game day gatherings—just slice them in half for easy sharing. Got teens with hungry friends? This burrito is your secret weapon. It even makes for a fun and different lunchbox treat (just pack the sauce on the side). Any time you need a meal that delivers big smiles, this is it.
Ingredients for Your Bacon Cheeseburger Burrito Fiesta
- 1 lb ground beef (80/20 blend is perfect for flavor)
- 8 slices bacon, cooked until crispy
- 1 cup shredded cheddar cheese
- 1/2 cup cheese sauce (homemade or a good store-bought queso)
- 1/4 cup sour cream (for cool creaminess)
- 4 large flour tortillas (burrito-sized!)
- 1/4 cup diced onions (optional, for crunch)
- 1/4 cup diced pickles (optional, for that essential tang)
- Salt and pepper to taste
Easy Ingredient Swaps & Substitutions
No stress if you’re missing something! Here are easy swaps:
- Ground Beef: Try ground turkey, chicken, or a plant-based crumble.
- Cheese Sauce: A can of cheddar cheese soup thinned with a little milk works in a pinch.
- Toppings: Swap in shredded lettuce, sliced jalapeños, or a drizzle of burger sauce.
- Tortillas: Use whole wheat, spinach, or gluten-free tortillas if needed.
Gather Your Kitchen Tools
You don’t need anything fancy! A large skillet for browning the beef, a smaller pan or microwave for the bacon, a mixing bowl, a cheese grater if you’re shredding your own, and a clean cutting board. That’s it!
Crafting Your Perfect Bacon Cheeseburger Burrito
Step 1: Build Your Flavor Foundation
Get your large skillet nice and hot over medium-high heat. Crumble in the ground beef. You’ll hear that fantastic sizzle. As it cooks, break it up with your spatula. Watch the pink turn to a rich, savory brown. Season generously with salt and pepper. This is where the deep, meaty flavor starts. Pro tip: Don’t drain all the fat! A little bit keeps the beef moist and adds incredible burger-like flavor to your burrito filling.
Step 2: The Grand Assembly Line
Lay your four large tortillas flat on your work surface. Now, the fun layering begins! Divide the hot, seasoned beef evenly down the center of each tortilla. Next, crumble two slices of crispy bacon over each pile of beef. The smoky aroma is amazing. Sprinkle a generous handful of shredded cheddar cheese over the warm meat—this helps it melt. Drizzle that luscious, creamy cheese sauce right on top. Finally, add your diced onions and pickles if using. The colors and textures are already a party.
Step 3: Roll, Seal, and Crisp to Perfection
Time to roll! Fold the sides of the tortilla in over the filling. Then, firmly roll from the bottom up, tucking the filling in as you go. You want a nice, tight burrito. Heat your skillet (you can wipe out the beef pan) over medium heat. No extra oil is needed if you have a non-stick pan. Place each burrito seam-side down. Let it cook for 2-3 minutes until golden brown and crispy. Gently flip and crisp the other side. The sound of that tortilla toasting is pure music.
Chef’s tip: For an extra-secure burrito that won’t leak, after your initial roll, wrap it tightly in parchment paper or foil for a minute. This lets the cheese melt and glue everything together before you crisp the outside.
Timing is Everything
This recipe is a weeknight superhero.
- Prep Time: 15 minutes (mostly cooking the bacon and dicing!)
- Cook Time: 10 minutes
- Total Time: A mere 25 minutes from fridge to table.
A Little Extra Yum: The Secret’s in the Sauce
Want to take it to the next level? Make a quick “burger sauce” for dipping or drizzling inside! Just mix equal parts mayonnaise and ketchup, a spoonful of pickle relish, a dash of onion powder, and a tiny squeeze of mustard. It adds that familiar, tangy fast-food burger flavor that makes this burrito truly magical.
Common Mistakes to Avoid
Mistake 1: Overfilling the Tortilla
It’s so tempting to pile everything in! But an overstuffed burrito is impossible to roll and will burst in the pan. The key is to leave about 3 inches of space on the sides and a couple of inches at the top. A modest, well-distributed layer of filling creates a neat, sturdy burrito that holds all the goodness inside. Less is more here.
Mistake 2: Using Cold Ingredients
If your beef, bacon, and cheese are cold when you assemble, the cheese won’t melt properly in the final crisp. Your burrito will be lukewarm inside. Always assemble with your cooked components still warm. The residual heat starts melting the shredded cheese right away, creating that gooey, cohesive texture we all love.
Mistake 3: Skipping the Skillet Crisp
Don’t just roll it and eat it! That final step in the hot skillet is non-negotiable. It transforms the soft tortilla into a delightful, crispy, golden shell. It also heats the entire bundle through, ensuring every bite is warm and the cheese is perfectly melted. It adds a wonderful texture contrast to the soft, creamy interior.
Mistake 4: Rolling with a Stiff Tortilla
A cold tortilla straight from the fridge will crack and tear. Always warm your tortillas for about 20 seconds in the microwave between damp paper towels, or heat them briefly in a dry skillet. This makes them soft, pliable, and much easier to roll without any frustrating breaks.
How to Store and Reheat Your Leftovers
Let any leftover Bacon Cheeseburger Burritos cool completely. Wrap each one tightly in aluminum foil or plastic wrap. Store them in an airtight container in the refrigerator for up to 3 days.
To reheat, the oven or air fryer is your best friend for keeping the tortilla crispy. Unwrap the burrito and place it on a baking sheet. Heat at 375°F for 10-15 minutes, flipping halfway. For a quick fix, you can microwave for 60-90 seconds to heat the inside, then finish in a hot skillet for 1 minute to re-crisp the shell.
You can also freeze these burritos for up to 2 months. Wrap them in foil, then place in a freezer bag. Reheat from frozen in the oven, adding an extra 5-10 minutes to the cooking time.
Presentation: Make it a Fiesta!
- Slice the burritos in half on a diagonal to show off the gorgeous layers inside.
- Serve on a platter with small bowls of extra cheese sauce, sour cream, and diced tomatoes for dipping.
- Add a side of crispy seasoned fries or a simple green salad to round out the meal.
- For a fun party tray, cut them into smaller pinwheel slices and secure with toothpicks.
Fun Variations to Try
Love this concept? Try these tasty twists for a Bacon Cheeseburger Burrito remix:
- Western Style: Add a handful of frozen corn and black beans to the beef.
- Spicy Fiesta: Mix a chopped jalapeño into the beef and use pepper jack cheese.
- Breakfast Burrito: Use scrambled eggs and breakfast sausage, but keep the bacon and cheese sauce!
- “Big Mac” Style: Add shredded lettuce and a drizzle of special burger sauce after crisping.
- BBQ Bacon: Swap the cheese sauce for your favorite BBQ sauce and use smoked cheddar.
- Pizza Burrito: Use Italian sausage, pepperoni, marinara, and mozzarella cheese.
Frequently Asked Questions
Can I make these Bacon Cheeseburger Burritos ahead of time?
Absolutely! You can prepare the filling (cooked beef, bacon, shredded cheese) up to 2 days in advance and store it in the fridge. When you’re ready to eat, just reheat the filling slightly, assemble your burritos, and crisp them in the skillet. This cuts your active cooking time down to just a few minutes. You can also fully assemble and crisp them, then reheat as directed in the storage section.
What’s the best cheese sauce to use?
For ultimate convenience, a good store-bought queso or jarred cheese sauce works perfectly. If you want to make your own, it’s easy! Melt 1 tablespoon of butter, whisk in 1 tablespoon of flour, cook for 1 minute, then whisk in 1 cup of milk until thickened. Remove from heat and stir in 1 cup of shredded cheddar until smooth. Season with a pinch of salt and mustard powder if you like.
How do I keep my burrito from getting soggy?
Sogginess comes from two things: wet fillings and steam. Make sure your cooked beef isn’t sitting in a pool of grease (drain a little if there’s a lot). Also, avoid putting cold, wet lettuce or tomatoes inside before crisping. The key is the hot skillet step—it seals and crisps the tortilla quickly, preventing steam from making it soft. Eat it promptly after crisping for the best texture.
Can I bake these burritos instead of pan-frying?
Yes, baking is a great hands-off method! Preheat your oven to 400°F. Place the assembled burritos seam-side down on a baking sheet lined with parchment paper. Lightly brush or spray the tops with oil. Bake for 15-20 minutes, flipping once halfway through, until they are golden brown and crispy all over. This method is perfect for making a larger batch at once.
What can I serve with this besides fries?
This hearty burrito pairs well with lighter sides. A simple mixed green salad with a vinaigrette cuts the richness. You could also serve sweet potato fries, a hearty tortilla soup, or a refreshing corn and black bean salsa. For a real treat, end the meal with a slice of something decadent like our Black Forest Roll Cake with White Chocolate and Cherry Delight.
Is there a way to make this recipe lower carb?
Definitely! Use large, sturdy lettuce leaves like romaine or iceberg as your wrapper instead of a tortilla. You can also use low-carb tortillas. For the fillings, stick with the beef, bacon, cheese, and sauce. This dish easily adapts to many eating styles, which is part of why I love it so much. Practicing conscious eating means enjoying hearty meals while making simple swaps that work for you.
My cheese sauce is too thick. How do I fix it?
No worries! A thick cheese sauce is an easy fix. Simply warm it up in a small saucepan over low heat. Add a splash of milk, cream, or even the liquid from your pickles jar, and whisk until it reaches a smooth, drizzle-able consistency. You want it to be a sauce, not a spread, so it flows nicely over the other fillings.
Can I use pre-cooked bacon?
Yes, pre-cooked bacon is a great time-saver! Just make sure to warm it up slightly before adding it to the burrito. This helps release its flavor and makes it less chewy. You can pop it in the microwave for 10-15 seconds or quickly heat it in the same pan you used for the beef.
What if I don’t have sour cream?
Greek yogurt is a fantastic one-to-one substitute for sour cream and adds a nice tang. You could also use a plain regular yogurt (just strain it for 10 minutes in a cheesecloth if it’s very runny). Alternatively, a dollop of creamy avocado or even a bit of ranch dressing can fill that cool, creamy role.
This feels like a big meal. Can I make a smaller version?
Of course! These are sometimes called “burrito bowls” or “naked burritos.” Simply skip the tortilla and serve the warm filling in a bowl. Top with the cold toppings like diced onions and pickles. It’s just as delicious and feels a bit lighter. For another handheld, portion-controlled dessert idea, check out our easy Cheesecake in a Loaf Pan recipe.
For more delicious and creative recipe ideas that blend comfort with fun, be sure to browse our full collection of recipes on the site. You’ll find everything from savory dinners to sweet treats like our vibrant Strawberry Mango Margarita Cupcakes or rich Orange and Double Chocolate Raw Cake.
The Final Bite
So there you have it. My family’s favorite solution for a delicious, no-fuss, and wildly satisfying dinner. The Bacon Cheeseburger Burrito proves that the best meals don’t have to be complicated. They just have to be made with a little bit of love and a lot of crispy bacon. Give it a try tonight—I promise, it will become a regular in your kitchen lineup too. Now, go roll up some happiness!
Equipment
- Grande poêle
- Petite casserole ou micro-ondes pour le bacon
- Bol de mélange
- Râpe à fromage (facultatif)
- Planche à découper
Ingredients
- 1 lb bœuf haché (80/20)
- 8 tranches bacon, cuit jusqu'à croustillant
- 1 tasse fromage cheddar râpé
- 1/2 tasse sauce au fromage (maison ou du commerce)
- 1/4 tasse crème aigre
- 4 grands tortillas de farine
- 1/4 tasse oignons hachés (facultatif)
- 1/4 tasse cornichons hachés (facultatif)
- Q.S. sel et poivre
Instructions
- Chauffez une grande poêle à feu moyen-vif et émiettez le bœuf haché, en le faisant cuire jusqu'à ce qu'il soit brun.
- Assaisonnez le bœuf cuit avec du sel et du poivre.
- Étalez les tortillas à plat et répartissez le bœuf, le bacon, le fromage cheddar, la sauce au fromage, les oignons et les cornichons parmi eux.
- Enroulez les tortillas fermement du bas vers le haut, en pliant les côtés pour sécuriser la garniture.
- Chauffez à nouveau la poêle à feu moyen et placez les burritos côté couture vers le bas dans la poêle.
- Faites cuire pendant 2-3 minutes jusqu'à ce qu'ils soient dorés et croustillants, puis retournez-les délicatement et faites dorer l'autre côté.
Notes
Nutrition

Hi, I’m Olivia Parker, the founder of BakingSecret.com and a lifelong lover of all things sweet and homemade. I grew up in a small town in Oregon, where the smell of fresh cookies in my family’s kitchen sparked my passion for baking. Over the years, I turned that passion into a mission: to help home bakers feel confident, inspired, and creative.
After studying food science and working in several artisan bakeries across the U.S., I decided to create a space where everyone from beginners to seasoned bakers can find reliable recipes, expert tips, and a warm, welcoming community. BakingSecret.com is my way of sharing the magic of baking with the world. When I’m not testing new recipes, you’ll find me exploring farmers’ markets, collecting vintage cookbooks, or perfecting my sourdough technique.