
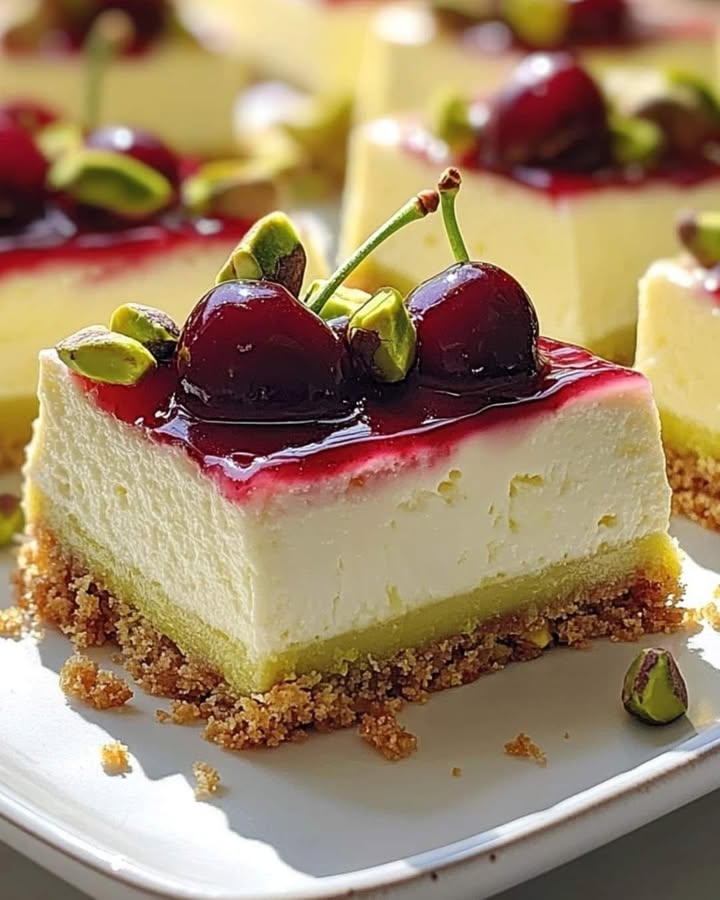
My Love for Lemon-Lime Pistachio Bars
I can’t tell you how many times I’ve needed a dessert that feels fancy but is secretly easy. That’s exactly what happened last summer. My friends were coming over for a casual barbecue, and I wanted to wow them without stressing all day. I started playing with flavors I love: creamy cheesecake, tart citrus, and a little nutty crunch. The result? These incredible Lemon-Lime Cherry Pistachio Cheesecake Bars. They were a total hit, and now I make them for everything. From birthdays to potlucks, these bars are my go-to triumph. Let me share the joy with you.
A Little Slice of Dessert History
Let’s chat about cheesecake bars. In my opinion, they are the clever cousin of the classic cheesecake. Traditional cheesecake is rich and elegant. But it can be daunting with its springform pan and risk of cracks. Bars, however, are friendly and forgiving. They take that luxurious cheesecake feeling and turn it into a shareable, portable treat. The combo of lemon and lime reminds me of old-fashioned lemon bars, but with a creamy twist. Adding pistachios and cherries is my modern take. It brings a wonderful texture and a pop of sweet-tart flavor that feels both classic and new. This recipe is a happy mash-up of traditions.
Why You’ll Adore This Recipe
You will love these bars for so many reasons!
- Flavor Explosion: The creamy, tangy cheesecake, the crunchy pistachios, and the sweet cherry swirl create a perfect balance in every bite.
- Simple Process: You don’t need any fancy techniques. It’s mostly mixing and baking.
- Always a Crowd-Pleaser: The bright colors and delicious taste make these bars disappear fast at any party.
- Flexible Timing: You can make them ahead and let them chill, freeing you up to enjoy your guests.
Perfect Occasions for These Cheesecake Bars
Imagine these bars at your next event! They shine at summer picnics, bringing a refreshing citrus note. They are perfect for holiday gatherings, with their festive red and green colors. I often bring them to potluck dinners because they travel so well. A platter of these bars makes any birthday or anniversary celebration feel extra special. They are also my secret weapon for “just because” days. Sometimes, a sweet treat is the best way to brighten a regular Tuesday.
What You’ll Need: Ingredients List
Gathering your ingredients is the first step to success. Here’s your shopping list:
- For the crust: Graham cracker crumbs, granulated sugar, melted butter.
- For the filling: Three packages of softened cream cheese, granulated sugar, three large eggs, fresh lime juice, fresh lemon juice, vanilla extract, chopped pistachios, and cherry preserves.
- For garnish: Fresh cherries and whipped cream.
Smart Substitution Ideas
Don’t stress if you’re missing something. You can easily swap ingredients!
- Graham Cracker Crust: Use digestive biscuits or even plain shortbread cookie crumbs.
- Cherry Preserves: Raspberry, strawberry, or even apricot jam works beautifully.
- Pistachios: Try chopped almonds or pecans for a different nutty flavor.
- Fresh Citrus Juice: Bottled juice can work in a pinch, but fresh gives the best bright taste.
- Cream Cheese: Full-fat gives the richest texture, but you can use Neufchâtel for a lighter version.
Creating Your Lemon-Lime Pistachio Bars
Okay, let’s get our hands busy and make these delightful bars! Follow each step carefully for the best result.
Step 1: Preheat and Prepare
Start by turning your oven to 350°F (175°C). Grab a 9×13-inch baking pan. Line it with parchment paper. This little trick is a lifesaver. It makes removing the bars so simple and keeps your pan clean. The paper should cover the bottom and sides, with a little overhang. This is your first move toward a perfect, easy-to-serve dessert.
Step 2: Building the Crust
In a medium bowl, mix your graham cracker crumbs, sugar, and melted butter. The smell is already amazing! Stir until it looks like wet sand. Then, pour this mixture into your prepared pan. Use your hands or the bottom of a glass to press it down firmly and evenly. You want a solid, uniform crust layer. This foundation will hold your creamy filling beautifully. Pro tip: Press really well so the crust doesn’t crumble when you cut the bars later.
Step 3: Making the Creamy Filling Base
Take your softened cream cheese and place it in a large mixing bowl. Add the sugar. Beat them together until the mixture is completely smooth and creamy. There should be no lumps. This smooth base is key for a silky cheesecake texture. If your cream cheese isn’t soft, you might get a lumpy filling. So, let it sit out on the counter for a while before you start.
Step 4: Adding Eggs and Citrus Zing
Now, add your eggs one at a time. Mix well after each egg is added. This helps the filling stay smooth and incorporate evenly. Next, pour in your fresh lemon juice, fresh lime juice, and vanilla extract. Stir until everything is fully blended. The room will smell like a sunny citrus grove! The combination of lemon and lime gives a complex, bright tang that’s not too sour.
Step 5: Introducing the Pistachios
Gently fold in your chopped pistachios. Use a spatula and a light touch. You want to distribute the nuts without crushing them too much. They will add little bursts of crunch and a lovely green color throughout the bars. This step adds texture and makes each bite interesting.
Step 6: The Beautiful Cherry Swirl
Pour your creamy filling over the crust. Spread it out evenly with your spatula. Now, take your cherry preserves. Drop small spoonfuls all over the top of the filling. Then, take a knife or a skewer. Swirl it gently through the preserves and filling. You’ll create a gorgeous marbled, pink pattern. Don’t over-swirl! Just a few gentle passes will keep the pattern defined. Chef’s tip: Warm the preserves slightly for easier swirling.
Step 7: Baking to Perfection
Place your pan in the preheated oven. Bake for 40 to 45 minutes. The edges will turn a light golden color. The center should be set but might still have a slight jiggle. That jiggle is good! It means it won’t overcook and become dry. Overbaking is the main cause of cracks in cheesecake. So, trust the timing and the look of the edges.
Step 8: Cooling Down for Firm Bars
When baking is done, take the pan out of the oven. Let it cool completely right on your counter. This gradual cooling helps prevent cracks. Then, move the whole pan to your refrigerator. Let it chill for at least 2 hours, or even overnight. This chilling step is non-negotiable. It firms up the filling so you can get clean, neat slices.
Step 9: Garnishing and Serving Your Creation
Time for the fun finale! Use a sharp knife to cut your chilled cheesecake into bars. I usually cut about 16. Top each bar with a dollop of whipped cream and a fresh cherry. This makes them look professional and utterly irresistible. Serve them on a nice platter and watch everyone’s eyes light up.
Your Time Commitment
Let’s plan your time. Prep work takes about 20 minutes. Baking takes 40-45 minutes. Cooling and chilling need at least 2 hours, preferably more. So, the total time from start to serving is around 3-4 hours. Most of that is hands-off waiting time. You can easily make these in the afternoon for an evening event.
A Special Chef’s Secret
My secret trick is for the crust. After you press it into the pan, bake it alone for 8 minutes before adding the filling. This pre-baking gives the crust a firmer, toastier base. It stands up better to the moist filling and adds a deeper flavor. It’s a small extra step that makes a big difference.
A Fun Fact About Pistachios
Did you know pistachios are one of the oldest flowering nut trees? People have enjoyed them for thousands of years. They’re not just tasty; they’re packed with good nutrients. Using them in desserts adds a unique color and a buttery crunch that almonds or walnuts just don’t have. Learning more about ingredient origins can be fascinating. For instance, understanding food sustainability helps us appreciate the journey of ingredients like pistachios from farm to table.
Tools You’ll Need
You don’t need lots of special equipment. Here’s your list:
- 9×13-inch baking pan
- Parchment paper
- Medium mixing bowl
- Large mixing bowl
- Hand mixer or stand mixer
- Spatula
- Measuring cups and spoons
- Knife for swirling and cutting
Storing Your Lemon-Lime Pistachio Bars
After serving, you’ll likely have leftovers (though they might not last long!). Store any leftover bars in an airtight container in the refrigerator. They will keep well for up to 4-5 days. The crust may soften a tiny bit over time, but the flavor remains delicious.
For longer storage, you can freeze these cheesecake bars. Place them in a single layer in a freezer-safe container. Separate layers with parchment paper. They can be frozen for up to 2 months. Thaw them in the refrigerator overnight before serving.
Always keep the bars chilled. The cream cheese filling needs a cool temperature to stay fresh and safe to eat. If you’re transporting them, use a cooler or an insulated bag.
My Best Tips and Advice
- Soft Cream Cheese is Key: Let it soften at room temperature for an hour. This prevents a lumpy filling.
- Don’t Overmix After Eggs: Mix just until combined to avoid incorporating too much air, which can cause cracking.
- Cool Completely Before Cutting: Use a sharp, clean knife. Dip it in hot water and wipe it between cuts for super clean slices.
- Swirl with Care: Use a light touch when swirling the cherry preserves to maintain a beautiful pattern.
Presentation Ideas to Impress
Make your bars look spectacular!
- Serve on a white platter with extra chopped pistachios sprinkled around.
- Place each bar on a small square of parchment paper for a bakery-style look.
- Add a tiny mint leaf next to the cherry garnish for a fresh touch.
- Drizzle a little extra cherry preserve on the plate before placing the bar.
Healthier & Fun Variations
Feel free to twist this recipe to suit your taste! Here are six ideas:
- Gluten-Free Bars: Use gluten-free graham crackers or oats for the crust.
- Lower-Sugar Version: Use a sugar substitute in the filling and sugar-free cherry preserves.
- Vegan Cheesecake Bars: Swap cream cheese for vegan cream cheese, use a plant-based butter, and skip the eggs.
- Different Nut Twist: Replace pistachios with toasted almonds or hazelnuts.
- Berry Blast: Use mixed berry preserves instead of cherry for a different fruit flavor.
- Chocolate Infusion: Add 1/2 cup of mini chocolate chips to the filling for a chocolate-cherry combo.
If you love bar desserts, you’ll find so many more inspirations in our main dessert bars and brownies category. It’s a treasure trove of easy, delicious ideas.
For other creative recipes using similar ingredients, check out our Cranberry Pistachio Truffles for a no-bake treat, our indulgent Chocolate Caramel Flan, a refreshing Cheesecake Fruit Salad, or even a savory Bacon Cheeseburger Burrito for when you need a break from sweets!
Common Mistakes to Avoid
Even simple recipes can have pitfalls. Here’s how to steer clear of common errors with these cheesecake bars.
Mistake 1: Using Cold Cream Cheese
This is the biggest mistake. Cold cream cheese will not blend smoothly with the sugar and eggs. Your filling will be lumpy and grainy, not creamy. To avoid this, take your cream cheese out of the fridge at least an hour before you start. Let it soften on the counter. It should feel soft and spreadable when you poke it. If you forget, you can microwave it for a few seconds, but be careful not to melt it.
Mistake 2: Overbaking the Bars
Overbaking leads to a dry, cracked cheesecake. Many people wait for the center to be completely firm like a cake. But cheesecake should still have a slight wobble in the center when you take it out. The edges should be set and lightly golden. The bars will firm up perfectly as they cool in the fridge. Set a timer and trust it. Checking at 40 minutes is a good start.
Mistake 3: Not Cooling Properly Before Chilling
Moving a hot cheesecake directly to the fridge can cause cracks from the sudden temperature change. It can also make your fridge work harder. Always let the pan cool completely on your kitchen counter first. This takes about an hour. Then, transfer it to the refrigerator for the final chill. This gradual cooling gives you the best texture.
Mistake 4: Cutting Before Fully Chilled
It’s tempting to cut into your bars right away. But if the filling isn’t fully set, your slices will be messy and soft. The bars will squish and lose their shape. Wait the full 2 hours, or even longer. Overnight chilling is ideal. This patience ensures you get beautiful, clean-cut bars that hold together.
Mistake 5: Over-Swirling the Cherry Preserves
When you add the cherry dollops and swirl, too much swirling will blend the preserves completely into the filling. You’ll lose that pretty marbled effect. Instead, drop the preserves in small spots. Then, use a knife to make just a few light figure-eight motions through the top. Stop when you see a nice pattern. A little restraint here makes a prettier dessert.
Your Questions Answered
Can I use bottled lemon and lime juice instead of fresh?
You can use bottled juice if you don’t have fresh fruit. The flavor will still be good. But fresh juice makes a noticeable difference. It has a brighter, more vibrant tang. Bottled juice can sometimes taste a bit flat or processed. If you must use bottled, choose a high-quality brand without added sweeteners. But for the best result, squeezing a few lemons and limes is worth the extra minute. It really brings the “sunshine” flavor to life in these Lemon-Lime Pistachio Bars.
How do I know when the bars are done baking?
The bars are done when the edges look set and have turned a light golden color. The center should still look a bit soft and might jiggle slightly when you gently tap the pan. It should not be liquid, but it should not be firm like a cake either. That slight wobble is perfect. It means the center will set up firmly as it cools in the refrigerator. Over baking until the center is firm will result in a dry, dense texture. Trust the visual cues and your timer.
Can I make these bars ahead of time?
Absolutely! These bars are fantastic for making ahead. You can bake them one or two days before your event. Just let them cool, chill them fully, and then keep them covered in the refrigerator. They actually taste better after a night’s rest. The flavors meld together, and the texture becomes perfectly set. If you need to store them even longer, you can freeze them as described in the storage section. This makes them a super convenient dessert for busy schedules.
What can I use instead of cherry preserves?
Many other fruit preserves work wonderfully. Raspberry jam gives a similar tart-sweet flavor. Strawberry preserves are a classic choice. Apricot or peach jam would offer a sweeter, milder twist. You could even use a mixed berry jam. The key is to use a good quality preserve or jam that’s thick enough to swirl without making the filling too wet. If your preserve is very runny, you might want to simmer it for a few minutes to thicken it slightly before using.
Do I have to use parchment paper?
Parchment paper is highly recommended. It makes removing the entire slab of cheesecake from the pan incredibly easy. You can then cut it on a cutting board for cleaner slices. Without parchment, you risk the crust sticking to the pan, and cutting in the pan can be tricky. If you don’t have parchment, you can grease the pan well. But parchment is the best guarantee for perfect, easy removal without any broken corners.
Can I freeze Lemon-Lime Pistachio Bars?
Yes, you can freeze them successfully. Place the fully chilled and cut bars in a single layer in a freezer-safe container. Put parchment paper between layers if you stack them. Freeze for up to 2 months. To thaw, move them to the refrigerator overnight. The texture will remain good, though the crust might soften a tiny bit more. They are a great treat to have on hand for unexpected guests or a quick dessert need.
Why did my cheesecake filling crack?
Cracks usually happen from over mixing or over baking. Adding too much air when beating the eggs can cause cracks. Mix just until ingredients are combined. Over baking makes the filling contract and pull apart as it cools. Follow the baking time closely and look for the slight wobble in the center. Also, cooling too quickly can cause cracks. Let the bars cool on the counter first before refrigerating. Even with a crack, your bars will taste delicious, but these tips help prevent it.
Are pistachios necessary? Can I omit them?
Pistachios add a wonderful crunch and a unique flavor. But you can omit them if you prefer or have an allergy. The bars will still be tasty. If you want a different crunch, you could substitute with another chopped nut like almonds or pecans. You could also leave the nuts out entirely for a smooth, classic cheesecake bar texture. The recipe is flexible. The pistachios just add that special “something” that makes this recipe stand out.
How many bars does this recipe make?
The recipe typically makes about 16 bars. This depends on how large you cut them. A 9×13-inch pan divided into 4 columns and 4 rows gives 16 nice, rectangular bars. You can cut them smaller for more servings, or larger for a bigger treat. They are rich, so a medium-sized bar is usually perfect for one person. This quantity is great for a party or a family that loves leftovers.
Can I use a different pan size?
You can use a different pan, but it will change the results. A 9×13-inch pan is ideal. Using a smaller pan, like a 9×9, will give thicker bars. You may need to bake them a bit longer. Using a larger pan will make thinner bars, and you might bake them a bit less. Just watch the edges and the center set as your guide. The crust layer might also need adjusting. Stick to the recommended size for the best and easiest results.
The Final Sweet Word
These Lemon-Lime Cherry Pistachio Cheesecake Bars truly are a magical treat. They combine creamy, tangy, crunchy, and sweet in one perfect bite. They look stunning but come together without fuss. I hope this recipe becomes a favorite in your home like it is in mine. It’s a dessert that promises smiles and satisfied sighs from everyone who tries it. So, gather your ingredients, enjoy the process, and get ready to share something wonderful. Happy baking!
Equipment
- Grand bol
- Fouet
- Spatule
- Plaque à pâtisserie
- Papier sulfurisé
Ingredients
- 3 paquet(s) fromage à la crème ramolli
- 300 g sucre
- 3 oeufs
- 60 ml jus de citron frais
- 60 ml jus de lime frais
- 5 ml extrait de vanille
- 100 g pistaches hachées
- 150 g confiture de cerise
Instructions
- Préchauffez votre four à 175°C et tapissez un moule à pâtisserie de 23x33 cm avec du papier sulfurisé.
- Dans un bol moyen, mélangez les miettes de biscuits Graham, le sucre et le beurre fondu jusqu'à obtenir un mélange sablonneux. Pressez ce mélange dans le fond du moule préparé.
- Dans un grand bol, battez le fromage à la crème ramolli et le sucre jusqu'à ce que le mélange soit lisse et crémeux.
- Ajoutez les œufs un par un, en mélangeant bien après chaque ajout. Ensuite, incorporez le jus de citron, le jus de lime et l'extrait de vanille.
- Incorporez délicatement les pistaches hachées dans le mélange de garniture.
- Versez la garniture crémeuse sur la croûte et étalez uniformément. Déposez des cuillerées de confiture de cerise sur le dessus et tournez délicatement avec un couteau.
- Faites cuire dans le four préchauffé pendant 40 à 45 minutes jusqu'à ce que les bords soient dorés et que le centre ait une légère tremblote.
- Laissez refroidir complètement sur votre comptoir avant de réfrigérer pendant au moins 2 heures ou toute la nuit.
- Une fois refroidies, coupez en barres, décorez avec de la crème fouettée et des cerises fraîches, et servez.
Notes
Nutrition

Hi, I’m Olivia Parker, the founder of BakingSecret.com and a lifelong lover of all things sweet and homemade. I grew up in a small town in Oregon, where the smell of fresh cookies in my family’s kitchen sparked my passion for baking. Over the years, I turned that passion into a mission: to help home bakers feel confident, inspired, and creative.
After studying food science and working in several artisan bakeries across the U.S., I decided to create a space where everyone from beginners to seasoned bakers can find reliable recipes, expert tips, and a warm, welcoming community. BakingSecret.com is my way of sharing the magic of baking with the world. When I’m not testing new recipes, you’ll find me exploring farmers’ markets, collecting vintage cookbooks, or perfecting my sourdough technique.