
When Life Gives You Brown Bananas, Make Banana Bread Brownies!
Has this ever happened to you? You spot those two lonely, overripe bananas on the counter. They’re too sweet for cereal, but you can’t bear to toss them. I stare at mine and think, “Banana bread?” But then my chocolate craving kicks in. “Brownies?” The ultimate dilemma. So, I got busy in my kitchen and created this magical mash-up: Banana Bread Brownies. It’s the cozy comfort of banana bread swirled with the deep, fudgy joy of a brownie. Trust me, your family will thank you, and those sad bananas will feel like heroes.
The Delicious Story Behind Two Desserts in One
This recipe is my own happy accident! Banana bread has been a home-baking staple for generations, a true way to avoid waste. Brownies, with their rich chocolate history, are everyone’s favorite pick-me-up. One rainy afternoon, I decided to combine the two. I wanted the moist, fruity layer of banana bread and the intense chocolate hit of a brownie in one simple pan. It worked beautifully! While not a centuries-old tradition, this blend is a modern twist that celebrates the best of both classic treats. It’s the kind of recipe that becomes *your* family’s new tradition.
Why You’ll Absolutely Love This Recipe
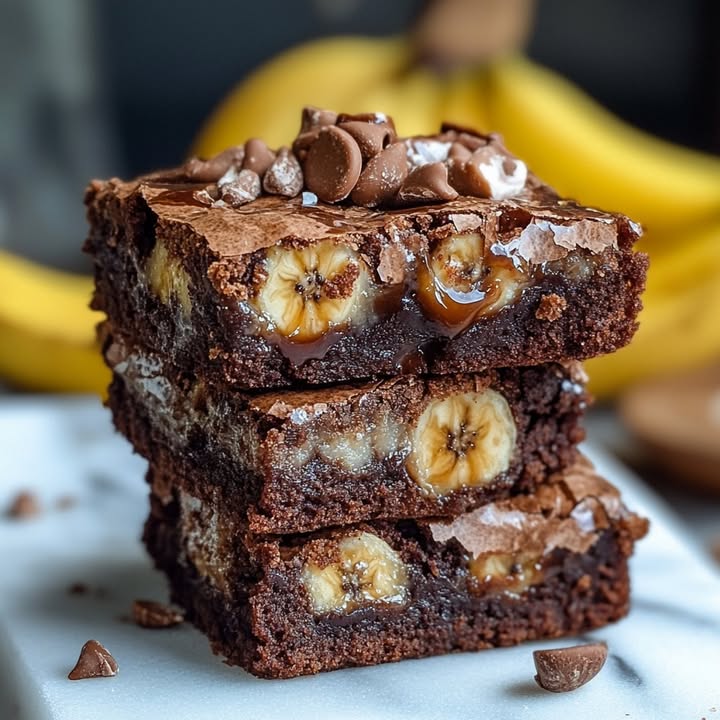
First, it’s the perfect solution for overripe bananas. No more guilt! Second, the flavor combination is unreal. The sweet banana and rich chocolate complement each other so well. Third, it looks impressive with that beautiful marbled top, but it’s surprisingly simple to make. You don’t need any fancy equipment. If you’ve ever made my Classic Lunchroom Ladies Brownies, you’ll find this process just as easy and even more fun with the swirl.
Perfect Occasions for These Crowd-Pleasing Bars
These bars are your new go-to dessert for almost any event! Bring them to a potluck for a surefire hit. Pack them in lunchboxes for a special surprise. They’re ideal for a cozy weekend baking project with kids. I love serving them as a sweet afternoon snack with coffee when friends drop by. They also make a fantastic, less-sweet alternative to a full-blown cake for birthdays. Honestly, any day feels a bit brighter with a banana bread brownie on your plate.
What You’ll Need: The Ingredients List
Gather these simple ingredients. Having everything ready before you start (that’s your *mise en place*) makes the process a breeze.
For the Banana Layer:
- 2 ripe bananas, mashed (the spottier, the better!)
- 1/2 cup granulated sugar
- 1/4 cup unsalted butter, melted
- 1 large egg
- 1 teaspoon vanilla extract
- 3/4 cup all-purpose flour
- 1/2 teaspoon baking powder
- Pinch of salt
For the Brownie Layer:
- 1/2 cup unsalted butter, melted
- 1/2 cup granulated sugar
- 1/2 cup brown sugar
- 2 large eggs
- 1 teaspoon vanilla extract
- 1/2 cup unsweetened cocoa powder
- 3/4 cup all-purpose flour
- 1/2 teaspoon baking powder
- 1/4 teaspoon salt
- 1/2 cup chocolate chips (optional, but highly recommended)
No Worries! Handy Substitution Options
Out of something? Don’t panic. Here are some easy swaps:
- Butter: You can use an equal amount of melted coconut oil for a dairy-free version.
- Flour: A 1-to-1 gluten-free baking blend works great here.
- Sugar: For the brown sugar, you can use all granulated sugar, but the brown sugar adds a nice molasses depth.
- Eggs: For a egg-free banana layer, try a “flax egg” (1 tbsp ground flax + 2.5 tbsp water per egg).
- Chocolate Chips: Feel free to use chopped nuts, white chocolate chips, or even leave them out.
Let’s Get Baking: Your Step-by-Step Guide
Step 1: Prep and Make the Banana Batter
First, preheat your oven to 350°F (175°C). Grease an 8×8-inch baking pan or line it with parchment paper for easy removal. Now, grab those ripe bananas. Mash them in a medium bowl until mostly smooth—a few small lumps are fine and add texture. Add the sugar, melted butter, egg, and vanilla to the bananas. Whisk it all together until the mixture is a lovely, creamy pale yellow. In a separate small bowl, whisk the flour, baking powder, and salt for the banana layer. Gently stir these dry ingredients into the wet banana mixture just until no flour streaks remain. Set this bowl aside.
Step 2: Whip Up the Fudgy Brownie Batter
In a large bowl, combine the melted butter, granulated sugar, and brown sugar. Whisk vigorously for a minute; it will look a bit gritty. Add the eggs and vanilla, and whisk again until the mixture becomes smoother and slightly glossy. Sift in the cocoa powder. This sifting step is a pro tip—it prevents lumps and makes the brownies super smooth. Stir until the cocoa is fully incorporated and the batter is a deep, dark chocolate brown. Now, add the flour, baking powder, and salt for the brownie layer. Fold gently with a spatula until just combined. If you’re using chocolate chips, fold them in now. The batter will be thick and fudgy.
Step 3: Layer, Swirl, and Bake to Perfection
Pour your banana batter into the prepared pan. Use your spatula to spread it into an even layer. Next, dollop large spoonfuls of the brownie batter over the top of the banana layer. Don’t worry about covering every inch. Take a knife or a skewer and gently swirl it through the two batters. Make a few figure-eight motions to create a beautiful marbled pattern. Don’t over-swirl, or you’ll mix them into one homogenous color. Pop the pan into the preheated oven. Bake for 30-35 minutes. The key here is not to overbake. The edges will be set, but a toothpick inserted in the center should come out with a few moist crumbs attached. Chef’s Tip: For super clean slices, let the brownies cool completely in the pan before cutting.
Timing is Everything: Your Bake Schedule
Here’s a quick breakdown of the time you’ll need:
- Prep Time: 15 minutes (perfect for getting the kids involved!)
- Cooking Time: 35 minutes (your kitchen will smell amazing)
- Cooling Time: At least 1 hour (the hardest part—waiting!)
- Total Time: About 1 hour 50 minutes from start to first bite
- Servings: 9 generous squares
- Calories: Approximately 290 per serving
My Secret for the Best Banana Bread Brownies
The real secret is in the ripeness of the bananas. Use bananas that are almost black with spots. They are sweeter, mash easier, and have a more concentrated banana flavor. This sweetness balances the bitterness of the cocoa powder perfectly. If your bananas aren’t quite ripe enough, you can roast them in their peels at 350°F for about 15-20 minutes until the skins are black. Let them cool, and you’ll have perfect baking bananas!
A Fun Fact About Baking Science
Combining banana and cocoa isn’t just delicious, it’s a bit of kitchen science! The natural pectin and moisture in bananas help keep baked goods incredibly moist. This is why the banana layer stays so tender even next to the dense brownie. Understanding these interactions is a key part of the wonderful science of baking.
Checklist: Necessary Equipment
You likely have everything you need already:
- 8×8-inch square baking pan
- Two mixing bowls (one medium, one large)
- Whisk and a spatula
- Measuring cups and spoons
- Fork or potato masher for the bananas
- Toothpick or skewer for testing doneness
Keeping Them Fresh: Smart Storage Tips
Once completely cooled, slice your brownies. You can store them right in the pan if you cover it tightly with plastic wrap or aluminum foil. They will stay moist at room temperature for up to 2 days.
For longer storage, I recommend placing the squares in a single layer in an airtight container. They freeze beautifully! Wrap individual squares in plastic wrap, then place them all in a freezer bag. They will keep for up to 3 months.
When you’re ready to enjoy a frozen treat, just let a square thaw at room temperature for about an hour. You can also pop it in the microwave for 15-20 seconds for a warm, gooey revival.
Helpful Tips and Advice for Success
- Room Temperature Eggs: Using eggs that aren’t straight from the fridge helps the batters emulsify better, leading to a smoother texture.
- Don’t Overmix: Once you add the flour, mix just until the ingredients are combined. Overmixing develops gluten and can make the bars tough.
- Test Early: Start checking for doneness at the 30-minute mark. Ovens vary, and it’s better to check early than to overbake.
- Cool Completely: I know it’s hard, but cutting into warm brownies will result in messy, crumbly squares. Patience gives you clean, beautiful bars.
Making Them Pretty: Presentation Ideas
These brownies are gorgeous on their own, but a little extra touch makes them party-ready!
- Dust with a light sprinkle of powdered sugar or cocoa powder.
- Drizzle with a simple vanilla or chocolate glaze.
- Serve warm with a scoop of vanilla ice cream for an epic sundae.
- Add a dollop of whipped cream and a banana slice on the side.
- For a brunch, cut them into smaller bite-sized pieces.
Mix It Up: Healthier & Fun Variations
Love the base recipe? Try one of these twists next time!
- Nutty Swirl: Add 1/2 cup of chopped walnuts or pecans to the banana batter for a crunchy contrast.
- Peanut Butter Marble: Swirl 1/3 cup of warmed peanut butter into the batters along with the chocolate for a PB&J-inspired treat.
- Gluten-Free & Dairy-Free: Use a GF 1-to-1 flour blend and coconut oil. The bananas keep everything wonderfully moist.
- Blondie Version: Skip the cocoa powder in the brownie layer. Use brown sugar and add white chocolate chips for a banana-blondie brownie.
- Extra Chocolatey: Sprinkle extra chocolate chips on top before baking. Because more chocolate is always a good idea.
- Spiced Banana: Add 1/2 tsp of cinnamon and a pinch of nutmeg to the banana batter for a warm, cozy flavor, perfect alongside a cup of coffee.
Common Mistakes to Avoid
Mistake 1: Using Underripe Bananas
This is the biggest flavor killer. Pale yellow, firm bananas lack the intense sweetness and fragrant aroma of ripe ones. Your banana layer will taste bland and starchy instead of sweet and flavorful. Always wait for those bananas to get nice and spotty, even a little black. The riper they are, the better your brownies will taste and the easier they are to mash.
Mistake 2: Overmixing the Batters
Once you add the flour to each batter, it’s time to be gentle. Vigorous stirring or using an electric mixer on high develops the gluten in the flour. This can make your banana bread brownies tough and chewy instead of tender and cakey. Mix with a spatula just until you no longer see dry flour streaks. A few small lumps are perfectly fine and mean you’ve stopped in time.
Mistake 3: Overbaking the Bars
We want fudgy, moist brownies, not dry cake! Baking them for too long is an easy mistake, especially since the top sets before the center is fully done. The toothpick test is your best friend. Insert it into the center. It should come out with a few moist crumbs attached, not completely clean. The bars will continue to set as they cool in the pan.
Mistake 4: Swirling Too Much
It’s so fun to make that marble pattern, but it’s possible to have too much of a good thing. If you swirl the knife through the batters a dozen times, you’ll just blend them into one muddy-colored batter. You’ll lose the distinct flavor layers. Aim for 4-6 gentle figure-eight motions. You should still see clear patches of both the light banana and dark brownie batters.
Mistake 5: Cutting While Warm
I get it, the aroma is irresistible. But if you slice into these bars while they’re still warm, they will fall apart into a delicious but messy pile. The structure needs time to set as it cools. Let the pan cool on a wire rack for at least an hour, or even better, until completely cool to the touch. You’ll be rewarded with neat, perfect squares.
Your Questions, Answered: FAQ
Can I use frozen bananas?
Absolutely! Thaw frozen bananas completely at room temperature or in the microwave. They will release a lot of liquid as they thaw. Drain this excess liquid before mashing, or your banana batter will be too wet and could make the final bars soggy. The bananas might be a bit mushier than fresh, but they’ll work just fine and are just as sweet.
Can I make this recipe into muffins?
Yes, this recipe adapts wonderfully to muffins! Line a muffin tin with paper liners. Spoon a heaping tablespoon of the banana batter into each cup, then top with a scoop of brownie batter. Use a toothpick to swirl gently. Bake at 350°F for about 18-22 minutes, or until a toothpick comes out clean. This makes about 12 standard muffins. They are perfect for on-the-go snacks or lunchbox treats.
My brownie batter seems very thick. Is that right?
Yes, that’s perfectly normal! A thick, fudgy brownie batter is exactly what you want. It creates that dense, rich chocolate layer that contrasts with the lighter banana cake. Don’t be tempted to add milk or water to thin it out. The thickness allows you to dollop it neatly on top of the banana batter for a clean swirl. Just use your spoon to drop clumps of it over the banana layer.
How do I know when the banana bread brownies are done baking?
Look for three signs: First, the edges will pull away slightly from the sides of the pan. Second, the top will be set and spring back lightly when touched. Third, and most importantly, perform the toothpick test. Insert a toothpick into the center of the pan (try to get a spot that’s more brownie than banana). It should come out with a few sticky, moist crumbs clinging to it. If it comes out with wet batter, bake for another 3-5 minutes and check again.
Can I add nuts or other mix-ins?
Please do! This recipe is very forgiving. A half cup of chopped walnuts or pecans mixed into the banana batter adds a lovely crunch. You could also stir mini chocolate chips, shredded coconut, or even a handful of dried cranberries into either batter. Just keep the total added mix-ins to about 3/4 cup so you don’t overwhelm the batters and affect the baking time.
Why do my brownies sink in the middle?
A slight dip in the very center is normal, but a major sinkhole usually means two things: either the batter was overmixed after adding the flour (developing too much gluten), or the brownies were underbaked. The structure wasn’t set enough to hold its shape as it cooled. Make sure to mix gently and bake until the toothpick test shows moist crumbs, not wet batter.
What’s the best way to store leftovers?
Store cooled brownies in an airtight container at room temperature for up to 2 days. For longer storage (up to 5 days), I keep them in the fridge. The cold makes them very firm, so let them sit out for 15 minutes before eating. For the best long-term solution, freeze them! Wrap individual bars tightly in plastic wrap and store in a freezer bag for up to 3 months.
Can I double this recipe?
You can, but don’t just double everything and use a bigger pan. Doubling works best if you bake it in two separate 8×8 pans. If you try to use a 9×13 pan, the center may not bake through before the edges get too dark. Simply make the recipe twice, or mix a double batch and divide it between two prepared pans. You’ll have one for now and one for the freezer!
Can I use Dutch-process cocoa instead of natural unsweetened cocoa?
This is a great question. In this recipe, you can use them interchangeably because we are using baking powder as the leavener. Dutch-process cocoa is treated with alkali, making it less acidic and milder in flavor. Natural cocoa is more acidic and tangy. Both will work fine here, so use your favorite. The Dutch-process will give a slightly darker color and smoother chocolate flavor.
My bananas aren’t ripe enough. Can I speed up the process?
Yes! Place your yellow bananas in a paper bag with an apple or a tomato. These fruits release ethylene gas, a natural ripening agent. Fold the bag closed and leave it on the counter. Check in 24 hours. For an even faster method, bake unpeeled bananas on a baking sheet at 300°F for 15-20 minutes, until the skins turn black. Let them cool, then scoop out the soft, sweet interior.
I hope you feel inspired to try this fantastic mash-up. It’s a wonderful addition to any baker’s repertoire, especially if you love recipes for dessert bars and brownies.
Ready, Set, Bake!
So, next time those bananas on your counter start calling, you know exactly what to do. Whip up a batch of these incredible Banana Bread Brownies. They combine two beloved classics into one unforgettable treat that’s moist, chocolaty, and bursting with banana flavor. It’s easy, uses simple ingredients, and brings so much joy. Share them with friends, pack them for a picnic, or enjoy one with your afternoon coffee. Happy baking, and don’t forget to tag me in your photos—I love seeing your creations!
Equipment
- Grand bol
- Fouet
- Spatule
- Plaque à pâtisserie
- Papier sulfurisé
Ingredients
- 2 bananes mûres
- 75 g sucre granulé
- 60 g beurre non salé fondu
- 1 œuf
- 1 càc extrait de vanille
- 90 g farine tout usage
- 2 g poudre à lever
- 1 pincée sel
- 60 g beurre non salé fondu
- 75 g sucre granulé
- 75 g sucre brun
- 2 œufs
- 1 càc extrait de vanille
- 60 g cacao en poudre
- 90 g farine tout usage
- 2 g poudre à lever
- 1 pincée sel
- 75 g pépites de chocolat optionnelles
Instructions
- Préchauffez votre four à 175°C et graissez une plaque à pâtisserie de 20x20 cm ou tapissez-la de papier sulfurisé.
- Dans un bol moyen, écrasez les bananes mûres jusqu'à ce qu'elles soient presque lisses, puis ajoutez le sucre, le beurre fondu, l'œuf et l'extrait de vanille, et fouettez jusqu'à ce que le mélange soit crémeux.
- Dans un autre bol, mélangez la farine, la poudre à lever et le sel pour la couche de banane, puis incorporez délicatement au mélange de banane jusqu'à ce qu'il soit juste combiné.
- Dans un grand bol, mélangez le beurre fondu, le sucre granulé et le sucre brun jusqu'à ce que le mélange soit granuleux, puis ajoutez les œufs et l'extrait de vanille, et fouettez jusqu'à ce que le mélange soit lisse.
- Tamisez le cacao en poudre et incorporez-le jusqu'à ce qu'il soit bien mélangé, puis ajoutez la farine, la poudre à lever et le sel, en pliant doucement jusqu'à ce que le mélange soit juste combiné. Si vous utilisez, incorporez les pépites de chocolat.
- Versez la pâte de banane dans le moule préparé et étalez-la uniformément, puis déposez la pâte à brownie sur le dessus.
- À l'aide d'un couteau ou d'un cure-dent, mélangez doucement les deux pâtes pour créer un motif marbré, en prenant soin de ne pas trop mélanger.
- Faites cuire au four pendant 30-35 minutes, en vérifiant la cuisson avec un cure-dent : il doit en ressortir avec quelques miettes humides.
- Laissez refroidir complètement dans le moule avant de couper en carrés.
Notes
Nutrition

Hi, I’m Olivia Parker, the founder of BakingSecret.com and a lifelong lover of all things sweet and homemade. I grew up in a small town in Oregon, where the smell of fresh cookies in my family’s kitchen sparked my passion for baking. Over the years, I turned that passion into a mission: to help home bakers feel confident, inspired, and creative.
After studying food science and working in several artisan bakeries across the U.S., I decided to create a space where everyone from beginners to seasoned bakers can find reliable recipes, expert tips, and a warm, welcoming community. BakingSecret.com is my way of sharing the magic of baking with the world. When I’m not testing new recipes, you’ll find me exploring farmers’ markets, collecting vintage cookbooks, or perfecting my sourdough technique.