
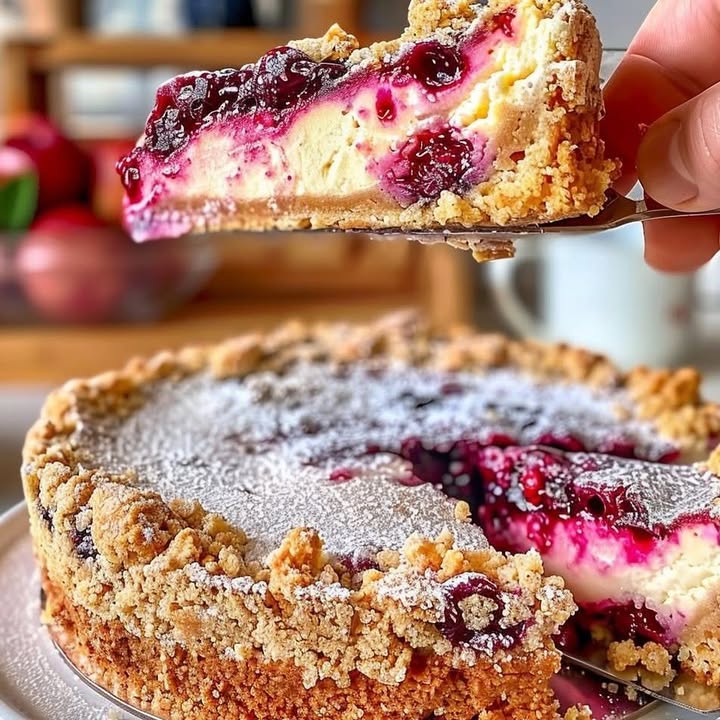
Why You’ll Fall in Love with This Mixed Berry Crumble Cheesecake
There’s something magical about a cheesecake that feels like a warm hug. I remember the first time I made this **Mixed Berry Crumble Cheesecake** for my family—it was one of those moments where everyone stopped mid-conversation, eyes wide, forks hovering in awe. The creamy cheesecake layer, the burst of juicy berries, and the buttery crumble topping come together in a symphony of flavors. It’s not just dessert; it’s an experience. Whether you’re a seasoned baker or just starting out, this recipe is forgiving, fun, and oh-so-delicious.
The Sweet History Behind This Cheesecake
Cheesecakes have been around for centuries, but this particular version is my modern twist on a classic. The idea came to me during a summer trip to a local farmers’ market, where I stumbled upon baskets of fresh mixed berries. I thought, why not combine the best of both worlds—a rich cheesecake base topped with a fruity layer and a crunchy crumble? It’s like taking a traditional New York cheesecake and giving it a playful, berry-packed makeover. Over the years, this recipe has become a staple at family gatherings and potlucks because it’s as beautiful as it is tasty.
Why You’ll Love This Recipe
What makes this **Berry Crumble Cheesecake** special is its balance of textures and flavors. The biscuit base is sturdy yet crumbly, the cheesecake filling is velvety smooth, and the berry layer adds a pop of tartness that cuts through the richness. Plus, the crumble topping gives it that extra crunch we all secretly crave. Best of all, it’s surprisingly easy to make. Even if you’ve never baked a cheesecake before, this recipe will guide you every step of the way.
Perfect Occasions to Whip Up This Dessert
This **Mixed Berry Crumble Cheesecake** is perfect for any occasion—or no occasion at all! Serve it at birthday parties, holiday dinners, or weekend brunches. It’s also a showstopper for baby showers, bridal events, or even a cozy movie night with friends. I once made it for a neighbor’s housewarming party, and it was gone within minutes. Trust me, this dessert has a way of bringing people together.
Ingredients You’ll Need
Here’s what you’ll need to create this masterpiece:
For the crumble topping:
- 100g plain flour
- 30g caster sugar
- 50g butter, melted
For the berry layer:
- 200g mixed berries (frozen or fresh work equally well)
For the cheesecake filling:
- 500g full-fat cream cheese at room temperature
- 150g double cream
- 3 tablespoons plain flour
- 1 egg
- 2 teaspoons vanilla extract
- 100g caster sugar
- Zest of 1 lemon
- 1 tablespoon lemon juice
For the biscuit base:
- 200g crushed digestive biscuits
- 1 tablespoon sugar
- 100g butter, melted
Substitution Options
Not everyone has the same ingredients on hand, so here are some swaps you can try:
- Use graham crackers instead of digestive biscuits for the base.
- If you don’t have caster sugar, regular granulated sugar works fine—just blend it in a food processor for a finer texture.
- Swap double cream with heavy cream if needed.
- Feel free to use any berries you like—raspberries, blueberries, or strawberries all work beautifully.
Preparation Section
Step 1: Preheat and Prep Your Base
Start by preheating your oven to 180°C (160°C fan) or Gas Mark 4. For the base, mix crushed digestive biscuits, sugar, and melted butter until it resembles damp sand. Press this mixture firmly into the bottom of a 20cm springform tin lined with baking paper. Pro tip: Use the back of a spoon to press it down evenly for a smooth finish. Pop it in the fridge to chill while you move on to the next steps.
Step 2: Make the Crumble Topping
In a small bowl, stir together the flour and sugar for the crumble. Add the melted butter and mix until the mixture becomes crumbly. It should look like coarse breadcrumbs. Set this aside in the fridge while you prepare the cheesecake filling. Chef’s tip: Chilling the crumble helps it stay firm during baking, giving you that perfect crunchy texture.
Step 3: Whip Up the Cheesecake Filling
In a large mixing bowl, beat the cream cheese until it’s smooth and creamy. Add the double cream, flour, egg, vanilla extract, sugar, lemon zest, and juice. Blend everything until just combined—don’t overmix, or you might introduce too much air, which can cause cracks later. The mixture should be thick, glossy, and fragrant from the lemon zest. Pour this luscious filling over your chilled biscuit base.
Step 4: Assemble and Bake
Scatter the mixed berries evenly over the cheesecake filling. They’ll sink slightly as the cake bakes, creating little pockets of fruity goodness. Sprinkle the prepared crumble topping generously over the berries. Bake in the preheated oven for 50–55 minutes. The top should turn golden brown, and the center should have a gentle wobble. Pro tip: Rotate the tin halfway through baking for even color.
Step 5: Cool and Chill
Once baked, switch off the oven and let the cheesecake cool inside with the door slightly open for 2 hours. This gradual cooling prevents cracks. Then, transfer it to the fridge to chill overnight. Trust me, the wait is worth it—the flavors meld together beautifully, and the texture becomes irresistibly creamy.
Timing
- Prep Time: 20 minutes
- Cooking Time: 50–55 minutes
- Resting Time: 2 hours (cooling) + overnight chilling
- Total Time: Approximately 12 hours
Chef’s Secret
To avoid cracks on the surface, run a thin knife around the edge of the cheesecake as soon as it comes out of the oven. This helps release any tension caused by the cooling process.
Extra Info
Did you know that adding lemon zest to desserts enhances their flavor profile? The citrus oils in the zest add brightness and depth, making this **Berry Crumble Cheesecake** taste even more vibrant.
Necessary Equipment
You’ll need a few basic tools to make this recipe:
- A 20cm springform tin
- Mixing bowls
- An electric mixer or whisk
- A spatula
- Baking paper
Storage Tips
After enjoying a slice, store the leftover cheesecake in the fridge. Cover it tightly with plastic wrap or place it in an airtight container to keep it fresh. It should last up to 3–4 days. If you want to freeze it, wrap individual slices in parchment paper and then aluminum foil. Frozen slices can be stored for up to 2 months.
If you’re serving it after freezing, let it thaw in the fridge overnight. Never microwave frozen cheesecake, as it can ruin the texture. Always serve it cold for the best taste and consistency.
Tips and Advice
- Make sure your cream cheese is at room temperature before mixing—it blends much smoother.
- Don’t skip the chilling step; it’s crucial for setting the cheesecake properly.
- For extra flair, garnish with mint leaves or edible flowers when serving.
Presentation Ideas
Dust the top with icing sugar using a fine sieve for a professional touch. Add a handful of fresh berries and a drizzle of honey or raspberry coulis for color and sweetness. Serve each slice on a pretty plate with a dollop of whipped cream for added indulgence.
Healthier Alternatives
If you’re looking for lighter options, here are six variations:
- Low-Fat Version: Use low-fat cream cheese and Greek yogurt instead of double cream.
- Vegan Option: Substitute dairy products with plant-based alternatives like coconut cream and vegan cream cheese.
- No-Sugar Version: Replace sugar with a natural sweetener like stevia or monk fruit.
- Gluten-Free Base: Use gluten-free cookies or oats for the crust.
- Protein-Packed: Add a scoop of vanilla protein powder to the cheesecake filling.
- Dairy-Free Berries: Use only fresh berries without adding additional sugar.
Common Mistakes to Avoid
Mistake 1: Overmixing the Filling
Overmixing introduces too much air into the cheesecake batter, leading to cracks during baking. To avoid this, blend the ingredients just until combined. A few tiny lumps are okay—they’ll disappear as the cheesecake bakes.
Mistake 2: Skipping the Cooling Process
Taking the cheesecake straight from the oven to the fridge causes thermal shock, which often results in cracks. Always let it cool gradually in the turned-off oven with the door slightly ajar.
Mistake 3: Using Cold Cream Cheese
Cold cream cheese doesn’t blend smoothly, leaving lumps in your filling. Take it out of the fridge an hour before you start baking.
Mistake 4: Not Greasing the Tin Properly
A poorly greased tin can make removing the cheesecake difficult. Line the base with baking paper and grease the sides lightly with butter or non-stick spray.
Mistake 5: Overloading the Berries
While berries are delicious, too many can make the cheesecake soggy. Stick to the recommended amount for the best texture.
FAQs
Can I use frozen berries?
Yes, frozen berries work perfectly fine. Just make sure they’re thawed and drained of excess liquid before using them.
How do I prevent cracks in my cheesecake?
Cracks often happen due to sudden temperature changes. Gradually cool the cheesecake in the oven and avoid overmixing the batter.
Can I make this recipe ahead of time?
Absolutely! This cheesecake tastes even better the next day, so it’s perfect for making ahead of time.
What size tin should I use?
A 20cm springform tin is ideal for this recipe. If you use a larger tin, the layers may be thinner.
Do I need to bake the base first?
No, the base doesn’t need pre-baking. Just chill it before adding the filling.
Can I freeze this cheesecake?
Yes, wrap individual slices in parchment paper and foil, then freeze for up to 2 months.
Is there a substitute for digestive biscuits?
Yes, graham crackers or any plain cookie crumbs can replace digestive biscuits.
Can I add other fruits?
Of course! Try apples, pears, or peaches for a different twist.
Why does my cheesecake have a grainy texture?
Graininess usually happens if the sugar isn’t fully dissolved. Ensure your cream cheese is soft and mix thoroughly.
What’s the best way to serve this cheesecake?
Serve it chilled, garnished with fresh berries and a dusting of icing sugar for a stunning presentation.
Final Thoughts
This **Mixed Berry Crumble Cheesecake** is more than just a dessert—it’s a celebration of flavors and textures. Whether you’re baking for loved ones or treating yourself, this recipe promises to impress. So grab your apron, gather your ingredients, and get ready to create a cheesecake that’s as delightful to make as it is to eat. Happy baking!
Equipment
- 20cm springform tin
- Mixing bowls
- Electric mixer or whisk
- Spatula
- Baking paper
Ingredients
- 100 g plain flour
- 30 g caster sugar
- 50 g butter, melted
- 200 g mixed berries frozen or fresh
- 500 g full-fat cream cheese at room temperature
- 150 ml double cream
- 3 tablespoons plain flour
- 2 teaspoons vanilla extract
- 100 g caster sugar
- 1 lemon zest of 1 lemon
- 1 tablespoon lemon juice
- 200 g crushed digestive biscuits
- 1 tablespoon sugar
- 100 g butter, melted
Instructions
- Preheat your oven to 180°C (160°C fan) or Gas Mark 4.
- Mix crushed digestive biscuits, sugar, and melted butter until it resembles damp sand.
- Press the mixture firmly into the bottom of a 20cm springform tin lined with baking paper and chill in the fridge.
- In a small bowl, combine flour and sugar for the crumble topping, then mix in melted butter until crumbly. Set aside in the fridge.
- In a large bowl, beat the cream cheese until smooth, then add double cream, flour, egg, vanilla extract, sugar, lemon zest, and juice. Blend until just combined.
- Pour the cheesecake filling over the chilled biscuit base.
- Scatter mixed berries over the cheesecake filling and sprinkle the crumble on top.
- Bake for 50–55 minutes until the top is golden brown and the center has a gentle wobble.
- Let the cheesecake cool in the oven with the door slightly open for 2 hours, then chill in the fridge overnight.