
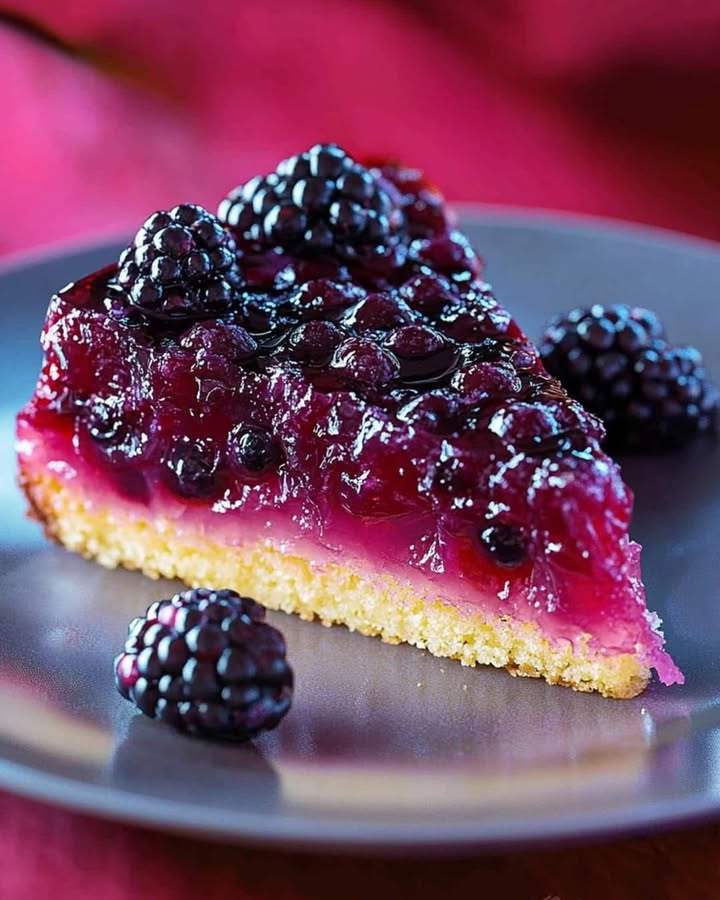
Is there anything more charmingly simple yet utterly impressive than flipping a cake out of a pan onto a plate? That moment of suspense, when you lift the pan and reveal a beautiful, jewel-toned berry topping, is pure kitchen magic. My first taste of Berry Upside-Down Cake was at a friend’s summer potluck years ago. The rich, caramelized blackberries and tender vanilla cake won my heart instantly. It was so much fancier than my usual sheet cake, yet the recipe was surprisingly straightforward. I’ve been baking it for my family ever since, and it never fails to impress.
The Story Behind Upside-Down Cakes
The modern upside-down cake is a true American classic. It likely evolved from old skillet cakes baked over an open fire. The most famous version, pineapple upside-down cake, took off in the early 1900s after Dole ran a contest. But long before canned pineapple, resourceful cooks were using what they had—like fresh summer berries. My version with blackberries is a beautiful twist on that tradition. It uses the same clever, caramel-soaked fruit base but bursts with tangy, dark berry flavor. It’s a fantastic way to celebrate seasonal fruit.
Why You’ll Love This Berry Upside-Down Cake
Honestly, this recipe is a gem for so many reasons! First, it looks like a million bucks with very little effort. The blackberries create a stunning, stained-glass effect on top. The cake itself is a soft, buttery vanilla sponge that soaks up just a hint of the berry caramel. It’s also wonderfully versatile. If you only have frozen berries, no problem—they work perfectly. It’s a one-pan wonder that feels special enough for a celebration but easy enough for a Sunday dessert.
Perfect Occasions for This Stunning Dessert
This cake is perfect for any gathering where you want a dessert that looks fantastic without stressing you out. Think casual backyard barbecues, weekend brunches, or book club meetings. I love bringing it to potlucks because it travels so well right in the pan. It’s also a beautiful way to end a weeknight family dinner. A simple dusting of powdered sugar makes it elegant, while a scoop of vanilla ice cream turns it into a decadent treat.
Berry Upside-Down Cake Ingredients
Here’s your simple shopping list. I always pull everything to room temperature before I start—it makes mixing a breeze!
- For the Blackberry Topping:
- 1/3 cup packed light brown sugar
- 2 tablespoons unsalted butter
- 2 cups fresh or frozen blackberries (no need to thaw)
- For the Cake Batter:
- 1/2 cup granulated sugar
- 1/2 cup unsalted butter, softened
- 2 large eggs, room temperature
- 1 1/2 cups all-purpose flour
- 2 teaspoons baking powder
- 1/2 teaspoon salt
- 1/2 cup whole milk
- 1 teaspoon pure vanilla extract
Ingredient Substitutions: Be Flexible!
Don’t be afraid to swap things based on what’s in your pantry. Dark brown sugar can stand in for light, giving a deeper molasses note. Out of blackberries? Try raspberries, blueberries, or even mixed berries. You can use buttermilk instead of regular milk for a slight tang. And if you’re out of vanilla extract, a scraped vanilla bean pod works wonderfully.
How to Make Your Berry Upside-Down Cake
Let’s get baking! Just follow these simple steps for a show-stopping dessert.
Step 1: Create That Luscious Blackberry Topping
Start by melting your brown sugar and butter together in a saucepan over medium heat. The mixture will bubble and smell like rich, warm caramel. Add your blackberries and gently toss them in this luxurious syrup for about a minute. You’ll see the berries start to release their gorgeous dark juices. Be careful not to stir too vigorously—you want them to stay mostly whole for that beautiful presentation. Immediately pour this mixture into a well-greased 9-inch round cake pan, spreading the berries into an even layer. That sizzling sound is the promise of deliciousness!
Pro tip: Grease your pan *really* well! I use a non-stick spray with flour in it, or you can butter and flour it. This ensures your topping will release cleanly.
Step 2: Cream the Butter and Sugar for the Cake Batter
In a large bowl, beat your softened butter and granulated sugar together with an electric mixer. Keep going for about 3 minutes until it’s pale, fluffy, and almost like a light frosting. This step is crucial for a tender cake crumb. Scrape down the sides of the bowl, then add your room-temperature eggs one at a time. Beat well after each addition so the mixture stays smooth and emulsified. You’ll end up with a creamy, voluminous base for your batter.
Step 3: Combine Your Dry Ingredients
In a separate medium bowl, whisk together the flour, baking powder, and salt. This isn’t just mixing—you’re aerating the flour and ensuring the leavening agents are evenly distributed. Doing this separately prevents you from over-mixing later, which can lead to a tough cake. Set this bowl aside with your measured milk and vanilla extract nearby, ready for the final mixing stage.
Step 4: Bring the Cake Batter Together
Now, add the vanilla extract to your milk. With your mixer on low speed, begin adding the flour mixture and the milk mixture to the creamed butter. Start with about a third of the flour, then half the milk, another third of flour, the rest of the milk, and finish with the last of the flour. Mix just until each addition is incorporated before adding the next. The batter will be thick, smooth, and beautifully speckled with vanilla beans if you used a pod.
Step 5: Assemble and Bake Your Masterpiece
Time to bring it all together! Spoon your vanilla cake batter carefully over the blackberry caramel in the pan. Gently spread it with a spatula to cover all the berries in an even layer. Pop the pan into your preheated 350°F (175°C) oven. Bake for 35-40 minutes. The cake is done when the top is golden and springs back to a light touch, and a toothpick inserted into the center of the cake (not straight down into the fruit) comes out clean.
Step 6: The Grand Flip and Serving
Here comes the fun part! Let the cake cool in the pan on a wire rack for *exactly* 30 minutes. This timing is key—too hot, and it will fall apart; too cool, and the caramel can stick. Run a thin knife around the edge to loosen it. Place your serving plate firmly on top of the pan. With confidence, flip the whole thing over. Give the pan a gentle tap, then slowly lift it away to reveal your stunning Blackberry Upside-Down Cake.
Chef’s Tip: For the cleanest release, slightly warm the bottom of the pan over a low burner for just 15 seconds before flipping. This re-melts the caramel just enough.
Berry Upside-Down Cake Timing Breakdown
- Prep Time: 20 minutes
- Cook Time: 35 minutes
- Cooling Time: 30 minutes
- Total Time: 1 hour 25 minutes
- Servings: 8 generous slices
My Secret for a Perfect Cake Every Time
My secret is all in the flour. Instead of just scooping from the bag, I always spoon the flour into my measuring cup and level it off with a knife. This prevents you from accidentally packing in too much flour, which leads to a dry, dense cake. That little extra effort makes the texture incredible—light, moist, and tender.
A Fun Twist on an Old Favorite
The upside-down cake technique is brilliant because the fruit essentially cooks twice. It first simmers in the caramel on the stovetop, then bakes under the cake batter. This double dose of heat concentrates the berry flavor and creates that delightful syrupy sauce. It’s a perfect example of simple ingredients turning into something extraordinary.
Kitchen Tools You’ll Need
- A 9-inch round cake pan (I prefer a springform for ultimate ease)
- Electric hand mixer or stand mixer
- Two mixing bowls (one large, one medium)
- Whisk and spatula
- Saucepan
- Wire cooling rack
Storing Your Leftover Cake
If you have any leftovers (a big if in my house!), store the cake covered at room temperature for up to two days. I just place the plate under a large, upside-down bowl.
For longer storage, wrap individual slices tightly in plastic wrap and freeze them for up to two months. The cake and berries hold up beautifully.
To thaw, just let a slice sit at room temperature for about an hour, or pop it in the microwave for a few seconds. It’s almost as good as fresh!
Tips for Upside-Down Cake Success
- Use Room Temperature Ingredients: Cold eggs or milk can make your batter curdle and not rise as well.
- Don’t Over-mix: Once you add the flour, mix until *just* combined. A few small lumps are okay!
- Cool Before Flipping: That 30-minute rest is non-negotiable. It lets the cake structure set so it doesn’t collapse.
- Grease the Pan Well: Don’t skimp on the non-stick spray or butter. Getting every corner ensures a clean flip.
How to Serve This Stunning Dessert
- Serve it slightly warm with a dollop of freshly whipped cream.
- A scoop of good vanilla bean ice cream melting over the warm berries is heavenly.
- For a brunch look, dust the top lightly with powdered sugar.
- Add a sprig of fresh mint or a few extra fresh berries on the plate for color.
- Slice it right at the table for that dramatic, delicious reveal.
6 Tasty Variations on This Berry Cake
Love the idea but want to mix it up? Here are some delicious twists:
- Tropical Pineapple: Use canned pineapple rings with a maraschino cherry in the center. So retro, so good!
- Apple-Ginger: Layer thin apple slices tossed with a teaspoon of grated fresh ginger in the caramel. Perfect for fall.
- Maple-Pecan: Replace the berries with a single layer of pecan halves and use maple syrup in your caramel. Top with a spice cake batter.
- Chocolate-Raspberry: Add 1/4 cup of cocoa powder to the dry ingredients and use raspberries. So decadent!
- Lemon-Blueberry: Add the zest of one lemon to your cake batter and use blueberries. Bright and fresh.
- Stone Fruit: Thinly sliced peaches, nectarines, or plums work wonderfully. Use vanilla or almond extract in the cake.
If you love creative bakes like this, you might also enjoy trying our viral Dubai Chocolate Pistachio Cookies. For another cake that wows a crowd, my Pecan Butter Cake is always a hit.
Common Mistakes to Avoid When Making Upside-Down Cake
Mistake 1: Flipping the Cake Too Soon
This is the number one heartbreaker. If you flip the cake while it’s still piping hot, the structure hasn’t set. The warm cake can tear or collapse under its own weight, and the hot caramel is too runny. It makes a sticky, messy disaster. Always, always let it cool in the pan for the full 30 minutes on a wire rack. This allows everything to firm up just enough for a perfect, clean release.
Mistake 2: Not Greasing the Pan Generously
That beautiful fruit and caramel topping is basically sugary glue. If you’re stingy with the butter or non-stick spray, it will weld itself to the pan. No matter how well you bake it, you’ll end up scraping it out in pieces. Take an extra thirty seconds to coat every inch of the pan’s bottom and sides. Pay special attention to the center where the fruit sits. A little extra fat here saves a lot of frustration later.
Mistake 3: Over-mixing the Cake Batter
Once you add flour to the wet ingredients, gluten starts to develop. The more you mix, the tougher and chewier the gluten strands become. This leads to a dense, tough cake instead of a light, tender crumb. Mix on low speed, and stop as soon as you no longer see dry streaks of flour. A few small lumps are absolutely fine. They will bake out, I promise.
Practical Tip: Use a spatula for the final folds instead of the electric mixer to prevent overdoing it.
Mistake 4: Using Fruit That’s Too Wet
If you’re using frozen berries, do not thaw them first. Thawed berries release a flood of water into the caramel, making it thin and soupy. This can seep into the cake batter and make it gummy. Toss your frozen berries straight from the freezer into the hot caramel. They will cook perfectly as the cake bakes. The same goes for fresh fruit—pat it dry if it’s been washed recently.
Frequently Asked Questions (FAQ)
Can I use frozen blackberries instead of fresh?
Absolutely! Frozen blackberries work perfectly in this recipe. In fact, I often prefer them because they hold their shape well and are available year-round. The key is to use them straight from the freezer—do not thaw them first. Adding frozen berries directly to the hot caramel prevents them from becoming mushy and releasing too much liquid. They will cook beautifully as the cake bakes, creating that same lovely syrupy topping. It’s a fantastic, budget-friendly way to make this cake any season.
Why did my cake stick to the pan when I flipped it?
The most common reasons are flipping too soon or not greasing the pan enough. The cake needs its full 30-minute cooling time to set. Also, be generous with your non-stick spray or butter. Make sure you run a thin knife or offset spatula all around the edge before flipping. If you’re nervous, try this trick: after cooling, place the pan on a warm burner for just 15-20 seconds. This gently re-melts the caramel on the bottom and helps release the cake.
Can I make this cake a day ahead?
Yes, you can! Bake and flip the cake as directed. Let it cool completely after the flip, then wrap it tightly in plastic wrap. Store it at room temperature overnight. The flavors often meld and improve. If you want to serve it warm, you can gently warm individual slices in the microwave for 10-15 seconds before serving.
What other pans can I use besides a 9-inch round?
You can use a 9-inch square pan or a 10-inch cast-iron skillet with great results. A springform pan also works wonderfully. Just adjust the baking time slightly. A thicker cake in a smaller pan may need 5-10 extra minutes, while a thinner layer in a larger pan may bake a few minutes faster. Always use the toothpick test to be sure.
My caramel hardened after I poured it in the pan. Is that okay?
That’s completely normal and actually good! The caramel will firm up as it sits and cools before you add the batter. When it goes into the hot oven, it will melt back into a syrupy sauce and cook with the fruit. Don’t try to re-melt it on the stove—just pour your batter right over the top and proceed. The oven’s heat will handle the rest.
Can I reduce the sugar in this recipe?
You can slightly reduce the sugar, but be cautious. The sugar in the topping creates the caramel, which is essential for flavor and texture. For the cake batter, you could reduce the granulated sugar by about 2 tablespoons for a less sweet cake. The texture might be slightly denser. For a conscious eating approach, focus on using high-quality, flavorful berries.
The berries all floated to one side of my cake. What happened?
This happens if the batter is too thin or if you pour it into the pan too forcefully. When spooning the batter over the berries, drop it in dollops all around the pan. Then, gently spread it with a spatula in a slow, even motion. This helps keep the berries in place. A properly thick batter (not over-mixed) also helps hold everything steady.
Do I have to use brown sugar for the topping?
Brown sugar is recommended because its molasses content creates a richer, deeper caramel with a butterscotch note. You can use all granulated sugar in a pinch. The result will be a lighter, clearer caramel that still tastes delicious. I wouldn’t recommend using only white sugar if you have brown—the flavor difference is worth it.
Can I add spices to the cake batter?
Definitely! A teaspoon of cinnamon or a pinch of nutmeg added to the dry ingredients would be lovely with the blackberries. You could also add the zest of an orange or lemon for a bright, citrusy twist. Just add these flavorings along with the dry ingredients so they get evenly distributed.
Is this cake suitable for freezing?
It freezes beautifully. After the cake is completely cooled, wrap individual slices tightly in plastic wrap, then place them in a freezer bag or airtight container. Freeze for up to 2 months. Thaw overnight in the refrigerator or for a few hours at room temperature. You can also warm a frozen slice directly in a low oven or the microwave.
For more wonderful treats like this, be sure to explore all of our other delicious cake and cupcake recipes that are perfect for any occasion.
The Final Slice
This Berry Upside-Down Cake is more than just a dessert; it’s a little bit of kitchen theater that ends in pure, berry-filled delight. It’s the perfect mix of nostalgic comfort and impressive presentation. Whether you’re baking for a quiet family night or a house full of friends, it’s guaranteed to bring smiles. So grab your pan, flip it with confidence, and get ready for the compliments. And remember, the best part isn’t just how it looks—it’s the look on everyone’s face when they take that first perfect bite.
Equipment
- Plaque à pâtisserie de 9 pouces
- Mélangeur électrique ou batteur sur socle
- Deux bols à mélanger
- Saucepan
- Grille de refroidissement
Ingredients
- 80 g sucre brun clair
- 30 g beurre non salé
- 300 g mûres fraîches ou congelées pas besoin de décongeler
- 100 g sucre granulé
- 110 g beurre non salé, ramolli
- 2 œufs, à température ambiante
- 190 g farine tout usage
- 10 g poudre à lever
- 2 g sel
- 120 ml lait entier
- 5 ml extrait de vanille
Instructions
- Faites fondre le sucre brun et le beurre dans une casserole à feu moyen jusqu'à ce que le mélange commence à bouillonner.
- Ajoutez les mûres dans le caramel pendant environ une minute et versez le mélange dans un moule à gâteau rond de 9 pouces graissé.
- Dans un grand bol, crémez le beurre et le sucre granulé ensemble jusqu'à ce que le mélange soit pâle et moelleux, environ 3 minutes.
- Ajoutez les œufs un à un, en battant bien après chaque ajout.
- Dans un autre bol, tamisez la farine, la poudre à lever et le sel.
- Ajoutez le lait et l'extrait de vanille au mélange de lait.
- Mélangez progressivement les ingrédients secs et humides dans le beurre crémeux, en alternant jusqu'à ce que le tout soit bien combiné.
- Versez la pâte sur le mélange de mûres et lissez-la uniformément.
- Faites cuire dans un four préchauffé à 175°C pendant 35-40 minutes jusqu'à ce qu'il soit doré.
- Laissez refroidir pendant 30 minutes, puis passez un couteau autour du bord et retournez sur une assiette de service.
Notes
Nutrition

Hi, I’m Olivia Parker, the founder of BakingSecret.com and a lifelong lover of all things sweet and homemade. I grew up in a small town in Oregon, where the smell of fresh cookies in my family’s kitchen sparked my passion for baking. Over the years, I turned that passion into a mission: to help home bakers feel confident, inspired, and creative.
After studying food science and working in several artisan bakeries across the U.S., I decided to create a space where everyone from beginners to seasoned bakers can find reliable recipes, expert tips, and a warm, welcoming community. BakingSecret.com is my way of sharing the magic of baking with the world. When I’m not testing new recipes, you’ll find me exploring farmers’ markets, collecting vintage cookbooks, or perfecting my sourdough technique.