
Why This Berry Bliss Red Velvet Cake Is a Showstopper
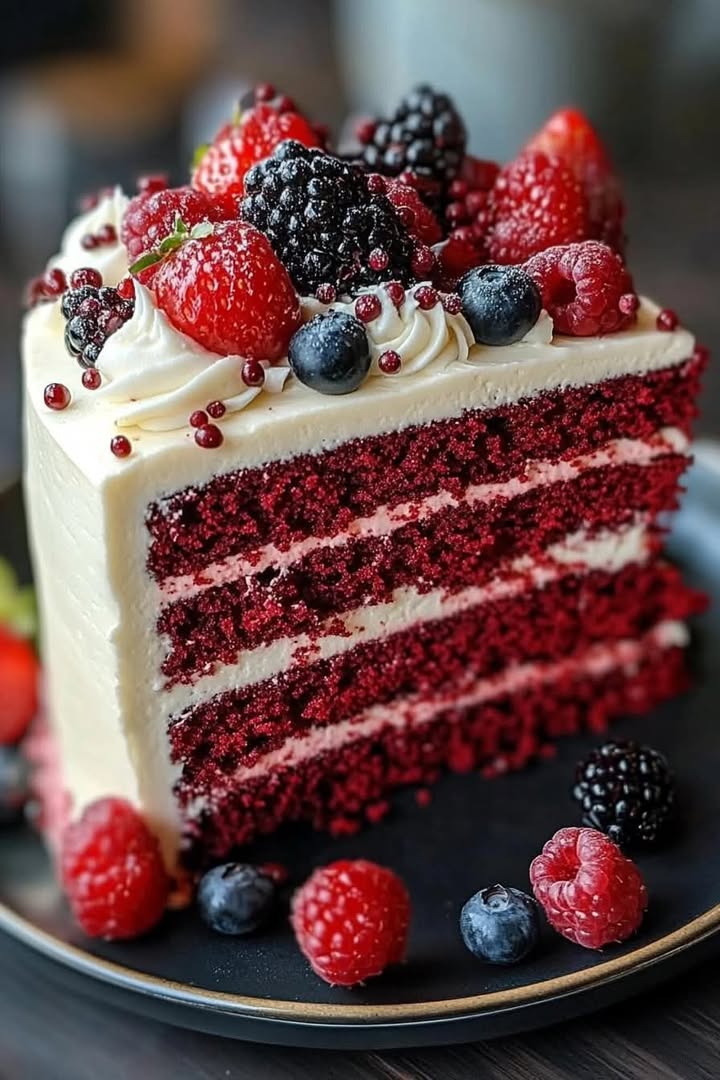
Picture this: a slice of cake so vibrant it could light up a room, layered with the juiciest berries and topped with velvety cream cheese frosting. Sounds dreamy, right? That’s exactly what happened when I first made this Berry Bliss Red Velvet Cake. It was for my niece’s birthday, and let me tell you, it stole the show. The combination of rich red velvet cake, tangy berry filling, and creamy frosting is nothing short of magical. Whether you’re baking for a special occasion or just because, this recipe is sure to become a family favorite.
A Little History Behind Red Velvet Cake
Red velvet cake has been around since the early 20th century, but its origins are a bit mysterious. Some say it started as a simple cocoa-flavored cake that turned reddish due to a reaction between cocoa powder and vinegar. Others believe it gained fame in the South thanks to its dramatic color and luxurious texture. Over the years, bakers have added their own twists, like cream cheese frosting and fruity fillings. My version, the Berry Velvet Delight, brings a modern twist by adding a burst of fresh berries. It’s a nod to tradition with a fresh, fruity flair.
Why You’ll Love This Recipe
This cake is a winner for so many reasons. First, the flavors are perfectly balanced—rich, tangy, sweet, and refreshing all at once. Second, it’s surprisingly easy to make, even if you’re not a pro baker. Plus, the vibrant red layers and colorful berry topping make it a feast for the eyes. When I served this cake at my niece’s party, everyone kept asking for seconds (and the recipe!). Trust me, once you try it, you’ll see why it’s worth every bite.
Perfect Occasions to Bake This Cake
This Berry Bliss Red Velvet Cake is perfect for birthdays, anniversaries, or holiday gatherings. It’s also a great choice for Valentine’s Day, thanks to its romantic red hue. But honestly, you don’t need a reason to bake it. I’ve made it for casual Sunday dinners, potlucks, and even just because I felt like having something sweet. It’s versatile enough to fit any occasion, big or small.
Ingredients You’ll Need
Here’s what you’ll need to create this masterpiece:
For the Red Velvet Cake:
- 2 cups all-purpose flour
- 1 cup granulated sugar
- 1 tsp baking powder
- 1 tsp baking soda
- 1 tsp cocoa powder
- ½ tsp salt
- 1 cup vegetable oil
- 1 cup buttermilk
- 2 large eggs
- 2 tbsp red food coloring or beet juice
- 1 tsp vanilla extract
- 1 tsp white vinegar
For the Berry Filling:
- 1 cup mixed fresh berries (blueberries, raspberries, strawberries)
- ¼ cup powdered sugar
- 1 tbsp lemon juice
- 1 tsp vanilla extract
For the Cream Cheese Frosting:
- 8 oz cream cheese, softened
- ½ cup unsalted butter, softened
- 4 cups powdered sugar
- 1 tsp vanilla extract
- Pinch of salt
For Garnish:
- Fresh berries (strawberries, raspberries, blueberries, blackberries)
- Edible flowers (optional)
Substitution Options
If you want to tweak the recipe, here are some ideas:
- Gluten-free option: Use gluten-free all-purpose flour instead of regular flour.
- Dairy-free option: Swap buttermilk with almond milk mixed with 1 tbsp lemon juice, and use dairy-free cream cheese and butter.
- Natural coloring: Replace red food coloring with beet juice for a natural alternative.
- Sugar alternatives: Try coconut sugar or stevia for a lower-sugar option.
Step 1: Prepare the Red Velvet Cake
Start by preheating your oven to 350°F (175°C). Grease and flour two 9-inch round cake pans to prevent sticking. In a medium bowl, whisk together the dry ingredients—flour, sugar, baking powder, baking soda, cocoa powder, and salt. In a separate large bowl, beat the wet ingredients—oil, buttermilk, eggs, food coloring, vanilla extract, and vinegar—until smooth. Gradually mix the dry ingredients into the wet ones until just combined. Be careful not to overmix, or your cake might turn out dense. Divide the batter evenly between the pans and bake for 25-30 minutes. A toothpick inserted into the center should come out clean. Let the cakes cool in the pans for 10 minutes before transferring them to wire racks.
Pro tip: For an extra vibrant red color, use gel-based food coloring instead of liquid.
Step 2: Make the Berry Filling
In a small saucepan, combine the fresh berries, powdered sugar, lemon juice, and vanilla extract. Heat over medium heat, stirring occasionally, until the berries soften and release their juices. This should take about 5-7 minutes. The mixture will thicken slightly as it cools. Once done, remove it from the heat and let it cool completely before using it in the cake. The tartness of the berries pairs beautifully with the sweetness of the cake and frosting.
Chef’s tip: If you want a smoother filling, strain the mixture through a fine mesh sieve to remove seeds.
Step 3: Whip Up the Cream Cheese Frosting
In a large bowl, beat the softened cream cheese and butter together until smooth and creamy. Gradually add the powdered sugar, one cup at a time, beating well after each addition. Add the vanilla extract and a pinch of salt, and beat again until fluffy. This frosting is rich and tangy, making it the perfect complement to the sweet berry filling and red velvet cake layers.
Pro tip: Make sure your cream cheese and butter are at room temperature for a smooth, lump-free frosting.
Step 4: Assemble the Cake
Once the cakes are completely cool, slice each one in half horizontally to create four layers. Place the first layer on your serving platter and spread a thin layer of berry filling on top. Follow this with a generous layer of cream cheese frosting. Repeat with the remaining layers, finishing with a thick layer of frosting on top. Take your time with this step—it’s what makes the cake look so impressive!
Chef’s secret: Chill the assembled cake for 15 minutes between layers to prevent slipping.
Step 5: Garnish and Serve
Decorate the top of the cake with fresh berries like strawberries, raspberries, and blueberries. Add edible flowers for an extra touch of elegance if you’re feeling fancy. Chill the cake in the refrigerator for at least 30 minutes before slicing to ensure the frosting sets. When you cut into it, you’ll see those beautiful layers of red velvet, berry filling, and frosting—a true work of art.
Timing Breakdown
- Prep time: 30 minutes
- Cooking time: 30 minutes
- Resting time: 1 hour (cooling and chilling)
- Total time: 2 hours
Chef’s Secret
To make your cake layers even, use a serrated knife or cake leveler to trim the tops if they dome during baking. This ensures a flat surface for stacking.
Extra Info
Did you know that red velvet cake was popularized during World War II? Rationing made cocoa powder scarce, so bakers used beets to add moisture and color to their cakes. My version uses fresh berries, which not only add color but also a burst of flavor.
Necessary Equipment
- Two 9-inch round cake pans
- Mixing bowls
- Electric mixer
- Spatula
- Serrated knife or cake leveler
- Wire cooling racks
Storage Tips
Store the Berry Bliss Red Velvet Cake in the refrigerator to keep the frosting firm and the berries fresh. Cover it with plastic wrap or place it in an airtight container to prevent it from drying out. It will stay fresh for up to 3 days.
If you want to freeze the cake, wrap each layer tightly in plastic wrap and then in aluminum foil. Thaw it in the refrigerator overnight before assembling and frosting. Avoid freezing the assembled cake with berries, as they may become mushy.
For best results, bring the cake to room temperature for 15-20 minutes before serving. This allows the flavors to shine and the frosting to soften slightly.
Tips and Advice
- Use room-temperature ingredients for smoother batter and frosting.
- Don’t skip the vinegar—it reacts with the baking soda to make the cake fluffy.
- Chill the cake before slicing for clean, picture-perfect pieces.
Presentation Ideas
- Arrange berries in a circular pattern on top for a professional look.
- Add a dusting of powdered sugar for a snowy effect.
- Use edible gold leaf for a touch of luxury.
Healthier Alternative Recipes
Looking for ways to lighten up this cake? Here are six variations:
- Gluten-Free Version: Use gluten-free flour and ensure all other ingredients are certified gluten-free.
- Low-Sugar Option: Replace granulated sugar with stevia or monk fruit sweetener.
- Vegan Twist: Substitute eggs with flax eggs and use plant-based butter and cream cheese.
- Whole Grain Goodness: Swap all-purpose flour with whole wheat pastry flour.
- No-Frosting Style: Skip the cream cheese frosting and serve with a dollop of whipped coconut cream.
- Superfood Boost: Add chia seeds or flaxseeds to the berry filling for extra nutrition.
Mistake 1: Overmixing the Batter
Overmixing can lead to a dense, tough cake. Mix just until the ingredients are combined. The batter should still have a few lumps. Tip: Use a gentle folding motion when adding dry ingredients to wet ones.
Mistake 2: Skipping the Cooling Step
Rushing to frost a warm cake can cause the frosting to melt and slide off. Always let the cake cool completely before assembling. Tip: Chill the layers in the fridge for 10-15 minutes if you’re short on time.
Mistake 3: Using Cold Cream Cheese
Cold cream cheese won’t blend smoothly, leaving lumps in your frosting. Soften it by leaving it out at room temperature for 30 minutes. Tip: Microwave it for 5-10 seconds if you forget to take it out ahead of time.
Mistake 4: Adding Too Much Food Coloring
Too much food coloring can alter the taste of your cake. Stick to 2 tablespoons or less. Tip: Use gel-based coloring for a more intense color without affecting flavor.
Mistake 5: Not Leveling the Layers
Uneven layers can make your cake wobbly and hard to stack. Trim the tops with a serrated knife or cake leveler. Tip: Save the scraps for snacking or crumbling over ice cream!
FAQ
Can I use frozen berries?
Yes, but thaw and drain them first to avoid excess moisture in the filling.
How do I store leftovers?
Cover the cake and refrigerate it for up to 3 days. Bring it to room temperature before serving.
Can I make this cake ahead of time?
Absolutely! Bake the layers a day in advance and assemble the cake the next day.
What can I use instead of red food coloring?
Beet juice or pureed cooked beets work well for a natural alternative.
Is this cake suitable for vegans?
With a few tweaks, yes! Use flax eggs, plant-based butter, and vegan cream cheese.
Can I freeze the assembled cake?
It’s better to freeze the layers separately and assemble after thawing.
How do I prevent the frosting from sliding?
Chill the cake briefly between layers to help the frosting set.
Can I use a different type of frosting?
While cream cheese frosting is traditional, you can try whipped cream or buttercream.
What’s the best way to slice the cake?
Use a sharp knife and dip it in hot water before each cut for clean slices.
Can I add nuts to the filling?
Yes! Chopped walnuts or pecans would add a nice crunch.
Final Thoughts
This Berry Bliss Red Velvet Cake is more than just a dessert—it’s an experience. From its stunning layers to its unforgettable flavors, it’s sure to impress anyone lucky enough to try it. Whether you’re baking for a special occasion or just treating yourself, this recipe is a keeper. So grab your apron, gather your ingredients, and get ready to create a cake that’s as delightful to make as it is to eat. Happy baking!
Equipment
- Mixing bowls
- Electric mixer
- Spatula
- Two 9-inch round cake pans
- Wire cooling racks
Ingredients
- 2 cups all-purpose flour
- 1 cup granulated sugar
- 1 tsp baking powder
- 1 tsp baking soda
- 1 tsp cocoa powder
- ½ tsp salt
- 1 cup vegetable oil
- 1 cup buttermilk
- 2 large eggs
- 2 tbsp red food coloring or beet juice
- 1 tsp vanilla extract
- 1 tsp white vinegar
- 1 cup mixed fresh berries
- ¼ cup powdered sugar
- 1 tbsp lemon juice
- 8 oz cream cheese softened
- ½ cup unsalted butter softened
- 4 cups powdered sugar
- 1 tsp vanilla extract
- a pinch salt
Instructions
- Preheat your oven to 350°F (175°C) and grease and flour two 9-inch round cake pans.
- In a medium bowl, whisk together the dry ingredients: flour, sugar, baking powder, baking soda, cocoa powder, and salt.
- In a separate large bowl, beat the wet ingredients: oil, buttermilk, eggs, food coloring, vanilla extract, and vinegar until smooth.
- Gradually mix the dry ingredients into the wet ingredients until just combined, taking care not to overmix.
- Divide the batter evenly between the prepared pans and bake for 25-30 minutes until a toothpick comes out clean.
- Let the cakes cool in the pans for 10 minutes before transferring to wire racks to cool completely.
- For the berry filling, combine the fresh berries, powdered sugar, lemon juice, and vanilla extract in a small saucepan and heat over medium, stirring until softened (about 5-7 minutes). Cool before using.
- For the frosting, beat the cream cheese and butter together until smooth, then gradually add powdered sugar and vanilla until fluffy.
- Once cakes are cool, slice each in half horizontally to create four layers.
- Assemble the cake by placing the first layer on a serving platter, spreading a layer of berry filling, then a layer of cream cheese frosting. Repeat with remaining layers and finish with frosting on top.
- Garnish with fresh berries and edible flowers if desired. Chill in the refrigerator for at least 30 minutes before slicing.