
Blueberry Cookie Bliss: Your New Favorite Bite
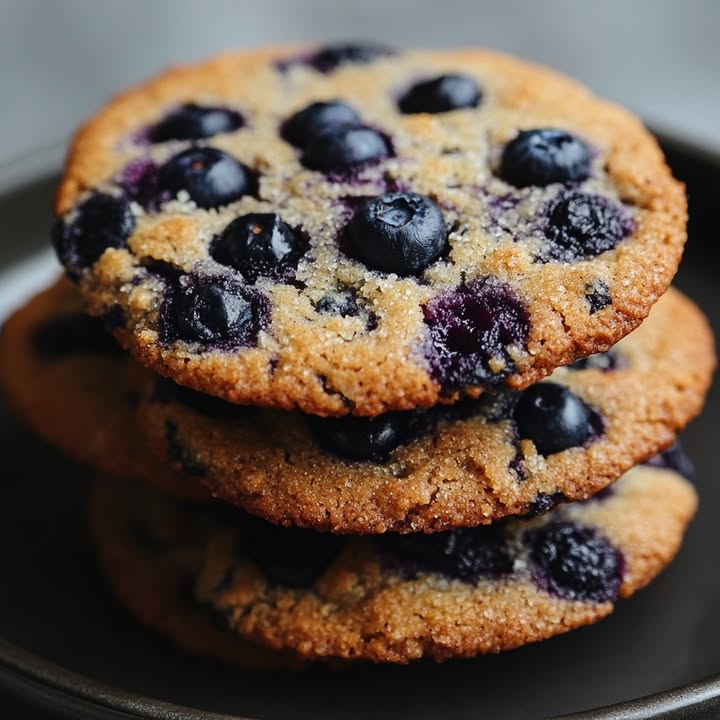
Have you ever wanted a cookie that’s both a little fancy and super simple? I have. I needed a treat for a last-minute playdate that didn’t scream “I spent all day in the kitchen!” I was staring at a pint of fresh blueberries, and a lightbulb went off. What if we folded those juicy berries into soft cookie dough? The result was pure magic. These Blueberry Cookies are like a cross between a muffin top and a sugar cookie. They are soft, sweet, with little bursts of tart berry in every single bite. My kids declared them the “best cookies ever,” and honestly? I have to agree.
A Berry Good Story: From Muffins to Cookies
We all love a good blueberry muffin, right? Warm, buttery, and studded with fruit. This recipe is my love letter to that classic flavor, but in a more shareable, dippable form. There isn’t a long historical tale here, just a home cook’s happy kitchen experiment. The traditional version uses the same cozy ingredients as your favorite muffin batter. The modern twist is baking it as a cookie. It’s a perfect way to use up fresh summer berries or bring a taste of summer any time with frozen ones. It proves that sometimes, the best recipes are born from a simple “what if?” moment.
Why You’ll Fall in Love With This Recipe
These cookies are special for so many reasons. First, the flavor is incredible. The sweet dough perfectly balances the bright pop of blueberry. Second, they are incredibly easy. You don’t need a mixer or any fancy tools. One bowl for wet ingredients, one for dry, and you’re minutes away from cookie dough. Finally, they are wonderfully soft and cake-like. If you prefer a soft cookie over a crisp one, this is your recipe. They stay tender for days, making them perfect for lunchboxes or a sweet afternoon pick-me-up.
Perfect Occasions for Berry Sweet Treats
These cookies are wonderfully versatile. I love making them for spring and summer gatherings like picnics or backyard barbecues. They feel festive and fresh. They’re also a star at morning coffee dates or afternoon tea, pairing beautifully with a cup of Earl Grey. For a special touch, pack them in a cute box for a homemade gift. Honestly, any day that needs a little brightening is a perfect day for Blueberry Cookie Bliss.
Gathering Your Ingredients for Sweet Success
You likely have most of these staples in your pantry already. Here’s what you’ll need for about 18 perfect cookies:
- 1/2 cup unsalted butter, softened
- 3/4 cup granulated sugar
- 1 large egg
- 1 teaspoon vanilla extract
- 1 1/2 cups all-purpose flour
- 1/2 teaspoon baking soda
- 1/4 teaspoon salt
- 1 cup fresh or frozen blueberries (if frozen, do not thaw)
- Optional: 1/2 teaspoon lemon zest for a citrusy twist
Easy Swaps: Make It Your Own
No worries if you’re missing something! This dough is very forgiving.
- Butter: Salted butter works fine. Just omit the added salt in the recipe.
- Sugar: For a deeper flavor, use half granulated and half light brown sugar.
- Blueberries: Dried blueberries can be used in a pinch. Soak them in warm water for 10 minutes to plump them up first, then drain well.
- Flour: For a slightly denser texture, you can use a 1:1 gluten-free flour blend.
Let’s Bake! Your Step-by-Step Guide to Perfection
Step 1: Preheat and Prep
Start by heating your oven to 350°F (175°C). This ensures it’s perfectly hot when your dough is ready. Line a baking sheet with parchment paper. Trust me, this non-stick magic makes cleanup a breeze and prevents any juicy blueberry spills from sticking. If you love extra-easy cleanup, a silicone baking mat works wonders too.
Step 2: Cream the Butter and Sugar
In a medium bowl, use a hand mixer or a sturdy spoon to cream the softened butter and sugar together. You want to beat it for a good 2-3 minutes until the mixture turns pale yellow and becomes wonderfully light and fluffy. This step is key! It incorporates air, which gives your cookies that lovely soft texture. You should hear a slight change in sound as it whips up.
Step 3: Add the Egg and Vanilla
Crack in the egg and pour in the vanilla extract. Beat everything together until the egg is fully incorporated and the mixture looks smooth and creamy. The vanilla fills the kitchen with its warm, sweet aroma—it’s the smell of homemade happiness. Pro tip: Make sure your egg is at room temperature. A cold egg can make the creamy butter re-solidify into little lumps.
Step 4: Whisk the Dry Ingredients
In a separate bowl, whisk together the flour, baking soda, and salt. This isn’t just mixing. Whisking evenly distributes the baking soda so your cookies rise perfectly. It also aerates the flour, making your final dough lighter. Take a moment to admire the pure white of the flour against the other ingredients.
Step 5: Combine Wet and Dry
Gradually add the dry ingredients to the wet butter mixture. Mix on low speed or stir by hand just until the flour disappears. The dough will be thick and soft. Remember, do not overmix. A few streaks of flour are okay. Overmixing develops gluten and can lead to tough cookies, and we want tender, soft bites.
Step 6: Gently Fold in the Blueberries
This is the fun part! Add your blueberries (and lemon zest if using) to the bowl. Use a rubber spatula to gently fold them in. Be very gentle to avoid crushing the berries and turning your whole dough purple. Frozen blueberries will make the dough cold and slightly stiffer, which is totally fine. Just work quickly.
Step 7: Scoop and Space
Drop rounded tablespoons of dough onto your prepared baking sheet. Space them about 2 inches apart. The dough will spread a little as it bakes. I like to use a small cookie scoop for evenly sized treats. Don’t worry about making them perfectly round; their rustic look is part of their charm.
Step 8: Bake to Golden Perfection
Slide the baking sheet into your preheated oven. Bake for 12-15 minutes. You’re looking for lightly golden edges while the centers still look soft and just set. The blueberries will get juicy and might burst a little, creating beautiful purple swirls. Chef’s tip: Ovens vary. Start checking at 10 minutes. The cookies will continue to firm up as they cool on the sheet.
Step 9: Cool and Enjoy
Let the cookies cool on the baking sheet for 5 minutes. This allows them to set so they don’t fall apart when you move them. Then, use a spatula to transfer them to a wire rack to cool completely. The hardest part is waiting! But a warm cookie with a cold glass of milk is honestly one of life’s greatest simple pleasures.
Timing is Everything
This recipe is famously quick. From start to finish, you’re looking at about 25 minutes of active time. Prep takes just 10 minutes of measuring and mixing. Baking is a speedy 15 minutes (or less!). This means you can have fresh, warm cookies ready faster than you can run to the store to buy some.
My Blueberry Cookie Secret
My secret weapon is a pinch of nutmeg (about 1/8 teaspoon) added to the dry ingredients. You won’t taste it as “nutmeg,” but it adds a mysterious warmth that makes the blueberry flavor sing even brighter. It’s that subtle “what is that?” factor that makes people ask for your recipe.
A Berry Interesting Fact
Blueberries aren’t just tasty; they’re packed with antioxidants. When you bake with them, those good-for-you compounds are still present. The vibrant color comes from anthocyanins, which are powerful antioxidants. So, while it’s a treat, you’re also getting a little nutritional boost with every bite. For more on how food components like this interact with our bodies, you can learn about digestive enzymes and nutrition from trusted health sources.
Tools You’ll Need
You don’t need fancy gear! Here’s the simple list:
- Mixing bowls (2 medium)
- Hand mixer or wooden spoon
- Whisk
- Rubber spatula
- Measuring cups and spoons
- Baking sheet
- Parchment paper or silicone mat
- Wire cooling rack
Storing Your Blueberry Treasures
To keep your cookies soft and delicious, store them in an airtight container at room temperature. Place a piece of bread in the container. The cookies will absorb moisture from the bread, staying soft for up to 4 days.
You can also freeze the baked cookies for longer storage. Let them cool completely, then layer them between sheets of parchment paper in a freezer-safe bag or container. They’ll keep for up to 3 months. Thaw at room temperature for an hour.
For the ultimate make-ahead plan, you can freeze the unbaked cookie dough! Scoop the dough onto a sheet, freeze until solid, then transfer the dough balls to a bag. Bake straight from the freezer, adding 1-2 extra minutes to the bake time. Fresh cookies on demand!
Tips for Flawless Cookies Every Time
- Use a cookie scoop for uniform size and even baking.
- If using frozen blueberries, keep them frozen until the last second to minimize color bleed.
- For extra flavor, toast your butter. Gently cook the butter until golden brown, let it solidify again, then use it in the recipe. It adds a rich, nutty note.
- Let your baking sheet cool completely between batches. Putting dough on a hot sheet makes cookies spread too much.
Presentation Ideas to Wow Your Guests
- Dust with a light shower of powdered sugar just before serving for a snowy, elegant look.
- Drizzle with a simple lemon glaze (mix 1/2 cup powdered sugar with 1-2 tsp lemon juice).
- Serve on a tiered cake stand for a tea party feel.
- Pack them in a decorative box tied with a ribbon for a heartfelt homemade gift.
Mix It Up! Healthier & Fun Variations
Love this base recipe? Try one of these delicious twists!
- Lemon Blueberry: Add the zest of one lemon to the dough and a teaspoon of lemon juice to the wet ingredients for a sunny, tart kick.
- Blueberry Oatmeal: Replace 1/2 cup of the flour with old-fashioned rolled oats for a hearty, chewy texture.
- White Chocolate Blueberry: Fold in 1/2 cup of white chocolate chips along with the blueberries for a decadent surprise.
- Whole Wheat Honey: Use whole wheat pastry flour and replace the granulated sugar with 1/2 cup honey. Reduce butter to 1/3 cup.
- Blueberry Almond: Replace 1/4 cup of flour with almond flour and add 1/2 tsp almond extract with the vanilla.
- Mini Muffin Version: Scoop the dough into a greased mini muffin tin and bake for 10-12 minutes for perfect two-bite treats.
If you’re loving these easy, fruity bakes, you might also adore my recipe for Buttery Raspberry Crumble Cookies. They have a sweet jam center and a crunchy topping that’s impossible to resist. And for another no-fuss, crowd-pleasing bar, my Easter Cake Mix Cookie Bars are always a hit with kids and adults alike.
Common Mistakes to Avoid
Mistake 1: Overmixing the Dough
This is the biggest culprit behind tough, dense cookies. When you mix the flour too vigorously or for too long, you develop the gluten in the wheat. Gluten is great for bread, but it makes cookies hard. Mix the dry ingredients into the wet ingredients just until you no longer see streaks of flour. It’s okay if there are a few lumps. The gentle folding of the blueberries will finish the job.
Mistake 2: Using Hot, Melted Butter
The recipe calls for softened butter, not melted. Softened butter is pliable and at room temperature. When creamed with sugar, it traps air, creating a light texture. Melted butter won’t trap that air, leading to cookies that spread too thin and can become greasy or flat. To soften butter quickly, cut it into chunks and let it sit on the counter for 20-30 minutes.
Mistake 3: Thawing Frozen Blueberries
If your recipe says “if frozen, do not thaw,” listen! Thawed blueberries release a lot of water and purple juice. This will turn your beautiful cookie dough into a soggy, purple mess and can make the cookies bake up gummy. Tossing frozen berries directly from the freezer into the dough helps them hold their shape and minimizes color bleeding.
Mistake 4: Overbaking for a “Done” Look
These cookies are meant to be soft and cake-like. They will not get crisp like a chocolate chip cookie. If you wait for the tops to turn golden brown, the bottoms will likely be too dark. Pull them out when the edges are just lightly golden and the centers look puffed and set, even if they seem a bit soft. They will firm up perfectly as they cool.
Mistake 5: Not Measuring Flour Correctly
Too much flour is a common baking error. The best method is to spoon the flour into your measuring cup and level it off with a knife. Don’t scoop the cup directly into the flour bag—this packs it down and can add up to an extra 1/4 cup of flour! That extra flour will make your cookies dry and crumbly instead of soft and tender.
Exploring different cookie recipes is a joy, and this blueberry gem is a wonderful addition to any baker’s collection. You can find even more inspiring ideas in our full archive of cookie and biscuit recipes, from classics to creative new treats.
Your Blueberry Cookie Questions, Answered
Can I use frozen blueberries instead of fresh?
Absolutely! Frozen blueberries work wonderfully in this recipe. The key is to use them straight from the freezer. Do not thaw them before adding to the dough. Thawed berries release too much liquid and will make your dough wet and discolored. Gently fold the frozen berries in at the last second, and be prepared for a slightly stiffer dough. Your bake time might be just a minute or two longer.
Blueberries contain natural pigments that can react with the baking soda (an alkali) in the dough. If your batter turns a bit green or blue-purple, don’t panic! It’s just chemistry and is completely safe to eat. To minimize this, you can toss your blueberries in a tablespoon of the recipe’s flour before folding them in. This light coating helps insulate them from the batter.
How can I prevent the blueberries from sinking to the bottom?
The best trick is to make sure your dough is thick enough to support the berries. Don’t over-mix or add extra liquid. Also, using slightly larger blueberries (not tiny wild ones) helps. As mentioned, coating them in a little flour before adding creates a barrier and helps them stay suspended throughout the cookie as it bakes.
Can I make the dough ahead of time?
Yes, you can! Prepare the dough, cover the bowl tightly with plastic wrap, and refrigerate for up to 24 hours. Chilling the dough actually allows the flavors to meld and can result in a slightly thicker cookie. Let the dough sit at room temperature for 10-15 minutes before scooping, as it will be quite firm from the fridge.
They freeze beautifully, both baked and as dough. For baked cookies, cool completely, then store in a freezer bag for up to 3 months. Thaw at room temperature. For dough, scoop balls onto a parchment-lined tray, freeze solid, then transfer to a bag. Bake from frozen, adding 1-3 extra minutes to the bake time.
Can I use other fruits instead of blueberries?
Certainly! This dough is a great base for other soft fruits. Diced strawberries (pat them very dry), raspberries (be extra gentle), or even chopped cherries would work. Dried fruits like cranberries or chopped apricots are also excellent. Just keep the total volume to about 1 cup.
The softness comes from the ratio of fat (butter) to flour, and the use of baking soda (which promotes a cake-like texture). The moisture from the blueberries also contributes. Storing them in an airtight container is crucial to lock in that moisture. Adding a piece of bread to the container works like a charm to keep them soft for days.
Is the lemon zest necessary?
Not at all, but it’s highly recommended! The lemon zest doesn’t make the cookies taste like lemon. Instead, it brightens the blueberry flavor and adds a subtle, fresh fragrance that makes the cookies taste more vibrant and complex. It’s a small step with a big impact.
Too much spread usually means your butter was too warm or melted. Ensure your butter is just softened, not oily. Also, check that your baking soda is fresh (it loses potency over time). Finally, make sure your baking sheet is cool when you put the dough on it. A hot sheet starts melting the butter before the cookies even hit the oven.
Yes, it adapts well to a bar form. Press the dough evenly into a greased 8×8 or 9×9 inch baking pan. Bake at 350°F for 20-25 minutes, or until a toothpick inserted in the center comes out clean. Let cool completely in the pan before cutting into squares. It’s an even easier way to feed a crowd!
There you have it! My go-to recipe for happy moments and satisfied smiles. These Blueberry Cookies remind me that the best baking doesn’t have to be complicated. It’s about simple ingredients coming together to create something truly special. I hope this recipe finds its way into your kitchen and becomes a cherished treat for your family and friends, just like it has for mine. Now go preheat that oven—your Blueberry Cookie Bliss awaits!
And if you’re in the mood for other indulgent, no-bake desserts, you must try the ultimate crowd-pleaser: my Reese’s Peanut Butter Cup Pie. It’s rich, creamy, and always disappears first at potlucks. For a cozy fall flavor, you can’t beat the warm, sweet taste of my Maple Cookies with Maple Icing.
Equipment
- Grand bol
- Fouet
- Spatule
- Plaque à pâtisserie
- Papier sulfurisé
Ingredients
- 115 g beurre non salé, ramolli
- 150 g sucre
- 1 œuf
- 5 ml extrait de vanille
- 190 g farine tout usage
- 2 g bicarbonate de soude
- 1 g sel
- 150 g bleuets frais ou surgelés
- 5 g zeste de citron (optionnel) pour une touche citrique
Instructions
- Préchauffez votre four à 175°C et tapissez une plaque à pâtisserie de papier sulfurisé.
- Dans un grand bol, crémez le beurre ramolli et le sucre jusqu'à obtenir un mélange léger et mousseux.
- Ajoutez l'œuf et l'extrait de vanille, puis battez jusqu'à obtenir un mélange onctueux.
- Dans un autre bol, tamisez la farine, le bicarbonate de soude et le sel.
- Incorporez progressivement les ingrédients secs au mélange humide jusqu'à ce qu'ils soient juste combinés.
- Incorporez délicatement les bleuets et le zeste de citron, en prenant soin de ne pas écraser les baies.
- Déposez des cuillerées de pâte sur la plaque à pâtisserie préparée, en les espaçant de 5 cm.
- Faites cuire au four pendant 12-15 minutes, jusqu'à ce que les bords soient légèrement dorés et que les centres soient encore moelleux.
- Laissez refroidir les biscuits sur la plaque pendant 5 minutes avant de les transférer sur une grille pour refroidir complètement.
Notes
Nutrition

Hi, I’m Olivia Parker, the founder of BakingSecret.com and a lifelong lover of all things sweet and homemade. I grew up in a small town in Oregon, where the smell of fresh cookies in my family’s kitchen sparked my passion for baking. Over the years, I turned that passion into a mission: to help home bakers feel confident, inspired, and creative.
After studying food science and working in several artisan bakeries across the U.S., I decided to create a space where everyone from beginners to seasoned bakers can find reliable recipes, expert tips, and a warm, welcoming community. BakingSecret.com is my way of sharing the magic of baking with the world. When I’m not testing new recipes, you’ll find me exploring farmers’ markets, collecting vintage cookbooks, or perfecting my sourdough technique.