
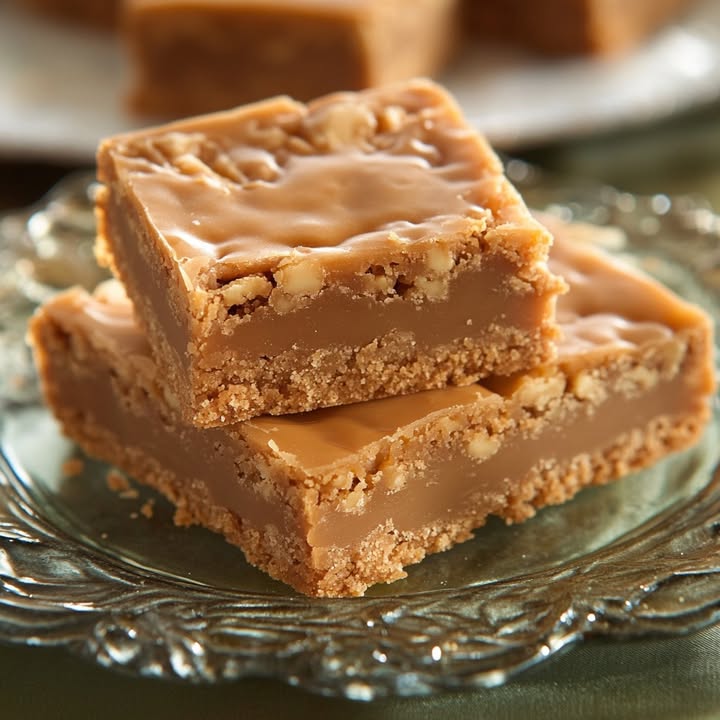
Trisha Yearwood’s Butterscotch Bars: A Sweet Slice of Southern Comfort
Imagine a treat that combines the cozy warmth of peanut butter cookies with the sweet, nostalgic charm of butterschotch chips. That’s exactly what you get with Trisha Yearwood’s Butterscotch Bars. This recipe feels like a hug from a Southern grandma—simple, hearty, and utterly delicious. I first baked these for a family picnic, and they vanished before I even set out the lemonade. The blend of creamy peanut butter, hearty oatmeal, and sweet butterscotch creates something truly magical. It’s a dessert that promises smiles and satisfied sighs.
The Story Behind These Butterscotch Peanut Butter Bars
Trisha Yearwood, celebrated country singer and beloved food personality, often shares recipes that taste like home. These bars are a perfect example. They aren’t about fancy techniques or exotic ingredients. They are about the joy found in a well-loved baking pan. The recipe echoes old-fashioned “kitchen sink” bars where cooks would use what they had on hand—peanut butter, oats, chips—to create a satisfying treat. The modern version is refined but keeps that soulful, generous spirit. It’s a classic that bridges generations.
Why You’ll Love This Recipe
You will love these Butterscotch Peanut Butter Bars for their simplicity and depth of flavor. The process is straightforward, no special skills required. The result is a bar that’s chewy, a bit crisp on the edges, and richly flavored. The peanut butter glaze adds a creamy, sweet finish that ties everything together. It’s a one-pan dessert that travels well for potlucks, wraps easily for school lunches, and satisfies that afternoon sweet craving perfectly. This recipe is a reliable friend in your baking repertoire.
Perfect Occasions for These Butterscotch Bars
These bars are versatile. They shine at casual gatherings like backyard barbecues or football tailgates. They are a hit at bake sales, always selling quickly. Pack them for road trips or as a special lunchbox treat. They also make a wonderful “just because” gift, wrapped in parchment paper and tied with a ribbon. Any event where you want to share a handmade, comforting sweet is the right occasion for these Butterscotch Peanut Butter Bars.
Ingredients for Butterscotch Peanut Butter Bars
- For the bars: 1/2 cup unsalted butter (softened), 1/2 cup granulated sugar, 1/2 cup packed brown sugar, 1/2 cup creamy peanut butter, 1 large egg, 1 teaspoon vanilla extract, 1 cup all-purpose flour, 1 teaspoon baking soda, 1/4 teaspoon salt, 1/2 cup quick-cooking oatmeal, 1 cup butterscotch chips.
- For the glaze: 1 cup powdered sugar, 4 tablespoons milk, 1/4 cup creamy peanut butter.
Handy Substitution Options
You can easily adapt this recipe. If you don’t have butterscotch chips, use chocolate chips or peanut butter chips. For a gluten-free version, swap the all-purpose flour with a 1:1 gluten-free blend. You can use old-fashioned oats instead of quick-cooking; the texture will be a bit more pronounced. Almond butter can replace peanut butter for a different nutty flavor. The recipe is forgiving and welcomes your personal touch.
Making Your Butterscotch Bars: A Step-by-Step Guide
Step 1: Preheat and Prepare
Set your oven to 350°F (175°C). Take a 9×13-inch baking dish and lightly grease it with butter or a non-stick spray. This simple step ensures your bars release easily and have those golden, buttery edges. The warming oven fills the kitchen with a promise of good things to come.
Step 2: Cream the Butter and Sugars
In a mixing bowl, combine the softened butter, granulated sugar, brown sugar, and 1/2 cup peanut butter. Beat them together until the mixture is light, fluffy, and uniformly pale. This creaming process incorporates air, which gives the bars a tender texture. The rich aroma of peanut butter and caramel-like brown sugar is intoxicating.
Pro tip: Ensure your butter is properly softened (cool to the touch, not melted) for the best texture.
Step 3: Add Egg and Vanilla
Beat in the large egg and vanilla extract until fully blended. The vanilla’s sweet fragrance enhances the peanut butter and butterscotch notes. The mixture will become slightly smoother and glossy.
Step 4: Combine Dry Ingredients
In another bowl, stir together the flour, baking soda, salt, and quick-cooking oatmeal. The oatmeal adds a wholesome, chewy backbone to the bars. Gradually add these dry ingredients to the wet mixture, mixing just until a cohesive dough forms. Overmixing can make the bars tough.
Step 5: Spread Dough and Add Butterscotch Chips
Transfer the dough to your greased baking dish. Use a spatula or your hands to press it into an even layer. Now, take your cup of butterscotch chips and sprinkle them generously over the top. The golden chips will nestle into the dough, ready to melt into sweet pockets during baking.
Step 6: Bake to Golden Perfection
Place the dish in your preheated oven. Bake for 20-25 minutes. Watch for the edges to turn a deep golden brown and the center to feel set when gently touched. The butterscotch chips will become soft and glisten. The smell will be absolutely divine.
Step 7: Make the Peanut Butter Glaze
While the bars bake, whisk together the powdered sugar, milk, and 1/4 cup peanut butter. Aim for a smooth, pourable glaze. It should be thick but still able to drizzle. This creamy topping is the final, irresistible layer.
Step 8: Glaze and Cool
As soon as the bars come out of the oven, pour the glaze over the hot surface. Use a spoon or spatula to spread it evenly. The warmth helps the glaze settle into a smooth, shiny coat. Now, patience! Let the pan cool completely on a rack before you even think about cutting. This ensures clean slices and perfect layers.
Chef’s secret: For extra flavor, add a tiny pinch of salt to the glaze. It balances the sweetness beautifully.
Timing Breakdown
Prep Time: 15 minutes. Cooking Time: 25 minutes. Total Time: 40 minutes. This includes the crucial cooling time before slicing. Servings: 16 bars. Kcal: Approximately 290 per bar.
A Little Extra Info
Butterscotch, historically, was a cooked syrup of brown sugar and butter. Today’s chips capture that flavor in convenient form. Using them with peanut butter is a classic American combo, reminiscent of childhood candies and lunchbox treats. This recipe honors that tradition with a homemade, from-the-heart twist.
Necessary Equipment
- 9×13-inch baking dish
- Mixing bowls
- Hand mixer or sturdy whisk
- Spatula
- Measuring cups and spoons
- Wire cooling rack
Storing Your Butterscotch Bars
These bars store wonderfully. At room temperature, keep them in an airtight container for up to 3 days. They will remain chewy and flavorful.
For longer storage, you can refrigerate them for up to a week. The texture may firm up slightly, but they are still delicious.
You can also freeze them. Wrap individual bars tightly in plastic wrap, then place in a freezer bag for up to 2 months. Thaw at room temperature before serving.
Tips and Advice for the Best Bars
- Use fresh, quick-cooking oatmeal for the best texture.
- Do not overbake. The bars should be set but not hard.
- Let the bars cool completely before cutting. This prevents crumbling.
- For a cleaner cut, use a sharp knife and wipe it between slices.
Presentation Ideas
Serve these bars on a rustic wooden board for a casual feel. For a party, cut them into smaller pieces and arrange on a tiered stand. Drizzle with extra melted butterscotch for a fancy touch. Pair them with a glass of cold milk or a cup of coffee for the ultimate experience.
Healthier Alternative Recipe Ideas
If you want to explore variations, here are six ideas:
- Dark Chocolate Butterscotch Bars: Swap butterscotch chips for dark chocolate chips for a richer, less sweet flavor.
- Gluten-Free Butterscotch Bars: Use a certified gluten-free flour blend and ensure your oats are gluten-free.
- Reduced-Sugar Bars: Cut the granulated sugar by half and use a sugar substitute in the glaze.
- Nutty Butterscotch Bars: Add 1/2 cup chopped toasted walnuts or pecans to the dough for crunch.
- Butterscotch Bar Cookies: Press dough into a lined cookie sheet and bake as individual cookies for easier sharing.
- Butterscotch Blondies: Increase the brown sugar to 1 cup and omit the oatmeal for a denser, chewier blondie base.
More Baking Inspirations
If you enjoy balancing sweet and spicy flavors, you might love our recipe for Sweet and Spicy Sriracha Burgers. For a lighter, fruity dessert, this Raspberry Yogurt Cake is a beautiful choice. Fans of rich, seasonal baking should try this decadent Pumpkin Crème Brûlée Cheesecake. And if you’re looking for ultimate comfort, our Pecan Pie Bread Pudding is a must-make. You can find many more sweet ideas in our dessert bars and brownies category.
Common Mistakes to Avoid
Mistake 1: Using Melted Butter Instead of Softened
This is a common error. Melted butter won’t cream properly with the sugars. It makes the dough greasy and can lead to a denser, oily bar. Your butter should be soft enough to indent easily when pressed, but still hold its shape. Leave it out at room temperature for about 30-45 minutes. This ensures the perfect texture.
Mistake 2: Overmixing the Dough After Adding Flour
Once you add the flour and oatmeal, mix only until the ingredients are just combined. Overmixing develops the gluten in the flour, which can make your bars tough and chewy in a unpleasant way. Stir gently with a spatula or use a mixer on low speed for a brief time. A few remaining streaks of flour are okay; they will incorporate during the final press into the pan.
Mistake 3: Cutting the Bars While Still Warm
The temptation is real. Warm bars smell incredible. But slicing them before they cool causes the glaze to run and the bars to crumble. The structure needs time to set. Let the pan cool on a rack until it feels completely cool to the touch. This patience rewards you with neat, perfect squares.
Mistake 4: Baking in a Pan That’s Not the Right Size
Using a smaller or deeper pan changes the baking dynamics. A 9×13-inch pan is specified for a good reason. It gives the bars the ideal thickness and surface area for even baking and the right texture. In a smaller pan, the bars become too thick and may undercook in the center. In a larger pan, they become thin and overcook quickly. Stick to the recommended size.
Expert Insight
The technique of creaming butter and sugars, foundational in this recipe, is similar to principles used in other cooking methods where controlling texture is key, such as in grilling where managing heat ensures a perfect sear without burning.
Frequently Asked Questions
Can I use natural peanut butter in this recipe?
You can, but be aware that natural peanut butter (often just peanuts and salt) tends to be more oily and less stable. The bars might spread more and have a slightly different texture. For best results, use a standard creamy peanut butter like Jif or Skippy, which have stabilizers added. If you use natural, consider chilling the dough for 15 minutes before pressing into the pan to help it firm up.
What can I substitute for butterscotch chips?
Butterscotch chips have a distinct, caramel-like flavor. If you need a substitute, peanut butter chips are a good alternative, maintaining the nutty theme. Chocolate chips, either semi-sweet or dark, will create a different but delicious bar. You could also use white chocolate chips or even cinnamon chips for a unique twist. The recipe is flexible, so choose what you love.
How do I know when the bars are done baking?
The bars are done when the edges are pulling away from the pan and have turned a deep golden brown. The center should feel firm when lightly pressed with a fingertip. A toothpick inserted into the center (avoiding a chip) should come out with just a few moist crumbs, not wet batter. Be mindful that over-baking leads to dry bars, so err on the side of slightly underdone if you prefer a very chewy texture.
Can I make these bars ahead of time?
Absolutely. These bars are excellent for making ahead. Bake and glaze them completely, then store in an airtight container at room temperature for up to 2 days before serving. For longer storage, refrigerate or freeze as described. They actually taste great cold, with the glaze firming up into a nice candy-like layer.
Is it okay to use old-fashioned oats instead of quick-cooking?
Yes, it is okay. Old-fashioned oats are larger and will give the bars a more pronounced oat texture and chew. They are a fine substitute. Quick-cooking oats are smaller and absorb moisture more readily, creating a more uniform, tender bar. Choose based on your texture preference.
Why do I need to add the glaze right after baking?
Applying the glaze while the bars are hot is crucial. The warmth helps the glaze soften, spread easily, and soak slightly into the top layer of the bar. This creates a cohesive finish where the glaze is part of the bar, not just a topping that sits on top and cracks off. It also gives that beautiful, glossy appearance.
Can I double this recipe?
You can double it, but do not simply double and bake in one pan. The baking time and heat distribution would be off. Instead, prepare two separate batches and bake them in two 9×13-inch pans. Or, for a thicker bar, you could use a larger, deeper pan like a half-sheet pan (18×13 inches), but you will need to adjust baking time and watch carefully.
My glaze is too thick. How can I fix it?
If your glaze is too thick to pour or spread, thin it gradually with a little more milk. Add just one teaspoon at a time, whisking well, until it reaches the desired consistency. Be careful not to make it too thin, or it will run off the bars and not set properly.
My glaze is too thin. How can I fix it?
If your glaze is too thin, thicken it by adding a bit more powdered sugar. Incorporate a tablespoon at a time, whisking until smooth. You can also let the glaze sit for a few minutes; sometimes it thickens slightly on its own as the sugar hydrates.
Are these butterscotch bars freezer-friendly?
They are very freezer-friendly. After cooling completely, wrap individual bars tightly in plastic wrap, then place them in a heavy-duty freezer bag or container. They can be frozen for up to 2 months. Thaw at room temperature for about an hour before serving. The texture remains excellent.
Final Thoughts
Trisha Yearwood’s Butterscotch Bars are more than just a recipe. They are a ticket to creating a moment of simple, shared joy. The process is easy, the ingredients are familiar, and the result is universally loved. From the first mix of peanut butter and sugar to the final drizzle of glaze, every step feels like putting love into a pan. Bake these bars, share them with someone, and watch as a simple dessert becomes a happy memory. That’s the real magic of baking.
Equipment
- Plaque à pâtisserie
- Fouet
- Spatule
- Grand bol
- Papier sulfurisé
Ingredients
- 1/2 tasse beurre non salé ramolli
- 1/2 tasse sucre cristallisé
- 1/2 tasse sucre brun compacté
- 1/2 tasse beurre de cacahuète crémeux
- 1 œuf
- 1 c. à café extrait de vanille
- 1 tasse farine tout usage
- 1 c. à café bicarbonate de soude
- 1/4 c. à café sel
- 1/2 tasse flocons d'avoine cuits rapidement
- 1 tasse pépites de butterscotch
Instructions
- Préchauffez le four à 175°C et graissez un moule à pâtisserie de 9x13 pouces.
- Dans un grand bol, crémez ensemble le beurre ramolli, le sucre cristallisé, le sucre brun et le beurre de cacahuète jusqu'à obtenir un mélange léger et crémeux.
- Incorporez l'œuf et l'extrait de vanille jusqu'à ce que le mélange soit homogène.
- Dans un autre bol, mélangez la farine, le bicarbonate, le sel et les flocons d'avoine.
- Ajoutez progressivement les ingrédients secs aux ingrédients humides, mélangez jusqu'à ce que le tout soit juste combiné.
- Étalez la pâte uniformément dans le moule graissé et parsemez de pépites de butterscotch sur le dessus.
- Faites cuire dans le four préchauffé pendant 20 à 25 minutes, jusqu'à ce que les bords soient dorés et que le centre soit bien cuit.
- Pendant la cuisson, préparez le glaçage en fouettant ensemble le sucre glace, le lait et le beurre de cacahuète jusqu'à obtenir un mélange lisse.
- Une fois les barres cuites, versez le glaçage chaud sur la surface et étalez-le uniformément.
- Laissez les barres refroidir complètement sur une grille avant de les couper en carrés.
Notes
Nutrition

Hi, I’m Olivia Parker, the founder of BakingSecret.com and a lifelong lover of all things sweet and homemade. I grew up in a small town in Oregon, where the smell of fresh cookies in my family’s kitchen sparked my passion for baking. Over the years, I turned that passion into a mission: to help home bakers feel confident, inspired, and creative.
After studying food science and working in several artisan bakeries across the U.S., I decided to create a space where everyone from beginners to seasoned bakers can find reliable recipes, expert tips, and a warm, welcoming community. BakingSecret.com is my way of sharing the magic of baking with the world. When I’m not testing new recipes, you’ll find me exploring farmers’ markets, collecting vintage cookbooks, or perfecting my sourdough technique.