
Why This Velvet Choco Cherry Cake is a Must-Try
There’s something magical about the combination of chocolate and cherries. One bite of this Velvet Choco Cherry Cake, and you’ll feel like you’ve been whisked away to a cozy little bakery in Paris. I first made this cake for my best friend’s birthday, and let me tell you, it was love at first bite! The rich cocoa flavor paired with sweet, juicy cherries creates a dessert that’s both comforting and indulgent. Whether you’re baking for a special occasion or just because, this recipe will become your go-to for chocolate cherry bliss.
A Little History Behind the Bliss
This cake draws inspiration from classic chocolate cakes but adds a modern twist with fresh cherries. Cherries and chocolate have been a beloved duo for centuries, dating back to European desserts where cherries were often paired with rich, dark chocolate. Back in the day, these cakes were reserved for grand celebrations, but now, we can enjoy them anytime. I tested this recipe over several weekends, tweaking the ingredients until I got the perfect balance of flavors. Trust me, this version is foolproof and oh-so-delicious!
Why You’ll Fall Head Over Heels for This Recipe
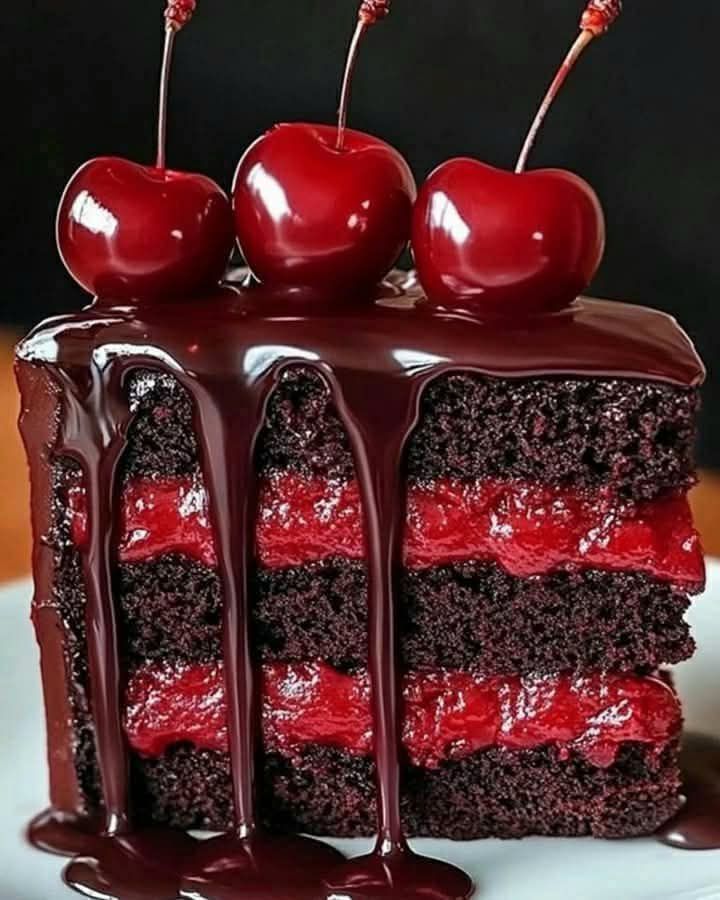
This Cherry Chocolate Bliss is everything you want in a cake: moist, flavorful, and easy to make. The cocoa powder gives it a deep chocolatey aroma, while the fresh cherries add bursts of sweetness in every bite. Plus, the whipped cream frosting is light and airy, making it the perfect topping without being overly heavy. It’s a crowd-pleaser that’s simple enough for beginners but impressive enough for seasoned bakers.
When to Whip Up This Decadent Dessert
This cake is perfect for birthdays, anniversaries, or even a casual weekend treat. Imagine serving it at a holiday dinner—your guests won’t stop raving about it! I also love making it for potlucks because it’s a showstopper that’s easy to transport. Honestly, any occasion is a good excuse to bake this beauty.
What You’ll Need
- 1 cup all-purpose flour
- ½ cup cocoa powder
- 1 teaspoon baking powder
- ½ teaspoon baking soda
- ½ teaspoon salt
- 1 cup sugar
- 2 large eggs
- 1 teaspoon vanilla extract
- 1 cup buttermilk
- ½ cup unsalted butter, softened
- 1 cup fresh cherries, pitted and chopped
- ½ cup heavy cream
- 2 tablespoons dark chocolate chips
- ½ cup powdered sugar for frosting
Swap It Out: Ingredient Substitutions
- Buttermilk: No buttermilk? Mix 1 cup of milk with 1 tablespoon of lemon juice or vinegar and let it sit for 5 minutes.
- Fresh cherries: If cherries aren’t in season, use canned cherries (drained) or dried cherries soaked in warm water.
- Heavy cream: Substitute with coconut cream for a dairy-free option.
- Cocoa powder: Use Dutch-processed cocoa for a richer flavor.
Step 1: Preheat and Prep
Start by preheating your oven to 350°F (175°C). Grease and flour two 8-inch round cake pans. This step is crucial because it ensures your cake doesn’t stick. I always use a pastry brush to spread softened butter evenly on the pans before dusting them with flour. Pro tip: Line the bottom of the pans with parchment paper for extra insurance.
Step 2: Mix the Dry Ingredients
In a medium bowl, whisk together the flour, cocoa powder, baking powder, baking soda, and salt. The cocoa powder smells heavenly as you mix it, and the dry ingredients should form a uniform, powdery blend. This step sets the foundation for your cake’s texture. Chef’s tip: Sift the cocoa powder to avoid lumps and ensure a smooth batter.
Step 3: Cream the Butter and Sugar
In a large bowl, cream the butter and sugar until light and fluffy. This process traps air in the mixture, giving your cake its tender crumb. Add the eggs one at a time, mixing well after each addition. Stir in the vanilla extract, which adds a subtle warmth to the batter. Picture the butter turning pale yellow and the sugar dissolving into a creamy cloud.
Step 4: Combine Wet and Dry Ingredients
Gradually add the dry ingredients to the butter mixture, alternating with the buttermilk. Mix until just combined—overmixing can make the cake dense. The batter should be thick but pourable, with streaks of chocolate running through it. Pro tip: Scrape down the sides of the bowl to ensure everything is evenly mixed.
Step 5: Fold in the Cherries and Chocolate Chips
Gently fold in the chopped cherries and dark chocolate chips. The cherries add pops of color and sweetness, while the chocolate chips create melty pockets of goodness. Be gentle here; you don’t want to crush the cherries. Imagine how those juicy cherries will burst in your mouth with every bite.
Step 6: Bake to Perfection
Divide the batter evenly between the prepared pans and bake for 25-30 minutes. Insert a toothpick into the center—if it comes out clean, your cakes are ready. The kitchen will fill with the irresistible aroma of chocolate and cherries. Let the cakes cool completely before frosting.
Step 7: Whip Up the Frosting
While the cakes cool, whip the heavy cream until stiff peaks form. Gently fold in the powdered sugar until smooth. The frosting should be light and airy, almost like a cloud. Spread it generously on the cooled cakes, then garnish with extra cherries and chocolate shavings for a finishing touch.
Timing Is Everything
This recipe takes about 15 minutes to prep, 30 minutes to bake, and no resting time is needed. In total, you’ll spend just 45 minutes creating this masterpiece. Each slice clocks in at around 375 calories, making it a decadent yet reasonable treat when served in 8 portions.
Chef’s Secret for Extra Fluffiness
Here’s a little secret: beat the egg whites separately and fold them into the batter. This trick adds extra airiness to your cake, making it even lighter and fluffier. Your guests won’t know what hit them!
Fun Fact About Cherries
Did you know that cherries are part of the rose family? They’re not only delicious but also packed with antioxidants. So, while you’re indulging in this Cherry Chocolate Bliss, you’re also getting a dose of health benefits. How’s that for guilt-free eating?
Tools of the Trade
You’ll need a few basic tools to make this cake: two 8-inch round cake pans, a whisk, a spatula, a mixer (handheld or stand), and a cooling rack. Having these on hand makes the process smoother and more enjoyable.
How to Store Your Cake
To keep your cake fresh, store it in an airtight container in the refrigerator. The frosting may soften slightly, but it will still taste amazing. Bring it to room temperature before serving for the best flavor and texture.
If you live in a cooler climate, you can store the cake at room temperature for up to two days. Just make sure it’s covered to prevent it from drying out.
For longer storage, freeze the unfrosted cake layers. Wrap them tightly in plastic wrap and foil, then thaw overnight in the fridge before frosting.
Tips and Advice for Success
- Use room-temperature eggs for easier mixing.
- Don’t skip the parchment paper—it’s a lifesaver!
- Chill the bowl and beaters before whipping the cream for firmer peaks.
Presentation Ideas
- Sprinkle shaved chocolate on top for elegance.
- Add a dusting of powdered sugar for a rustic look.
- Serve with a side of fresh cherries for a pop of color.
Healthier Alternatives
Here are six variations to make this cake healthier:
- Gluten-Free: Swap all-purpose flour for almond or oat flour.
- Low-Sugar: Use a sugar substitute like stevia or monk fruit.
- Vegan: Replace eggs with flax eggs and use plant-based butter and cream.
- Whole Grain: Use whole wheat flour instead of all-purpose.
- Dairy-Free: Opt for coconut cream and dairy-free chocolate chips.
- Protein-Packed: Add a scoop of chocolate protein powder to the batter.
Mistake 1: Overmixing the Batter
Overmixing leads to a dense cake. Mix just until the ingredients are combined. Pro tip: Stop the mixer as soon as you see no streaks of flour.
Mistake 2: Skipping the Parchment Paper
Without parchment paper, your cake might stick to the pan. Always line your pans to avoid this disaster.
Mistake 3: Using Cold Eggs
Cold eggs don’t incorporate well into the batter. Take them out of the fridge 30 minutes before starting.
Mistake 4: Overbaking
Check your cake a few minutes before the timer goes off. Overbaked cakes are dry and crumbly.
Mistake 5: Rushing the Cooling Process
Frosting a warm cake causes the frosting to melt. Patience is key here!
FAQs About Velvet Choco Cherry Cake
Can I use frozen cherries?
Yes, but thaw and drain them first to prevent excess moisture in the batter.
How do I know when the cake is done?
Insert a toothpick into the center. If it comes out clean, the cake is ready.
Can I make this ahead of time?
Absolutely! Bake the layers a day in advance and frost just before serving.
What if I don’t have buttermilk?
Mix milk with lemon juice or vinegar as a substitute.
Can I double the recipe?
Yes, just adjust the pan sizes accordingly.
Is this cake kid-friendly?
Definitely! Kids love the chocolate-cherry combo.
How long does it last?
Up to 3 days in the fridge or 2 months in the freezer.
Can I use a different frosting?
Of course! Try cream cheese or ganache for variety.
Why is my frosting runny?
It might be too warm. Chill the bowl and beaters before whipping.
What’s the best way to pit cherries?
Use a cherry pitter or a small knife for easy removal.
Final Thoughts
This Velvet Choco Cherry Cake is more than just a dessert—it’s an experience. From the rich chocolate layers to the juicy cherries and light whipped cream frosting, every bite is pure bliss. Whether you’re baking for a celebration or just because, this recipe will bring joy to everyone who tries it. So grab your apron, gather your ingredients, and let’s get baking!
Equipment
- Two 8-inch round cake pans
- Mixing bowl
- Whisk
- Spatula
- Mixer (handheld or stand)
- Cooling rack
Ingredients
- 1 cup all-purpose flour
- ½ cup cocoa powder
- 1 teaspoon baking powder
- ½ teaspoon baking soda
- ½ teaspoon salt
- 1 cup sugar
- 2 large eggs
- 1 teaspoon vanilla extract
- 1 cup buttermilk
- ½ cup unsalted butter, softened
- 1 cup fresh cherries, pitted and chopped
- ½ cup heavy cream
- 2 tablespoons dark chocolate chips
- ½ cup powdered sugar for frosting
Instructions
- Preheat your oven to 350°F (175°C) and grease and flour two 8-inch round cake pans.
- In a medium bowl, whisk together the flour, cocoa powder, baking powder, baking soda, and salt.
- In a large bowl, cream the butter and sugar until light and fluffy, then add eggs one at a time and stir in the vanilla extract.
- Gradually add the dry ingredients to the butter mixture, alternating with the buttermilk, mixing until just combined.
- Gently fold in the chopped cherries and dark chocolate chips.
- Divide the batter evenly between the prepared pans and bake for 25-30 minutes, or until a toothpick comes out clean.
- While the cakes cool, whip the heavy cream until stiff peaks form, then gently fold in the powdered sugar and spread on the cooled cakes.