
The Ultimate Chocolate Truffle Cheesecake Recipe
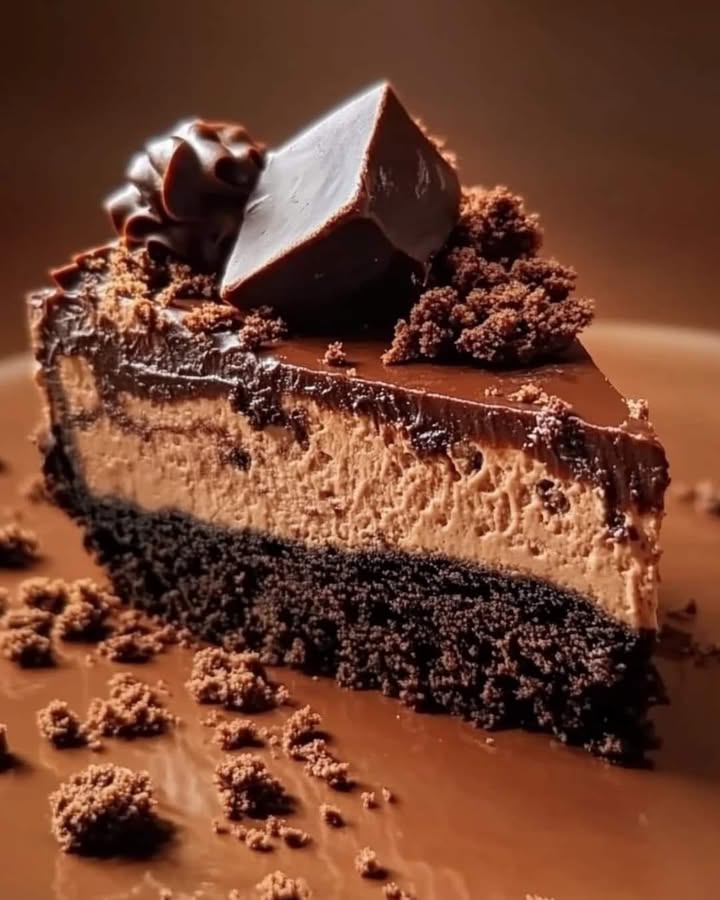
Let me tell you about a dessert that changed my family’s Sunday dinners. My niece, a notorious chocolate skeptic, tried one bite of this cheesecake and her eyes widened. “This is like eating a giant, creamy chocolate truffle,” she declared. That’s the magic of this Chocolate Truffle Cheesecake. It’s not just a cheesecake; it’s an experience. With a fudgy chocolate crust, a silky chocolate filling, and a decadent ganache topping, every slice is a rich, luxurious celebration.
A Dream Dessert With a Story
The classic cheesecake has roots in ancient Greece, but our modern, chocolate-loaded versions are pure indulgence. This recipe is my personal twist, born from a love for chocolate truffles. I wanted a dessert that captured that dense, melt-in-your-mouth quality. After many trials (some too soft, some too stiff!), this version perfected the balance. It’s a modern dessert fantasy, combining the structure of a New York-style cheesecake with the soul of a French chocolate truffle.
Why You’ll Adore This Chocolate Truffle Cheesecake
You will love this because it is stunningly delicious yet surprisingly straightforward. It doesn’t require fancy techniques. The result is incredibly impressive. The texture is perfectly dense and creamy, not light or airy. It’s a true chocolate lover’s dream. It also slices beautifully, making it perfect for parties. And the combination of chocolate and caramel notes from the brown sugar creates a depth of flavor that is simply unforgettable.
Perfect Occasions for This Showstopper
This cheesecake is meant for moments that deserve a grand finale. It’s ideal for birthday celebrations, holiday feasts like Christmas or Thanksgiving, and romantic anniversary dinners. I also love making it for potluck parties—it always becomes the centerpiece of the dessert table. Any gathering where you want to offer a truly special, homemade treat is the right occasion for this Chocolate Truffle Cheesecake.
Ingredients for Your Chocolate Truffle Cheesecake
For the Chocolate Crust:
- 1 cup graham cracker crumbs
- 1/3 cup granulated sugar
- 1/4 cup baking cocoa
- 1/4 cup melted butter
For the Cheesecake Filling:
- 12 oz semi-sweet chocolate chips (Ghirardelli preferred)
- 24 oz cream cheese, at room temperature
- 1 cup granulated sugar
- 1/4 cup brown sugar
- 3 tablespoons cocoa powder (Ghirardelli recommended)
- 5 large eggs
- 3/4 cup heavy whipping cream
- 2 teaspoons vanilla extract
For the Ganache Topping:
- 6 oz semi-sweet chocolate baking bar
- 2/3 cup heavy whipping cream
- 2 tablespoons melted butter
- Reddi-Wip for garnish
- Chocolate syrup for garnish
Smart Substitution Options
Don’t stress if you’re missing an ingredient! Here are easy swaps:
- Graham Crackers: Use digestive biscuits or even Oreo crumbs (without the filling) for a different twist.
- Cocoa Powder: Any unsweetened cocoa works, but Dutch-processed gives a darker, richer color.
- Chocolate Chips: Feel free to use dark chocolate chips if you prefer a less sweet, more intense flavor.
- Heavy Cream: In the filling, full-fat sour cream can be used for a slightly tangier profile.
- Springform Pan: If you don’t have one, a deep 9-inch pie dish works, but slicing and serving is trickier.
How to Make Your Chocolate Truffle Cheesecake
Step 1: Prepare the Chocolate Crust
Start by preheating your oven to 325°F (163°C). This gentle heat is key for a smooth bake. Crush the graham crackers in a plastic bag with a rolling pin until you have fine crumbs. The sound is satisfyingly crunchy! In a bowl, mix these crumbs with the granulated sugar and baking cocoa. The mixture will look dry and sandy. Pour in the melted butter and stir. It will suddenly transform into a fragrant, wet-sand consistency that smells like brownies. Press this firmly into the bottom of your 9-inch springform pan. A flat-bottomed glass helps create a nice, even layer. This crust bakes into a firm, chocolatey foundation.
Pro tip: Really press the crust down hard. This prevents it from mixing with the filling later.
Step 2: Make the Cheesecake Filling
Now, melt your chocolate chips using a double boiler or microwave. Stir until it’s perfectly smooth and glossy, then set it aside to cool slightly. In your food processor, blend the softened cream cheese until it’s utterly smooth and lump-free. Add both sugars and the cocoa powder. Pulse until it’s combined—the color will be a lovely light brown. Next, add the eggs, heavy cream, and vanilla. Process again until the batter is silky and homogeneous. Finally, pour in that gorgeous melted chocolate. Blend it in until the entire filling is a uniform, deep, dark brown. It will be thick and luxurious. Pour this over your prepared crust.
Pro tip: Room temperature cream cheese is non-negotiable! Cold cheese will create lumps no processor can fix.
Step 3: Bake the Cheesecake
Place your pan in the preheated oven. Bake for 75-80 minutes. The center should look set but still have a slight jiggle, like Jell-O, not a liquid wave. This jiggly center is your friend—it means the cheesecake will finish setting perfectly as it cools. Once baked, run a thin knife around the edge to loosen it. This prevents cracking as it cools and contracts. Let it cool completely on a wire rack. Then, cover it loosely and refrigerate for at least 4-6 hours, preferably overnight. This patience is the secret to the perfect, sliceable texture.
Chef’s tip: Avoid opening the oven door during baking. Sudden temperature changes can cause the cheesecake to fall or crack.
Step 4: Prepare the Ganache Topping
When the cheesecake is chilled, make the ganache. Heat the heavy cream and butter in a microwave-safe bowl for 60-90 seconds until the butter melts. Break your semi-sweet chocolate bar into pieces and add them to the warm cream mixture. Let it sit for one full minute. This allows the chocolate to soften gently. Then, stir slowly until it becomes a velvety, glossy, perfect ganache. Let it cool at room temperature for a few minutes until it thickens slightly but is still pourable.
Step 5: Assemble the Final Dessert
Pour the slightly thickened ganache over the cold cheesecake. It will spread into a smooth, shiny layer. If you want extra flair, use a vegetable peeler to shave curls from any leftover chocolate bar and sprinkle them on top. Let the ganache set for about an hour before serving. This final layer adds an unbelievable richness and makes the dessert look professionally stunning.
Step 6: Serve Like a Pro
Use a thin, sharp knife to slice. Dip the knife in hot water and wipe it clean between each cut. This gives you perfectly clean, beautiful slices. Garnish each plate with a drizzle of chocolate syrup and a dollop of Reddi-Wip. The contrast of the cold, dense cheesecake with the light cream is divine.
Timeline for Your Chocolate Truffle Cheesecake
| Preparation Time | 30 minutes |
| Baking Time | 75-80 minutes |
| Cooling Time | 1 hour |
| Chilling Time | 4-6 hours (minimum) |
| Total Time (until serving) | About 6-7 hours |
A Secret for the Smoothest Texture
My absolute secret? Use a food processor, not a mixer. A stand mixer can incorporate too much air, leading to a lighter texture and potential cracking. The food processor blends the cream cheese, eggs, and chocolate into an ultra-smooth, dense emulsion that mimics the texture of a real chocolate truffle. It’s the key difference between a good chocolate cheesecake and an extraordinary one.
A Fun Fact About Chocolate
The cocoa powder in the crust and filling isn’t just for color. It contains compounds that actually enhance the perception of sweetness and richness. This means your cheesecake tastes even more chocolatey than the sum of its parts! It’s a little bit of kitchen science magic.
Necessary Equipment
You don’t need specialized tools, but these are essential:
- 9-inch springform pan
- Food processor (highly recommended) or stand mixer
- Double boiler or microwave-safe bowl for melting chocolate
- Rolling pin and plastic bag (for crust)
- Wire cooling rack
- Thin, sharp knife for serving
How to Store Your Cheesecake
Short-Term Storage: Keep the cheesecake covered in the springform pan or on a plate under a cake dome in the refrigerator. It will stay perfect for up to 5 days. The cold environment keeps the texture firm and the flavors bright.
Freezing for Later: This cheesecake freezes beautifully! Wrap the whole cheesecake or individual slices tightly in plastic wrap, then in aluminum foil. Freeze for up to 2 months. Thaw overnight in the refrigerator before serving. The ganache may lose a little shine, but the taste will be intact.
Serving After Storage: Always serve it cold from the fridge. If you let it sit out too long, it can become too soft and difficult to slice neatly. A cold slice is the ideal experience.
Tips and Advice for Success
- Patience is Ingredient #1: The long chill time is not optional. It allows the structure to fully set.
- Prevent Sticking: Run the knife under hot water for each slice. It makes serving effortless.
- Quality Chocolate Matters: Using a good brand like Ghirardelli makes a noticeable difference in depth of flavor.
- Don’t Overbake: That slight jiggle in the center is your guide to perfect baking.
Presentation Tips to Impress
Make your dessert table shine with these ideas:
- Top with fresh raspberries or strawberries for a pop of color and tartness.
- Sprinkle with a little sea salt on the ganache for a sophisticated salted chocolate effect.
- Serve with a small side of caramel sauce for a chocolate caramel cheesecake experience.
- For parties, pre-slice and place on individual plates for easy grabbing.
Healthier Alternative Recipes
Love the idea but want a lighter option? Try these tasty variations:
- No-Bake Chocolate Cheesecake: Use a similar crust, but blend filling with melted chocolate, cream cheese, and a touch of maple syrup. Chill until set. It’s lighter and doesn’t require baking.
- Greek Yogurt Blend: Substitute half the cream cheese with full-fat Greek yogurt. It adds protein and a tangy note, reducing overall fat.
- Dark Chocolate Version: Use 70% dark chocolate for all chocolate elements and reduce the granulated sugar by 1/4 cup. It’s richer and less sweet.
- Mini Cheesecakes: Make crust and filling in muffin tins. Bake for only 20-25 minutes. Perfect for portion control and parties.
- Vegan Chocolate Cheesecake: Use a nut-based crust, and for the filling, blend soaked cashews, coconut cream, cocoa, and agave syrup. A completely plant-based delight.
- Berry Topped Cheesecake: Skip the ganache and top the chilled cheesecake with a mixture of fresh, macerated berries. It’s fresher and adds vitamins.
I often make a batch of savory Veggie Cheese Muffins for brunch when I’m planning a rich dessert like this cheesecake for later. It balances the meal! If you adore layered desserts, my no-bake layered chocolate cheesecake with Oreo crust is another fantastic option. For a completely different main course that pairs well, consider a light Lemon Garlic Cod or a fun Homemade Mexican Pizza.
Common Mistakes to Avoid
Mistake 1: Using Cold Cream Cheese
This is the biggest culprit for a lumpy filling. Cold cream cheese won’t blend smoothly with the other ingredients, no matter how long you mix. You’ll end up with tiny bits of unblended cheese in your beautiful chocolate batter. To avoid this, let your cream cheese sit on the counter for at least two hours before starting. It should feel soft and spreadable when you poke it.
Mistake 2: Overbaking the Cheesecake
Many bakers think a cheesecake should be completely firm in the oven. That leads to a dry, crumbly texture. The perfect cheesecake is set around the edges but still has a slight wobble in the center, about the size of a quarter. This wobble means it will finish setting as it cools. Trust the jiggle! Pull it from the oven at that moment for creamy perfection.
Mistake 3: Skipping the Chill Time
Trying to serve the cheesecake after just cooling on the rack is a recipe for a mess. It will be too soft to slice cleanly and the flavors won’t have melded. The long refrigeration (4-6 hours minimum) is essential for the structure to firm up. Think of it as the final, invisible step of cooking. Plan to make it the day before you need it.
Mistake 4: Not Loosening the Crust Before Baking
If you just press the crust into the pan and pour filling on top, it can fuse together. Before adding the filling, I like to use a small spoon to lightly press the crust away from the sides of the pan by about 1/8 inch. This creates a tiny gap that helps the crust stay distinct after baking.
A Note on Nutrition and Quality
Using high-quality ingredients like real cocoa and good chocolate not only improves flavor but can also contribute small amounts of beneficial plant compounds. For a deeper understanding of how the vitamins and minerals in foods like dairy and cocoa interact with our health, trusted resources can offer great insight. Always choose ingredients you feel good about.
Frequently Asked Questions (FAQ)
Can I make this Chocolate Truffle Cheesecake without a springform pan?
You can, but a springform pan is highly recommended. The removable sides make it easy to release the cheesecake without damaging the crust or sides. If you must use a regular pie dish, be very careful when serving. Consider lining the dish with parchment paper for easier removal. The presentation will be less perfect, but the taste will still be wonderful.
Why is my cheesecake filling cracked on the top?
Cracking usually happens from overbaking, rapid temperature change (like opening the oven door), or too much air in the batter. Ensure you don’t overmix after adding the eggs. Use a food processor for a denser emulsion. Bake until just set with a slight jiggle. Running a knife around the edge after baking also helps prevent cracks from tension as it cools.
Can I freeze this cheesecake?
Absolutely! This cheesecake freezes very well. Wrap the whole cheesecake or individual slices tightly in plastic wrap, then in foil. Freeze for up to 2 months. Thaw overnight in the refrigerator. The texture may be slightly denser, but the flavor will be fully preserved. It’s a great way to have a ready-to-serve dessert for unexpected guests.
What’s the difference between this and a regular chocolate cheesecake?
The “truffle” aspect comes from the intense chocolate concentration and the dense, smooth texture. This recipe uses chocolate in the crust, a double dose of cocoa and melted chocolate in the filling, and a ganache topping. It’s also blended in a food processor for a truffle-like density, unlike lighter, mixer-made cheesecakes. It’s a more decadent, focused chocolate experience.
How do I know when the ganache topping is ready to pour?
The ganache should be smooth, glossy, and slightly thickened. After stirring the melted chocolate into the warm cream, let it sit at room temperature for 5-10 minutes. Dip a spoon in it; it should coat the spoon nicely and not be runny like water. If it’s too thin, wait a few more minutes. If it’s too thick, warm it for a few seconds in the microwave.
Can I use milk chocolate instead of semi-sweet?
You can, but the cheesecake will be much sweeter and less rich. Semi-sweet chocolate provides a balanced, deep chocolate flavor that isn’t overly sugary. If you use milk chocolate, consider reducing the granulated sugar in the filling by about 1/4 cup to compensate. The texture will still be perfect.
Does the cheesecake need to be baked in a water bath?
This particular recipe does not require a water bath. The high fat content from the cream cheese, chocolate, and cream, along with the moderate oven temperature, helps bake it evenly without drying out. A water bath is often used for lighter cheesecakes to prevent cracking, but our dense truffle-style version is fine without it.
My crust is soggy. How can I prevent that?
A soggy crust usually means it wasn’t pressed firmly enough or the filling was too thin before baking. Press the crust mixture very firmly into the pan. Also, ensure your filling is properly thick and emulsified before pouring. If you’re worried, you can pre-bake the crust for 8-10 minutes at 325°F before adding the filling for extra firmness.
How many people does this cheesecake serve?
Because it is so rich and dense, a 9-inch cheesecake like this can comfortably serve 16-20 people. The slices can be modest but satisfying. For a smaller group, you’ll have delicious leftovers to enjoy for days, which is never a bad thing!
What other toppings work besides ganache?
While ganache is classic, you can top it with a simple dollop of whipped cream and chocolate shavings. A caramel drizzle would make it a chocolate caramel cheesecake. Fresh berries, a raspberry coulis, or even a sprinkle of chopped toasted nuts like pecans or hazelnuts add wonderful texture and flavor contrast.
For more incredible creations like this, explore all our decadent cheesecake recipes. We have a whole collection of sweet ideas waiting for you.
Your Chocolate Dream is Ready
This Chocolate Truffle Cheesecake is more than a recipe; it’s a guaranteed crowd-pleaser. It turns a simple dinner into a celebration. The process is a fun kitchen project, and the result is pure luxury. Remember, the secret is in the patience—that long chill time is what gives you that perfect, sliceable, truffle-like texture. So grab your food processor, melt that chocolate, and get ready to make a dessert that will have everyone asking for your secret. Happy baking!
Equipment
- Moule à charnière de 9 pouces
- Robot culinaire fortement recommandé
- Bain-marie ou bol adapté pour micro-ondes pour faire fondre le chocolat
- Roulette à pâtisserie
- Grille de refroidissement
Ingredients
- 1 tasse miettes de biscuits graham
- 1/3 tasse sucre granulé
- 1/4 tasse cacao en poudre
- 1/4 tasse beurre fondu
- 12 oz pépites de chocolat semi-sucré Ghirardelli de préférence
- 24 oz fromage à la crème à température ambiante
- 1 tasse sucre granulé
- 1/4 tasse sucre brun
- 3 cuillères à soupe cacao en poudre Ghirardelli recommandé
- 3/4 tasse crème épaisse
- 2 cuillères à café extrait de vanille
- 6 oz chocolat pour cuisson semi-sucré
- 2/3 tasse crème épaisse
- 2 cuillères à soupe beurre fondu
- q.s. Reddi-Wip pour garnir
- q.s. sauce au chocolat pour garnir
Instructions
- Préchauffez votre four à 163°C (325°F).
- Écrasez les biscuits graham dans un sac en plastique avec un rouleau à pâtisserie jusqu'à obtenir des miettes fines.
- Mélangez les miettes avec le sucre granulé et le cacao en poudre dans un bol.
- Incorporez le beurre fondu jusqu'à ce que le mélange soit homogène.
- Pressez le mélange fermement au fond d'un moule à charnière de 9 pouces.
- Faites fondre les pépites de chocolat dans un bain-marie ou au micro-ondes et laissez refroidir légèrement.
- Mélangez le fromage à la crème dans un robot culinaire jusqu'à ce qu'il soit lisse et sans grumeaux.
- Ajoutez les deux sucres et le cacao en poudre au fromage à la crème et pulsez pour combiner.
- Incorporez les œufs, la crème épaisse et la vanille; mélangez jusqu'à obtenir une texture soyeuse.
- Versez le chocolat fondu légèrement refroidi et mélangez jusqu'à obtenir un mélange uniforme.
- Versez la garniture sur la croûte préparée.
- Faites cuire pendant 75 à 80 minutes, jusqu'à ce que le centre soit bien pris avec un léger mouvement.
- Laissez refroidir complètement sur une grille et réfrigérez pendant au moins 4 à 6 heures, de préférence toute la nuit.
- Pour la ganache, chauffez la crème épaisse et le beurre jusqu'à ce qu'ils soient fondus.
- Ajoutez le chocolat pour cuisson à la crème chaude ; laissez reposer une minute, puis remuez jusqu'à obtenir une texture lisse.
- Versez la ganache sur le cheesecake refroidi et laissez prendre pendant une heure avant de servir.
- Coupez avec un couteau fin et tranchant trempé dans l'eau chaude pour obtenir des tranches nettes, puis garnissez de sauce chocolat et de Reddi-Wip.
Notes
Nutrition

Hi, I’m Olivia Parker, the founder of BakingSecret.com and a lifelong lover of all things sweet and homemade. I grew up in a small town in Oregon, where the smell of fresh cookies in my family’s kitchen sparked my passion for baking. Over the years, I turned that passion into a mission: to help home bakers feel confident, inspired, and creative.
After studying food science and working in several artisan bakeries across the U.S., I decided to create a space where everyone from beginners to seasoned bakers can find reliable recipes, expert tips, and a warm, welcoming community. BakingSecret.com is my way of sharing the magic of baking with the world. When I’m not testing new recipes, you’ll find me exploring farmers’ markets, collecting vintage cookbooks, or perfecting my sourdough technique.