
Why This Chocolate Cake Roll is a Must-Try
There’s something magical about the first slice of a Chocolate Cake Roll. The way the soft, spongy cake unfurls to reveal a creamy filling is like unwrapping a gift. I remember making this for the first time on a chilly Sunday afternoon. My kids were hovering around the kitchen, sneaking tastes of whipped cream while I spread it over the warm cake. It wasn’t perfect—there was a crack or two—but it tasted like pure joy. And that’s why I’m sharing this recipe with you today. Whether you’re new to baking or a seasoned pro, this Chocolate Cream Roll will become your go-to dessert.
A Little History Behind the Chocolate Cake Roll
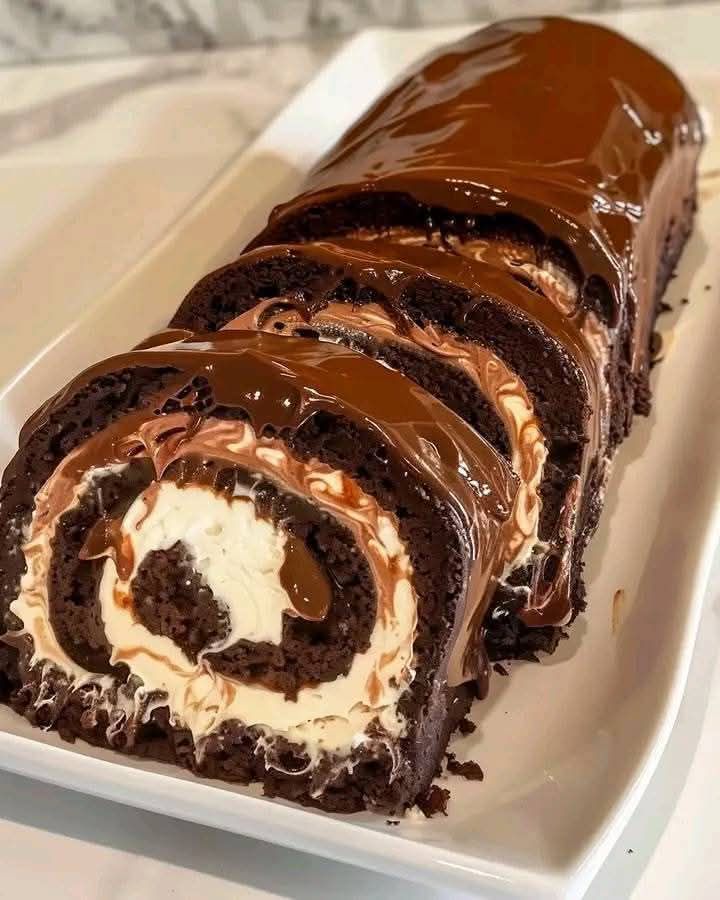
The Chocolate Cake Roll has its roots in classic European sponge cakes, which have been rolled up with jam or cream for centuries. In America, it gained fame as a holiday favorite, especially during Christmas when families love to serve something festive and homemade. I’ve seen versions stuffed with fruit preserves, Nutella, and even peppermint cream. But my favorite? A rich chocolate ganache topping paired with fluffy whipped cream inside. It’s simple yet elegant—a true crowd-pleaser.
Why You’ll Love This Recipe
This Chocolate Cream Roll is all about balance. The light, airy cake contrasts beautifully with the decadent filling and glossy ganache. Plus, it’s easier than you think! No fancy equipment needed—just a good whisk and some patience. Best of all, it’s versatile. You can dress it up for a party or enjoy it as a cozy treat at home. Trust me, once you try this, you’ll want to make it again and again.
Perfect Occasions to Make This Cake Roll
Need an impressive dessert for Thanksgiving? Done. Want to wow your coworkers at the office potluck? Check. Looking for a fun project to do with your kids? Absolutely. This Chocolate Cream Roll works for birthdays, anniversaries, or just because you deserve a little indulgence. Serve it with fresh berries for a romantic touch or sprinkle powdered sugar for a rustic vibe.
Ingredients You’ll Need
Here’s everything you need to whip up this masterpiece:
For the Cake:
- 3/4 cup all-purpose flour
- 1/4 cup unsweetened cocoa powder
- 1 tsp baking powder
- 1/4 tsp salt
- 4 large eggs
- 3/4 cup granulated sugar
- 1 tsp vanilla extract
- 2 tbsp vegetable oil
- 1/4 cup powdered sugar for rolling
For the Filling:
- 1 cup heavy whipping cream
- 1/4 cup powdered sugar
- 1 tsp vanilla extract
For the Topping:
- 1 cup semi-sweet chocolate chips
- 1/2 cup heavy cream
Substitution Options
Not everyone keeps every ingredient on hand, so here are some swaps:
- All-purpose flour: Swap with gluten-free flour if needed.
- Cocoa powder: Use Dutch-process cocoa for a deeper flavor.
- Heavy cream: Coconut cream works for a dairy-free option.
- Semi-sweet chocolate chips: Dark or milk chocolate chips are great alternatives.
Step 1: Make the Cake
Start by preheating your oven to 350°F (175°C). Grease a 10×15-inch jelly roll pan and line it with parchment paper. Sift together the flour, cocoa powder, baking powder, and salt in a medium bowl. In another bowl, beat the eggs and sugar until they turn pale yellow and frothy—it takes about 5 minutes. Add the vanilla and oil, mixing gently. Fold in the dry ingredients until smooth. Spread the batter evenly into the pan. Bake for 10-12 minutes, or until the top springs back when touched. While still warm, sprinkle powdered sugar onto a towel, flip the cake onto it, and roll it up snugly. Let it cool completely.
Pro tip: Rolling the cake while it’s warm helps prevent cracks later!
Step 2: Prepare the Filling
In a large bowl, whip the heavy cream, powdered sugar, and vanilla until stiff peaks form. Unroll the cooled cake carefully, then spread the whipped cream evenly across the surface. Roll it back up tightly, leaving the towel behind. Place seam-side down on a serving platter.
Chef’s tip: Chill the cake briefly before adding the ganache for better stability.
Step 3: Make the Chocolate Topping
Heat the heavy cream until it simmers, then pour it over the chocolate chips in a bowl. Let it sit for 2 minutes, then whisk until silky smooth. Pour the ganache over the cake roll, spreading it evenly with a spatula. Pop it in the fridge to set for at least 1 hour before slicing.
Timing Breakdown
- Prep Time: 20 minutes
- Cooking Time: 12 minutes
- Resting Time: 1 hour
- Total Time: About 1 hour 30 minutes
Chef’s Secret
To get those picture-perfect slices, dip your knife in hot water and wipe it clean between cuts. This trick ensures smooth edges every time!
An Interesting Fact
Did you know that sponge cakes date back to the 1600s? They were originally baked without leavening agents, relying solely on beaten eggs for their rise. Pretty cool, right?
Necessary Equipment
- Jelly roll pan
- Parchment paper
- Electric mixer
- Whisk
- Offset spatula
Storage Tips
Once assembled, store your Chocolate Cream Roll in the fridge. Cover it loosely with plastic wrap to keep it fresh. It stays good for up to 3 days, though it rarely lasts that long in my house!
If you want to freeze it, wrap it tightly in plastic wrap and foil. Thaw overnight in the fridge before serving. Just note that the texture might change slightly after freezing.
For best results, bring the cake to room temperature for 15-20 minutes before slicing. This enhances the flavors and makes it easier to cut.
Tips and Advice
- Don’t skip greasing and lining the pan—it prevents sticking.
- Use room-temperature eggs for fluffier batter.
- Be gentle when folding in the dry ingredients to avoid deflating the mixture.
Presentation Ideas
- Dust with powdered sugar using a stencil for a decorative pattern.
- Garnish with fresh raspberries or strawberries for a pop of color.
- Drizzle extra melted chocolate over the top for added drama.
Healthier Alternatives
Want to lighten things up? Try these variations:
- Gluten-Free: Use almond flour instead of all-purpose flour.
- Low-Sugar: Substitute monk fruit sweetener for granulated sugar.
- Vegan: Replace eggs with aquafaba and use coconut cream for the filling.
- Dark Chocolate Lovers: Swap semi-sweet chips for dark chocolate.
- Fruit-Filled: Add a layer of raspberry jam under the whipped cream.
- Minty Twist: Stir peppermint extract into the ganache for a refreshing kick.
Mistake 1: Overmixing the Batter
Overmixing leads to a dense cake instead of a light, airy one. To avoid this, fold the dry ingredients gently into the wet mixture. Stop as soon as everything is combined.
Tip: Use a spatula rather than a whisk for folding.
Mistake 2: Skipping the Towel Roll
Rolling the cake while it’s warm trains it to hold its shape later. If you skip this step, the cake may crack when you fill it.
Tip: Sprinkle enough powdered sugar on the towel to prevent sticking.
Mistake 3: Rushing the Chilling Process
Patience pays off! Letting the cake chill ensures the ganache sets properly and makes slicing easier.
Tip: Set a timer to remind yourself when it’s ready.
FAQ
Can I make this ahead of time?
Absolutely! You can prepare the cake a day in advance and store it in the fridge. Just add the ganache before serving.
What size pan should I use?
A standard 10×15-inch jelly roll pan works best. Avoid larger pans, as the cake won’t be thick enough.
Can I freeze the cake?
Yes, but wrap it well to prevent freezer burn. Thaw in the fridge overnight before serving.
How do I fix cracked cake rolls?
No worries! Cracks happen. Simply cover them with ganache or dust with powdered sugar for a rustic look.
Is this recipe beginner-friendly?
Definitely! With clear instructions and minimal tools, even novice bakers can succeed.
Can I use store-bought whipped cream?
You can, but homemade whipped cream tastes fresher and holds up better.
What’s the best way to serve leftovers?
Store leftovers in the fridge and enjoy within 3 days. Bring to room temperature before serving.
Do I have to use ganache?
Nope! Dust with powdered sugar or drizzle caramel sauce for a simpler finish.
Can I double the recipe?
Yes, but bake in two separate pans to ensure even cooking.
Why does my cake taste eggy?
Eggy flavors come from underbaking. Make sure to bake for the full 10-12 minutes.
Final Thoughts
Baking a Chocolate Cream Roll might seem intimidating at first, but trust me—it’s worth the effort. From the velvety ganache to the pillowy whipped cream filling, every bite is pure bliss. So grab your apron, gather your ingredients, and give this recipe a whirl. Your family and friends will thank you!
Equipment
- Jelly roll pan
- Electric mixer
- Whisk
- Offset spatula
- Parchment paper
Ingredients
- 3/4 cup all-purpose flour
- 1/4 cup unsweetened cocoa powder
- 1 tsp baking powder
- 1/4 tsp salt
- 4 large eggs
- 3/4 cup granulated sugar
- 1 tsp vanilla extract
- 2 tbsp vegetable oil
- 1/4 cup powdered sugar for rolling
Instructions
- Preheat your oven to 350°F (175°C) and grease a 10x15-inch jelly roll pan, lining it with parchment paper.
- Sift together the flour, cocoa powder, baking powder, and salt in a medium bowl.
- In another bowl, beat the eggs and sugar until pale yellow and frothy (about 5 minutes).
- Add the vanilla and oil, mixing gently.
- Fold in the dry ingredients until smooth and spread the batter evenly into the prepared pan.
- Bake for 10-12 minutes, or until the top springs back when touched.
- While still warm, sprinkle powdered sugar onto a towel, flip the cake onto it, and roll it up snugly. Let it cool completely.
- In a large bowl, whip the heavy cream, powdered sugar, and vanilla until stiff peaks form.
- Unroll the cooled cake carefully, then spread the whipped cream evenly across the surface.
- Roll it back up tightly, placing it seam-side down on a serving platter.
- Heat the heavy cream until it simmers, then pour it over the chocolate chips in a bowl.
- Let it sit for 2 minutes, then whisk until silky smooth.
- Pour the ganache over the cake roll, spreading it evenly with an offset spatula.
- Refrigerate to set the ganache for at least 1 hour before slicing.
Notes
Nutrition

Hi, I’m Olivia Parker, the founder of BakingSecret.com and a lifelong lover of all things sweet and homemade. I grew up in a small town in Oregon, where the smell of fresh cookies in my family’s kitchen sparked my passion for baking. Over the years, I turned that passion into a mission: to help home bakers feel confident, inspired, and creative.
After studying food science and working in several artisan bakeries across the U.S., I decided to create a space where everyone from beginners to seasoned bakers can find reliable recipes, expert tips, and a warm, welcoming community. BakingSecret.com is my way of sharing the magic of baking with the world. When I’m not testing new recipes, you’ll find me exploring farmers’ markets, collecting vintage cookbooks, or perfecting my sourdough technique.