
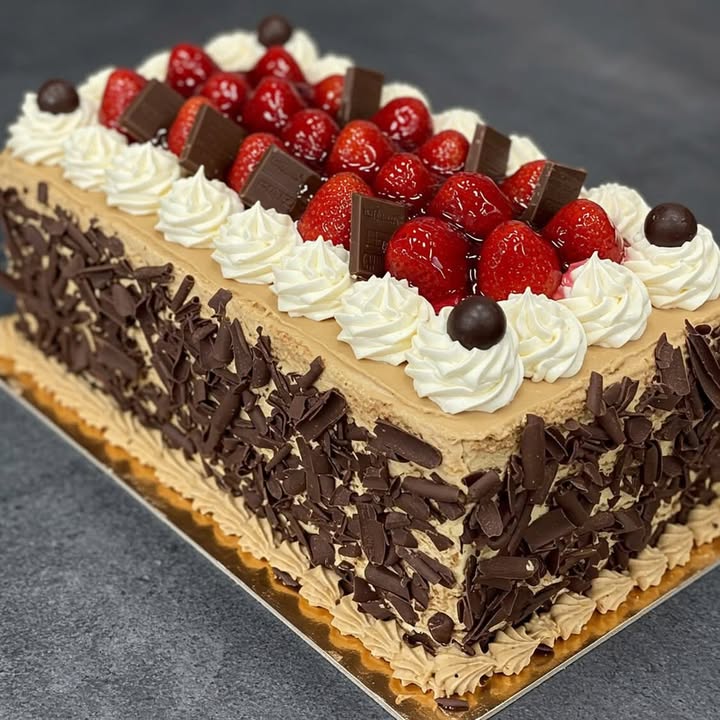
Why This Chocolate Strawberry Delight is a Must-Try
There’s something magical about the combination of rich chocolate, juicy strawberries, and creamy condensed milk. I still remember the first time I made this Wet Chocolate Cake Stuffed with Strawberries and Condensed Milk. It was my mom’s birthday, and I wanted to create something unforgettable. The result? A cake so moist, so decadent, that my family couldn’t stop raving about it. This Chocolate Strawberry Delight is perfect for celebrations or just because you want to treat yourself.
A Little History Behind the Cake
This cake draws inspiration from Latin American desserts, where condensed milk reigns supreme. It’s a modern twist on classic chocolate cakes, adding a fruity kick with fresh strawberries. Growing up, my grandma used to make simple chocolate cakes topped with whipped cream and fruit. Over time, I experimented by layering them with condensed milk and fresh berries. The result? A dessert that feels both nostalgic and excitingly new.
Why You’ll Love This Recipe
This Chocolate Strawberry Delight isn’t just any cake—it’s a showstopper. The cake itself is moist and chocolatey, while the filling is creamy and bursting with strawberry flavor. Plus, it’s surprisingly easy to make. Even if you’re not a pro in the kitchen, this recipe will guide you step-by-step. Trust me, your friends and family will think you spent hours perfecting it!
Perfect Occasions to Make This Cake
Whether it’s a birthday, anniversary, or just a random Tuesday, this cake fits every occasion. I’ve served it at holiday gatherings, potlucks, and even casual weekend brunches. It’s also a hit with kids, thanks to its sweet and fruity flavors. Honestly, there’s no wrong time to whip up this Chocolate Strawberry Delight.
Ingredients You’ll Need
Here’s what you’ll need to make this masterpiece:
For the Cake:
- 3 cups of flour
- 1 cup of cocoa powder
- 2 teaspoons of baking soda
- 1 teaspoon of salt
- 3 eggs
- 1 cup of oil
- 1 cup of buttermilk (made with 1 cup whole milk + juice of 2 lemons)
- 2 teaspoons of vanilla essence
- 2 cups of sugar
For the Filling:
- 100 g of butter
- 2 cans of condensed milk
- 150 g of powdered milk
- 200 g of chopped strawberries
Substitution Options
If you’re missing an ingredient or want to tweak the recipe, here are some swaps:
- Use almond or coconut milk instead of whole milk for a dairy-free option.
- Swap strawberries for raspberries or blueberries if you prefer.
- Replace powdered milk with heavy cream for an even richer filling.
Step-by-Step Preparation
Step 1: Preheat and Prep
Start by preheating your oven to 350°F (180°C). Grease your cake pan generously with butter and line the bottom with parchment paper. This little trick ensures your cake won’t stick. Pro tip: Dust the pan with a bit of flour after greasing for extra insurance.
Step 2: Make the Buttermilk
In a small bowl, mix 1 cup of whole milk with the juice of 2 lemons. Let it sit for 15 minutes until it thickens slightly. The tangy flavor of buttermilk adds a lovely depth to the cake. If you don’t have lemons, vinegar works too!
Step 3: Mix Dry Ingredients
In a large bowl, sift together the flour, cocoa powder, baking soda, and salt. Sifting helps remove lumps and makes the cake lighter. Set this aside while you prepare the wet ingredients.
Step 4: Combine Wet Ingredients
In another bowl, whisk the eggs, oil, buttermilk, and vanilla essence until smooth. The mixture should look glossy and well-blended. Don’t rush this step—it’s key to achieving that velvety texture.
Step 5: Bring It All Together
Add the dry ingredients to the wet mixture in two parts, mixing gently with a spatula. Fold in the sugar last, ensuring everything is fully incorporated. Your batter should be thick yet pourable.
Step 6: Bake the Cake
Pour the batter into the prepared pan and bake for 25 minutes. To check if it’s done, insert a toothpick into the center—it should come out clean. The aroma of chocolate wafting through your kitchen is simply irresistible.
Step 7: Cool and Layer
Let the cake cool in the pan for 10 minutes before transferring it to a wire rack. Once completely cool, slice it into two or three layers. This is where the fun begins—get ready to stuff it with goodness!
Step 8: Prepare the Filling
Melt the butter in a saucepan over medium heat. Stir in the condensed milk and powdered milk until smooth. Add the chopped strawberries and mix well. The vibrant red of the berries against the creamy filling is a sight to behold.
Step 9: Assemble the Cake
Spread the filling evenly over the first cake layer, then place the second layer on top. Repeat if using three layers. Finish by spreading any remaining filling on the sides for a rustic look.
Timing Breakdown
Preparation takes about 20 minutes, baking requires 25 minutes, and cooling/resting adds another 30 minutes. In total, you’ll spend around 1 hour and 15 minutes creating this masterpiece.
Chef’s Secret
To take this cake to the next level, chill it in the fridge for an hour before serving. The flavors meld beautifully, and the filling becomes firmer, making slicing easier.
Extra Info
Did you know that strawberries are part of the rose family? Their sweet-tart flavor pairs perfectly with chocolate, which is why they’re often paired in desserts worldwide.
Necessary Equipment
You’ll need a mixing bowl, whisk, spatula, measuring cups, a saucepan, a cake pan, and a cooling rack. Simple tools for a stunning result!
Storage Tips
Store the cake in an airtight container in the fridge for up to 3 days. The cold temperature keeps the filling firm and prevents spoilage.
If you’d like to freeze it, wrap individual slices tightly in plastic wrap and store them in a freezer-safe bag. They’ll keep for up to 2 months.
When reheating, let the cake come to room temperature for 30 minutes before serving. This allows the textures to shine.
Tips and Advice
- Don’t overmix the batter—it can make the cake dense.
- Use ripe strawberries for the best flavor.
- Chill the assembled cake before slicing for neat portions.
Presentation Ideas
- Garnish with fresh strawberry slices and chocolate shavings.
- Dust the top with powdered sugar for a snowy effect.
- Serve with a dollop of whipped cream on the side.
Healthier Alternatives
Want to lighten things up? Try these variations:
- Gluten-Free Option: Swap regular flour for almond or oat flour.
- Low-Sugar Version: Use stevia or monk fruit instead of sugar.
- Vegan Twist: Replace eggs with flax eggs and use plant-based butter.
- Lightened-Up Filling: Use Greek yogurt instead of condensed milk.
- Fruit Swap: Substitute strawberries with mango or kiwi.
- Dark Chocolate Base: Use dark cocoa powder for a deeper flavor.
Common Mistakes to Avoid
Mistake 1: Skipping the Buttermilk Step
The buttermilk gives the cake its signature moisture. Skipping it results in a drier texture. Always take the time to make it—it’s worth it!
Mistake 2: Overfilling the Layers
Too much filling can cause the cake to slide apart. Spread it evenly and leave a small border around the edges.
Mistake 3: Rushing the Cooling Process
Cutting into a warm cake ruins its structure. Patience pays off here—let it cool completely.
FAQ
Can I use frozen strawberries?
Yes, but thaw and drain them first to avoid excess liquid in the filling.
How do I prevent the cake from sticking?
Grease the pan thoroughly and line it with parchment paper. A light dusting of flour helps too.
Can I make this ahead of time?
Absolutely! Assemble the cake a day in advance and store it in the fridge.
What if I don’t have a stand mixer?
No problem! A hand whisk or spatula works just fine for mixing.
Is this cake kid-friendly?
Yes, kids love the sweet and fruity flavors. Just omit alcohol if adding liqueurs.
Can I add nuts to the filling?
Definitely! Chopped almonds or walnuts add a nice crunch.
How do I know when the cake is done?
Insert a toothpick—if it comes out clean, the cake is ready.
Can I use store-bought buttermilk?
Yes, it saves time and works just as well.
What’s the best way to slice the cake?
Use a sharp knife and wipe it clean between cuts for neat slices.
Can I double the recipe?
Yes, simply adjust the quantities and use two pans for baking.
Final Thoughts
This Chocolate Strawberry Delight is more than just a dessert—it’s a celebration of flavors and textures. Whether you’re baking for loved ones or treating yourself, this cake promises to deliver joy with every bite. So grab your apron, gather your ingredients, and get ready to create something truly unforgettable!
Equipment
- Mixing bowl
- Whisk
- Spatula
- Cake pan
- Cooling rack