
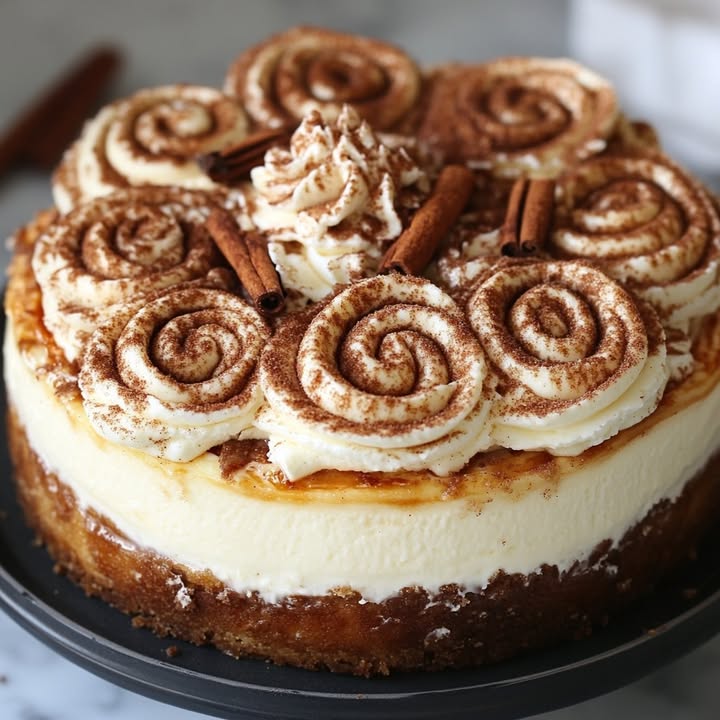
The Cinnamon Roll Cheesecake: Where Two Dessert Legends Collide
Okay, friends, let’s talk about a kitchen experiment that went spectacularly right. Imagine a lazy Sunday morning. The smell of warm cinnamon rolls is filling the kitchen, but you’re also craving something rich and creamy. Why choose? That’s how this Cinnamon Roll Cheesecake was born in my kitchen. It’s the cozy, spiced heart of a cinnamon bun, hugged by the silky, decadent soul of a classic New York cheesecake. One bite, and my family declared it my new signature dish. Trust me, this is the fusion dessert that will make you a baking legend at your next gathering.
A Sweet Slice of History: From Bun to Cheesecake
Cinnamon rolls have roots in Swedish and Danish baking, a sweet bread for fika (coffee break). Cheesecake, of course, dates back to ancient Greece! The modern “cinnamon roll cheesecake” is a beautiful 21st-century mashup. It takes the gooey, spiced ribbon we all love from the roll and bakes it right into a luxurious cheesecake filling. It’s a perfect example of how classic desserts can inspire something entirely new and wonderful. My version keeps the spirit of both, with a buttery graham cracker crust standing in for the fluffy dough—a happy shortcut that delivers on flavor and texture.
Why You’ll Adore This Cinnamon Roll Cheesecake Recipe
You’ll love this recipe because it solves the ultimate dessert dilemma. It’s incredibly impressive but built on simple, reliable steps. The contrasting textures are pure magic: the crunchy crust, the velvety filling, and the sweet, spicy swirls all play together. It’s also a make-ahead dream! Bake it today, glaze it tomorrow, and you have a stunning, stress-free dessert ready to wow your guests. The flavor combination is pure comfort, familiar yet fancy enough for any special table.
Perfect Occasions for Your Show-Stopping Cheesecake
This cheesecake isn’t just for dessert; it’s an event! It’s the star of holiday brunches (even better than a plain coffee cake), the perfect birthday treat for someone special, or a gorgeous centerpiece for a dinner party. I love bringing it to potlucks because it travels well and always disappears first. Honestly, any day that needs a little extra sweetness is the right day for this cake. It turns an ordinary Tuesday into a celebration.
Gathering Your Ingredients
Let’s gather the simple components that create this masterpiece. Make sure your cream cheese and eggs are at room temperature for a super smooth filling. Here’s what you’ll need:
For the Crust:
- 1 ½ cups graham cracker crumbs
- ¼ cup granulated sugar
- 1 teaspoon ground cinnamon
- 5 tablespoon unsalted butter, melted
For the Cinnamon Swirl:
- ⅓ cup brown sugar, packed
- 1 tablespoon ground cinnamon
- 2 tablespoon all-purpose flour
- 4 tablespoon unsalted butter, melted
For the Cheesecake Filling:
- 24 ounce (three 8-oz blocks) cream cheese, softened
- 1 cup granulated sugar
- 1 teaspoon vanilla extract
- 3 large eggs
- ½ cup sour cream
- ¼ cup heavy cream
For the Glaze:
- ½ cup powdered sugar
- 1 tablespoon milk
- ½ teaspoon vanilla extract
Handy Substitution Options
Out of something? No panic! Here are easy swaps:
Graham Crackers: Use digestive biscuits or vanilla wafer crumbs.
Sour Cream: Plain full-fat Greek yogurt works beautifully.
Heavy Cream: You can use additional sour cream or more full-fat yogurt.
Brown Sugar: For the swirl, you can use granulated sugar mixed with a touch of molasses. For a fun twist, try using my Soft Batch Pumpkin Sugar Cookies as a crumbled crust base instead of graham crackers!
How to Make Your Cinnamon Roll Cheesecake Masterpiece
Follow these simple steps for a flawless, gorgeous dessert.
Step 1: Prep and Preheat
Start by heating your oven to 325°F (163°C). This lower temperature is key for a creamy, crack-free cheesecake. Take your 9-inch springform pan, grease the bottom and sides lightly. Then, wrap the outside bottom and sides tightly with aluminum foil. This creates a watertight seal if you bake in a water bath, but for this recipe, it mainly protects from any butter leaks. Set it on a baking sheet for easy handling.
Step 2: Make the Crust
In a medium bowl, mix the graham cracker crumbs, sugar, and cinnamon. Pour in the melted butter and stir until the mixture looks like wet sand and holds together when pinched. Pour it into your prepared pan. Use a flat-bottomed cup or your fingers to press it firmly and evenly into the bottom. Bake this for just 8 minutes. You’ll smell a lovely, toasty aroma. Let it cool on a rack while you make the filling. Pro tip: Pressing the crust firmly prevents it from crumbling when you slice the cheesecake later.
Step 3: Create the Cinnamon Swirl
This is the magic ribbon! In a small bowl, whisk together the brown sugar, cinnamon, and flour. Drizzle in the melted butter and stir until it forms a thick, spreadable paste. It will be fragrant and dark. Set this aside—it’s ready to become those beautiful marbled layers.
Step 4: Whip Up the Cheesecake Filling
In a large bowl, beat the softened cream cheese with an electric mixer on medium-low speed until it’s perfectly smooth and creamy, about 2 minutes. Scrape down the bowl. Add the sugar and vanilla, beating again until combined. Now, add the eggs one at a time, beating just until each yolk disappears into the batter. Over-mixing eggs can add too much air and cause cracks. Finally, blend in the sour cream and heavy cream on low speed until the batter is uniform, silky, and luscious.
Step 5: Layer and Swirl
Pour about half of your cheesecake batter over the cooled crust. Smooth it gently. Now, take half of your cinnamon swirl mixture. Drop dollops of it randomly over the batter. Take a thin knife or a skewer and gently drag it through the batter in figure-eight patterns to create beautiful streaks. Pour the remaining batter over the top, and repeat the process with the last of the cinnamon swirl. Swirl again! Don’t overdo it, or the swirls will muddle.Chef’s tip: Warming your knife under hot water and drying it can help create cleaner swirls.
Step 6: Bake to Perfection
Carefully place your creation in the oven. Bake for 55 to 65 minutes. The cheesecake is done when the edges are slightly puffed and set, but the center—about a 3-inch circle—still has a slight jiggle when you gently shake the pan. It will firm up as it cools. Turn off the oven, crack the door open, and let the cheesecake cool inside for about an hour. This gradual cooling helps prevent sinking and cracking.
Step 7: Chill and Glaze
After its oven cool-down, remove the cheesecake, take off the foil, and let it cool completely on the counter. Then, cover it and refrigerate for at least 4 hours, but overnight is truly best. This long chill sets the texture perfectly. Before serving, make the simple glaze: whisk powdered sugar, milk, and vanilla until smooth. Drizzle it artfully over the cold cheesecake. Slice with a hot, clean knife for perfect pieces.
Understanding Your Time Commitment
This is a dessert that rewards patience. Hands-on prep is quick—about 25 minutes of active work. The bake time is just over an hour. The real key is the chilling time. Four hours is the minimum, but letting it sleep in the fridge overnight makes it sublime. So, plan for about 6 hours from start to finish, or better yet, bake it the day before you need it.
The #1 Chef’s Secret for Creamy Success
Room temperature ingredients are non-negotiable. Take your cream cheese, eggs, and sour cream out of the fridge at least 1-2 hours before you start. Soft cream cheese blends smoothly without lumps. Room-temperature eggs incorporate more easily and evenly, preventing you from over-mixing the batter. This simple step is the biggest guarantee of a velvety, heavenly texture.
A Fun Fact About Cinnamon
That warm, comforting spice in your swirl isn’t just tasty—it has a royal history! In ancient times, cinnamon was so highly prized it was considered a gift fit for monarchs and gods. It was worth more than silver. So when you sprinkle that tablespoon into your swirl, remember you’re adding a touch of ancient luxury to your modern masterpiece.
Necessary Kitchen Equipment
- 9-inch springform pan
- Stand mixer or hand mixer
- Large and small mixing bowls
- Aluminum foil
- Measuring cups and spoons
- Spatula
- Whisk
- Toothpick or knife for swirling
Storing Your Cinnamon Roll Cheesecake
Once glazed, store any leftover cheesecake in the refrigerator, covered tightly with plastic wrap or in an airtight container. It will keep beautifully for up to 5 days. The flavors actually deepen and meld, making day-two slices a real treat.
For longer storage, you can freeze this cheesecake. Wrap the whole chilled cheesecake (unglazed is best) tightly in plastic wrap, then in foil. Or, slice it and wrap individual portions. It will freeze well for up to 2 months.
To serve frozen cheesecake, thaw it overnight in the refrigerator. Then, add your fresh glaze just before serving. This makes it a fantastic make-ahead dessert for busy holidays or unexpected guests. For more decadent inspiration, explore our full collection of creamy and delicious cheesecake recipes.
Tips and Advice for Flawless Results
- Don’t Over-mix: Once the eggs are added, mix on low speed and only until combined.
- Prevent Sticking: Run a thin knife around the edge of the cheesecake after the initial cool-down, before chilling, to ensure clean release.
- Easy Clean Slices: Dip your knife in hot water and wipe it clean between each slice for picture-perfect servings.
- Test for Doneness: Look for that jiggly center. A toothpick test doesn’t work well for creamy cheesecakes.
Presentation Tips to Make it Shine
- Drizzle the glaze from a spoon in a back-and-forth motion, or use a piping bag for more control.
- Garnish with a light sprinkle of cinnamon or a few toasted pecans or walnuts for crunch.
- Serve each slice on a plate with a dollop of fresh whipped cream or a small scoop of vanilla ice cream.
- Pair it with a cup of strong coffee or a glass of cold milk for the ultimate experience.
6 Delicious Healthier Alternative Recipes
Love the idea but want a lighter twist? Try these variations:
- Greek Yogurt Swapped: Replace all the sour cream with full-fat plain Greek yogurt. It adds protein and tang while keeping creaminess.
- Sugar Reduction: You can reduce the granulated sugar in the filling by ¼ cup. The swirl and crust provide plenty of sweetness.
- Nutty Crust: Swap half the graham crumbs for finely ground almonds or walnuts for added healthy fats and flavor.
- Mini Cheesecakes: Make individual servings in a muffin tin with liners. Reduce baking time to 18-22 minutes. Perfect for portion control!
- Fruit-Forward Version: Add a layer of finely chopped apples sautéed with a little cinnamon under the batter for an Apple Cinnamon Roll Cheesecake.
- Dairy-Free Delight: Use high-quality dairy-free cream cheese, coconut cream for the heavy cream, and a plant-based butter. Check that all other ingredients align with your dietary needs.
Common Mistakes to Avoid
Mistake 1: Using Cold Ingredients
This is the most common culprit for a lumpy cheesecake filling. Cold cream cheese will never become perfectly smooth, no matter how long you beat it. Lumps of cold cheese bake into dense spots. Cold eggs are harder to incorporate evenly, leading to over-mixing. Always plan ahead. Take your dairy and eggs out at least an hour before you start baking. They should feel cool to the touch, not cold.
Mistake 2: Over-Mixing the Batter After Adding Eggs
Once you add the eggs, your mixing style needs to change. Beating too much at this stage incorporates excess air. This air expands in the oven, then collapses as the cheesecake cools, causing cracks and a less dense texture. After adding each egg, mix on low speed just until the yolk disappears and the batter is uniform. A few gentle stirs by hand at the end can help ensure everything is blended without over-aerating.
Mistake 3: Overbaking the Cheesecake
Unlike a cake, a cheesecake is done when it’s still slightly wobbly in the center. If you bake it until the top is completely firm and a toothpick comes out clean, it’s overdone. It will continue to cook from residual heat as it cools. An overbaked cheesecake becomes dry, grainy, and is much more likely to crack. Trust the jiggle test! The center should move like set Jell-O when you gently shake the pan, not like liquid.
Mistake 4: Skipping the Gradual Cool-Down
Pulling a hot cheesecake out of the oven and plopping it on the counter is a shock to its system. The sudden temperature change causes it to contract too quickly, which almost guarantees a big crack down the middle. Letting it cool slowly in the turned-off oven with the door ajar allows it to gradually adjust to the cooler air. This patience pays off with a smooth, professional-looking top.
Your Cinnamon Roll Cheesecake Questions, Answered
Can I make this cheesecake without a springform pan?
It’s not recommended. A springform pan has a removable side, which is essential for getting this tall, delicate dessert out in one beautiful piece. If you’re in a pinch, you could use a deep 9-inch cake pan lined with parchment paper slings, but unmolding will be much trickier. Investing in a good springform pan is worth it for all sorts of lovely recipes, like this stunning Blackberry Velvet Gothic Cake.
Why did my cheesecake crack on top?
Cracks usually happen from over-mixing (adding too much air), overbaking, or cooling too quickly. Don’t worry! It’s still delicious. Next time, ensure ingredients are room temp, mix gently after adding eggs, don’t overbake, and cool it gradually. Also, the cinnamon swirls and glaze do a great job of hiding any minor cracks, so it’s never a disaster.
How do I know when the cheesecake is perfectly done baking?
Look for the edges to be slightly puffed and set. The center, about the size of a large peach, should still have a noticeable jiggle when you gently wiggle the pan. It should look set around the edges but soft in the middle. Remember, it will firm up significantly during the long chill in the fridge.
Can I use a different type of crust?
Absolutely! The graham-cinnamon crust is classic, but get creative. You could use crushed ginger snaps, vanilla wafers, or even biscoff cookies. For a nuttier flavor, replace ½ cup of the crumbs with finely ground pecans. Just keep the total crumb amount and butter ratio the same for the right texture.
My cinnamon swirl sunk to the bottom. What happened?
This can happen if the swirl mixture is too heavy or liquid. Make sure you’ve added the flour to your swirl—it helps thicken it so it suspends in the batter. Also, ensure your first layer of cheesecake batter is thick enough before adding the first swirl. If the batter is too thin, the swirl can sink through.
How far in advance can I make this?
This cheesecake is a fantastic make-ahead dessert. You can bake it, chill it (unglazed), and keep it covered in the fridge for up to 2 days before serving. Add the glaze on the day you plan to serve it for the freshest look and texture. You can also freeze it for up to 2 months.
Can I add raisins or nuts to the cinnamon swirl?
Yes, for a more traditional cinnamon roll feel! Mix in ¼ to ⅓ cup of plumped raisins (soaked in warm water or rum) or chopped toasted pecans/walnuts into your cinnamon swirl mixture before dolloping it. This adds wonderful texture and flavor pockets throughout the cake.
Is there a way to make this without a mixer?
You can, but it requires elbow grease. Ensure your cream cheese is very soft. Use a sturdy wooden spoon or flexible spatula to press and smear the cream cheese against the side of the bowl until smooth before adding other ingredients. A whisk can help incorporate the eggs and dairy. It’s more work, but doable for a strong arm!
What’s the purpose of the sour cream and heavy cream?
Sour cream adds a delightful tang that balances the sweetness and contributes to a super creamy, rich texture. Heavy cream adds fat and moisture, making the finished cheesecake luxuriously smooth and helping prevent a dry, crumbly outcome. Together, they create the ideal cheesecake mouthfeel. For a different kind of tropical creamy delight, check out our Hawaiian Carrot Pineapple Cake with its luscious cream cheese frosting.
Can I turn this into a pumpkin cinnamon roll cheesecake for fall?
That’s a fantastic idea! You certainly can. Reduce the sour cream to ¼ cup and add ¾ cup of plain pumpkin puree to the filling. Increase the spices in the swirl or add a pinch to the filling. The pumpkin adds moisture and flavor, and it pairs so well with cinnamon. Just note that it may affect the baking time slightly, so keep an eye on the jiggle. For more fall inspiration, my Pineapple Upside-Down Sugar Cookies are a quick and fun seasonal treat.
Ready to Bake a Memory?
So there you have it—your guide to creating a dessert that’s pure magic. This Cinnamon Roll Cheesecake is more than just a recipe; it’s an experience. It fills your home with an incredible aroma and brings people together around the table. Remember, great baking is about joy, not perfection. Even if it cracks a little, it will taste phenomenal. Every slice offers a balance of energy and pleasure, much like the wholesome ingredients guide from the USDA emphasizes for balanced eating. So, preheat that oven, soften that cream cheese, and get ready for the compliments. You’ve got this, baker! Now go create something wonderful.
Equipment
- Grand bol
- Fouet
- Spatule
- Plaque à pâtisserie
- Papier sulfurisé
Ingredients
- 24 oz fromage à la crème
- 1 tasse sucre
- 3 bloc(s) fromage à la crème
- 3 crosse(s) œufs
- 1/2 tasse crème épaisse
- 1 cuillère à soupe beurre non salé, fondu
- 1/3 tasse sucre brun, compacté
- 1 cuillère à soupe extrait de vanille
- 1/4 tasse sucre glace
- 1 cuillère à soupe farine tout usage
- 1 cuillère à soupe cannelle en poudre
Instructions
- Préchauffez le four à 163°C (325°F) et préparez un moule à charnière de 9 pouces.
- Mélangez les miettes de biscuits graham, le sucre et la cannelle dans un bol, puis ajoutez le beurre fondu et remuez jusqu'à obtenir un mélange homogène. Pressez le mélange au fond du moule préparé et faites cuire pendant 8 minutes.
- Dans un petit bol, fouettez ensemble le sucre brun, la cannelle et la farine pour le tourbillon. Ajoutez le beurre fondu, remuez pour former une pâte épaisse et réservez.
- Dans un grand bol, battez le fromage à la crème ramolli jusqu'à lisse, puis ajoutez le sucre et la vanille et battez jusqu'à ce que le tout soit bien mélangé.
- Ajoutez les œufs un à un, en mélangeant à basse vitesse après chaque ajout pour ne pas trop mélanger. Ensuite, incorporez la crème épaisse jusqu'à l'obtention d'un mélange homogène.
- Versez la moitié de la pâte à cheesecake dans la croûte, lissez le dessus, puis déposez la moitié du mélange de tourbillon de cannelle par-dessus. Utilisez un couteau pour créer des tourbillons.
- Répétez avec le reste de la pâte à cheesecake et du tourbillon de cannelle, en veillant à ne pas trop tourner le mélange.
- Faites cuire pendant 55 à 65 minutes jusqu'à ce que les bords soient pris et que le centre ait une légère tremblote. Laissez refroidir dans le four avec la porte entrouverte pendant environ une heure.
- Retirez du four, laissez refroidir complètement, puis réfrigérez pendant au moins 4 heures ou toute la nuit.
- Pour le glaçage, fouettez le sucre glace, le lait et la vanille jusqu'à obtenir un mélange lisse et arrosez le cheesecake réfrigéré avant de servir.
Notes
Nutrition

Hi, I’m Olivia Parker, the founder of BakingSecret.com and a lifelong lover of all things sweet and homemade. I grew up in a small town in Oregon, where the smell of fresh cookies in my family’s kitchen sparked my passion for baking. Over the years, I turned that passion into a mission: to help home bakers feel confident, inspired, and creative.
After studying food science and working in several artisan bakeries across the U.S., I decided to create a space where everyone from beginners to seasoned bakers can find reliable recipes, expert tips, and a warm, welcoming community. BakingSecret.com is my way of sharing the magic of baking with the world. When I’m not testing new recipes, you’ll find me exploring farmers’ markets, collecting vintage cookbooks, or perfecting my sourdough technique.