
The Ultimate Classic Chocolate Chip Cookies: A Touch of Walnut Magic
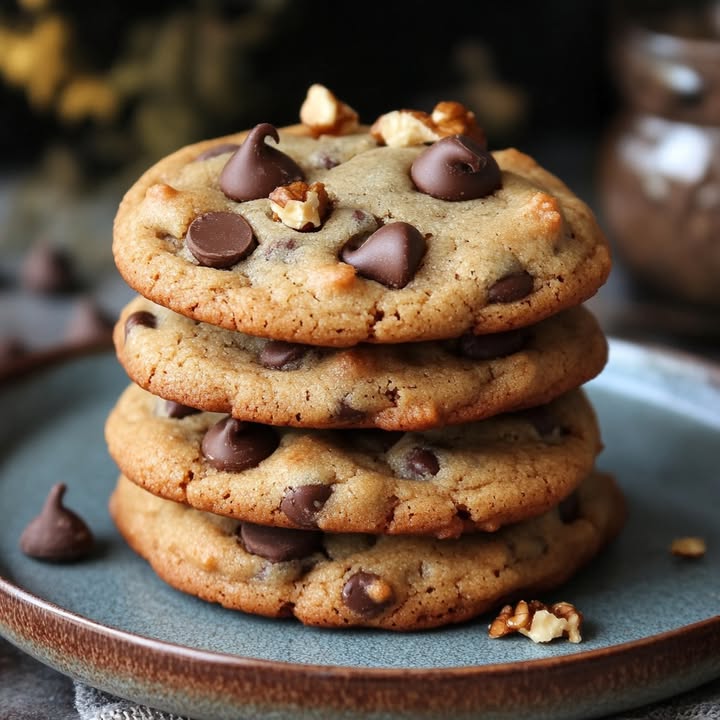
There’s a moment in every kitchen that feels like pure happiness. It’s when you pull a tray of golden-brown cookies from the oven. The air is warm and sweet. You see those chocolate chips glistening and the walnuts toasted. I believe a perfect cookie should be crisp at the edge and chewy in the middle. It should have pockets of melted chocolate and crunchy nuts. This recipe delivers that magic every single time. It’s my family’s most requested bake.
A Brief History of the Classic Walnut Cookie
The chocolate chip cookie itself was a happy accident. Ruth Wakefield invented it in 1938. She expected the chocolate bits to melt into her Toll House Inn dough. They stayed chunky, creating a new classic. Adding walnuts is a natural upgrade. It brings a rich, earthy crunch that balances the sweet chocolate. This version feels timeless and a little gourmet. It’s the modern twist on a beloved original.
Why You’ll Love These Chewy Walnut Cookies
You will adore these cookies for three big reasons. First, the flavor is deep and complex. Sweet brown sugar, bitter chocolate, and nutty walnuts create a perfect trio. Second, the texture is absolutely dreamy. They are chewy, soft-centered, and satisfyingly crisp. Third, they are incredibly simple to make. No fancy tools or skills are needed. Just a bowl, a spoon, and a lot of love.
Perfect Occasions for These Homemade Cookies
This recipe is your secret weapon for many sweet moments. Bake them for a weekend family treat. Pack them in a lunchbox for a surprise. Bring a batch to a potluck or picnic. They are perfect for holiday cookie exchanges. I love making them as a “thank you” gift for neighbors. A jar of these classic chocolate chip cookies with walnuts says “home” louder than anything.
What You Need: The Ingredients List
Gathering your ingredients is the first step to success. Here is your shopping list:
- 2 ¼ cups all-purpose flour
- 1 teaspoon baking soda
- ½ teaspoon salt
- 1 cup unsalted butter, softened
- ¾ cup granulated sugar
- ¾ cup packed brown sugar
- 2 large eggs
- 2 teaspoons vanilla extract
- 2 cups semisweet chocolate chips
- 1 cup chopped walnuts
Smart Substitution Options
Don’t worry if you need to swap an ingredient. This recipe is flexible!
- Butter: You can use salted butter. Just omit the added salt in the recipe.
- Sugar: If you prefer, use all brown sugar for a deeper molasses flavor.
- Chocolate: Dark chocolate chips or chunks work beautifully for a less sweet cookie.
- Walnuts: Pecans or almonds are fantastic alternatives. Even toasted hazelnuts would be divine.
- Flour: For a gluten-free version, use a 1:1 gluten-free all-purpose flour blend.
Let’s Bake! Your Step-by-Step Guide
Step 1: Preheat and Prepare
Start by turning your oven to 375°F (190°C). This gives it time to reach the perfect temperature. Line your baking sheets with parchment paper. This little trick prevents sticking and makes cleanup a breeze. It also helps the cookies bake evenly. No scrubbing pans later!
Step 2: Mix the Dry Team
Take a medium bowl for your dry ingredients. Whisk together the flour, baking soda, and salt. The whisking action aerates the flour. It also ensures the baking soda and salt are evenly distributed. This is crucial for consistent rising and flavor. Set this bowl aside. Your “dry team” is ready for action later.
Step 3: Cream the Butter and Sugars
Now, grab a large mixing bowl. Add your softened butter, granulated sugar, and brown sugar. Beat them together until the mixture is light, creamy, and fluffy. This can take 2-3 minutes. You’ll see the color change to a pale caramel. This step creates the cookie’s tender structure. Pro tip: Softened butter should be cool to the touch but easily indented. Not melted!
Step 4: Add Eggs and Vanilla
Crack in one egg at a time. Beat well after each addition. This incorporates the egg fully into the rich butter mixture. Then, pour in your vanilla extract. The aroma will suddenly fill your kitchen with promise. The mixture will look glossy and smooth. This is your cookie’s flavorful base.
Step 5: Blend in the Dry Ingredients
Gradually add your reserved dry ingredients to the wet mixture. Mix on a low speed or stir by hand. Do this just until the flour disappears. A few streaks are okay. Over-mixing here can make the cookies tough. We want a soft dough. It will be thick and a bit shaggy at this point.
Step 6: The Grand Finale: Chocolate and Walnuts
This is the fun part! Pour in the two cups of chocolate chips and the chopped walnuts. Stir them into the dough until they are evenly distributed. You’ll see the dough transform into a speckled, nutty masterpiece. The walnuts add such a lovely texture. Chef’s Tip: Toast your walnuts for 5 minutes in the oven before chopping. It unlocks a deeper, richer nut flavor.
Step 7: Scoop and Space
Use a tablespoon or a small cookie scoop. Drop rounded mounds of dough onto your prepared sheets. Space them about 2 inches apart. This gives them room to spread and bake properly. They shouldn’t touch each other. The dough balls look rustic and inviting already.
Step 8: Bake to Golden Perfection
Place the sheets in your preheated oven. Bake for 9 to 11 minutes. Watch for the edges to turn a lovely golden brown. The centers should still look soft and slightly underdone. This is the secret to a chewy middle. Let them cool on the baking sheet for 5 minutes. Then move them to a wire rack to finish cooling.
Timing Your Cookie Session
This recipe is wonderfully quick. Prep time is about 15 minutes of active work. Cooking time is around 10 minutes per batch. Your total time from start to first bite is about 25 minutes. The recipe yields about 24 glorious cookies. Each one is roughly 210 calories.
A Chef’s Secret for the Best Walnut Cookies
My biggest secret is in the resting. After you mix the dough, let it sit for 30 minutes at room temperature. Cover the bowl with a kitchen towel. This allows the flour to fully hydrate. The sugars dissolve a bit more. Your cookies will spread less and have a more robust flavor. Trust me, it’s worth the wait.
A Sweet Extra Fact
Did you know the quality of your vanilla matters hugely? Real vanilla extract comes from the vanilla bean pod. Its flavor is complex and warm. Imitation vanilla is made from synthetic compounds. For a truly special cookie, invest in a good bottle of real vanilla. You’ll taste the difference in every bite.
Necessary Equipment
You don’t need fancy tools. Here’s what I use:
- Large and medium mixing bowls
- A hand mixer or a sturdy wooden spoon
- Measuring cups and spoons
- A whisk for dry ingredients
- Baking sheets
- Parchment paper or silicone baking mats
- A wire cooling rack
How to Store Your Classic Chocolate Chip Cookies
Let the cookies cool completely on the wire rack first. Any leftover warmth can create steam in a container. Steam leads to soggy cookies. We want to keep that crisp-chewy texture.
Place the cooled cookies in an airtight container. A cookie jar, tin, or even a zip-top bag works well. Layer them gently. You can place a sheet of parchment between layers if stacking. Store them at room temperature for up to 5 days.
For longer storage, you can freeze them. Place them in a single layer in a freezer-safe container or bag. They will keep for up to 3 months. To enjoy, just thaw at room temperature. They taste nearly as good as fresh-baked.
Tips and Advice for Success
- Always use room temperature eggs. They blend into the butter mixture more smoothly than cold eggs.
- Pack your brown sugar firmly into the measuring cup. This ensures you get the correct amount for that moist texture.
- If your cookies spread too much, your butter might be too soft or melted. Chill the dough for 15 minutes before baking.
- Rotate your baking sheets halfway through baking if your oven has hot spots. This ensures even color.
Presentation Tips for Your Cookies
Presentation makes everything more fun. Here are a few ideas:
- Stack them on a vintage cake stand for a tea party.
- Pack them in a clear cellophane bag tied with a ribbon for a gift.
- Serve them warm with a glass of cold milk for a classic combo.
- Place them on a wooden board alongside some warm Apple Pie Dip for a dessert spread.
- Add a few to a lunchbox with a note for a sweet surprise.
Healthier & Fun Alternative Recipes
Love this base recipe? Try these six delicious variations!
1. Gluten-Free Chocolate Chip Walnut Cookies: Simply swap the all-purpose flour for a gluten-free blend. Ensure it contains xanthan gum. The result is just as chewy and delightful.
2. Vegan Walnut Cookies: Use vegan butter and a plant-based egg substitute. Choose vegan chocolate chips. The walnuts already are plant-based, so you’re good there!
3. Dark Chocolate & Sea Salt Cookies: Replace semisweet chips with high-quality dark chocolate chunks. Sprinkle a pinch of flaky sea salt on each cookie before baking.
4. Oatmeal Chocolate Chip Walnut Cookies: Reduce flour to 1 ½ cups and add 1 cup of old-fashioned oats. This adds fiber and a lovely hearty texture.
5. Spiced Walnut Cookies: Add 1 teaspoon of cinnamon and a pinch of nutmeg to the dry ingredients. It gives a cozy, autumnal flavor perfect with the walnuts.
6. White Chocolate & Cranberry Walnut Cookies: Swap semisweet chips for white chocolate chips. Add ½ cup of dried cranberries. It’s a festive, tart, and sweet combination.
If you love incorporating nuts into cakes, you must try our Hawaiian Carrot Pineapple Cake. It uses walnuts for a similar wonderful crunch.
Common Mistakes to Avoid
Mistake 1: Using Melted or Cold Butter
Butter temperature is critical. Melted butter will make your cookies flat and greasy. Cold butter won’t blend properly with the sugars. You need softened butter. It should bend easily but not be shiny or oily. Leave it out on the counter for 30-60 minutes before starting. Or, microwave it for 5-10 seconds on low if you’re in a pinch.
Mistake 2: Over-Mixing the Flour
When you add the dry ingredients, mix just until no white streaks remain. Over-mixing develops the gluten in the flour. This leads to tough, dense cookies instead of tender, chewy ones. Use a low speed on your mixer or fold by hand. Stop as soon as the dough comes together.
Mistake 3: Overbaking for Too Long
The perfect cookie looks underdone in the center when it comes out. The edges should be golden, but the middle should be soft and puffed. Overbaking dries them out. They become crunchy all through. Remember, they continue to set as they cool on the hot baking sheet. Set your timer and trust it.
Mistake 4: Not Spacing the Dough Properly
Cramming dough balls too close on the sheet is a common error. They need space to spread. If they merge, you’ll get one giant, uneven cookie. Use two baking sheets if needed. Giving them 2 inches of space ensures each cookie gets its own golden, chewy glory.
Mistake 5: Skipping the Salt
Salt is not just for savory food. In baking, it balances sweetness and enhances all other flavors. Skipping the salt makes cookies taste bland and overly sweet. That ½ teaspoon is a powerhouse. It makes the chocolate taste richer and the nuts more pronounced. Always include it.
Frequently Asked Questions
Can I make the dough ahead and bake later?
Absolutely! You can prepare the dough, cover it tightly, and refrigerate it for up to 3 days. This actually improves flavor. When ready to bake, let it sit at room temperature for 20 minutes to soften slightly. Then scoop and bake as directed. You can also freeze the dough balls on a tray, then transfer to a bag. Bake frozen dough balls for a minute or two longer.
Flat cookies usually point to butter that was too soft or melted. Also, check your baking soda. It should be fresh. Old baking soda loses its power to lift the cookies. Ensuring your dough is cool before baking helps. Chill it for 30 minutes if your kitchen is warm. Proper measurements matter too. Too much butter or sugar can cause excess spreading.
Can I use other nuts besides walnuts?
Yes, many nuts work wonderfully. Pecans are a classic substitute. Almonds, toasted and chopped, bring a different flavor. Hazelnuts paired with chocolate are divine. Even macadamia nuts would create a rich, buttery cookie. The key is to use nuts you love. Toast them lightly for the best flavor before adding.
How do I get soft, chewy centers every time?
The secret is in the bake time and the brown sugar. Brown sugar contains molasses, which adds moisture. Don’t overbake. Pull the cookies when the edges are set but centers look soft. Let them cool on the baking sheet. This finishes the cooking gently, locking in that chewy texture. Also, don’t overmeasure your flour. Spoon it into the cup and level it off.
Is it okay to use salted butter?
You can use salted butter. Just omit the additional ½ teaspoon of salt called for in the recipe. The salt content in salted butter varies by brand. So by removing the added salt, you avoid an accidentally too-salty cookie. The flavor will still be perfect.
What’s the best way to chop walnuts?
For even pieces, place walnuts on a cutting board. Use a sharp chef’s knife. Rock the knife back and forth through the pile. You can also pulse them briefly in a food processor. Be careful not to grind them into a powder. We want small, crunchy pieces. Pre-chopped walnuts from the store are fine too, but chopping yourself is often fresher.
You absolutely can. A sturdy wooden spoon and some elbow grease work perfectly. Cream the butter and sugars by pressing and stirring vigorously. It will take a few minutes. Mixing in the eggs and flour by hand is fine. Just be sure to incorporate everything well. Many great cookies were made before electric mixers existed!
Stored properly in an airtight container at room temperature, they stay fresh for about 5 days. Their texture is best within the first 3 days. For longer freshness, freezing is the best option. They thaw beautifully. You can even warm them in the microwave for 10 seconds to mimic that fresh-from-the-oven feel.
Why toast the walnuts first?
Toasting walnuts unlocks their oils and deepens their flavor. Raw walnuts can taste a bit bitter or bland. Toasting brings out a rich, nutty taste that pairs better with sweet chocolate. Simply spread them on a tray and bake at 350°F for 5-7 minutes. Let them cool before chopping and adding to the dough.
They are a huge hit with kids! The classic chocolate chip cookie is a universal favorite. The walnuts add a fun crunch. If you’re worried about nut allergies, you can simply omit them. The cookie will still be delicious. For general food safety and nutrition information, including handling nuts, you can refer to trusted resources like the FDA’s nutrition facts and food safety guidance.
Exploring more cookie ideas? You’ll find a treasure trove of inspiration in our full collection of cookie and biscuit recipes. From classic to innovative, there’s always a new batch to bake.
The Joy of Sharing a Classic Bake
Baking these cookies is more than following a recipe. It’s about creating a moment of warmth and comfort. The smell fills your home with welcome. The taste brings instant smiles. Whether you enjoy them warm with a friend or pack them for a loved one, they carry a simple, powerful message of care. I hope this recipe becomes a staple in your kitchen. May your batches be golden, your centers chewy, and your chocolate chips abundant. Happy baking!
Equipment
- Grand bol
- Fouet
- Spatule
- Plaque à pâtisserie
- Papier sulfurisé
Ingredients
- 2 ¼ tasses farine tout usage
- 1 cuillère à café bicarbonate de soude
- ½ cuillère à café sel
- 1 tasse beurre non salé, ramolli
- ¾ tasse sucre granulé
- ¾ tasse sucre brun, tassé
- 2 œufs
- 2 cuillères à café extrait de vanille
- 2 tasses pépites de chocolat mi-sucrées
- 1 tasse noix hachées
Instructions
- Préchauffez le four à 190°C et tapissez les plaques à pâtisserie de papier sulfurisé.
- Dans un bol moyen, fouettez ensemble la farine, le bicarbonate de soude et le sel. Réservez.
- Dans un grand bol, battez le beurre ramolli, le sucre granulé et le sucre brun jusqu'à ce que le mélange soit léger et mousseux.
- Ajoutez les œufs un à un, en battant bien après chaque ajout, puis incorporez l'extrait de vanille.
- Mélangez progressivement les ingrédients secs dans le mélange humide jusqu'à ce qu'ils soient juste combinés.
- Incorporez les pépites de chocolat et les noix hachées jusqu'à ce qu'ils soient uniformément répartis.
- Déposez des mottes arrondies de pâte sur les plaques à pâtisserie préparées, en les espaçant d'environ 5 cm.
- Faites cuire pendant 9 à 11 minutes jusqu'à ce que les bords soient dorés et que les centres soient mous. Laissez refroidir sur les plaques pendant 5 minutes avant de les transférer sur une grille.
Notes
Nutrition

Hi, I’m Olivia Parker, the founder of BakingSecret.com and a lifelong lover of all things sweet and homemade. I grew up in a small town in Oregon, where the smell of fresh cookies in my family’s kitchen sparked my passion for baking. Over the years, I turned that passion into a mission: to help home bakers feel confident, inspired, and creative.
After studying food science and working in several artisan bakeries across the U.S., I decided to create a space where everyone from beginners to seasoned bakers can find reliable recipes, expert tips, and a warm, welcoming community. BakingSecret.com is my way of sharing the magic of baking with the world. When I’m not testing new recipes, you’ll find me exploring farmers’ markets, collecting vintage cookbooks, or perfecting my sourdough technique.