
A Slice of Paradise: Why This Coconut Chocolate Delight is a Must-Try
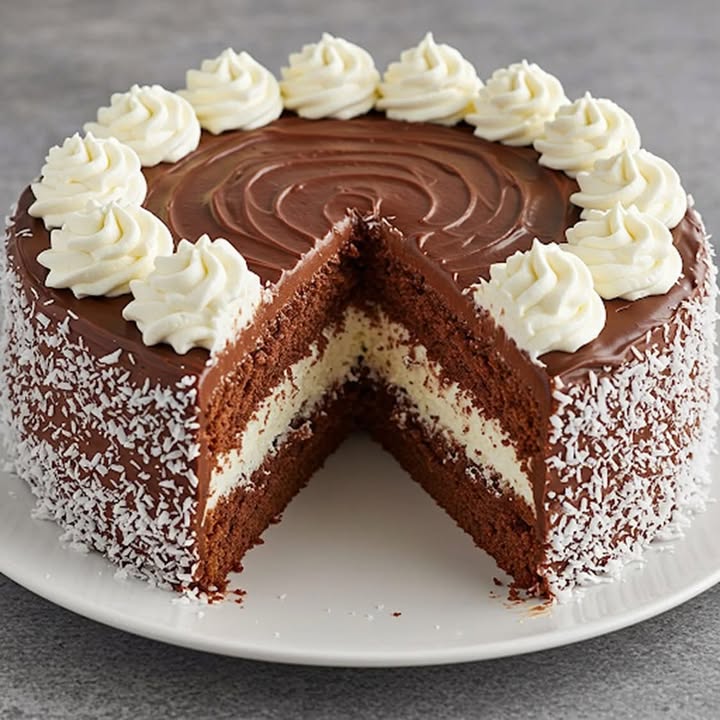
Picture this: a rich, cocoa-infused sponge cake layered with a creamy coconut filling that’s so dreamy, it feels like a tropical getaway in every bite. That’s exactly what this Coconut Chocolate Delight brings to your table. I first made this cake for a friend’s birthday, and let me tell you—it was love at first bite. The combination of chocolate and coconut is simply irresistible, and chilling it makes the flavors even more magical. Whether you’re baking for family or impressing guests, this recipe will become your go-to dessert.
The Sweet History Behind This Cake
This cake reminds me of lazy summer afternoons spent experimenting in the kitchen. Growing up, my grandmother used to make a simple sponge cake, but she always added her own twist—coconut. Over time, I decided to take her idea and give it a modern spin by adding cocoa powder and a decadent coconut filling. It’s a perfect blend of tradition and innovation. The result? A cake that’s comforting yet exciting—a true crowd-pleaser.
Why You’ll Fall Head Over Heels for This Recipe
What makes this Coconut Chocolate Delight stand out is its balance of flavors and textures. The cocoa sponge is light and airy, while the coconut filling is rich and creamy. Plus, it’s surprisingly easy to make! Even if you’re not a seasoned baker, this recipe is forgiving and fun. And did I mention how versatile it is? Serve it cold for a refreshing treat or at room temperature for a cozy dessert. Either way, it’s pure bliss.
Perfect Occasions to Whip Up This Cake
Whether you’re hosting a summer barbecue, celebrating a special occasion, or just craving something sweet, this cake fits the bill. It’s perfect for birthdays, potlucks, or even as a thoughtful gift for a neighbor. I once brought this cake to a holiday party, and it disappeared within minutes. People couldn’t stop raving about how the chocolate and coconut complemented each other perfectly.
Ingredients You’ll Need
- For the cake:
- 4 eggs
- 1 cup of sugar
- 1 cup of wheat flour
- 1 teaspoon of baking powder
- ½ cup of milk
- ½ cup of vegetable oil
- 1 teaspoon of vanilla extract
- ½ cup of unsweetened cocoa powder
- For the filling and topping:
- 1 cup of whipped cream (soft peaks)
- 1 cup of condensed milk
- 1 cup of grated coconut
- ½ cup of coconut milk
- ½ cup of sugar
- 1 teaspoon of vanilla extract
Substitution Options
If you’re missing an ingredient, don’t worry! Here are some swaps you can try:
- Use almond milk instead of regular milk for a dairy-free option.
- Swap vegetable oil with melted butter for a richer flavor.
- If you can’t find fresh grated coconut, use store-bought shredded coconut.
- Replace condensed milk with a homemade version using evaporated milk and sugar.
Step 1: Prepare the Cocoa Sponge Cake
Start by beating the eggs and sugar until they’re foamy and light yellow. This step is crucial because it gives the cake its airy texture. Next, gently fold in the flour, cocoa powder, and baking powder. Alternate these dry ingredients with the milk and oil to keep the batter smooth. Finally, stir in the vanilla extract for that hint of warmth. Pro tip: Sift the flour and cocoa powder together to avoid lumps.
Step 2: Bake the Cake
Pour the batter into a greased cake pan and pop it into the oven at 180°C (350°F) for 25-30 minutes. Keep an eye on it—you’ll know it’s done when a toothpick comes out clean. Let the cake cool completely before handling. Trust me, patience pays off here. Cutting into a warm cake could ruin its delicate structure.
Step 3: Make the Dreamy Coconut Filling
In a large bowl, whip the cream until soft peaks form. Then, mix in the condensed milk, grated coconut, coconut milk, sugar, and vanilla extract. The aroma of coconut combined with the sweetness of condensed milk is heavenly. Stir gently to keep the mixture fluffy. Chef’s tip: Chill the mixing bowl and beaters before whipping the cream—it helps it hold its shape better.
Step 4: Assemble the Cake
Carefully slice the cooled sponge cake horizontally into two layers. Spread the coconut filling generously over the bottom layer, then place the top layer back on. Use the remaining filling to frost the entire cake. Don’t worry if it’s not picture-perfect; the rustic look adds charm. Pop the cake into the fridge for at least two hours to let the flavors meld.
Timing Breakdown
- Prep Time: 20 minutes
- Cooking Time: 30 minutes
- Resting Time: 2 hours (chilling)
- Total Time: Approximately 3 hours
Chef’s Secret
For an extra burst of flavor, toast the grated coconut lightly before adding it to the filling. This enhances its natural sweetness and adds a subtle crunch that contrasts beautifully with the soft cake.
An Interesting Fact About Coconut
Did you know that coconuts are often called the “tree of life”? They’re incredibly versatile, providing everything from food to skincare products. In many tropical cultures, coconut is considered a symbol of purity and prosperity. No wonder it pairs so well with chocolate—it’s practically divine!
Necessary Equipment
- Stand mixer or hand mixer
- Cake pans
- Spatula
- Whisk
- Toothpick or cake tester
Storage Tips
Store the Coconut Chocolate Delight in the refrigerator to keep it fresh. Cover it tightly with plastic wrap or transfer it to an airtight container to prevent it from drying out. It stays good for up to five days, though it’s unlikely to last that long!
If you need to freeze it, wrap individual slices in parchment paper and place them in a freezer-safe bag. Thaw overnight in the fridge before serving. Freezing works best if you haven’t added the whipped cream yet.
Avoid leaving the cake at room temperature for more than two hours, especially during hot weather. Coconut-based desserts spoil quickly if not stored properly.
Tips and Advice
- Use room-temperature eggs for easier mixing.
- Don’t skip sifting the dry ingredients—it ensures a smooth batter.
- If the filling feels too runny, chill it briefly before assembling the cake.
Presentation Ideas
- Garnish with toasted coconut flakes for a professional touch.
- Dust the top with powdered sugar for a chic finish.
- Serve with a dollop of whipped cream and fresh berries for added flair.
Healthier Alternatives
Love this cake but want to lighten it up? Try these variations:
- Gluten-Free Option: Substitute wheat flour with almond flour or oat flour.
- Low-Sugar Version: Use stevia or monk fruit sweetener instead of sugar.
- Vegan Twist: Replace eggs with flax eggs and use plant-based whipped cream.
- Protein-Packed Cake: Add a scoop of chocolate protein powder to the batter.
- Fruit-Filled Delight: Mix in diced mango or pineapple for a fruity kick.
- Dark Chocolate Lover’s Dream: Swap cocoa powder with melted dark chocolate.
Mistake 1: Overmixing the Batter
Overmixing leads to a dense cake instead of a light, fluffy one. Once the wet and dry ingredients are combined, stop mixing immediately. Pro tip: Use a spatula for the final folds to maintain airiness.
Mistake 2: Skipping the Chilling Step
Rushing the chilling process affects the cake’s texture and flavor. Give it at least two hours in the fridge to let the layers set and the flavors develop fully.
Mistake 3: Using Stale Coconut
Old coconut loses its freshness and flavor. Always check the expiration date or opt for freshly grated coconut for the best results.
FAQs
Can I make this cake ahead of time?
Absolutely! This cake tastes even better the next day as the flavors deepen. Just store it in the fridge and bring it to room temperature before serving.
How do I know when the cake is done baking?
Insert a toothpick into the center of the cake. If it comes out clean or with a few crumbs, it’s ready. Avoid overbaking, as the cake may dry out.
Can I use sweetened condensed milk?
Yes, but reduce the added sugar slightly to balance the sweetness. Taste the filling before assembling the cake to adjust accordingly.
What if I don’t have coconut milk?
You can substitute it with heavy cream or whole milk, though the coconut flavor won’t be as pronounced.
Is this cake suitable for vegans?
With a few tweaks, yes! Use flax eggs, plant-based whipped cream, and vegan condensed milk alternatives.
How do I prevent the cake from sticking to the pan?
Grease the pan thoroughly with butter or nonstick spray, and line the bottom with parchment paper for extra insurance.
Can I freeze this cake?
Yes, but it’s best to freeze unfrosted layers. Wrap them tightly and thaw in the fridge before adding the filling.
Why does my whipped cream deflate?
This happens if the cream is overwhipped or if the bowl isn’t cold enough. Chill your tools beforehand and whip gently.
Can I add alcohol to the filling?
Of course! A splash of rum or coconut liqueur adds a sophisticated twist without overpowering the other flavors.
How do I toast coconut evenly?
Spread the coconut on a baking sheet and bake at 180°C (350°F) for 5-7 minutes, stirring occasionally. Watch closely to avoid burning.
Baking is all about creativity and joy, and this Coconut Chocolate Delight embodies both. So grab your apron, gather your ingredients, and get ready to create a masterpiece that’ll leave everyone asking for seconds.
Equipment
- Stand mixer or hand mixer
- Cake pans
- Spatula
- Whisk
- Toothpick or cake tester
Ingredients
- 4 eggs
- 1 cup sugar
- 1 cup wheat flour
- 1 teaspoon baking powder
- 1/2 cup milk
- 1/2 cup vegetable oil
- 1 teaspoon vanilla extract
- 1/2 cup unsweetened cocoa powder
- 1 cup whipped cream soft peaks
- 1 cup condensed milk
- 1 cup grated coconut
- 1/2 cup coconut milk
- 1/2 cup sugar
- 1 teaspoon vanilla extract
Instructions
- Beat the eggs and sugar until foamy and light yellow.
- Gently fold in flour, cocoa powder, and baking powder.
- Alternate adding the milk and oil to the dry ingredients until smooth.
- Stir in the vanilla extract.
- Pour the batter into a greased cake pan and bake at 180°C (350°F) for 25-30 minutes.
- Let the cake cool completely.
- In a large bowl, whip the cream until soft peaks form.
- Mix in the condensed milk, grated coconut, coconut milk, sugar, and vanilla extract.
- Slice the cooled cake horizontally into two layers.
- Spread the coconut filling over the bottom layer and place the top layer back on.
- Frost the entire cake with the remaining filling.
- Chill the cake in the fridge for at least 2 hours.