
Why This Creamy Chocolate Delight is a Game-Changer
Picture this: you’re hosting a dinner party, and everyone’s raving about dessert. But here’s the twist—you only used three ingredients to make it! That’s right. This Creamy Chocolate Delight is so simple yet so luxurious that your guests will think you spent hours in the kitchen. I first made this for a family get-together when I was short on time and ingredients. To my surprise, it became the star of the evening. The best part? It’s foolproof. If I can nail it, so can you!
A Little Background on This Sweet Treat
This recipe reminds me of those no-bake desserts my grandma used to whip up during summer. She always said, “The simpler, the better.” Back then, she’d use whatever she had in the pantry—chocolate, cream, and something sweet. Fast forward to today, and this version feels like a modern twist on her classic approach. The addition of whipped cream gives it that airy texture, while condensed milk adds just the right amount of sweetness. It’s nostalgia with a touch of restaurant-worthy elegance.
Why You’ll Fall in Love with This Recipe
Here’s why this Creamy Chocolate Delight deserves a spot in your recipe book:
- Easy as pie: No fancy skills needed—just mix, chill, and serve.
- Quick prep: Ready in under 10 minutes (plus chilling time).
- Versatile: Perfect for any occasion or even a solo treat.
- Customizable: Swap toppings to suit your mood or what’s in your fridge.
When to Serve This Creamy Chocolate Delight
Whether it’s a cozy family dinner, a holiday feast, or a casual hangout with friends, this dessert fits every vibe. It’s especially great for last-minute gatherings because it doesn’t require baking or complicated steps. I’ve served it at birthday parties, potlucks, and even romantic dinners. Trust me, it never disappoints!
The Ingredients You Need
Let’s talk about what makes this magic happen:
- 200 g of melting chocolate (melted)
- 1 cup of cold whipping cream
- 1 can of condensed milk
- Strawberries and crushed cookies for decoration
Substitution Options
Not everyone has the same pantry staples, and that’s okay. Here are some swaps you can try:
- Chocolate: Use dark, milk, or semi-sweet chocolate depending on your preference.
- Cream: Heavy cream works perfectly if you don’t have whipping cream.
- Condensed milk: Honey or maple syrup can be used in a pinch, though the texture might vary slightly.
- Toppings: Try nuts, sprinkles, or fresh fruit instead of strawberries and cookies.
Step 1: Melt the Chocolate
Start by melting your chocolate. You can do this using a water bath or the microwave. If you’re microwaving, heat it in 30-second intervals, stirring in between, until smooth and glossy. Pro tip: Let the melted chocolate cool slightly before mixing it with other ingredients. Hot chocolate can curdle the cream, and we don’t want that!
Step 2: Whip the Cream
Grab your cold whipping cream and beat it until stiff peaks form. This step transforms the texture from ordinary to dreamy. Imagine fluffy clouds of cream ready to hug all that rich chocolate. Make sure your bowl and beaters are chilled—it helps the cream whip faster and hold its shape better.
Step 3: Combine Everything
Now comes the fun part. Add the condensed milk to the whipped cream and gently fold it in. Then, pour in the cooled melted chocolate. Mix everything with slow, enveloping movements. Think of it as giving your dessert a gentle massage to keep it light and airy. Chef’s tip: Don’t overmix; stop as soon as everything is combined.
Step 4: Chill and Set
Spoon the mixture into serving cups or bowls and pop them into the fridge for at least two hours. This resting time allows the flavors to meld and the dessert to firm up. Patience pays off—you’ll be rewarded with a velvety texture that melts in your mouth.
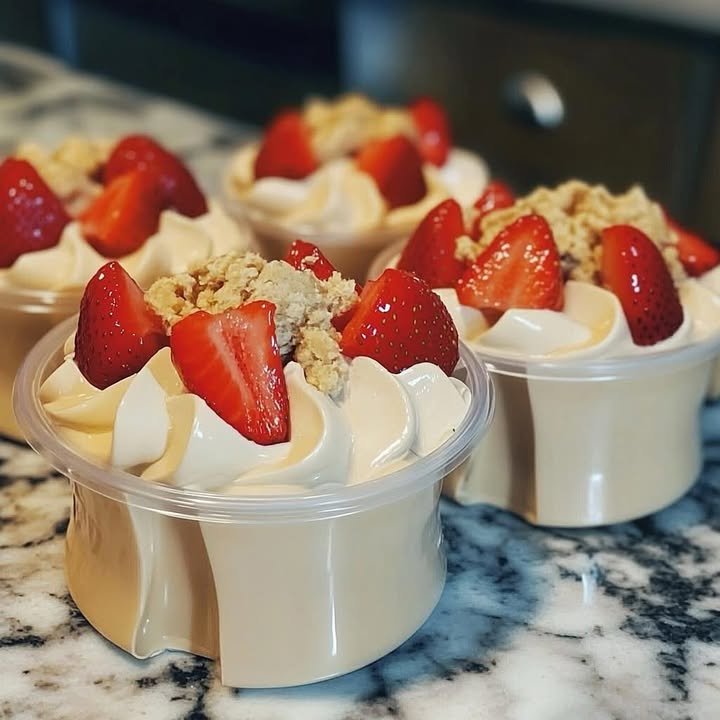
Step 5: Decorate and Enjoy
Before serving, add a splash of color with fresh strawberries and a sprinkle of crushed cookies. These toppings not only look pretty but also add a delightful crunch to balance the creaminess. Now, dig in and savor the fruits of your labor!
Timing Breakdown
Here’s how long each stage takes:
- Prep time: 10 minutes
- Chilling time: 2 hours
- Total time: 2 hours and 10 minutes
Chef’s Secret
For an extra layer of indulgence, drizzle a bit of caramel sauce over the top before serving. It pairs beautifully with the chocolate and adds a wow factor without much effort.
An Interesting Tidbit
Did you know that chocolate has been called “the food of the gods”? Ancient civilizations like the Mayans and Aztecs believed it had mystical powers. While I can’t promise this dessert will grant you superhuman abilities, it sure feels magical when you take a bite!
Necessary Equipment
You don’t need anything fancy to make this dessert. Just grab:
- A mixing bowl
- An electric mixer or whisk
- A microwave-safe bowl or saucepan for melting chocolate
- Serving cups or bowls
Storage Tips
If you have leftovers (unlikely!), store them in an airtight container in the fridge. They’ll stay fresh for up to three days. Keep in mind that the texture may soften slightly after the first day, but it will still taste amazing.
To freeze, place the dessert in freezer-safe containers. It can last up to a month. Thaw overnight in the fridge before serving.
Always label your containers with dates to avoid forgetting how long they’ve been stored. Organization is key to avoiding wasted treats!
Tips and Advice
Here are a few tricks to elevate your dessert:
- Use high-quality chocolate for a richer flavor.
- Chill your bowls and beaters before whipping the cream—it makes a huge difference.
- Experiment with different toppings to match the season or theme of your event.
Presentation Ideas
Make your dessert stand out with these creative touches:
- Serve in martini glasses for a classy look.
- Add edible flowers for a pop of color.
- Layer the dessert with crushed cookies for a parfait effect.
Healthier Alternatives
Want to enjoy this Creamy Chocolate Delight guilt-free? Try these variations:
- Low-Sugar Version: Use sugar-free condensed milk and dark chocolate.
- Dairy-Free Option: Substitute coconut cream for whipping cream and vegan chocolate.
- Protein-Packed Twist: Add a scoop of vanilla protein powder to the mix.
- Fruit-Infused Delight: Fold in mashed bananas or pureed berries for natural sweetness.
- Nutty Indulgence: Stir in chopped almonds or hazelnuts for added crunch.
- Avocado Magic: Blend avocado with cocoa powder and sweetener for a creamy base.
Mistake 1: Overmixing the Batter
Overmixing can deflate the whipped cream, leaving your dessert flat and dense. To avoid this, fold the ingredients gently and stop once they’re combined. Remember, less is more!
Mistake 2: Skipping the Chilling Step
Patience is key here. Skipping the chilling step results in a runny dessert that won’t hold its shape. Give it at least two hours in the fridge for the best results.
Mistake 3: Using Warm Chocolate
Adding warm chocolate to the whipped cream can cause it to melt and lose its structure. Always let the chocolate cool slightly before incorporating it.
FAQs
Can I use store-bought whipped cream?
Absolutely! While homemade whipped cream offers a fresher taste, store-bought works fine in a pinch. Just ensure it’s thick enough to hold its shape.
How long does it last in the fridge?
Your dessert will stay fresh for up to three days in the fridge. After that, the texture may start to soften.
Can I make this ahead of time?
Yes! This dessert actually benefits from being made ahead since it needs time to set. Prepare it the night before and chill overnight for easy serving.
What toppings go well with this dessert?
Strawberries, crushed cookies, nuts, caramel sauce, and fresh mint leaves are all fantastic options. Get creative!
Is this recipe kid-friendly?
Definitely! Kids love the creamy texture and rich chocolate flavor. Plus, they can help decorate it, making it a fun activity.
Can I double the recipe?
Of course! Simply multiply each ingredient by two and follow the same steps. It’s perfect for larger gatherings.
Do I need an electric mixer?
Nope! A hand whisk works too, though it might take a bit longer to whip the cream.
Can I freeze this dessert?
Yes, you can freeze it for up to a month. Just thaw it in the fridge before serving.
What type of chocolate is best?
Use high-quality melting chocolate for the richest flavor. Dark chocolate is a popular choice, but milk chocolate works well too.
Can I make this gluten-free?
Yes! Ensure your toppings (like cookies) are gluten-free, and you’re good to go.
Final Thoughts
This Creamy Chocolate Delight is proof that great things come in small packages—or rather, simple recipes. With just three ingredients and minimal effort, you can create a dessert that looks and tastes like it came straight from a fancy restaurant. So go ahead, give it a try, and don’t forget to leave a “thank you” in the comments if you love it as much as I do!
Equipment
- Mixing bowl
- Electric mixer or whisk
- Microwave-safe bowl or saucepan for melting chocolate
- Serving cups or bowls
- Spatula
Ingredients
- 200 g melting chocolate melted
- 1 cup cold whipping cream
- 1 can condensed milk
Instructions
- Melt the chocolate using a water bath or microwave; let cool slightly.
- Whip the cold cream until stiff peaks form in a chilled bowl.
- Fold the condensed milk into the whipped cream, then gently mix in the cooled melted chocolate.
- Spoon the mixture into serving cups and chill in the fridge for at least two hours.
- Before serving, decorate with fresh strawberries and crushed cookies.