
A Creamy Rice Cake That Feels Like a Hug
There’s something magical about desserts that remind you of home. For me, this Creamy Rice Cake is like a warm hug on a plate. It all started when I was trying to recreate my grandma’s famous rice pudding but wanted to give it a twist. The result? A no-bake dessert so creamy and comforting, it became an instant hit at family gatherings. This cake combines the classic flavors of rice with milk and elevates them with a crunchy cookie base. Trust me, once you try it, you’ll be hooked!
The Story Behind This Sweet Treat
Rice with milk has been a beloved dessert in many cultures for generations. Whether it’s Spanish “Arroz con Leche” or a simple stovetop pudding, its creamy texture and sweet aroma are hard to resist. My version takes this classic and turns it into a show-stopping Creamy Rice Cake. The idea came to me during a summer heatwave when turning on the oven felt like a crime. I experimented with a no-bake method, and voilà—this masterpiece was born. It’s perfect for anyone who loves traditional flavors but wants something a little more modern.
Why You’ll Love This Recipe
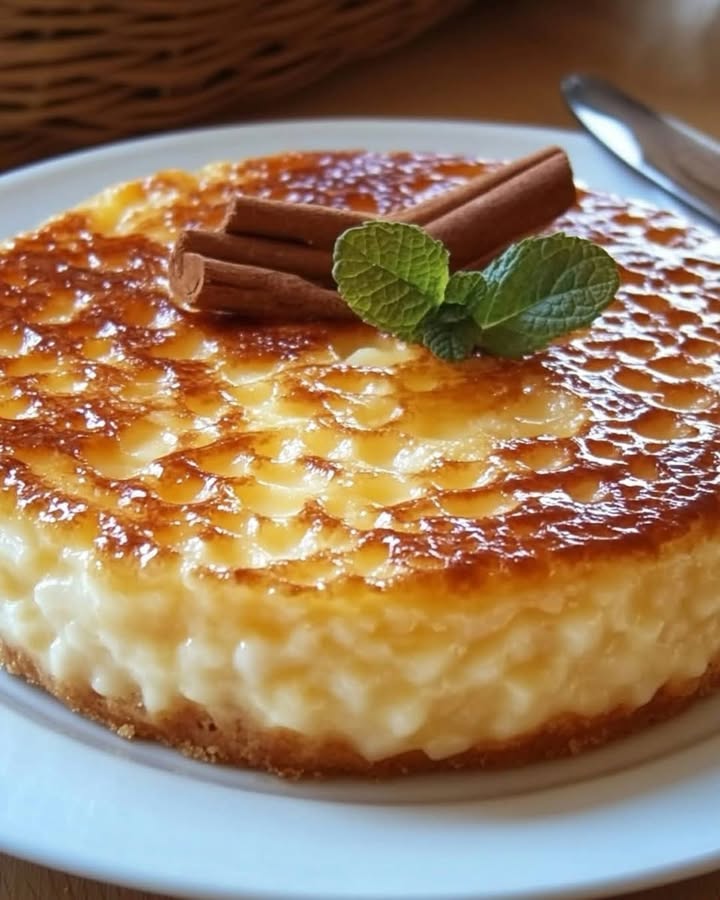
This Creamy Rice Cake is a dream come true for dessert lovers. First, it’s super easy to make—even if you’re not a whiz in the kitchen. Second, the combination of textures is divine: a buttery cookie crust, creamy rice filling, and a hint of cinnamon on top. Plus, it’s versatile! You can serve it as a casual treat or dress it up for special occasions. And did I mention there’s no oven involved? That’s right—no sweating over a hot stove. Just mix, chill, and enjoy!
Perfect Occasions to Make This Creamy Rice Cake
This dessert is perfect for any occasion—or no occasion at all! Whip it up for Sunday brunch, a holiday feast, or even a cozy movie night. It’s also a crowd-pleaser at potlucks and birthday parties. I love making it for family dinners because it feels nostalgic yet fresh. Pro tip: Serve it chilled on a hot day for a refreshing treat that everyone will rave about.
Ingredients
- 1 liter of whole milk
- 200 g of rice
- 150 g of sugar
- 1 cinnamon branch
- 1 lemon peel
- 1 envelope of flavorless gelatin (7 g)
- 200 ml of cream to beat
- Maria-type cookies for the base
- 80 g of melted butter
Substitution Options
If you’re out of whole milk, you can use a mix of half-and-half and water. For a gluten-free version, swap the Maria cookies with gluten-free biscuits. Vegan friends can replace dairy milk with almond or oat milk and use coconut cream instead of whipping cream. Gelatin can be substituted with agar-agar for a plant-based option. Feel free to experiment—desserts are all about creativity!
Step 1: Prepare the Cookie Base
Start by crushing your cookies into fine crumbs. I like to use a food processor, but a ziplock bag and rolling pin work just as well. Mix the crumbs with melted butter until they resemble wet sand. Press this mixture firmly into a removable mold—I recommend using one with a springform bottom for easy unmolding later. Pop it in the fridge while you tackle the next steps. Pro tip: Use the back of a spoon to press the base evenly for a professional finish.
Step 2: Cook the Rice with Milk
In a large pot, bring the milk to a gentle boil along with the cinnamon stick and lemon peel. These add incredible fragrance and depth to the dish. Once it’s simmering, stir in the rice and cook over low heat for 30–40 minutes. Keep stirring occasionally to prevent sticking. As the rice absorbs the milk, it transforms into a thick, creamy mixture that smells absolutely heavenly. Patience is key here—the longer it cooks, the creamier it gets.
Step 3: Sweeten the Mixture
Now comes the fun part: adding sweetness! Stir in the sugar and cream, then let everything simmer for another 5 minutes. The sugar dissolves beautifully, creating a luscious texture. Remove the cinnamon stick and lemon peel before moving on—you don’t want anyone biting into those by accident. At this stage, your kitchen will smell like a bakery, and you might have to resist sneaking a taste.
Step 4: Incorporate the Gelatin
Hydrate the gelatin in cold water according to the package instructions, then dissolve it in the hot rice mixture. This step ensures your cake sets perfectly in the fridge. Mix thoroughly to avoid any lumps. The gelatin acts like glue, holding everything together while maintaining that dreamy creaminess we all crave. Pour this heavenly concoction onto your chilled cookie base and smooth it out with a spatula.
Step 5: Chill and Set
Let the cake cool at room temperature for about 30 minutes before transferring it to the fridge. Chill for at least 4 hours—overnight is even better. This resting period allows the flavors to meld and the gelatin to firm up. Trust me, waiting is worth it. When you finally unmold the cake, you’ll see how beautifully it holds its shape.
Step 6: Decorate and Serve
Before serving, carefully unmold the cake and sprinkle some ground cinnamon or grated lemon zest on top for a pop of color and flavor. You could also drizzle honey or caramel sauce for extra indulgence. Slice it neatly and watch as your guests’ eyes light up. This dessert isn’t just tasty—it’s Instagram-worthy too!
Chef’s Tip
To take this Creamy Rice Cake to the next level, toast the crushed cookies lightly before mixing them with butter. This adds a subtle nutty flavor that pairs beautifully with the creamy filling. Your guests won’t know what’s different, but they’ll definitely notice how amazing it tastes.
Timing
- Prep Time: 20 minutes
- Cooking Time: 45 minutes
- Resting Time: 4 hours (or overnight)
- Total Time: Approximately 5 hours
Chef’s Secret
For an ultra-smooth texture, blend the cooked rice mixture briefly with an immersion blender before adding the gelatin. This breaks down any remaining grains and creates a velvety consistency that feels luxurious on the tongue.
Extra Info
Did you know that rice pudding dates back to ancient Rome? Back then, it was considered a medicinal dish due to its nourishing properties. Today, it’s simply a comfort food that brings people together. Isn’t it fascinating how recipes evolve over time?
Necessary Equipment
- Large pot
- Removable mold (springform recommended)
- Spatula
- Food processor or ziplock bag and rolling pin
- Immersion blender (optional)
Storage Tips
Store leftover Creamy Rice Cake in the fridge, covered with plastic wrap or in an airtight container. It stays fresh for up to 3 days. If you live in a warm climate, keep it toward the back of the fridge where it’s coldest. Avoid freezing this dessert, as the texture may become grainy upon thawing.
When reheating individual slices, microwave them briefly (about 10 seconds) to soften the filling slightly. Be careful not to overheat, though—you don’t want the base to get soggy.
If you’re transporting the cake, place it in a sturdy container with a flat bottom. Secure the lid tightly to prevent spills. Let it sit at room temperature for 10–15 minutes before serving to enhance the flavors.
Tips and Advice
- Use short-grain rice for the creamiest texture.
- Don’t rush the cooking process; low and slow is the way to go.
- Taste the mixture before chilling to adjust sweetness if needed.
- Decorate just before serving to keep toppings fresh and vibrant.
Presentation Ideas
- Garnish with fresh berries for a pop of color.
- Dust powdered sugar through a stencil for a decorative touch.
- Serve with a dollop of whipped cream on the side.
- Drizzle chocolate syrup in zigzag patterns across the top.
Healthier Alternative Recipes
If you’re looking to lighten things up, here are six variations to try:
- Low-Sugar Version: Replace sugar with a sugar substitute like stevia or erythritol.
- Gluten-Free Option: Use gluten-free cookies and ensure your gelatin is certified gluten-free.
- Vegan Delight: Swap dairy products with plant-based alternatives like almond milk and coconut cream.
- Protein-Packed: Add a scoop of vanilla protein powder to the rice mixture for an extra boost.
- Fruit-Infused: Stir in diced mango or strawberries for natural sweetness and added nutrients.
- Spiced-Up: Add a pinch of nutmeg or cardamom for a warm, exotic twist.
Mistake 1: Overcooking the Rice
One common mistake is cooking the rice too long, which can make it mushy and ruin the texture of your cake. To avoid this, keep the heat low and stir frequently. Test the rice after 30 minutes—if it’s tender but still holds its shape, it’s ready.
Mistake 2: Skipping the Resting Time
Impatience can lead to disaster here. If you skip chilling the cake, it won’t set properly and could fall apart when sliced. Give it ample time in the fridge—trust me, good things come to those who wait!
Mistake 3: Using Old Gelatin
Expired gelatin loses its gelling power, leaving you with a runny mess. Always check the expiration date before using. Pro tip: Store unopened gelatin packets in a cool, dry place to extend their shelf life.
FAQ
Can I use instant rice for this recipe?
No, instant rice won’t work here. It lacks the starch needed to create the creamy texture. Stick to regular short-grain rice for best results.
What size mold should I use?
A standard 9-inch round mold works perfectly. If you prefer a taller cake, use a smaller diameter mold, but adjust the chilling time accordingly.
How do I prevent the base from being too crumbly?
Make sure the butter is fully melted and evenly distributed among the cookie crumbs. Press the mixture firmly into the mold to help it hold together.
Can I freeze this dessert?
Freezing isn’t recommended, as it can alter the texture. However, if you must, wrap individual slices tightly in plastic wrap and consume within a week.
Is this recipe kid-friendly?
Absolutely! Kids love the creamy filling and crunchy base. Plus, it’s easy enough for them to help assemble.
Maria cookies are ideal, but graham crackers or digestive biscuits are great alternatives if you can’t find them.
Can I make this ahead of time?
Yes! This cake actually improves with time, so feel free to prepare it a day in advance. Just keep it refrigerated until ready to serve.
How do I unmold the cake cleanly?
Run a thin knife around the edges of the mold before releasing the springform latch. Gently lift the ring to reveal your masterpiece.
What can I use instead of gelatin?
Agar-agar is a great plant-based alternative. Follow the package instructions for proper usage.
Why does my cake taste bland?
You might need more sugar or spices. Taste the mixture before chilling and adjust seasonings as needed. Don’t forget the cinnamon—it adds warmth and depth.
A Dessert Worth Every Bite
This Creamy Rice Cake is more than just a dessert; it’s a celebration of tradition, creativity, and pure joy. From its humble beginnings as rice pudding to its modern incarnation as a no-bake cake, it’s a testament to how food connects us across generations. So grab your ingredients, roll up your sleeves, and treat yourself—and your loved ones—to this unforgettable delight. Because life’s too short not to indulge in something sweet every now and then!
Equipment
- Large pot
- Removable mold (springform recommended)
- Spatula
- Food processor or ziplock bag and rolling pin
- Immersion blender (optional)
Ingredients
- 1 liter whole milk
- 200 g rice
- 150 g sugar
- 1 piece cinnamon branch
- 1 piece lemon peel
- 1 envelope flavorless gelatin (7 g)
- 200 ml cream to beat
- 80 g melted butter
Instructions
- Crush the cookies into fine crumbs and mix with melted butter to form a wet sand-like mixture.
- Press the cookie mixture firmly into a removable mold and refrigerate.
- In a large pot, bring the milk to a gentle boil with cinnamon stick and lemon peel.
- Stir in the rice and cook on low heat for 30–40 minutes, stirring occasionally.
- Add sugar and cream, then simmer for another 5 minutes and remove cinnamon and lemon peel.
- Hydrate gelatin in cold water, dissolve it in the hot rice mixture, and mix thoroughly.
- Pour the rice mixture onto the chilled cookie base and smooth it out.
- Cool at room temperature for 30 minutes, then refrigerate for at least 4 hours to set.
- Unmold the cake and decorate with cinnamon or lemon zest before serving.
Notes
Nutrition

Hi, I’m Olivia Parker, the founder of BakingSecret.com and a lifelong lover of all things sweet and homemade. I grew up in a small town in Oregon, where the smell of fresh cookies in my family’s kitchen sparked my passion for baking. Over the years, I turned that passion into a mission: to help home bakers feel confident, inspired, and creative.
After studying food science and working in several artisan bakeries across the U.S., I decided to create a space where everyone from beginners to seasoned bakers can find reliable recipes, expert tips, and a warm, welcoming community. BakingSecret.com is my way of sharing the magic of baking with the world. When I’m not testing new recipes, you’ll find me exploring farmers’ markets, collecting vintage cookbooks, or perfecting my sourdough technique.