
Why You’ll Fall in Love with Creamy Velvet Truffles
Picture this: you’re at a family gathering, and everyone’s eyes light up as you bring out a plate of these Creamy Velvet Truffles. They’re rich, indulgent, and oh-so-pretty to look at. My first attempt at making them was for my niece’s birthday. She loves anything red and chocolatey, so I thought, why not combine the two? Let me tell you, they were gone in minutes. These truffles are perfect for impressing guests or just treating yourself because, let’s face it, you deserve it.
A Little History Behind Creamy Velvet Truffles
While truffles have been around for centuries, the idea of turning cake into bite-sized chocolate-covered treats is a modern twist. The original truffle—made from ganache rolled in cocoa powder—comes from France. But this version takes inspiration from American-style red velvet cake. It’s like having your cake and eating it too, but in a more fun, shareable form. When I made these for the first time, I felt like a dessert wizard. Trust me, once you try them, you’ll feel the same way.
Why You’ll Love This Recipe
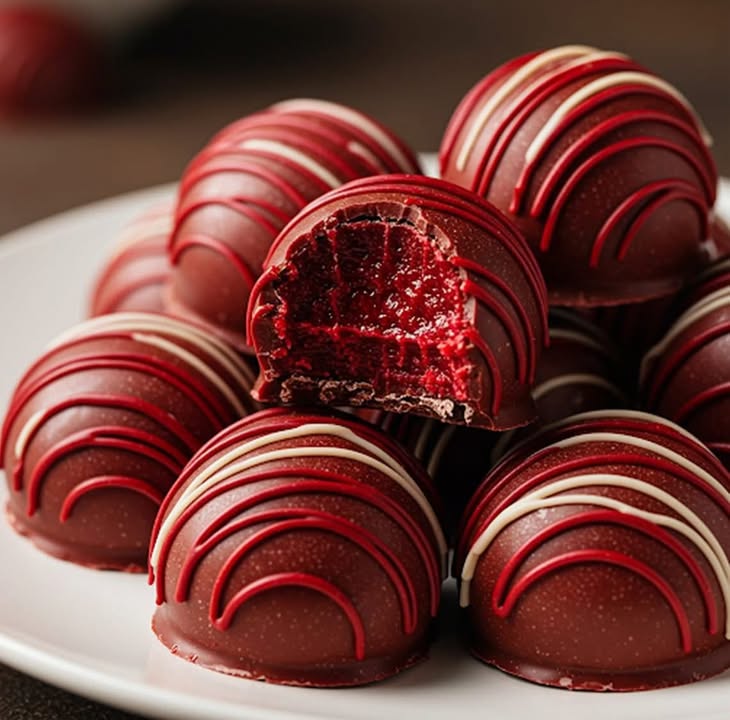
These Creamy Velvet Truffles are irresistible for so many reasons. First, they’re creamy on the inside and coated in smooth chocolate on the outside—a texture combo that’s hard to beat. Plus, they’re surprisingly easy to make, even if you’re new to baking. The vibrant red color adds a festive touch, making them ideal for holidays or celebrations. And did I mention how much fun it is to roll them into balls? It’s almost therapeutic!
Perfect Occasions to Make These Truffles
Whether it’s Valentine’s Day, Christmas, or just a random Tuesday, these truffles fit the bill. Serve them at parties, gift them to friends, or enjoy them during movie night. I’ve even packed them in cute boxes as homemade gifts—they always get rave reviews. Honestly, there’s no bad time to whip up a batch of these delightful treats.
Ingredients
- For the cake:
- 1 Velvet Red Mixing Box (or homemade mix with: 250 g flour, 250 g sugar, 1 tsp baking soda, 1 tsp cocoa, 1 tsp salt)
- 1 cup vegetable oil
- 1 cup buttermilk (or milk + vinegar)
- 3 eggs
- 1 tsp vanilla extract
- Red food coloring (if using homemade mix)
- For the filling:
- 200 g cream cheese, room temperature
- ½ cup powdered sugar
- 1 tsp vanilla extract
- For the coating:
- 200 g dark or semi-sweet chocolate, melted
- Optional: cocoa powder or grated coconut for decoration
Substitution Options
If you don’t have all the ingredients, no worries! Swap vegetable oil for melted butter, and use Greek yogurt instead of buttermilk. For the filling, mascarpone works well in place of cream cheese. If you want to skip the red dye, simply omit it—the taste will still be amazing. As for the coating, white chocolate or almond bark can replace dark chocolate, depending on your preference.
Step 1: Prepare the Cake
Start by preheating your oven to 180°C (350°F). Mix all the cake ingredients until you achieve a smooth, red batter. Pour it into a greased pan and bake for 25–30 minutes. Keep an eye on it; you’ll know it’s done when a toothpick comes out clean. Once baked, let the cake cool completely. Pro tip: Cooling is crucial because warm cake crumbles won’t hold together well later.
Step 2: Prepare the Filling
In a mixing bowl, beat the cream cheese, powdered sugar, and vanilla until soft and creamy. This step is key to achieving that luscious center. Imagine spreading this velvety mixture over the cake crumbs—it’s going to smell heavenly. Don’t rush this part; take your time to ensure it’s perfectly smooth.
Step 3: Form the Truffles
Now comes the fun part! Crumble the cooled cake into a large bowl. Add the cream cheese mixture and mix until everything sticks together. Roll the mixture into small, bite-sized balls. Place them on a tray and refrigerate for 30 minutes to firm up. Pro tip: Wet your hands slightly to prevent sticking while rolling.
Step 4: Cover the Truffles
Melt the chocolate gently in a microwave or double boiler. Dip each ball into the melted chocolate, ensuring it’s fully coated. Place them back on the tray and sprinkle with cocoa powder or grated coconut if desired. Chill again for 30 minutes to set the chocolate. Watching the glossy chocolate harden is oddly satisfying, isn’t it?
Timing
- Prep Time: 20 minutes
- Cooking Time: 25–30 minutes
- Resting Time: 60 minutes (refrigeration)
- Total Time: About 2 hours
Chef’s Secret
Here’s a little trick: chill the truffle balls twice—once before dipping and once after. This ensures they stay firm and don’t fall apart during the chocolate-coating process. It’s a game-changer, trust me.
Extra Info
Did you know red velvet cake wasn’t originally red? Back in the day, natural cocoa reacted with acidic ingredients to create a reddish hue. Nowadays, we add food coloring to enhance the color. Fun fact: red velvet desserts gained popularity thanks to their appearance in movies like Steel Magnolias.
Necessary Equipment
- Baking pan
- Mixing bowls
- Electric mixer or whisk
- Tray or baking sheet
- Parchment paper
- Fork or dipping tool for chocolate coating
Storage Tips
To keep your Creamy Velvet Truffles fresh, store them in an airtight container in the refrigerator. They’ll last up to one week. The cold temperature helps maintain their shape and prevents the chocolate from melting. If you need to transport them, pack them in layers separated by parchment paper to avoid sticking.
For longer storage, freeze the uncoated truffle balls. Simply thaw them overnight in the fridge before dipping in chocolate. Frozen truffles retain their flavor for up to three months.
When serving, let them sit at room temperature for 10–15 minutes. This softens the chocolate slightly, enhancing the overall experience.
Tips and Advice
Roll the truffles evenly for a professional look. Use a cookie scoop to portion the dough quickly. If the chocolate seizes while melting, stir in a teaspoon of vegetable oil to smooth it out. Always work with chilled truffles to prevent messes.
Presentation Ideas
- Serve on a tiered dessert stand for elegance.
- Package in clear bags tied with ribbon for gifting.
- Arrange in a heart shape for romantic occasions.
Healthier Alternatives
1. Gluten-Free Option: Use gluten-free flour for the cake base.
2. Low-Sugar Version: Substitute sugar with stevia or monk fruit sweetener.
3. Vegan Twist: Replace eggs with flaxseed meal and use dairy-free cream cheese and chocolate.
4. Protein-Packed: Add a scoop of protein powder to the filling.
5. Nutty Delight: Mix chopped nuts into the truffle mixture.
6. Fruit-Filled: Swirl in raspberry jam for a fruity surprise.
Common Mistakes to Avoid
Mistake 1: Skipping the Chilling Step
Not chilling the truffles before dipping leads to messy results. The warmth makes the chocolate slide off. Always refrigerate to keep the balls firm.
Mistake 2: Overmixing the Filling
Overmixing incorporates too much air, making the filling airy rather than dense. Mix just until combined for the best texture.
Mistake 3: Using Warm Chocolate
Warm chocolate won’t set properly. Let it cool slightly before dipping the truffles to avoid melty disasters.
FAQ
Can I use boxed cake mix?
Absolutely! A red velvet boxed mix works great and saves time without compromising flavor.
How do I fix seized chocolate?
Add a teaspoon of vegetable oil and stir gently. Heat it briefly if needed, but avoid overheating.
Can I freeze these truffles?
Yes! Freeze the uncoated balls for up to three months. Thaw before dipping in chocolate.
What’s the best way to roll truffles?
Keep your hands slightly damp to prevent sticking. Aim for uniform sizes for a polished look.
Can I use white chocolate for coating?
Of course! White chocolate adds a beautiful contrast to the red velvet interior.
Do I have to use food coloring?
Nope! Omitting it won’t affect the taste, though the vibrant red color is part of the charm.
How long do these truffles last?
Stored in the fridge, they’ll stay fresh for up to one week. Freeze for longer storage.
Are these kid-friendly?
Kids love helping roll the truffles and decorating them. Just supervise when handling hot chocolate.
Can I make mini truffles?
Yes! Smaller truffles are adorable and perfect for parties. Adjust baking time accordingly.
What tools do I need?
You’ll need mixing bowls, a whisk, a tray, parchment paper, and a fork or dipping tool for chocolate.
There you have it—a complete guide to making Creamy Velvet Truffles. Whether you’re a seasoned baker or a beginner, this recipe is sure to delight. So grab your apron and start creating something magical today!
Equipment
- Mixing bowls
- Electric mixer or whisk
- Tray or baking sheet
- Baking pan
- Parchment paper
Ingredients
- 250 g flour
- 250 g sugar
- 1 tsp baking soda
- 1 tsp cocoa
- 1 tsp salt
- 1 cup vegetable oil
- 1 cup buttermilk or milk + vinegar
- 3 eggs
- 1 tsp vanilla extract
- 200 g cream cheese room temperature
- ½ cup powdered sugar
- 1 tsp vanilla extract
- 200 g dark or semi-sweet chocolate melted
- q.s. cocoa powder for decoration
- q.s. grated coconut for decoration (optional)
Instructions
- Preheat your oven to 180°C (350°F).
- Mix all the cake ingredients until you achieve a smooth, red batter.
- Pour the batter into a greased pan and bake for 25–30 minutes, until a toothpick comes out clean.
- Let the cake cool completely.
- In a mixing bowl, beat the cream cheese, powdered sugar, and vanilla until soft and creamy.
- Crumble the cooled cake into a large bowl, then add the cream cheese mixture and mix until combined.
- Roll the mixture into small, bite-sized balls and place them on a tray.
- Refrigerate the balls for 30 minutes to firm up.
- Melt the chocolate gently in a microwave or double boiler.
- Dip each ball into the melted chocolate, ensuring it's fully coated.
- Place the coated truffles back on the tray and sprinkle with cocoa powder or grated coconut, if desired.
- Chill again for 30 minutes to set the chocolate.
Notes
To keep your truffles fresh, store them in an airtight container in the refrigerator for up to one week. For longer storage, freeze the uncoated truffle balls for up to three months; thaw in the fridge before dipping.
The vibrant red color is optional, and omitting food coloring will not change the taste.
Enjoy rolling them into balls, it's a fun and therapeutic process!
Nutrition

Hi, I’m Olivia Parker, the founder of BakingSecret.com and a lifelong lover of all things sweet and homemade. I grew up in a small town in Oregon, where the smell of fresh cookies in my family’s kitchen sparked my passion for baking. Over the years, I turned that passion into a mission: to help home bakers feel confident, inspired, and creative.
After studying food science and working in several artisan bakeries across the U.S., I decided to create a space where everyone from beginners to seasoned bakers can find reliable recipes, expert tips, and a warm, welcoming community. BakingSecret.com is my way of sharing the magic of baking with the world. When I’m not testing new recipes, you’ll find me exploring farmers’ markets, collecting vintage cookbooks, or perfecting my sourdough technique.