
Why This Decadent Cherry Cheesecake Will Steal Your Heart
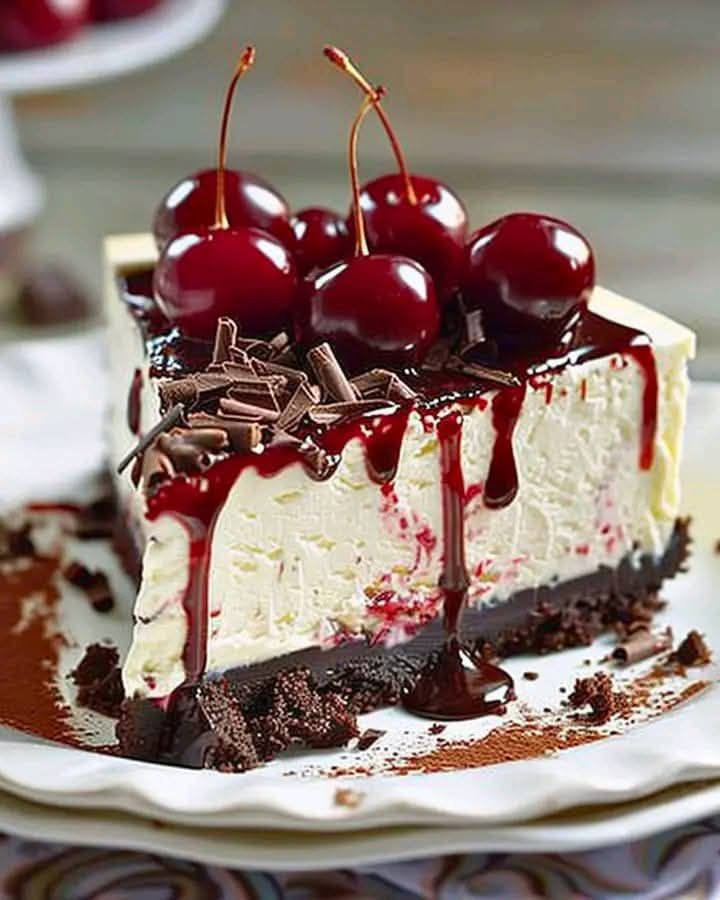
Picture this: a slice of creamy, chocolatey heaven topped with juicy cherries and fluffy whipped cream. Sounds dreamy, right? That’s exactly what happened when I first made this Black Forest Cheesecake for my family’s Sunday dinner. My nephew, who usually turns his nose up at desserts, polished off two slices before I could even snap a picture! This Decadent Cherry Cheesecake is more than just a dessert—it’s an experience. Rich chocolate meets sweet-tart cherries in a symphony of flavors that will leave your taste buds dancing.
A Little History Behind the Magic
The Black Forest Cake, or Schwarzwälder Kirschtorte, hails from Germany and is named after the lush Black Forest region. Traditionally, it’s a towering cake layered with chocolate sponge, whipped cream, and cherries, often spiked with kirsch (cherry brandy). Over time, creative bakers adapted this classic into cheesecake form, combining the best parts of both worlds. When I decided to try my hand at this modern twist, I knew I had to make it extra special—because life’s too short for boring desserts!
Why You’ll Fall Head Over Heels for This Recipe
Let me count the ways! First, the flavors are unmatched—a luxurious blend of dark chocolate, tangy cream cheese, and sweet cherries. Second, it’s surprisingly simple to make. Don’t let the fancy name fool you; if I can pull it off, so can you. Lastly, this Decadent Cherry Cheesecake is versatile. Whether you’re hosting a holiday party or craving something indulgent on a random Tuesday, this recipe has got your back.
Perfect Occasions to Whip Up This Showstopper
This cheesecake is perfect for birthdays, anniversaries, or any celebration where you want to impress. It’s also ideal for potlucks because everyone loves a good cheesecake. And hey, why not treat yourself just because? Sometimes, all it takes is a slice of this beauty to turn an ordinary day into something extraordinary.
Ingredients List
- For the Crust:
- 1 cup chocolate cookie crumbs
- 1/3 cup melted butter
- For the Cheesecake Filling:
- 3 blocks (8 oz each) cream cheese, softened
- 1 cup sugar
- 3 large eggs
- 1/2 cup sour cream
- 1 tsp vanilla extract
- 1/4 cup cocoa powder
- 1/2 cup melted dark chocolate, cooled slightly
- For the Topping:
- 1 cup cherry pie filling
- 1 cup whipped cream
- Dark chocolate shavings for garnish
Substitution Options
No chocolate cookies for the crust? Use graham crackers instead. If you’re out of sour cream, Greek yogurt works beautifully as a substitute. For a boozy twist, stir a tablespoon of kirsch into the cherries. And if you’re feeling adventurous, swap the cherry topping for raspberries or strawberries.
Step 1: Prepare the Crust
Start by preheating your oven to 325°F (160°C). Mix the chocolate cookie crumbs with melted butter until they resemble wet sand. Press this mixture firmly into the bottom of a 9-inch springform pan. Pop it in the oven for 10 minutes, then let it cool while you prepare the filling. The aroma of warm chocolate wafting through your kitchen is worth every second of effort. Pro tip: Use the bottom of a glass to press the crust evenly for a professional finish.
Step 2: Make the Cheesecake Filling
In a mixing bowl, beat the softened cream cheese and sugar until smooth and velvety. Add the eggs one at a time, ensuring each egg is fully incorporated before adding the next. Blend in the sour cream, vanilla, cocoa powder, and melted chocolate. The result should be a glossy, decadent batter that smells like pure bliss. Chef’s tip: Scrape down the sides of the bowl frequently to avoid lumps.
Step 3: Bake the Cheesecake
Pour the silky filling over the cooled crust. Wrap the outside of the springform pan in foil to prevent leaks, then place it in a larger baking dish. Fill the dish halfway with hot water to create a steamy environment. Bake for 55-65 minutes, or until the center is set but still slightly jiggly. Turn off the oven and crack the door open to let the cheesecake cool gradually. This slow cooling helps prevent cracks.
Step 4: Chill and Decorate
Once cooled, refrigerate the cheesecake for at least 4 hours—or better yet, overnight. When ready to serve, spread the cherry pie filling generously over the top. Dollop whipped cream around the edges and sprinkle dark chocolate shavings for a touch of elegance. Each bite promises a burst of flavor that’s rich, creamy, and utterly irresistible.
Timing Breakdown
- Prep Time: 20 minutes
- Cooking Time: 1 hour
- Resting Time: 4+ hours
- Total Time: Approximately 6 hours
Chef’s Secret
To ensure your cheesecake doesn’t crack, add a pinch of salt to the filling. Salt stabilizes the proteins in the cream cheese, making the texture smoother and less prone to cracking during baking.
Extra Info
Did you know that the Black Forest region in Germany is famous for its cherry orchards? That’s why cherries are such a key component of this iconic dessert. Fun fact: authentic recipes often include kirsch, a cherry liqueur, which adds depth to the flavor profile.
Necessary Equipment
- 9-inch springform pan
- Mixing bowls
- Electric mixer
- Baking dish for water bath
- Foil
- Offset spatula for smoothing
Storage Tips
Store leftovers in the refrigerator, covered tightly with plastic wrap or in an airtight container. This keeps the cheesecake fresh for up to 5 days. Avoid freezing the entire cake, as the texture may change upon thawing. However, individual slices freeze well if wrapped properly.
If you live in a warm climate, keep the cheesecake chilled until serving time. Warm temperatures can cause the whipped cream topping to melt, ruining the presentation. Lastly, always bring the cheesecake to room temperature for about 15 minutes before slicing for the best flavor and texture.
Tips and Advice
Always use room-temperature ingredients for the filling. Cold cream cheese can lead to lumpy batter, which no one wants. For a cleaner slice, dip your knife in hot water and wipe it dry between cuts. And don’t skip the water bath—it’s the secret to achieving that perfectly creamy texture.
Presentation Ideas
- Garnish with fresh mint leaves for a pop of color.
- Serve on a decorative plate with a dusting of cocoa powder.
- Add edible flowers for a touch of elegance.
- Use a piping bag to create artistic swirls with whipped cream.
Healthier Alternatives
Here are six variations to lighten up this Decadent Cherry Cheesecake:
- Low-Sugar Option: Replace regular sugar with a sugar substitute like stevia or monk fruit.
- Vegan Version: Use vegan cream cheese, coconut oil instead of butter, and aquafaba (chickpea liquid) in place of eggs.
- Gluten-Free: Swap chocolate cookies for gluten-free cookies in the crust.
- Reduced-Fat: Opt for low-fat cream cheese and Greek yogurt.
- No-Bake: Skip the oven entirely by setting the cheesecake in the fridge overnight.
- Fruit Swap: Try blueberries or raspberries instead of cherries.
Common Mistakes to Avoid
Mistake 1: Overmixing the Batter
Overmixing introduces too much air, leading to cracks during baking. Mix just until the ingredients are combined. Tip: Stop mixing as soon as the batter looks smooth.
Mistake 2: Skipping the Water Bath
The water bath ensures even cooking and prevents the cheesecake from drying out. Without it, you risk a cracked surface and uneven texture.
Mistake 3: Rushing the Cooling Process
Turning off the oven and letting the cheesecake cool slowly prevents sudden temperature changes that cause cracks. Patience pays off here!
Mistake 4: Using Cold Ingredients
Cold cream cheese won’t blend smoothly, resulting in lumps. Always let your ingredients come to room temperature before starting.
Mistake 5: Cutting Too Soon
Slicing the cheesecake before it’s fully chilled makes messy, wobbly pieces. Wait at least 4 hours—or overnight—for the best results.
FAQ Section
Can I make this cheesecake ahead of time?
Absolutely! In fact, it tastes even better the next day. Just cover and store it in the fridge until you’re ready to serve.
What can I do if my cheesecake cracks?
No worries! Cover minor cracks with whipped cream or cherry topping. Remember, taste matters more than perfection.
Do I have to use a springform pan?
Yes, a springform pan is essential for easy removal without damaging the delicate cheesecake.
Can I freeze this cheesecake?
While freezing the whole cake isn’t recommended, individual slices freeze well when wrapped tightly in plastic wrap and foil.
How do I know when the cheesecake is done?
The edges should be set, but the center should still jiggle slightly. It will firm up as it cools.
Is there a way to make this gluten-free?
Yes, simply use gluten-free chocolate cookies for the crust. Easy peasy!
Can I use fresh cherries instead of pie filling?
Definitely! Cook fresh cherries with sugar and cornstarch to create a homemade compote.
Why does my cheesecake taste grainy?
Graininess usually happens when the sugar isn’t fully dissolved. Beat the cream cheese and sugar longer to achieve a smoother consistency.
What type of chocolate should I use?
Dark chocolate with at least 60% cocoa content works best for a rich, intense flavor.
Can I omit the alcohol in traditional recipes?
Of course! While kirsch adds authenticity, it’s optional. Your cheesecake will still shine without it.
Final Thoughts
This Decadent Cherry Cheesecake is proof that sometimes, the simplest things bring the most joy. With its luscious layers and stunning presentation, it’s sure to become a favorite in your recipe collection. So go ahead—grab those ingredients, roll up your sleeves, and get ready to wow everyone at your table. Trust me, they’ll thank you later!
Equipment
- Mixing bowls
- Electric mixer
- Offset spatula for smoothing
- 9-inch springform pan
- Baking dish for water bath
Ingredients
- 1 cup chocolate cookie crumbs
- 1/3 cup melted butter
- 3 blocks (8 oz each) cream cheese, softened
- 1 cup sugar
- 3 large eggs
- 1/2 cup sour cream
- 1 tsp vanilla extract
- 1/4 cup cocoa powder
- 1/2 cup melted dark chocolate, cooled slightly
- 1 cup cherry pie filling
- 1 cup whipped cream
- q.s. dark chocolate shavings for garnish
Instructions
- Preheat your oven to 325°F (160°C).
- Mix the chocolate cookie crumbs with melted butter until they resemble wet sand.
- Press this mixture firmly into the bottom of a 9-inch springform pan.
- Bake the crust for 10 minutes, then let it cool while preparing the filling.
- In a mixing bowl, beat the softened cream cheese and sugar until smooth.
- Add the eggs one at a time, fully incorporating each before adding the next.
- Blend in the sour cream, vanilla, cocoa powder, and melted chocolate until glossy.
- Pour the filling over the cooled crust.
- Wrap the outside of the springform pan in foil and place it in a larger baking dish.
- Fill the baking dish halfway with hot water.
- Bake for 55-65 minutes, or until the center is slightly jiggly.
- Turn off the oven and crack the door open, letting the cheesecake cool gradually.
- Refrigerate the cheesecake for at least 4 hours or overnight.
- Spread the cherry pie filling over the top, dollop whipped cream around the edges, and sprinkle dark chocolate shavings.
Notes
Nutrition

Hi, I’m Olivia Parker, the founder of BakingSecret.com and a lifelong lover of all things sweet and homemade. I grew up in a small town in Oregon, where the smell of fresh cookies in my family’s kitchen sparked my passion for baking. Over the years, I turned that passion into a mission: to help home bakers feel confident, inspired, and creative.
After studying food science and working in several artisan bakeries across the U.S., I decided to create a space where everyone from beginners to seasoned bakers can find reliable recipes, expert tips, and a warm, welcoming community. BakingSecret.com is my way of sharing the magic of baking with the world. When I’m not testing new recipes, you’ll find me exploring farmers’ markets, collecting vintage cookbooks, or perfecting my sourdough technique.