
Why This Decadent Cherry Roll Will Steal Your Heart
Picture this: a slice of cake so soft, so chocolatey, and so perfectly balanced with sweet cherries that it feels like a warm hug for your taste buds. That’s what happened when I first made this Decadent Cherry Roll. It was one of those “I can’t believe I made this” moments. My family couldn’t stop raving about it, and neither could my friends at the next potluck. Whether you’re a seasoned baker or just starting out, this recipe is forgiving, fun, and downright delicious.
The Story Behind the Decadent Cherry Roll
This beauty is inspired by the classic Black Forest Cake, a dessert born in Germany. Traditionally, it’s layers of chocolate cake, whipped cream, and cherries, all soaked in cherry liqueur. But let’s be honest—most of us don’t have time to layer cakes and soak them in booze. Enter the roll version! It’s quicker to make but still packs all the rich flavors we love. When I tested this recipe, I swapped the liqueur for a kid-friendly version, and guess what? The kids gobbled it up faster than I could snap a picture!
Why You’ll Love This Recipe
This Decadent Cherry Roll is a showstopper without the stress. The sponge cake is light and airy, while the filling bursts with creamy sweetness and juicy cherries. Plus, rolling it up feels like a little baking magic trick. Even if it cracks (and it might), the toppings hide any imperfections. Best of all? It’s versatile. Serve it at brunch, dessert, or even as a midnight snack—it’s THAT good.
Perfect Occasions to Make This Roll
This roll shines at birthday parties, holiday gatherings, or casual weekend treats. I once brought it to a summer barbecue, and it disappeared before the burgers were ready. It’s also perfect for Valentine’s Day or Mother’s Day because who doesn’t love chocolate and cherries? Honestly, though, you don’t need a special occasion. Just make it because life is better with cake.
Ingredients
Here’s what you’ll need to whip up this masterpiece:
Chocolate Sponge Cake:
- 4 large eggs, room temperature
- ½ cup granulated sugar
- ½ cup all-purpose flour
- ¼ cup cocoa powder
- 1 tsp baking powder
- Pinch of salt
- 1 tsp vanilla extract
Filling:
- 1½ cups heavy cream
- ¼ cup powdered sugar
- 1 tsp vanilla extract
- 1 cup canned cherries, drained
Toppings:
- Whipped cream for piping
- ½ cup chocolate chips
- ½ cup heavy cream for ganache
- Maraschino cherries
- Shaved chocolate
Substitution Options
No canned cherries? Use fresh ones or frozen berries instead. If you’re dairy-free, swap the heavy cream for coconut cream. For gluten-free bakers, almond flour works beautifully in place of all-purpose flour. And if you’re feeling fancy, add a splash of cherry liqueur to the filling for an adult twist.
Step 1: Preheat the Oven
Start by preheating your oven to 350°F (175°C). Grab a 10×15-inch baking sheet and line it with parchment paper. This step is crucial because parchment keeps the cake from sticking. Trust me—I learned the hard way when my first attempt turned into a crumbly mess. Pro tip: Dust the parchment lightly with cocoa powder for extra insurance.
Step 2: Make the Sponge Cake
In a mixing bowl, beat the eggs and sugar until they’re pale, fluffy, and almost mousse-like. Sift the flour, cocoa powder, baking powder, and salt together, then gently fold them into the egg mixture. Be careful not to overmix; we want a tender cake, not a tough one. Stir in the vanilla extract for that hint of warmth. Spread the batter evenly on the prepared sheet—it should look smooth and velvety. Pop it in the oven for 10–12 minutes. When it’s done, the cake will spring back when touched.
Step 3: Roll the Cake
While the cake is still warm, flip it onto a clean towel dusted with cocoa powder. Peel off the parchment paper carefully—it’s satisfying, trust me. Then, roll the cake up with the towel from one short end. Rolling it warm helps prevent cracking later. Let it cool completely. Chef’s tip: Don’t rush this step. Patience pays off here!
Step 4: Prepare the Filling
Whip the heavy cream, powdered sugar, and vanilla extract until stiff peaks form. Imagine clouds of cream that hold their shape but are still soft enough to spread. Gently fold in the drained cherries. The red pops against the white cream—it’s almost too pretty to eat. Almost.
Step 5: Assemble the Swiss Roll
Unroll the cooled sponge carefully. Spread the whipped cream and cherry mixture evenly over the surface. Now comes the fun part: roll it back up tightly, starting from the same short end. Place it seam-side down on a serving platter. It’s okay if it’s not perfect; the toppings will cover any flaws.
Step 6: Decorate the Cake
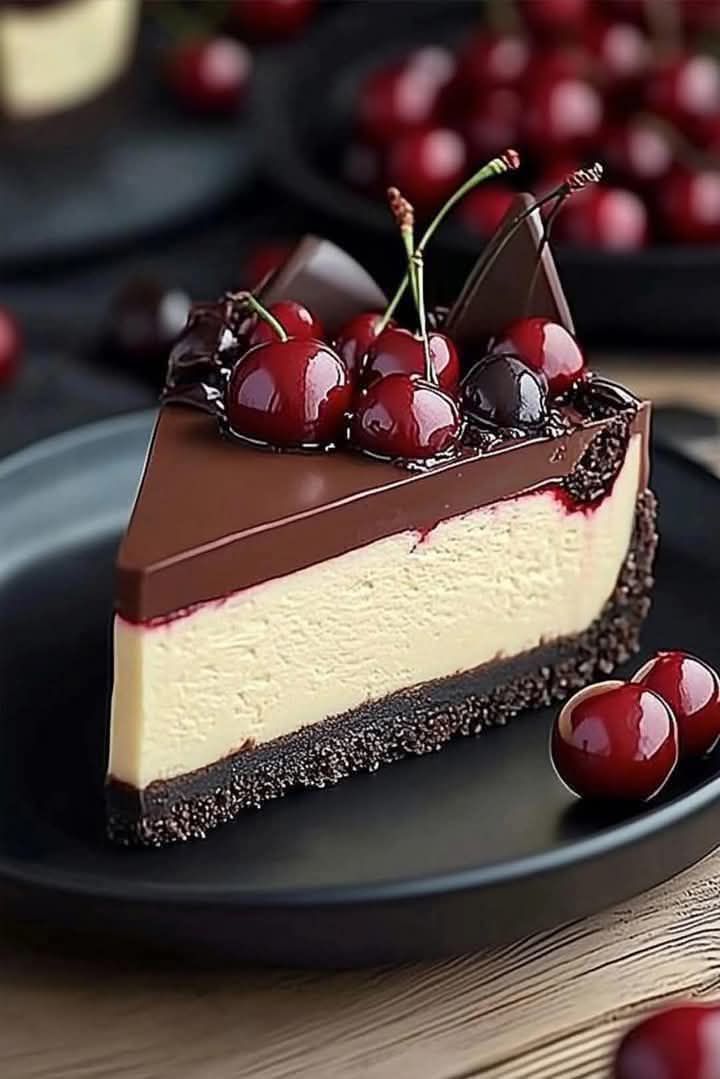
Melt the chocolate chips and heavy cream together for the ganache. Drizzle it generously over the roll—it’s glossy, rich, and oh-so-tempting. Pipe whipped cream on top, add maraschino cherries, and sprinkle shaved chocolate for a final touch. Refrigerate for at least an hour before slicing. Serve chilled, and watch everyone’s eyes light up.
Timing
Prep Time: 30 minutes
Cooking Time: 12 minutes
Resting Time: 1 hour
Total Time: About 1 hour 45 minutes
Chef’s Secret
For an extra-rich flavor, toast the cocoa powder in a dry skillet for 1–2 minutes before using it. It deepens the chocolate aroma and makes the cake even more irresistible.
Extra Info
Did you know that the Swiss roll technique dates back to the 19th century? It’s been a favorite ever since because it combines elegance with simplicity. Fun fact: some bakers call it a “jelly roll,” even though jelly isn’t always involved.
Necessary Equipment
You’ll need a few basic tools: a whisk or electric mixer, a spatula, a baking sheet, parchment paper, a towel, and a piping bag for the whipped cream. Nothing fancy—just kitchen essentials.
Storage
Store leftovers in the fridge, wrapped tightly in plastic wrap or placed in an airtight container. It stays fresh for up to 3 days. If you freeze it, wrap it well and consume within a month. Thaw overnight in the fridge before serving.
When storing, keep the whipped cream toppings minimal to avoid sogginess. A light dusting of cocoa powder or shaved chocolate holds up better during storage.
Pro tip: Slice the roll before freezing individual portions. That way, you can grab a piece whenever a craving strikes.
Tips and Advice
- Use room-temperature eggs for a fluffier sponge.
- Dust your hands and work surface with cocoa powder to prevent sticking.
- Chill the assembled roll before decorating for easier handling.
Presentation Tips
- Serve slices on a white plate to highlight the colors.
- Add edible flowers for a pop of color.
- Drizzle extra ganache around the plate for a restaurant-worthy look.
Healthier Alternative Recipes
If you’re looking for lighter options, try these variations:
- Gluten-Free Roll: Swap all-purpose flour for almond or oat flour.
- Vegan Roll: Use aquafaba instead of eggs and coconut cream for the filling.
- Low-Sugar Roll: Replace granulated sugar with a sugar substitute like stevia.
- Fruit-Filled Roll: Substitute cherries with raspberries or blueberries.
- Spiced Roll: Add cinnamon or nutmeg to the batter for warmth.
- Mocha Roll: Mix instant coffee powder into the ganache for a coffee kick.
Mistake 1: Overmixing the Batter
Overmixing leads to a dense cake instead of a light, airy sponge. To avoid this, fold the dry ingredients gently into the wet mixture. Stop as soon as everything is combined. Pro tip: Use a spatula instead of a whisk for folding.
Mistake 2: Skipping the Cocoa Powder Dusting
Without cocoa powder on the towel, the cake may stick while rolling. Always dust generously—it’s a small step that makes a big difference.
Mistake 3: Rushing the Cooling Process
Rolling the cake too soon can cause it to crack. Let it cool completely before unrolling and assembling. Patience is key here!
Mistake 4: Overfilling the Roll
Too much filling spills out when you roll the cake. Spread it evenly but sparingly, leaving a border around the edges.
Mistake 5: Slicing Too Soon
Cutting the roll before chilling results in messy slices. Chill it for at least an hour to set the filling and ganache.
FAQ
Can I use fresh cherries instead of canned?
Absolutely! Fresh cherries work beautifully. Just pit and chop them before adding to the filling.
How do I prevent the cake from cracking?
Roll the cake while it’s still warm and dust the towel with cocoa powder. Cracks are normal, but they won’t affect the taste.
Can I make this ahead of time?
Yes! Assemble the roll a day in advance and store it in the fridge. Bring it to room temperature before serving.
What if I don’t have a piping bag?
No worries. Use a zip-top bag and snip off a corner to pipe the whipped cream.
Is this recipe beginner-friendly?
Definitely! The steps are straightforward, and the results are forgiving. Even imperfect rolls taste amazing.
Can I freeze the finished roll?
Yes, wrap it well and freeze for up to a month. Thaw in the fridge overnight.
Do I need a stand mixer?
Nope. A hand mixer or whisk works fine. Just make sure the eggs are beaten until fluffy.
Can I skip the ganache?
Sure! The roll is delicious without it, but the ganache adds a luxurious touch.
What size pan should I use?
A 10×15-inch baking sheet is ideal. Anything smaller may result in a thicker cake that’s harder to roll.
Can I add alcohol to the filling?
Of course! A splash of cherry liqueur or brandy enhances the flavor for adults.
Final Thoughts
This Decadent Cherry Roll is proof that baking doesn’t have to be complicated to be impressive. With its rich chocolate sponge, creamy filling, and festive toppings, it’s a dessert that brings joy to every table. So grab your apron, gather your ingredients, and let’s make some magic in the kitchen. Happy baking!
Equipment
- Whisk or electric mixer
- Spatula
- Baking sheet
- Parchment paper
- Clean towel
- Piping bag
Ingredients
- 4 large eggs room temperature
- ½ cup granulated sugar
- ½ cup all-purpose flour
- ¼ cup cocoa powder
- 1 tsp baking powder
- 1 tsp vanilla extract
- 1 pinch salt
- 1½ cups heavy cream
- ¼ cup powdered sugar
- 1 tsp vanilla extract
- 1 cup canned cherries drained
Instructions
- Preheat the oven to 350°F (175°C) and line a 10x15 inch baking sheet with parchment paper.
- In a mixing bowl, beat the eggs and sugar until pale and fluffy.
- Sift the flour, cocoa powder, baking powder, and salt, then gently fold into the egg mixture.
- Stir in the vanilla extract, spread the batter on the prepared sheet, and bake for 10-12 minutes.
- While warm, flip the cake onto a cocoa-dusted towel and roll it up with the towel.
- Let it cool completely.
- In another bowl, whip heavy cream, powdered sugar, and vanilla until stiff peaks form; gently fold in the drained cherries.
- Unroll the cooled sponge and spread the cream and cherry filling evenly across it.
- Roll the cake back up, seam-side down, and place on a serving platter.
- Prepare the ganache by melting chocolate chips and heavy cream together, then drizzle over the roll.
- Pipe whipped cream on top, garnish with maraschino cherries and shaved chocolate, and refrigerate for at least an hour before serving.
Notes
Nutrition

Hi, I’m Olivia Parker, the founder of BakingSecret.com and a lifelong lover of all things sweet and homemade. I grew up in a small town in Oregon, where the smell of fresh cookies in my family’s kitchen sparked my passion for baking. Over the years, I turned that passion into a mission: to help home bakers feel confident, inspired, and creative.
After studying food science and working in several artisan bakeries across the U.S., I decided to create a space where everyone from beginners to seasoned bakers can find reliable recipes, expert tips, and a warm, welcoming community. BakingSecret.com is my way of sharing the magic of baking with the world. When I’m not testing new recipes, you’ll find me exploring farmers’ markets, collecting vintage cookbooks, or perfecting my sourdough technique.