
Why This Decadent Chocolate Delight Will Be Your New Favorite
There’s something magical about a chocolate cake that’s spongy, rich, and bursting with flavor. I remember baking this Decadent Chocolate Delight for my son’s birthday last year. The moment it came out of the oven, the house smelled like a dream—warm, sweet, and utterly inviting. Everyone devoured it, and my friend even asked me to teach her how to make it. It’s not just a cake; it’s an experience. Trust me, once you try this recipe, you’ll want to share it with everyone you love.
A Bite of History: How Chocolate Cake Became a Classic
Chocolate cake has been around for centuries, but its rise to fame began in the 19th century when cocoa powder became widely available. Back then, cakes were simpler and less indulgent than today’s versions. Over time, bakers added more chocolate, butter, and sugar, transforming them into the rich desserts we crave now. This recipe blends the best of both worlds—a nod to tradition with a modern twist of molten chocolate filling. It’s like a warm hug on a cold day!
Why You’ll Love This Recipe
This Decadent Chocolate Delight is perfect for anyone who loves chocolate but doesn’t want to spend hours in the kitchen. The ingredients are easy to find, and the steps are simple enough for beginner bakers. Plus, the result is a cake so moist and flavorful, you’ll feel like a professional pastry chef. Whether you’re celebrating a special occasion or just craving something sweet, this cake delivers every time.
Perfect Occasions to Whip Up This Cake
This cake shines at birthdays, holidays, and family gatherings. Imagine slicing into it during Thanksgiving or surprising your partner on Valentine’s Day. It’s also great for potlucks or Sunday brunches. Honestly, any day can be a good day for chocolate cake. As they say, life is short—eat dessert first!
What You’ll Need to Make This Magic Happen
- 2 cups of wheat flour
- 100 g of black or milk chocolate
- 1 cup of granulated sugar
- 1 cup of milk
- 200 g of butter
- 3 eggs
- 2 tablespoons of cocoa powder
- 2 tablespoons vanilla extract
- 1 teaspoon baking powder
- Molten chocolate to decorate
Substitution Options for Flexibility
If you don’t have all the ingredients, no worries! Swap wheat flour with almond or gluten-free flour if needed. Use coconut oil instead of butter for a dairy-free option. And if you’re out of granulated sugar, brown sugar works too. For vegans, replace eggs with flaxseed gel (1 tablespoon ground flaxseed + 3 tablespoons water per egg). Feel free to experiment while keeping the essence of the cake intact.
Step-by-Step Guide to Baking Perfection
Step 1: Preheat Your Oven
Start by preheating your oven to 180°C (350°F). This ensures the cake bakes evenly and rises beautifully. While waiting, grease your baking pan with butter or line it with parchment paper. Pro tip: Dusting the pan with a little flour prevents sticking without altering the taste.
Step 2: Melt the Chocolate and Butter
In a heatproof bowl over simmering water, melt the chocolate and butter together. Stir gently until smooth and glossy—it’s like liquid gold! Be patient; rushing this step might burn the chocolate. Once done, set it aside to cool slightly before adding it to the batter.
Step 3: Beat Eggs and Sugar
In a large mixing bowl, beat the eggs with sugar until light and fluffy. You’ll notice the color change from pale yellow to almost white—that’s when you know it’s ready. This step is crucial because it traps air, which makes the cake spongy and soft.
Step 4: Combine Wet Ingredients
Pour the melted chocolate mixture into the beaten eggs and sugar. Mix well until fully incorporated. Add vanilla extract, cocoa powder, and baking powder, stirring until smooth. The aroma at this point is intoxicating—you might want to sneak a taste!
Step 5: Incorporate Dry Ingredients
Gradually add the flour, alternating with the milk. Mix gently to avoid lumps. Overmixing can make the cake dense, so stop as soon as everything comes together. The batter should be thick yet pourable, like velvet.
Step 6: Bake to Perfection
Pour the batter into the prepared pan and bake for 30–40 minutes. To check doneness, insert a toothpick—if it comes out clean, you’re golden. The cake will puff up and develop a shiny crust. Let it cool completely before decorating.
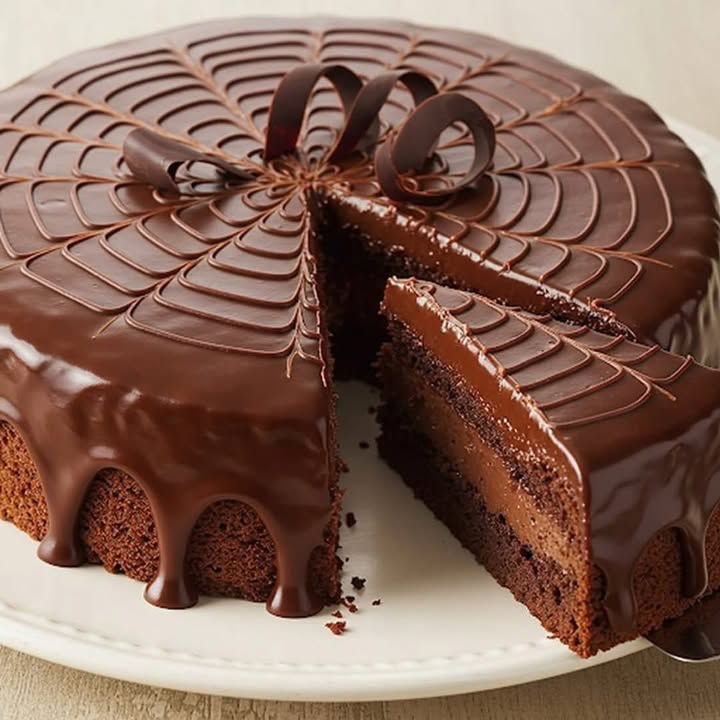
Step 7: Decorate and Serve
Once cooled, cut the cake in half horizontally and spread molten chocolate between the layers. Cover the top with more chocolate and get creative with decorations. Sprinkles, nuts, or fresh berries work wonders here.
Chef’s Tip for Extra Flair
To enhance the chocolate flavor, use high-quality dark chocolate with at least 70% cocoa content. It adds depth and richness that cheaper alternatives lack. A splash of espresso powder mixed into the batter intensifies the chocolate notes without making it taste like coffee.
Timing Breakdown
- Prep Time: 20 minutes
- Cooking Time: 30–40 minutes
- Resting/Cooling Time: 30 minutes
- Total Time: About 1 hour and 20 minutes
An Interesting Tidbit About Chocolate
Did you know chocolate was once considered medicine? In the 16th century, Europeans believed drinking hot chocolate could cure ailments. Thankfully, we’ve moved beyond medicinal uses and embraced it purely for pleasure. Isn’t that reason enough to indulge?
Necessary Equipment
- Mixing bowls
- Electric mixer or whisk
- Baking pan
- Spatula
- Toothpick or skewer
- Double boiler or heatproof bowl
Storage Tips for Maximum Freshness
Store leftover slices in an airtight container at room temperature for up to two days. If you live in a warm climate, refrigerate the cake to prevent spoilage. Wrap individual slices in plastic wrap before freezing for longer storage—they’ll stay fresh for up to three months.
When reheating frozen cake, let it thaw overnight in the fridge. Then, microwave briefly to restore its moist texture. Avoid microwaving for too long, as it may dry out the cake.
Always keep the cake away from strong-smelling foods like onions or garlic, as it can absorb odors easily. Proper storage ensures every bite tastes as fresh as the first.
Tips and Advice for Success
- Weigh your ingredients for precision, especially flour and sugar.
- Don’t skip sifting the flour—it removes lumps and aerates the batter.
- Let the melted chocolate cool slightly before mixing; otherwise, it might cook the eggs.
- Frost only after the cake is completely cool to prevent melting.
Presentation Ideas That Wow
- Dust the top with powdered sugar for a classic look.
- Drizzle caramel sauce alongside chocolate for contrast.
- Add edible flowers for a touch of elegance.
- Serve with a dollop of whipped cream or ice cream.
Healthier Alternatives to Try
Want to enjoy this cake guilt-free? Here are six variations:
- Gluten-Free Version: Replace wheat flour with almond or oat flour. Adjust liquid quantities slightly for consistency.
- Vegan Delight: Use plant-based butter, milk, and flaxseed gel instead of eggs.
- Low-Sugar Option: Substitute granulated sugar with stevia or monk fruit sweetener.
- Protein-Packed Cake: Add a scoop of protein powder to the batter for an energy boost.
- Fruit Infusion: Fold mashed bananas or applesauce into the mix for natural sweetness.
- Spiced Twist: Include cinnamon or chili powder for a unique kick.
Common Mistakes to Avoid
Mistake 1: Overmixing the Batter
Overmixing leads to a tough, dense cake. Stir just until ingredients combine. Think gentle folds rather than vigorous stirs. Pro tip: Stop mixing when streaks of flour disappear.
Mistake 2: Opening the Oven Too Soon
Opening the oven door prematurely causes uneven baking and sinking. Resist peeking until at least halfway through the cooking time. Patience pays off!
Mistake 3: Using Cold Ingredients
Cold eggs and butter won’t emulsify properly, affecting texture. Always bring ingredients to room temperature before starting.
Frequently Asked Questions
Can I Use Cocoa Powder Instead of Chocolate Bars?
Yes, but adjust the liquid content since cocoa powder absorbs more moisture. Add an extra tablespoon or two of milk to maintain the right consistency.
How Do I Know When the Cake Is Done?
Insert a toothpick into the center. If it comes out clean or with a few crumbs (not wet batter), the cake is ready. Another sign is a springy texture when lightly pressed.
Can I Make This Cake Ahead of Time?
Absolutely! Bake it a day in advance and store it in an airtight container. Decorate just before serving to keep the frosting looking fresh.
What If My Cake Sinks in the Middle?
Sinking usually happens due to underbaking or opening the oven too early. Ensure proper baking time and avoid disturbances. Also, check your baking powder isn’t expired.
Is This Recipe Suitable for Kids?
Definitely! Kids adore this cake’s rich flavor and soft texture. Just reduce the sugar slightly if preferred. It’s a crowd-pleaser for all ages.
Can I Add Nuts or Fruits?
Of course! Walnuts, pecans, or dried fruits like cherries complement the chocolate beautifully. Fold them in gently during the final mixing stage.
Why Does My Cake Taste Dry?
Dryness often results from overbaking or incorrect measurements. Stick to the recommended times and weigh ingredients accurately for best results.
How Do I Prevent Cracks on Top?
Cracks occur when the batter dries out quickly. Cover the pan loosely with foil midway through baking to retain moisture.
Can I Freeze the Cake?
Yes, wrap individual slices tightly in plastic wrap and freeze. Thaw overnight in the fridge before serving. Freezing preserves freshness for up to three months.
What Makes This Cake So Moist?
The combination of butter, eggs, and milk creates a tender crumb. Melting the chocolate and butter enhances the richness, while careful mixing avoids toughness.
Final Thoughts on This Decadent Treat
Baking this Decadent Chocolate Delight is more than just following a recipe—it’s creating memories. Whether you’re celebrating a milestone or simply treating yourself, this cake promises happiness in every bite. So grab your apron, gather your ingredients, and let’s make magic happen in the kitchen. Happy baking!
Equipment
- Mixing bowls
- Electric mixer or whisk
- Spatula
- Baking pan
- Toothpick or skewer
- Double boiler or heatproof bowl
Ingredients
- 2 cups wheat flour
- 100 g black or milk chocolate
- 1 cup granulated sugar
- 1 cup milk
- 200 g butter
- 3 eggs
- 2 tablespoons cocoa powder
- 2 tablespoons vanilla extract
- 1 teaspoon baking powder
- q.s. molten chocolate to decorate
Instructions
- Preheat your oven to 180°C (350°F) and grease your baking pan.
- Melt the chocolate and butter together in a heatproof bowl over simmering water until smooth and glossy.
- In a large mixing bowl, beat the eggs with sugar until light and fluffy.
- Pour the melted chocolate mixture into the beaten eggs and sugar, and mix well. Add vanilla extract, cocoa powder, and baking powder.
- Gradually add the flour, alternating with the milk, mixing gently to avoid lumps.
- Pour the batter into the prepared pan and bake for 30–40 minutes, checking doneness with a toothpick.
- Let it cool completely, then cut the cake in half and spread molten chocolate between the layers, decorating the top as desired.
Notes
Nutrition

Hi, I’m Olivia Parker, the founder of BakingSecret.com and a lifelong lover of all things sweet and homemade. I grew up in a small town in Oregon, where the smell of fresh cookies in my family’s kitchen sparked my passion for baking. Over the years, I turned that passion into a mission: to help home bakers feel confident, inspired, and creative.
After studying food science and working in several artisan bakeries across the U.S., I decided to create a space where everyone from beginners to seasoned bakers can find reliable recipes, expert tips, and a warm, welcoming community. BakingSecret.com is my way of sharing the magic of baking with the world. When I’m not testing new recipes, you’ll find me exploring farmers’ markets, collecting vintage cookbooks, or perfecting my sourdough technique.