
A Sweet and Simple Easter Surprise: No-Bake Mini Swirl Cheesecakes
I was hunting for that perfect Easter dessert. It needed to be cute, colorful, and scream “Spring!” But I also didn’t want to turn on the oven. Between hunting for eggs and visiting family, oven time is precious. Then, I remembered my favorite no-bake cheesecake trick. I gave it a pastel twist, and these Easter Mini Cheesecakes were born. They are little bites of joy. They look festive and taste like a creamy dream. Let’s make them!
From Classic to Colorful: The Story of Mini Cheesecakes
Cheesecake is ancient, really. Records show the Greeks loved a simple cheese and honey treat. Our modern, creamy version took off in America. New York made it famous. But I always think of cheesecake as a celebration cake. Then, the mini trend started. Single-serving desserts became a party favorite. They are just easier to share. For Easter, I wanted to blend that tradition with a playful, modern touch. Swirling pastel colors into mini cheesecakes feels fresh, fun, and totally festive.
Why You’ll Love These Easter Mini Cheesecakes
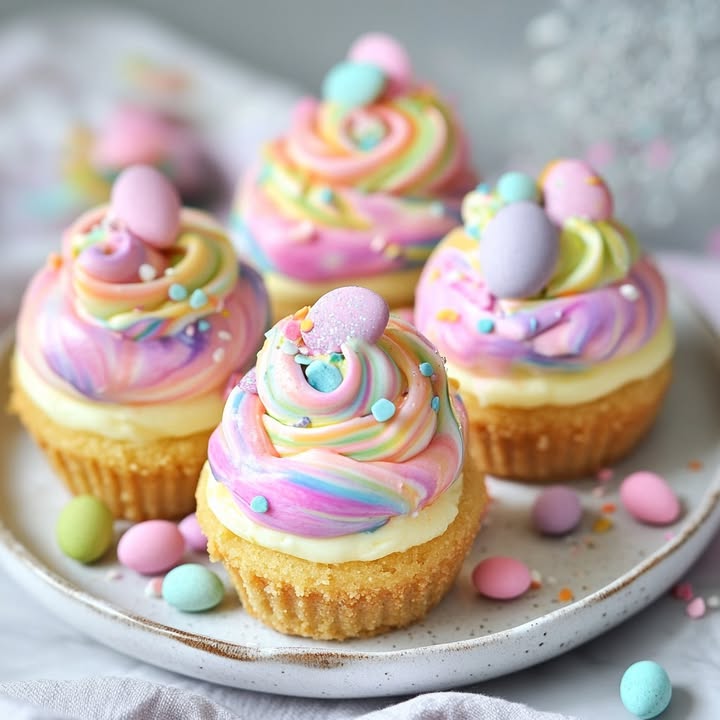
You’ll adore these for so many reasons! First, no oven means no stress. The kitchen stays cool. Second, they are so pretty. The soft pink, yellow, blue, and purple swirls are like a spring garden. They taste light and fluffy, not heavy. Kids love helping swirl the colors. Plus, you can make them ahead. This frees you up for all the other holiday fun.
Perfect Occasions for Pastel Swirl Cheesecakes
These little cakes are perfect for more than just Easter Sunday. They shine at any spring gathering. Think about a baby shower with pastel decorations. They fit a Mother’s Day brunch perfectly. They are great for a school spring party. Pack them for a picnic. They even make a lovely end to a simple family dinner. Any time you want a touch of cheerful color, these are your answer.
Ingredients for Your Easter Cheesecakes
Gathering your ingredients is simple. Here is your shopping list:
- For the crust: 1 cup graham cracker crumbs, 3 tablespoons granulated sugar, 4 tablespoons unsalted butter (melted).
- For the filling: 8 ounces cream cheese (softened), 1 cup powdered sugar, 1 teaspoon vanilla extract, 1 cup whipped topping or whipped cream, Gel food coloring (pastel shades: pink, yellow, blue, purple).
- Optional garnish: Whipped cream, sprinkles, mini chocolate eggs.
Smart Substitution Options
Don’t worry if you’re missing something. You can swap many items. For the crust, try digestive biscuit crumbs or gluten-free graham crackers. Use coconut oil instead of butter. For the filling, mascarpone cheese can replace cream cheese. It’s richer. Maple syrup or honey can substitute for powdered sugar. Use less, about ¾ cup. If you don’t have whipped topping, whip your own heavy cream with a little sugar. Liquid food coloring works, but gel gives brighter, pastel colors.
Crafting Your Colorful Easter Desserts
Here’s the fun part! Let’s create these beautiful mini cheesecakes together.
Step 1: Build the Crunchy Base
Start by lining your muffin tin with cute cupcake liners. I like pastel ones to match the filling. Mix the graham cracker crumbs, sugar, and melted butter in a bowl. The smell is sweet and toasty. You’ll get a sandy, moist mixture. Spoon about a tablespoon into each liner. Use the bottom of a small glass or your fingers to press it down firmly. This makes a solid crust. A solid crust stops it from crumbling later. Chill the whole tin for 15 minutes. This lets the butter set and hold everything together.
Step 2: Make the Fluffy Filling
Now, beat your softened cream cheese in a clean bowl. Soft cheese is key for a smooth, lump-free texture. Beat it until it’s completely creamy. Add the powdered sugar and vanilla. Beat again until it’s fully mixed. The vanilla aroma is wonderful. Next, gently fold in your whipped topping. Use a spatula and broad strokes. You want to keep that airy lightness. The mixture will become voluminous and fluffy. It should look like a cloud.
Pro tip: If your cream cheese is still a bit firm, let it sit on the counter longer. Or, beat it with a tablespoon of milk to help it soften up.
Step 3: Create Your Pastel Palette
Divide the fluffy filling evenly into four small bowls. This is where the magic happens. Add a tiny drop of gel food coloring to each bowl. Use pink, yellow, blue, and purple. Stir each one gently until the color is even. You want soft, Easter egg shades. Don’t add too much color. Pastels are light and gentle. The sight of these four colorful bowls is just so happy and spring-like.
Step 4: The Art of Swirling
Take your chilled crusts out. Now, spoon small dollops of each colored filling into each liner. I do a little pink, then yellow, then blue, then purple. Don’t worry about making it neat. The messy dollops create the best swirls. Take a toothpick or a thin skewer. Gently drag it through the colored dollops in a circular pattern. Just one or two loops is enough. You’ll see the beautiful swirls form instantly. It’s like painting on a creamy canvas.
Chef’s tip: For a more defined swirl, let the colored batters chill for 10 minutes first. This makes them a bit firmer so the colors don’t blend too much when you swirl.
Step 5: Chill and Set for Perfect Texture
The final step is patience. Carefully place the muffin tin in the refrigerator. Let the cheesecakes chill for at least 3 hours. Overnight is even better. This time allows the filling to firm up perfectly. It transforms from fluffy to a soft, sliceable consistency. When they are set, they are ready to garnish and serve.
Timing Your Easter Mini Cheesecakes
This is a “waiting” recipe more than a “working” one. Prep is quick: about 20 minutes of active work. There is zero cooking time because we are no-bake! The total time, including chilling, is about 3 hours and 20 minutes. This makes it perfect to make in the morning for an evening event. Or, make them the night before your Easter feast.
A Chef’s Secret for the Best Swirls
My secret is in the swirl tool. A toothpick is fine, but try a thin cocktail skewer or even a unbent paperclip. The thinner the tool, the more detailed your swirl lines will be. Also, don’t press too deep. You want to swirl just the top layer of filling. This keeps the beautiful colors visible and prevents mixing them into a muddy single color.
A Little Extra Info: The Power of Graham Crackers
Graham crackers were actually invented for a healthy diet! A minister named Sylvester Graham promoted them in the 1800s. He believed in simple, wholesome food. Today, we love them for their sweet, slightly spicy flavor. They make the perfect crust for no-bake treats. They hold together well and add a wonderful texture contrast to the creamy filling.
Necessary Equipment
You don’t need fancy tools. Here’s your list:
- Standard 12-cup muffin tin
- Cupcake liners
- Mixing bowls
- Hand mixer or sturdy whisk
- Spatula
- Measuring cups and spoons
- Small bowls for coloring (4)
- Toothpick or thin skewer
How to Store Your No-Bake Cheesecakes
These Easter Mini Cheesecakes store beautifully. Keep them covered in the muffin tin or transfer them to an airtight container. They must stay in the refrigerator. They will stay fresh and delicious for up to 4 days. The crust may soften a tiny bit over time, but the flavor will still be great.
I do not recommend freezing them. The whipped topping in the filling doesn’t freeze well. It can become grainy and separate when thawed. The texture of the cheesecake will change. For the best experience, enjoy them chilled from the fridge.
If you need to transport them, keep them in their tin. Cover the whole tin tightly with plastic wrap or foil. Carry them in a cooler bag if you’re going to a picnic or party. This keeps them at a safe, cool temperature until serving.
Tips and Advice for Success
Always use full-fat, brick-style cream cheese for the best texture. The spreadable kind in tubs has more water. This can make your filling too soft. Make sure your whipped topping is fully thawed if using frozen. Cold, lumpy topping won’t blend smoothly. When pressing the crust, really press it firm. A loose crust will collapse when you add the filling. For the cleanest swirls, don’t overfill the liners. Leave a little space at the top for your swirl pattern to shine.
Presentation Tips for a Festive Display
Make them look extra special with these ideas:
- Use decorative Easter-themed cupcake liners.
- Top each cheesecake with a small dollop of fresh whipped cream and a single mini chocolate egg.
- Arrange them on a platter surrounded by real spring flowers like hyacinths or daffodils.
- Create a “nest” of shredded coconut around each cheesecake and place a few jelly bean “eggs” in it.
- For a brunch, serve them on individual small plates with a dusting of colored sugar.
Try These Delicious Recipe Variations
Love this idea? Try these other twists on the recipe!
- Chocolate Crust Swirl: Use chocolate graham crackers for the crust. Keep the pastel filling for a fun contrast.
- Citry Swirl: Add a teaspoon of lemon or orange zest to the filling before dividing it. It gives a fresh, springy taste.
- Berry Swirl: Fold a tablespoon of raspberry or strawberry puree into one of the colored batters. This adds a natural fruit flavor and color.
- Nutty Crunch: Add finely chopped toasted almonds or pecans to the graham cracker crust for extra texture.
- Mocha Swirl: Mix a tablespoon of cocoa powder and a teaspoon of instant coffee into one bowl of filling for a brown, coffee-flavored swirl.
- Eggless Garnish: For a non-candy option, top with a fresh berry like a raspberry or a small mint leaf.
If you love cheesecakes, you’ll find more inspiration in our full collection of cheesecake recipes. From baked to no-bake, we have many beautiful ideas.
Common Mistakes to Avoid
Mistake 1: Using Cold, Hard Cream Cheese
This is the biggest reason for a lumpy filling. If your cream cheese is still cold from the fridge, it won’t blend smoothly. You’ll get small bits of cheese throughout your batter. It also won’t incorporate well with the whipped topping. To avoid this, let the cream cheese sit on your counter for at least an hour before starting. It should feel soft and spreadable when you poke it.
Mistake 2: Over-Mixing the Swirls
It’s easy to get excited and swirl the colors too much. You start with beautiful separate dollops. Then you drag the toothpick round and round too many times. This blends all the colors into one muted, muddy color. You lose that pretty pastel effect. To keep defined swirls, limit yourself to just one or two gentle passes with the toothpick. Think of it as a light marble effect, not a full mix.
Mistake 3: Skipping the Crust Chill Time
You mix the crust and press it in, then immediately add the filling. This seems faster. But the melted butter in the crust hasn’t set yet. When you add the heavy filling, the crust can shift and crumble. It might not hold its shape. Always chill the pressed crust for that 15 minutes. This short time lets the butter firm up and lock the crumbs together. It creates a stable base for your cheesecake.
Mistake 4: Not Letting the Cheesecakes Set Long Enough
After 2 hours, the cheesecakes look set on top. You might be tempted to serve them. But the center is still likely too soft. When you try to lift one, it might slump or the filling could ooze. For the perfect, neat texture that holds its shape, give them the full 3 hours minimum. Overnight chilling is ideal. This patience pays off with a perfect bite every time.
Frequently Asked Questions
Can I make these Easter cheesecakes dairy-free?
Yes, you can make a dairy-free version. Use a plant-based cream cheese alternative. Many brands work well. For the whipped topping, choose a dairy-free whipped cream or coconut cream that you whip yourself. For the crust, check that your graham crackers are dairy-free. Some brands use butter. You can also use a gluten-free or nut-based crust. Melt coconut oil instead of butter to bind it. The process is exactly the same. The result will be a lovely, creamy dessert everyone can enjoy.
How long ahead can I prepare these mini cheesecakes?
These are a fantastic make-ahead dessert. You can prepare them fully up to two days before your event. Store them covered in the refrigerator. Add the garnishes like whipped cream and sprinkles the day you serve them. This keeps the garnishes fresh and bright. The cheesecake itself will stay perfect. Making them ahead actually helps because the flavors meld and the texture becomes even more consistent.
Can I use a different type of crust?
Absolutely! The graham cracker crust is classic, but feel free to experiment. You could use crushed vanilla wafers, shortbread cookies, or even pretzels for a salty-sweet twist. For a nutty flavor, try crushed pecans or almonds mixed with a little butter and sugar. Just keep the ratio similar: about 1 cup crumbs, 3 tbsp sugar, and 4 tbsp melted butter. Press and chill it the same way. Any crunchy cookie or nut makes a great base.
My filling is too runny. What did I do wrong?
A runny filling usually comes from two things. First, the cream cheese was not thick enough. Avoid the spreadable tub variety. Use the block-style, full-fat cream cheese. Second, the whipped topping might have been over-folded or too warm. When you fold in the topping, do it gently. Keep the mixture cool. If it seems runny after mixing, you can try to rescue it. Chill the entire mixture in the bowl for 30 minutes before dividing and coloring. It will firm up a bit.
What’s the best way to color the filling for bright pastels?
Gel food coloring is your best friend here. Liquid food coloring is more watery. You need more of it to get color, which can thin your filling. Gel coloring is concentrated and vibrant. You use just a tiny drop to get a beautiful pastel shade. Start with one drop per bowl. Mix it in. If you want a slightly deeper color, add a second tiny drop. Remember, pastels are light colors. Don’t go too dark. The soft shades are what make these look like Easter eggs.
Can I make these into a large cheesecake instead of minis?
You can! Use a 9-inch pie plate or springform pan. Double the crust recipe. Press it into the bottom of the pan. Triple the filling recipe. Divide and color the filling as instructed. Then, spoon the colored dollops over the entire crust. Swirl with a toothpick over the whole surface. Chill for at least 4 hours, or overnight. Slice it like a regular cheesecake. It makes a stunning centerpiece dessert for a bigger crowd.
Are these no-bake cheesecakes kid-friendly to make?
They are very kid-friendly! The steps are simple and safe since there’s no oven or hot surfaces. Kids love to help press the crust into the liners. They absolutely adore choosing the colors and swirling the toothpick. It’s a great way to get them involved in holiday baking. Plus, they get to enjoy a tasty treat they helped create. Just supervise the use of the mixer and the food coloring for younger children.
How many calories are in one of these mini cheesecakes?
One mini cheesecake, with the garnishes listed, is about 210 calories. This is a rough estimate. It can change based on your specific brands and how much garnish you add. If you’re watching your intake, you can make lighter swaps. Use a light cream cheese and a light whipped topping. Remember, treats like these are for celebration and enjoyment. For general guidance on balancing treats with your overall calorie needs, trusted nutritional resources can help.
What can I use instead of whipped topping from a tub?
Fresh whipped cream is a fantastic substitute. Take 1 cup of cold heavy whipping cream. Add 2 tablespoons of powdered sugar. Whip it with a mixer until it forms stiff peaks. Then, fold this into your cream cheese mixture just like the tub topping. Fresh whipped cream tastes lighter and richer. It also holds up well in the chilled cheesecake. It’s a simple upgrade if you have the time.
Can I freeze these cheesecakes for later?
I don’t recommend freezing these particular cheesecakes. The filling contains whipped topping or whipped cream. These dairy products don’t freeze well in this context. They can become grainy and separate when thawed. The texture will not be smooth and creamy anymore. For the best experience, enjoy them fresh from the refrigerator. They keep well in the fridge for several days, so you can make them ahead without needing to freeze.
Ready to Make Your Easter Celebration Sweeter?
These Easter Mini Cheesecakes are more than just a dessert. They are a happy, colorful activity and a delicious end to your meal. They bring the joy of spring to your table without any baking stress. I love how they make everyone smile. Give them a try this holiday. They might become your new Easter tradition, just like they are for my family. Happy baking, and Happy Easter!
Equipment
- Moulin à pâtisserie
- Fouet
- Spatule
- Moule à muffins
- Papier sulfurisé
Ingredients
- 1 tasse biscuits graham émiettés
- 3 cuillères à soupe sucre granulé
- 4 cuillères à soupe beurre non salé, fondu
- 8 onces fromage à la crème, ramolli
- 1 tasse sucre en poudre
- 1 cuillère à café extrait de vanille
- 1 tasse garniture fouettée ou crème fouettée
- q.s. colorant alimentaire en gel (teintes pastel)
Instructions
- Tapissez un moule à muffins avec de jolis caissettes.
- Mélangez les biscuits graham émiettés, le sucre et le beurre fondu dans un bol jusqu'à ce que le tout soit bien combiné.
- Versez environ une cuillère à soupe du mélange dans chaque caissette et pressez fermement pour former une croûte. Réfrigérez pendant 15 minutes.
- Dans un bol propre, battez le fromage à la crème ramolli jusqu'à ce qu'il soit crémeux.
- Ajoutez le sucre en poudre et l'extrait de vanille au fromage à la crème et mélangez jusqu'à ce que le tout soit bien combiné.
- Incorporez délicatement la garniture fouettée en utilisant de grands gestes jusqu'à obtenir une texture légère et mousseuse.
- Divisez la garniture en quatre bols et ajoutez une petite goutte de colorant alimentaire en gel dans chacun. Remuez jusqu'à ce que les couleurs soient bien réparties.
- Déposez des cuillerées de chaque couleur dans les caissettes, créant des tas mélangés.
- Utilisez un cure-dent ou une fine brochette pour tourbillonner délicatement les couleurs.
- Réfrigérez le moule à muffins pendant au moins 3 heures ou toute la nuit jusqu'à ce qu'il soit bien pris.
Notes
Nutrition

Hi, I’m Olivia Parker, the founder of BakingSecret.com and a lifelong lover of all things sweet and homemade. I grew up in a small town in Oregon, where the smell of fresh cookies in my family’s kitchen sparked my passion for baking. Over the years, I turned that passion into a mission: to help home bakers feel confident, inspired, and creative.
After studying food science and working in several artisan bakeries across the U.S., I decided to create a space where everyone from beginners to seasoned bakers can find reliable recipes, expert tips, and a warm, welcoming community. BakingSecret.com is my way of sharing the magic of baking with the world. When I’m not testing new recipes, you’ll find me exploring farmers’ markets, collecting vintage cookbooks, or perfecting my sourdough technique.