
Who Says Healthy Can’t be Delicious? Meet Your New Favorite Cookie!
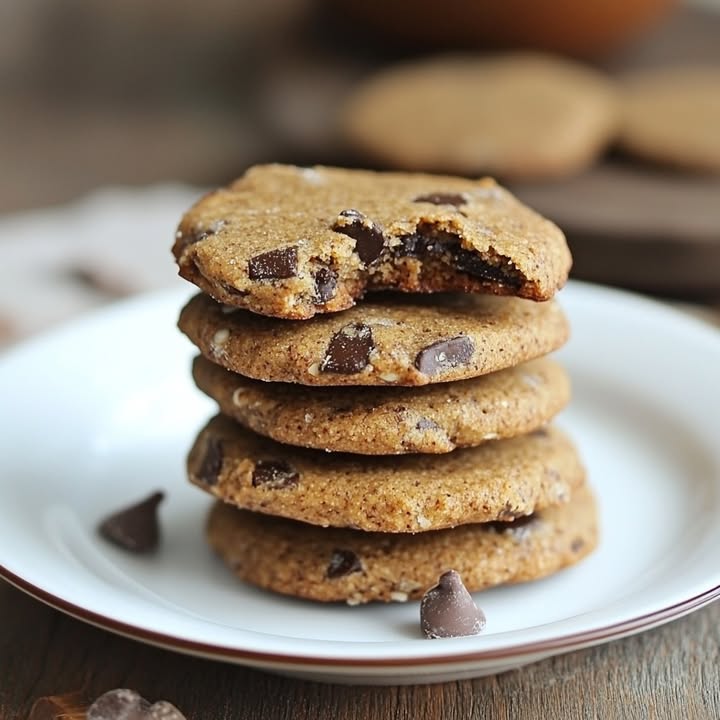
Picture this. It’s 3 PM. The kids are home. Your energy is dipping. And that sugary cookie in the pantry is calling your name like a siren song. We’ve all been there. But what if I told you there’s a sweet, satisfying treat you can enjoy without any guilt or sugar crash? I created this recipe out of pure necessity on one of those chaotic afternoons. With just a few ripe bananas and my pantry staples, I whipped up a batch of these amazing **Healthy Flourless Cookies**. The smell filled the kitchen, and my family devoured them before they even cooled. They’re soft, chewy, and honestly, taste like real cookie dough magic.
A Bite-Sized History: From Oatcakes to Healthy Indulgence
Cookies have been a source of comfort for centuries, but our modern versions are often loaded with refined sugar and flour. My **no sugar, no flour cookies** are a loving nod to simpler, older ways of baking. Think of hearty oatcakes or mashed fruit sweeteners used long before white sugar was common. I see this recipe as a modern twist on that wholesome tradition. It’s about using what’s good and natural to create something that feels indulgent. This isn’t just a “diet” cookie. It’s a smart, back-to-basics treat that everyone, from grandkids to grandparents, can get excited about.
Why You’ll Fall in Love With These No Sugar Cookies
You’ll adore this recipe because it’s shockingly simple and incredibly forgiving. No fancy equipment or baking degrees needed! The ripe bananas provide a natural sweetness that makes added sugar completely unnecessary. The oats give a wonderful, hearty texture that satisfies your craving for something substantial. Plus, with the healthy fats from the nut butter and nuts, these cookies are a balanced snack. They taste like a treat but fuel your body like one. I love that I can have one (or two!) with my morning coffee without starting my day on a sugar rollercoaster.
The Perfect Occasion for Wholesome Cookies
These **healthy banana oat cookies** are the ultimate all-purpose goodie. I pack them in lunch boxes for a midday boost. They’re my go-to for playdates because other parents always ask for the recipe. Need a quick pre-workout bite? Grab one. Heading to a potluck where you want a healthy option? Bring a platter. They’re also fantastic for new moms, classroom celebrations, or just as a “I survived this Tuesday” reward. Their simple, clean ingredients make them a welcome gift for anyone mindful of what they eat, without feeling deprived.
What You’ll Need: The Simple Ingredient List
Gather these simple, real-food ingredients. That’s the beauty of flourless baking!
- 2 ripe bananas, mashed – The spottier, the sweeter!
- 1 ½ cups rolled oats – Old-fashioned oats work best for texture.
- ½ cup natural peanut butter or almond butter – The runny, drippy kind is perfect.
- ½ cup chopped nuts – Walnuts, almonds, or pecans add crunch.
- ¼ cup dark chocolate chips (optional) – For a little joyous celebration.
- 1 teaspoon cinnamon – A warm, cozy hug in spice form.
- 1 teaspoon vanilla extract – The secret flavor booster.
- A pinch of salt – It makes all the flavors pop.
No Problem! Handy Substitution Options
Don’t have something? Let’s improvise! Baking should be fun, not stressful.
- Out of bananas? Try ¾ cup of unsweetened applesauce or pumpkin puree. The texture will be slightly different but still great.
- Nut allergies? Use sunflower seed butter. It’s a perfect one-to-one swap and gives a lovely flavor.
- Not a fan of nuts? Skip the chopped nuts and add more oats or some unsweetened shredded coconut.
- No chocolate chips? Dried cranberries or raisins are a wonderful chewy alternative. Or just leave them out!
- Need it gluten-free? Ensure your rolled oats are certified gluten-free. That’s it!
Let’s Make Some Magic: Step-by-Step Guide
Follow these easy steps for perfect cookies every time. I’ve included all my little kitchen secrets.
Step 1: Get Your Kitchen Ready
First, turn your oven to 350°F (175°C). This gives it time to heat evenly while you mix. Grab a baking sheet and line it with parchment paper. No parchment? A light spray of oil works too. This simple step is your insurance policy against sticking. I learned this the hard way with a batch of cookies that became one giant cookie sheet cake! Now, get out a medium-sized mixing bowl. You won’t even need a mixer for this easy dough.
Step 2: The Sweet Base – Mashing Bananas
Peel your ripe bananas and drop them into your bowl. Use a fork or potato masher to squish them into a gooey, sweet paste. Get out any big lumps. The smell of mashed banana is so nostalgic, isn’t it? This is the glue and the natural sweetener for our whole recipe. Pro tip: The more brown spots on your bananas, the sweeter your cookies will be. No need for any added sugar at all!
Step 3: Mixing the Cookie Dough
Now for the fun part! Add all the remaining ingredients to the bowl with your mashed bananas. That’s the oats, nut butter, chopped nuts, chocolate chips (go on, add them!), cinnamon, vanilla, and pinch of salt. Stir everything together with a sturdy spoon. Watch as the runny nut butter and banana mix with the oats to form a thick, sticky dough. It will look chunky and wholesome, and that’s exactly right. Your kitchen will already smell amazing.
Step 4: Shaping Your Cookies
Use a tablespoon or a small cookie scoop to portion out the dough. Drop rounded mounds onto your prepared baking sheet. Then, use the back of a fork or your fingers to gently press down on each mound. Flatten them slightly so they bake evenly. These cookies won’t spread much on their own, so shaping them now gives you that perfect cookie form. This is a great job for little kitchen helpers!
Step 5: Baking to Golden Perfection
Carefully slide your baking sheet into the preheated oven. Bake for 12 to 15 minutes. You’re looking for golden edges and a top that looks set. Don’t wait for them to get brown all over. A little softness in the middle is good—they firm up as they cool. The aroma of cinnamon and toasting oats is your signal that something wonderful is happening in your oven.
Step 6: The Crucial Cooldown
Take the cookies out of the oven. This is the hardest part: let them cool. Leave them on the baking sheet for 5 minutes, just to set. Then, move them to a wire rack using a spatula. They’ll be a bit fragile when hot but become perfectly chewy as they cool. Chef’s Tip: For an extra flavor boost, sprinkle a tiny bit of sea salt on the warm cookies. It’s a game-changer!
Timing is Everything
This recipe is wonderfully fast, perfect for a last-minute treat.
- Prep Time: 10 minutes (really!)
- Cooking Time: 12-15 minutes
- Total Time: About 25 minutes
- Servings: Makes about 12 delicious cookies
- Kcal per cookie: Approximately 150 (depending on your add-ins)
Chef’s Secret for the Best Texture
Want a bakery-style texture? Let the mixed dough sit for 10 minutes before scooping. This gives the oats a chance to absorb the moisture from the bananas and nut butter. The result? A firmer, chewier cookie that holds together beautifully and has a more developed, cozy flavor.
A Little Extra Cookie Info
Did you know using overripe bananas isn’t just smart for sweetness? Those brown spots mean the starches have converted to simpler sugars. This makes the bananas easier to digest and gives our cookies a deeper, almost honey-like flavor. It’s nature’s perfect sweetener at work! This is a great example of how focusing on food-based nutrition from whole ingredients can create simple, satisfying pleasures.
Your Simple Equipment Checklist
You likely have everything already! Here’s what you need:
- Medium mixing bowl
- Fork or potato masher
- Sturdy spoon or spatula
- Measuring cups and spoons
- Baking sheet
- Parchment paper (highly recommended)
- Wire cooling rack
How to Keep Your Cookies Fresh & Tasty
Let your cookies cool completely before storing. Any leftover warmth can create steam and make them soggy. I always wait until they are room temperature.
Place them in an airtight container at room temperature. They’ll stay fresh and chewy for 2-3 days. If you live in a humid climate, you might want to add a piece of paper towel to the container to absorb extra moisture.
For longer storage, freeze them! Layer the cookies between sheets of parchment in a freezer bag. They’ll keep for up to 3 months. You can thaw them at room temperature or pop a frozen one straight into your lunchbox—it’ll be thawed by snack time.
My Best Tips for Cookie Success
- Banana Ripeness is Key: Seriously, use those black bananas! They are sweeter, mash easier, and give a stronger banana flavor that makes these cookies irresistible.
- Sticky Dough Solution: If the dough is too sticky to handle, wet your hands or the back of your spoon with a little water. This prevents sticking and makes shaping a breeze.
- Customize to Your Heart’s Content: This recipe is a blank canvas. Add a handful of shredded coconut, swap cinnamon for pumpkin spice, or use white chocolate chips with dried cherries. Make it yours!
- Don’t Overbake: They will look a bit underdone when you take them out. Trust the process. They set up perfectly as they cool on the rack.
Make Them Look as Good as They Taste
- Drizzle melted dark chocolate over the cooled cookies for a fancy finish.
- Serve them on a rustic wooden board with a bowl of fresh berries for a beautiful snack spread.
- Pack them in a cute mason jar tied with twine for a thoughtful, healthy gift.
- For a party, make them mini using a teaspoon to scoop. They’re perfect bite-sized treats!
Love This? Try These Healthier Bakes!
If you love these **no sugar added cookies**, you’ll adore these other guilt-free treats. They’re all part of my family’s favorite rotation for healthy baking recipes.
- Apricot & Seed Power Balls: Blend dates, oats, sunflower seeds, and dried apricots. Roll into balls for a no-bake energy bite.
- Sweet Potato Brownies: Black bean brownies get a rival! Mashed sweet potato creates a fudgy, moist brownie with hidden veggies.
- Apple Cinnamon “Cookies”: Swap banana for unsweetened applesauce and add diced apple pieces for a fall-inspired version.
- Coconut Lime Delights: Add zest from one lime and ¼ cup shredded coconut to the basic dough for a tropical twist.
- Double Chocolate Mint: Use cacao powder in the dough and mint extract instead of vanilla. Add dark chocolate chips for a decadent yet clean treat.
- Pumpkin Pie Spice Cookies: Perfect for autumn! Replace half the banana with pumpkin puree and use pumpkin pie spice instead of cinnamon.
Common Mistakes to Avoid
Even easy recipes have little pitfalls. Here’s how to dodge them for perfect cookies every time.
Mistake 1: Using Underripe Bananas
This is the most common error. Pale yellow, firm bananas lack the sweetness and moisture of ripe ones. Your cookies will taste bland and the dough will be dry and crumbly. Wait for those bananas to get spotty and soft. If you’re in a pinch, you can bake underripe bananas at 300°F for 15-20 minutes to soften and sweeten them slightly.
Mistake 2: Over-Measuring the Oats
It’s easy to pack rolled oats into a measuring cup, but this adds too much dry ingredient. You’ll end up with a crumbly mixture that won’t hold together. Always spoon your oats into the measuring cup lightly. Then level it off with the back of a knife. This gives you the perfect, light cup for a chewy texture.
Mistake 3: Skipping the Flattening Step
Because this dough has no flour or rising agents, it won’t spread in the oven like a traditional cookie. If you leave your scoops as round balls, they’ll bake into dense, muffin-like domes. Taking 5 seconds to gently press each one with a fork creates the classic cookie shape and ensures even baking from edge to center.
Mistake 4: Baking on a Hot or Unprepared Pan
Putting cookie dough on a warm baking sheet from a previous batch will make them start cooking unevenly right away. Always use a cool, lined sheet for each batch. Parchment paper isn’t just for non-stick purposes. It also prevents the bottoms from over-browning, giving you a perfect golden bake every time.
Your Healthy Cookie Questions, Answered!
Can I use quick oats instead of rolled oats?
You can, but the texture will be different. Rolled oats (old-fashioned oats) give these cookies a hearty, chewy bite. Quick oats are cut smaller and absorb more moisture. If you use them, your cookies will be softer and may have a more uniform, less textured feel. I prefer the robust texture of rolled oats for the best no sugar cookies.
This usually happens for two reasons. First, your bananas might have been very large, adding too much liquid. Second, your nut butter might be the “no-stir” kind with added oils, which can be runnier. Fix it by adding a couple more tablespoons of rolled oats to the dough until it’s thick and scoopable. Let the dough sit for 10 minutes to allow the oats to absorb the excess moisture.
Can I make these completely nut-free?
Absolutely! To make nut-free healthy cookies, replace the nut butter with sunflower seed butter or a seed butter of your choice. Also, omit the chopped nuts or replace them with seeds like pumpkin or sunflower seeds. This creates a safe and delicious alternative for anyone with nut allergies, keeping the recipe just as wholesome.
This recipe is almost vegan already! Just check your chocolate chips. Many dark chocolate chips are dairy-free, but some brands contain milk solids. Simply ensure you use a certified vegan dark chocolate chip. All other ingredients—bananas, oats, nut butter, nuts, and spices—are naturally plant-based. You’ve got a perfect vegan treat.
Yes, and I do it all the time! With a balance of complex carbs from oats, natural sugars from banana, protein and fat from nut butter, they are a great breakfast cookie. They provide sustained energy without the crash of a sugary cereal or pastry. Pair one with a piece of fruit or a yogurt for a complete, on-the-go morning meal.
You sure can. Scoop the dough into balls and place them on a baking sheet. Freeze until solid (about 1-2 hours), then transfer the frozen dough balls to a freezer bag. When you want fresh cookies, bake them straight from frozen. Just add 1-2 minutes to the baking time. It’s wonderful having healthy cookie dough ready anytime a craving strikes!
Dry cookies mean the moisture balance was off. The most likely culprit is over-measuring the oats (see Mistake 2!). Another cause could be overbaking. Remember, they continue to set as they cool on the rack. Next time, try adding an extra tablespoon of nut butter or even a splash of plant-based milk to the dough if it seems too crumbly before baking.
What’s the best way to mash the bananas?
I use a simple fork in a bowl. For very ripe bananas, this is quick and easy. If you want them super smooth, you can use a potato masher. For large batches, some people use a stand mixer with the paddle attachment. Avoid using a blender, as it can turn them too liquidy. A little chunk is perfectly fine in these rustic, flourless cookies.
Can I add protein powder to this recipe?
You can, but it will change the texture. Add 1-2 tablespoons of your favorite vanilla or plain protein powder. Be aware that protein powder absorbs a LOT of moisture. You will likely need to add a splash of milk (dairy or plant-based) to the dough to compensate and keep it from becoming too dry and crumbly. It’s a great post-workout boost!
How do I know when they are done baking?
Look for the edges to turn a light golden brown. The tops will look set and will no longer appear wet or shiny. They will still feel soft to the touch in the center, and that’s perfect. They firm up beautifully as they cool. If the edges are dark brown, they are overdone. A 12-minute check is always a good idea.
I hope this recipe brings as much joy to your kitchen as it has to mine. It’s proof that a healthier choice doesn’t have to mean giving up on flavor or fun. For more decadent (but still wonderful) baking projects, you must try the rich, homemade goodness of my A-Number-1 Egg Bread or get swept away by the elegance of a Crimson Choco-Berry Rhapsody Cheesecake. When you need comfort, my Classic New Orleans Bread Pudding is pure magic. And for a fruity favorite, my Strawberry Swirl Cheesecake is always a showstopper.
Happy, Healthy Baking!
So there you have it. Your secret weapon for a sweet, smart treat is ready. These Healthy Flourless Cookies are more than a recipe. They’re a little bit of kitchen alchemy. They turn simple, good-for-you ingredients into something that feels like a warm hug. Whether you’re making them for a busy week, a family treat, or a friend in need of a pick-me-up, they deliver every time. Now, go grab those spotty bananas and bake a batch. Your future self (and probably your whole family) will thank you. Happy baking!
Equipment
- Bol mélangeur
- Fouet
- Spatule
- Plaque de cuisson
- Papier sulfurisé
Ingredients
- 2 pièces bananes mûres écrasées
- 150 g flocons d'avoine
- 125 g beurre de cacahuète
- 50 g noix hachées
- 40 g pépites de chocolat noir facultatif
- 1 cuil. à café cannelle
- 1 cuil. à café extrait de vanille
- 1 pincée sel
Instructions
- Préchauffez le four à 175°C et tapissez une plaque de cuisson de papier sulfurisé.
- Pelez et écrasez les bananes dans un bol moyen.
- Ajoutez tous les ingrédients restants dans le bol et mélangez jusqu'à ce que tout soit bien combiné.
- Utilisez une cuillère à soupe ou une boule à cookies pour prélever la pâte et déposez-la sur la plaque préparée en aplatissant légèrement chaque tas.
- Faites cuire au four pendant 12-15 minutes jusqu'à ce que les bords soient dorés et que le dessus soit ferme.
- Laissez les cookies refroidir sur la plaque pendant 5 minutes avant de les transférer sur une grille pour refroidir complètement.
Notes
Nutrition

Hi, I’m Olivia Parker, the founder of BakingSecret.com and a lifelong lover of all things sweet and homemade. I grew up in a small town in Oregon, where the smell of fresh cookies in my family’s kitchen sparked my passion for baking. Over the years, I turned that passion into a mission: to help home bakers feel confident, inspired, and creative.
After studying food science and working in several artisan bakeries across the U.S., I decided to create a space where everyone from beginners to seasoned bakers can find reliable recipes, expert tips, and a warm, welcoming community. BakingSecret.com is my way of sharing the magic of baking with the world. When I’m not testing new recipes, you’ll find me exploring farmers’ markets, collecting vintage cookbooks, or perfecting my sourdough technique.