
Why You’ll Fall in Love with This Honey Chocolate Cake
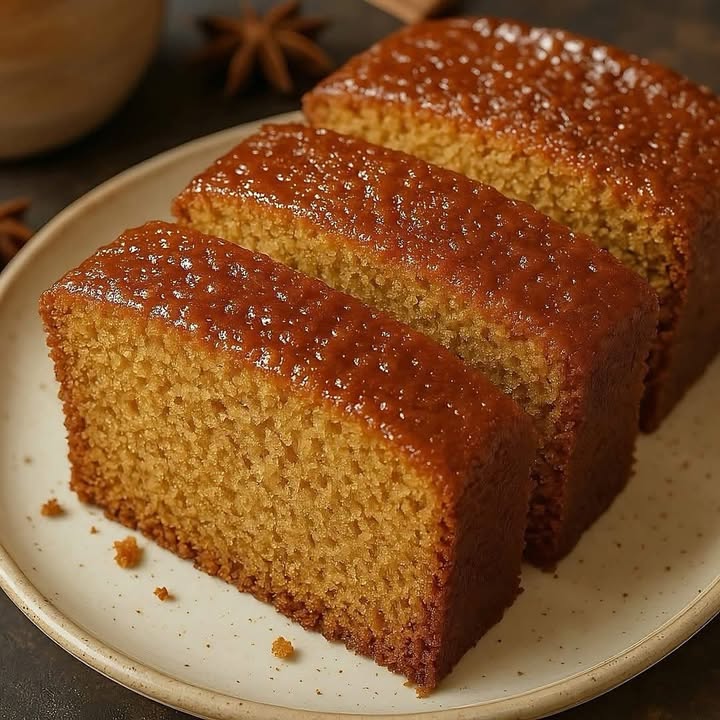
Picture this: a cake so soft, so moist, and so aromatic that it practically melts in your mouth. That’s exactly what you get with this Honey Chocolate Cake. It’s like the love child of honey bread and a decadent chocolate sponge cake. I first made this for a family gathering last Christmas, and let me tell you, it was gone before dessert plates could even hit the table. The secret? A rich syrup soak after baking and a glossy chocolate coating. If you’re looking for a showstopper dessert that’s as easy to make as it is delicious, this is it.
The Sweet History Behind This Cake
Honey bread has been a beloved treat across cultures for centuries, often served during holidays and special occasions. But when I stumbled upon an old recipe book at a flea market, I found a twist on the classic—this time baked into a spongy cake layered with flavors of spices and chocolate. Intrigued, I decided to try it out. After tweaking the recipe over several weekends (and eating way too many slices), I landed on this version. It’s become my go-to for potlucks, birthdays, and even cozy nights in with a cup of tea.
Why This Recipe Stands Out
What makes this Honey Chocolate Cake truly special is how it balances simplicity and indulgence. The warm spices give it a comforting aroma, while the honey adds natural sweetness without being overpowering. And oh, that chocolate coating? It’s the crowning glory. Whether you’re a seasoned baker or just starting out, this recipe will have you feeling like a pro. Plus, it’s one of those cakes that tastes even better the next day—perfect for meal prep!
When to Serve This Cake
This cake shines at any event where you want to impress. Think holiday dinners, birthday parties, or brunches with friends. It’s also great for gifting. Wrap a slice in parchment paper, tie it with twine, and watch someone’s face light up. Personally, I love making it for fall gatherings—it pairs beautifully with pumpkin spice lattes and cozy sweaters.
Ingredients
- For the cake:
- 2 cups wheat flour
- 1 cup brown sugar
- 1 tsp baking soda
- 1 tsp baking powder
- 1 tsp cinnamon
- 1 tsp ground cloves
- A pinch of nutmeg
- 1 cup warm milk
- ½ cup honey
- ½ cup melted butter
- 2 eggs
- For the syrup:
- ½ cup milk
- 1 tbsp honey
- 1 tbsp cocoa powder
- For the topping:
- 300g melted milk or semi-sweet chocolate
Substitution Options
If you need to tweak the recipe, here are some swaps:
- Use maple syrup instead of honey for a different flavor profile.
- Swap all-purpose flour for wheat flour if that’s what you have.
- Vegan? Replace eggs with flax eggs and use plant-based milk and butter.
Preparation
Step 1: Mix the Dry Ingredients
In a large mixing bowl, combine the wheat flour, brown sugar, baking soda, baking powder, cinnamon, cloves, and nutmeg. Whisk them together until everything is evenly distributed. This step ensures your cake has a consistent texture and flavor throughout. Pro tip: Sift the dry ingredients to avoid lumps and aerate the mixture for a lighter crumb.
Step 2: Beat the Wet Ingredients
In another bowl, whisk together the warm milk, honey, melted butter, and eggs. The warmth from the milk helps dissolve the honey, creating a smooth liquid base. As you mix, notice how the honey gives the batter a golden hue—it’s almost like sunshine in a bowl!
Step 3: Combine Everything
Pour the wet ingredients into the dry ones and stir gently until fully incorporated. Be careful not to overmix; otherwise, your cake might turn dense. The batter should be thick but pourable, with a lovely aroma of spices wafting through the air.
Step 4: Bake the Cake
Pour the batter into a greased cake pan and pop it into a preheated oven at 180°C (350°F). Let it bake for 35-40 minutes. You’ll know it’s done when a toothpick inserted into the center comes out clean. As it bakes, your kitchen will fill with the irresistible scent of spiced honey—a true delight.
Step 5: Soak with Syrup
While the cake cools slightly, prepare the syrup by heating the milk, honey, and cocoa powder in a small saucepan. Once smooth, brush this syrup generously over the warm cake. This step is key to achieving that signature juiciness everyone raves about.
Step 6: Add the Chocolate Coating
Melt your chocolate and spread it evenly over the cooled cake. Allow it to set before slicing. Chef’s tip: For a glossy finish, add a teaspoon of vegetable oil to the melted chocolate.
Timing Breakdown
Prep Time: 20 minutes
Cooking Time: 40 minutes
Total Time: About 1 hour
Resting time isn’t necessary, but letting the cake sit overnight enhances its flavors.
Chef’s Secret
To take this cake to the next level, toast the spices lightly before adding them to the dry mix. This unlocks their full potential and gives the cake an extra depth of flavor.
Extra Info
Did you know honey never spoils? Archaeologists have found pots of honey in ancient Egyptian tombs that are still perfectly edible today. No wonder it adds such timeless sweetness to this cake!
Necessary Equipment
- Mixing bowls
- Whisk
- Measuring cups and spoons
- Cake pan
- Oven
- Small saucepan
Storage Tips
Store the Honey Chocolate Cake in an airtight container at room temperature for up to three days. Keep it away from direct sunlight and heat sources to preserve its freshness. If you live in a humid area, refrigerate it to prevent the chocolate from melting. Just bring it back to room temperature before serving for the best taste experience.
For longer storage, freeze individual slices wrapped tightly in plastic wrap and aluminum foil. They’ll stay good for up to two months. Simply thaw overnight in the fridge when you’re ready to indulge again.
Finally, always label your containers with the date. Trust me, once you taste this cake, you won’t want to risk forgetting how fresh it is!
Tips and Advice
To elevate your Honey Chocolate Cake, serve it with a dollop of whipped cream or a scoop of vanilla ice cream. Dusting powdered sugar on top adds a touch of elegance. Experiment with different chocolates for the coating—dark chocolate offers a sophisticated contrast, while white chocolate provides a fun twist.
Presentation Ideas
- Serve slices on rustic wooden boards for a farmhouse vibe.
- Garnish with edible flowers for a pop of color.
- Drizzle additional honey or caramel sauce over each slice.
Healthier Alternatives
Want to lighten things up? Try these variations:
- Gluten-Free Option: Substitute wheat flour with almond or oat flour.
- Low-Sugar Version: Use stevia or monk fruit sweetener instead of brown sugar.
- Dairy-Free Delight: Swap regular milk and butter with coconut milk and oil.
- Protein-Packed Cake: Add a scoop of protein powder to the dry ingredients.
- Fruit-Infused Twist: Fold diced apples or pears into the batter.
- Spice Boost: Increase the amount of cinnamon and add ginger for extra zing.
Common Mistakes to Avoid
Mistake 1: Overmixing the Batter
Overmixing leads to a tough, rubbery cake. Mix just until the ingredients come together. Remember, a few lumps are okay—they’ll disappear during baking.
Mistake 2: Skipping the Syrup
The syrup is what makes this cake irresistibly moist. Don’t skip it! Take the time to soak the cake thoroughly—it’s worth it.
Mistake 3: Using Cold Milk
Cold milk can cause the melted butter to solidify, resulting in uneven mixing. Always use warm milk to keep the batter smooth.
FAQs
Can I use honey substitutes?
Yes, maple syrup or agave nectar work well. However, they may alter the flavor slightly.
How do I prevent the chocolate from cracking?
Add a bit of oil to the melted chocolate for flexibility. Also, let the cake cool completely before applying the coating.
Is this cake kid-friendly?
Absolutely! Kids adore the sweet-spicy combo and gooey chocolate layer.
Can I make this ahead of time?
Definitely. In fact, making it a day in advance allows the flavors to meld beautifully.
What if I don’t have a stand mixer?
No problem! A hand whisk works fine. Just ensure the batter is smooth and lump-free.
Can I double the recipe?
Yes, but bake in two separate pans to ensure even cooking.
Why does my cake sink in the middle?
This usually happens if the oven door is opened too early. Resist peeking until the minimum baking time is reached.
Can I omit the spices?
You can, but they add warmth and complexity. Consider reducing rather than removing them entirely.
Does this cake travel well?
It sure does. Wrap slices individually to keep them intact.
Can I freeze leftovers?
Of course! Wrap tightly and store in the freezer for up to two months.
Final Thoughts
This Honey Chocolate Cake is more than just a dessert—it’s a celebration of flavors, textures, and aromas. Whether you’re baking for loved ones or treating yourself, it promises to deliver joy in every bite. So grab your apron, gather your ingredients, and get ready to create something truly unforgettable. Happy baking!
Equipment
- Mixing bowls
- Whisk
- Measuring cups and spoons
- Cake pan
- Oven
- Small saucepan
Ingredients
- 2 cups wheat flour
- 1 cup brown sugar
- 1 tsp baking soda
- 1 tsp baking powder
- 1 tsp cinnamon
- 1 tsp ground cloves
- a pinch nutmeg
- 1 cup warm milk
- 1/2 cup honey
- 1/2 cup melted butter
- 2 eggs
Instructions
- In a large mixing bowl, combine the wheat flour, brown sugar, baking soda, baking powder, cinnamon, cloves, and nutmeg; whisk until evenly distributed.
- In another bowl, whisk together the warm milk, honey, melted butter, and eggs until smooth.
- Pour the wet ingredients into the dry ones and stir gently until fully incorporated.
- Pour the batter into a greased cake pan and bake in a preheated oven at 180°C (350°F) for 35-40 minutes.
- While the cake cools slightly, heat the syrup ingredients in a small saucepan until smooth, then brush it over the warm cake.
- Melt the chocolate and spread it evenly over the cooled cake. Allow it to set before slicing.
Notes
Nutrition

Hi, I’m Olivia Parker, the founder of BakingSecret.com and a lifelong lover of all things sweet and homemade. I grew up in a small town in Oregon, where the smell of fresh cookies in my family’s kitchen sparked my passion for baking. Over the years, I turned that passion into a mission: to help home bakers feel confident, inspired, and creative.
After studying food science and working in several artisan bakeries across the U.S., I decided to create a space where everyone from beginners to seasoned bakers can find reliable recipes, expert tips, and a warm, welcoming community. BakingSecret.com is my way of sharing the magic of baking with the world. When I’m not testing new recipes, you’ll find me exploring farmers’ markets, collecting vintage cookbooks, or perfecting my sourdough technique.